Table of Contents
Advertisement
Advertisement
Table of Contents

Subscribe to Our Youtube Channel
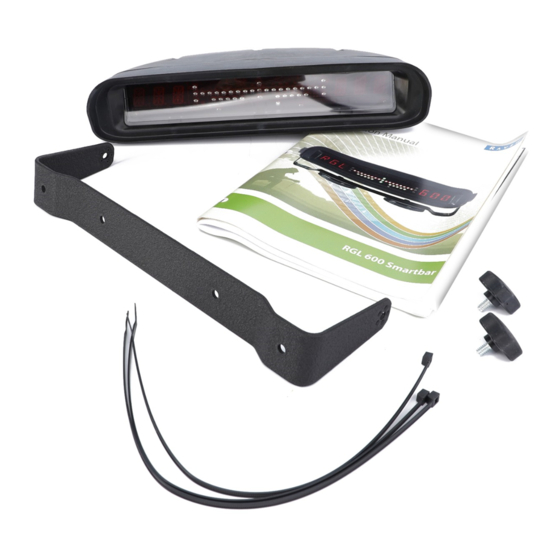
Summary of Contents for Raven RGL 600
- Page 1 RGL 600 SMARTBAR SWATH PATH GUIDANCE SYSTEM OPERATION MANUAL...
- Page 2 Use with firmware version ____...
- Page 3 The Devices · Device relating to this Compliance Notice, RGL 600 Smartbar, comply with Part 15 of the FCC Rules. Operation is subject to the following two conditions: (1) This device may not cause harmful interference, and (2) this device must accept any interference received, including interference that may cause undesired operation.
- Page 4 RAVEN INDUSTRIES LIMITED WARRANTY WHAT IS COVERED? This warranty covers all defects in workmanship or materials in your Raven Flow Control Product under normal use, maintenance, and service. HOW LONG IS THE COVERAGE PERIOD? This warranty coverage runs for 12 months from the purchase date of your Raven Flow Control Product.
- Page 5 RAVEN INDUSTRIES FLOW CONTROL DIVISION 205 East Sixth Street - P.O. Box 5107 - Sioux Falls, South Dakota 57117-5107 E-mail: fcdinfo@ravenind.com www.ravenprecision.com Toll-free: 800-243-5435 - Fax: 605-331-0426 RGL 600 Smartbar Operation Manual #016-0159-936 Rev a 10/03...
-
Page 6: Table Of Contents
RGL 600 Built-In Display Test ........25... - Page 7 RGL 600 MAIN UNIT CONNECTORS ........
-
Page 8: Introduction
INTRODUCTION The RGL 600 Smart Light Bar, connected to a DGPS receiver, provides guidance control and display for swathing applications. The RGL 600 Smartbar receives position, speed over ground (SOG), and course over ground (COG) from a DGPS receiver. The Smartbar compares this COG and position to the desired swath pattern, and produces a guidance display. -
Page 9: Smartbar Display
SMARTBAR DISPLAY Left alphanumeric display showing swath number 3 bright red digits/characters B,F - Left and right GPS Status, see table under “Alarms” 3 vertical bright amber LED’s (All LED’s out is good, any LED on is a problem) Left Offset distance error, turn left to correct 8 horizontal bright red LED’s Center Guidance Status 3 vertical bright green LED’s... -
Page 10: Smartbar Button Box
SMARTBAR BUTTON BOX SELECT/UP button The SELECT button is like an Enter or Execute button. It changes or advances data values in the Configuration Mode and activates actions in the Operational Mode. This is the most used button. It is located at the top of the Button Box for the operator’s easy thumb access. -
Page 11: General Direction To Target Indicator
GENERAL DIRECTION TO TARGET INDICATOR A General Direction to Target Indication is displayed on an alphanumeric display digit to show the direction towards various targets. An example is the left most digit of the guidance offset error display when the offset error is less than 100. From the perspective of the operator, this is a general pointer to the swath line (or other target) that is in control. -
Page 12: Notations Used For Display Figures And Menu Navigation Diagrams
Notations used for display figures and menu navigation diagrams The following notations are used to describe the Smartbar LED indicators and alphanumeric displays: - LED is OFF - LED is ON - LED is flashing ON/OFF - LED is flashing OFF/ON (used to denotate alternating flash when shown with This example shows a multiple sequence alphanumeric display. -
Page 13: Smartbar Operational Mode Menu Navigation
3 seconds. A screen showing “TO...CFG” is displayed. Press the SELECT button to enter the Configuration Mode. Or press the MENU button to return to the RGL 600 screen. For more details, see the section - Entering and Leaving the Configuration Mode. -
Page 14: Basic Swathing Menu Navigation Diagrams
A-B Marks have not been set enter Configuration Mode Power if A is if A is if A-B SET A SET B AUT DIR RGL 600 not set are set turn toward Swath #2 Set the Set the Direction Mark Mark Increase... - Page 15 A-B Marks and Direction are set enter from Configuration Menu Navigation Mode Diagram #1 Skipped if a Position Swath Number is Saved Power Clear RGL 600 CLR ALL Clear Advance Save CLR SAV Saved Swath # Position Position Skipped if no Position is Saved...
-
Page 16: Combined Headlands Menu Navigation Diagram
Combined Headlands Menu Navigation Diagram Menu Navigation Diagram #3 conditions: Tape Measure is OFF Headlands control is Combined (CMB), DIR is MAN Headlands and A-B marks are clear Configuration Mode enter Skipped if a Position Power Swath Number is Saved Clear SET A HDL 02... -
Page 17: Separate Headlands With Tape Measure Menu Navigation Diagram
Separate Headlands with Tape Measure Menu Navigation Diagram Menu Navigation Diagram #4 conditions: Tape Measure is ON Headlands control is Separate (SEP) Headlands, A-B marks, and DIRection are set Configuration Mode enter Skipped if a Position Power Swath Number is Saved Clear CLR ALL Clear... -
Page 18: Entering And Leaving The Configuration Mode
(see the [GPS] main menu example below). The Configuration Mode can only be entered from the Operational Mode main screen [RGL 600]. To enter the Configu- ration Mode, press and hold the MENU button for approximately 3 seconds. When the [TO...CFG] screen shows (see below), the MENU button may be released. -
Page 19: The Smartbar Configuration Mode
The Smartbar Configuration Mode There are normally 7 main menus in the Configuration Mode as listed here: GPS Receiver Status monitoring SWA Swath Configuration parameters System Configuration (includes BAUD rate) MSG Output Messages control (present only if SYS-MSG=ON) Display Settings (present only if SYS-DSP=CFG) Inertial Augmentation System (configuration for optional tilt compensation) Diagnostic Built-In Testing Pressing the MENU button at a Configuration Mode main menu will view the next Configura-... -
Page 21: Gps - Gps Receiver Status Monitoring
Horizontal Dilution Of Precision (HDOP) (display only) Age Of Data (display only) Speed Over Ground (display only) When using a Raven receiver and SYS-GPS is set to INV, the GPS Main Menu will display the following screens: Receiver Serial # (display only) - Page 22 Meters - Km/Hr English - Statute miles/Hr Course Over Ground in degrees **When using a Raven receiver and SYS-GPS is set to INV, the GPS Main Menu will display the following screens Receiver Serial # Receiver Firmware WAAS PRN - Allows...
-
Page 23: Swa - Swath Configuration Parameters
THE SMARTBAR CONFIGURATION MODE (continued) SWA - Swath Configuration parameters SWT Swath Type Press SELECT button to select Swath Type Back-and-Forth (BF), Snap-To- Swath (SNP), Row Swathing (ROW), Pivot swath pattern (PVT), Contour Swathing (CON), Seed Swathing (SED) Squeeze pattern (SQ), Racetrack pattern (RT), or One Button (ONE). -
Page 24: Sww Swath Width
THE SMARTBAR CONFIGURATION MODE (continued) SWW Swath Width Press SELECT button to set the Swath Width as required. The boom width of your machine determines the swath width. As you press the SELECT button the width increases by 5 ft (FT), 5.0 ft (FTF), or 10 decimeters (MT). The DOWN button decreases the width by 1 ft (FT), 0.1 ft (FTF), or 1 decimeter (MT). -
Page 25: Scl Guidance Offset Scale Sensitivity
Auto 0.5% Custom Guidance Scales can be installed via the Raven Configuration Block (SCB). Custome Scale names can also be assigned by the SCB. If custom scale names are present in the SCB, those names will replace FIN, NRM, CRS, or AUT as Guidance Offset Scale identifiers. -
Page 26: Hdl Headlands Mode
THE SMARTBAR CONFIGURATION MODE (continued) Headlands Mode HDL configuration is not present if Swath Type (SWT) is set to ROW, PVT, CON, SQ, RT or ONE. SELECT button selects between OFF, SEP (Separate), CMB (Combined), or DHC (Double Headlands C pattern). When OFF is selected, no headlands control features are active. -
Page 27: Sys - System Configuration (Includes Baud Rate)
THE SMARTBAR CONFIGURATION MODE (continued) SYS - System Configuration (includes BAUD rate) BAUD rate setting The BAUD rate controls the data rate for messages received from the DGPS Receiver and outgoing transmit messages. Press SELECT button to select AUT (Automatic BAUD select), 38400, 19200, 9600, or 4800. -
Page 28: Gps Gps Settings
Press SELECT button to set GPS Settings (GPS) to GEN (generic not used) or INV (Auto configure Raven Invicta Receiver). The default setting is GEN (Generic). When SYS-GPS is set to INV, and MENU button is pressed ‘INV-SEL-TO-INI.’ will appear. -
Page 29: Sav Save Position Distance
THE SMARTBAR CONFIGURATION MODE (continued) DSP - Display Settings (continued) Save Position Distance Press SELECT button to set DSP-OFF to XTO or RNG (Cross Track Distance or Range). When swathing a field, the current position can be saved by pressing the SELECT button at a menu “SAV POS”. -
Page 30: Con Contour Control
IAS Configuration” for configuration details. DIA - Diagnostic Built-In Testing RGL 600 Built-In Display Test Press the SELECT button to execute the Display Test sequence. The SELECT button is pressed two times in the sequence to proceed past display inspection points. The MENU button may be pressed at any time to abort the Display Test. -
Page 31: Cks Program Memory Checksum
THE SMARTBAR CONFIGURATION MODE (continued) DSP - Diagnostic Built-In Testing (continued) Program Memory Checksum Press the SELECT button to execute a program memory checksum calculation. The calculated 8 Hexadecimal digit checksum is displayed in 4 display cycles. (see below) Firmware program integrity is validated if the indicated checksum matches a known or published checksum for the current version. -
Page 32: Basic Swathing
BASIC SWATHING The Smartbar has two basic parallel swath types: Back and Forth (BF) and Snap-to-Swath (SNP). With each pattern you must first mark point A and then point B. This defines the A-B line, which is swath number 1. Swath number 2 will be in the direction (from the A-B line) you will work the field. -
Page 33: Back And Forth Swathing (Bf)
Back and Forth Swathing (BF) Back and Forth swathing is used, as the name applies, to swath the field in first one direction and then the other using swaths that are parallel to the A-B line. Below are the steps required for BF swathing. -
Page 34: To Begin Your First Swath
To Begin Your First Swath Make sure the GPS antenna has a good view of the sky and the system is operating with NO alarm conditions. Using a visible site as a point of reference, steer a straight line parallel to your intended swath paths as you mark your reference points A and B. Important The Smartbar will establish all subsequent swaths as parallel to the AB line, so make sure no GPS alarms are present while establishing the A-B line. -
Page 35: Clearing The A-B Line
To enter new reference marks at the end of the current field or to change reference marks: Pres the MENU button to display ‘CLR A-B’. Clear the current reference marks by pressing the SELECT button. NOTE: If your GPS receiver is outputting 10 messages per second, you may notice that as you move over bumps and dips in the field, the steering LED’s change rapidly. -
Page 36: Saving Your Present Position
SAVING YOUR PRESENT POSITION Arrive Zone 30ft wide x 20ft long, Saved Position begins 5 ft before Point Saved Position point. Save Lights ON STEADY after reaching this zone. Outside Leave Zone described areas 60ft square Save Lights centered on Saved Position point. FLASH TOGETHER Save Lights FLASH ALTERNATELY... -
Page 37: Swathing With Headlands
Swathing with Headlands The area defined by the boom width, as you drive around a field perimeter, is known as the ‘headlands’ of the field. This is the area that cannot be reached by normal swathing if the field is confined. The Smartbar allows you to spray the headlands and then spray the rest of the field using normal swathing. -
Page 38: Separate Headlands
Separate Headlands If HDL configuration is not already set to SEP, enter the Configuration Mode, go to SWA main menu, HDL sub-menu, and set HDL to SEP. Exit the Configuration Mode. Use the MENU button to advance to the HDL guidance screen. Use the SELECT button to mark headlands points as you drive the headlands area. -
Page 39: Combined Headlands
Combined Headlands If HDL configuration is not already set to CMB, enter the Configuration Mode, go to SWA main menu, HDL sub-menu, and set HDL to CMB. Exit the Configuration Mode. Use the MENU button to advance to the HDL guidance screen. Press the SELECT button to mark A. -
Page 40: Double Headlands C Pattern
DH1-2 and DH3-4 includes ON/OFF indicators (similar to headland con- trols) on the center top and bottom RGL 600 green LED’s. These indicators direct the opera- tor to turn the applicator ON or OFF so that the headland swath, which is inside of DH1-2, can be the same length and alignment as the DH1-2 line, if desired. - Page 41 DH1-2 segment. This may be a fence line or field boundary in many cases. Clear any previous swath setting and press the MENU button until the RGL 600 display reads “SET...DH1”. Press the SELECT button to set the DH1 mark. Drive along the intended DH1-2 line segment with the applicator ON.
- Page 42 Position the machine for the desired beginnng of the DH3-4 line segment. This may be a fence line or field boundary in many cases. Press the SELECT button to set the DH3 mark. This display will indicate “SET...DH4”. Press the DOWN button for straight-line guidance as required.
-
Page 43: Headland Approach Display
Headland Approach Display The Headland Approach Display shows the distance to upcoming headland boundaries in- stead of the swath number in the left alphanumeric display. A symbol is also displayed which indicates entering or leaving the headland area. When the machine is in a headland ap- proaching a boundary to the spray ON area, the approach display comes on one-quarter swath width from the boundary. -
Page 44: Pivot Swathing
PIVOT SWATHING The Pivot Pattern provides a circular swathing of fields that have a well-defined center and are shaped like a circle or a section of a circle. The requirement for circular swathing usually results from use of a pivot irrigation system. There are two steps in using the Pivot Pattern: Determine the center of the circular pattern. -
Page 45: Pivot Pattern Configuration
The Pivot Minimum Radius setting defines a circular area at center of the field. Circular swaths are assigned outside of this area. As the radius of circular swaths become smaller and smaller, the inside spray nozzle moves slower than the outside spray nozzle. The PMR setting determines the smallest circle to be sprayed. -
Page 46: Marking The Pivot Reference Circle
circular guidance Power guidance to current Swath Number guidance Reference Circle & Offset distance Position is Saved? Swath # Save Clear Position Pivot Increase Brightness Clear CLR ALL Decrease Brightness Automatic (no button press) Operational Mode Clear CLR SAV Saved Position press SELECT Button Pivot Pattern press MENU Button... -
Page 47: Driving The Pivot Return
Driving the Pivot Pattern No button presses are necessary after the Pivot Reference Circle is marked. Use the same technique as Snap-To-Swath for parallel swathing, except each swath is part of a circle. As the operator drives the field, the Smartbar will always give guidance indication to the closest swath. -
Page 48: Row Swathing
ROW SWATHING Use Row Swathing when you are driving in plowed rows and must follow the rows precisely. The SELECT button is pressed at the end of each row to advance to the next row. For Row Swathing, the Smartbar continuously memorizes the track just behind the current position. When the SELECT button is pressed at the end of a row, guidance is given to the swath in either direction to the next row. -
Page 49: Contour Swathing
CONTOUR SWATHING Some fields require Contour Swathing for application of fertilizer, chemicals, or other agricul- tural maintenance. If a field has contoured terraces, Contour Swathing may be required for swathing to follow the contour of the terraces. Some fields may have an irregular shape, which requires Contour Swathing for reasonable coverage. -
Page 50: Contour Control Configuration Setting
Contour Control Configuration Setting To mark the beginning of the first swath (1A), press the SELECT button at the BEG...CON screen. See the Menu Navigation Diagram for Contour Swathing in this section. To mark the end of the first swath (1B), press the DOWN button. This will be done just prior to turning toward the second swath. -
Page 51: Configuration Steps For Contour Swathing
Configuration Steps for Contour Swathing To use Contour Swathing, enter the Configuration Mode and navigate to the Swath (SWA) menu. Set the Swath Type (SWT) to CON. Set the Contour type (CON) to Normal (NRM), Fine (FIN), Very Fine (VFN), or Course (CRS). Set the Swath Width (SWW) to the dimension across each swath. -
Page 52: Using Contour Swathing
Align w/prev begin start to begin SELECT Button swath #1 swath #1 swath #2 . . . to begin swath #2 . . . Clear offset offset BEG CON 1 10% SAV POS CLR CON error error Save if a Position is Saved Position press SELECT Button... -
Page 53: Seed Swathing
SEED SWATHING (SED) Seed swathing (SED) is used, as the name imples, for seeding purposes using swaths that are parallel to the A-B line. SED swathing is much like BF except that whenever the Select button is pressed to advance to the next swath, an “auto swath calibrate”... -
Page 54: Racetrack Swathing
RACETRACK SWATHING Racetrack Swathing is a special swath pattern used by aviators when crop dusting. press SELECT button to Mark the C point press SELECT button to Mark the B point Swath Swath Swath Swath Swath Swath Swath Swath Swath Swath Swath Swath... -
Page 55: Squeeze Swathing
SQUEEZE SWATHING Squeeze Swathing is a special swath pattern used by aviators when crop dusting. press SELECT button to Mark the C point press SELECT button to Mark the B point Swath Swath Swath Swath Swath Swath Swath Swath Swath Swath Swath Swath... -
Page 56: One Button Swathing
Swath Navigation Configuration Snap to Nearest swath # has not been set Mode Complete Power swath RGL 600 SET A turn toward Swath #2 Reset CAL SWA Set the A mark Swath Width End Mark Automatic (no button press) -
Page 57: Smartbar Tilt Upgrade Option
SMARTBAR TILT UPGRADE OPTION The Smartbar Tilt Upgrade Option provides straight parallel swath guidance on fields that are not level. This option corrects position errors that occur when an applicator machine moves over an uneven field. For accurate DGPS signal reception, the GPS antenna is usually placed on the highest part of the applicator machine. -
Page 58: Ias Configuration
IAS Configuration Inertial Diagnostics Augmentation System press SELECT Button OFF, SLO, NRM, FST, or VFS press MENU Button Tilt Mode press DOWN Button 1.0-40.0 feet Automatic (no button press) 0.10-9.99 meters Antenna Height degrees indication Calibrate -179 to 0 to 180 Tilt Sensor Angle - degrees left... -
Page 59: Aht - Antenna Height
AHT - Antenna Height The GPS antenna height is entered and displayed. This is an important part of the tilt error correction. It must match the measurement between the antenna mounted on the applicator machine to the ground. The setting range is 1.0 feet to 40.0 feet or 0.10m to 9.99m. Press the SELECT button to increase the Antenna Height by 1.0 feet or by 0.10 meter. -
Page 60: Swath Calibration
SWATH CALIBRATION The Swath Calibration feature is an aid for very accurate swathing requirements. The DGPS Receiver accuracy is high for short periods of time. When long time intervals occur during swathing, small across track position drifts can be corrected using Swath Calibration. The machine operator must be able to determine the precise corrected position of the current swath line and position the machine to that point. - Page 61 Within this same nearly perpendicular angular alignment, the offset LED’s are displayed using a special pattern. This pattern indicates the distance from (or to) the selected swath line. Since the machine alignment is perpendicular to the swath line, this distance is an along track distance indication.
- Page 62 An Ideal Turn Special Display 90° 85° 95° 80° 100° 70° UTS = FT 110° Region SWT = SNP SWW = 100ft SCL = NRM 45° 135° 10° 170° 0° Edge 180° of field spray 0° area Swath #3 Swath #4 Approaching end of Swath #3, #1 - 0°...
-
Page 63: Alarms
ALARMS System performance can be adversely affected under certain operating conditions. Loss of differential signal and/or poor satellite geometry can cause the accuracy of the system to fall below that required for precision guidance. Should conditions exist which cause the accuracy to lessen, the user is notified with one of three possible alarm conditions;... -
Page 64: Gps Receiver/Smartbar Communications
The top green LED will flash when the GPS position solution rate is less than 5 hertz. This is not an error condition. If using a Raven receiver, the RGL 600 may be used to auto configure the receiver. In the SYS configuration menu, set GPS to INV. -
Page 65: Care And Cleaning
BAUD rate with the BAUD rate of the GPS receiver. If using a Raven receiver, the RGL 600 may be used to auto configure the receiver. In the SYS configuration menu, set GPS to INV. Erratic Swathing Patterns Make sure the straight line formed by the ‘A’... -
Page 66: Rgl 600 Main Unit Connectors
RGL 600 MAIN UNIT CONNECTOR CABLE OPTIONS... - Page 67 WIRELESS SMARTBAR BUTTON BOX In addition to the standard Smartbar Button Box, the RGL 600 also has an optional wireless button box. The look, feel and functionality of this button box is identical to the wired version (refer to page 5 of this manual), however, no additional cables are necessary for operation.
-
Page 68: Cable Wiring Diagrams
CABLE WIRING DIAGRAMS... - Page 69 CABLE WIRING DIAGRAMS (continued)
- Page 70 CABLE WIRING DIAGRAMS (continued)
-
Page 71: Smartbar Specifications
SMARTBAR SPECIFICATIONS Specification Description Voltage 10-32 VDC 650 milli-amps at max brightness, Current 100 milli-amps at min brightness, 12 VDC W eight 4.5 lbs. Environmental -40 degrees to +70 degrees C Humidity 95% non-condensing... -
Page 72: Appendix A - Driving Your Machine Using The Smartbar
APPENDIX A - DRIVING YOUR MACHINE USING THE SMARTBAR 1 ft There are many different driving techniques and various conditions encountered when following parallel swath lines to cover a field. No single 3° technique or method is likely to be suitable for all conditions. -
Page 73: Appendix B - Invicta Dgps Receiver Setup
Refer to the Invicta front panel shown below and use the following steps to setup you Invicta DGPS Receiver to operate with the RGL 600 Smartbar. Refer to the operation manual supplied with your Invicta DGPS Receiver to clarify or modify these steps. -
Page 74: Appendix C - Global Positioning System (Gps)
APPENDIX C - GLOBAL POSITIONING SYSTEM (GPS) GPS is a satellite-based global navigation system created and operated by the United States Department of Defense (DOD). Originally intended solely to enhance military defense capabilities, GPS capabilities have expanded to provide highly accurate position and timing information for many civilian applications. -
Page 75: Appendix D - Differential Gps (Dgps) Beacon
APPENDIX D - DIFFERENTIAL GPS (DGPS) BEACON DGPS works by placing a high-performance GPS receiver (reference station) at a known location. Since the receiver knows its exact location, it can determine the errors in the satellite signals. It does this by measuring the ranges to each satellite using the signals received and comparing these measured ranges to the actual ranges calculated from its known position.
Need help?
Do you have a question about the RGL 600 and is the answer not in the manual?
Questions and answers