Table of Contents
Advertisement
Notice to the user
Government law prohibits the operation of unlicensed radio transmitters within
the territories under government control.
Illegal operation is punishable by fine or imprisonment or both.
THANK YOU!
We are grateful you choose BeiFeng series professional radio
communications products!
Since 1989, BeiFeng has been always engaging in research and
exploration of radio communications technologies, In order to lead intelligent
technologies in the industry. We still make every effort to research and design
products according to modern complicated communications environment, and
we offer complete and customized communication solutions to clients. Our
products will satisfy you because of its excellent performance and outstanding
communications strength. No matter what field you are in. You will be Satisfied
with the radio.
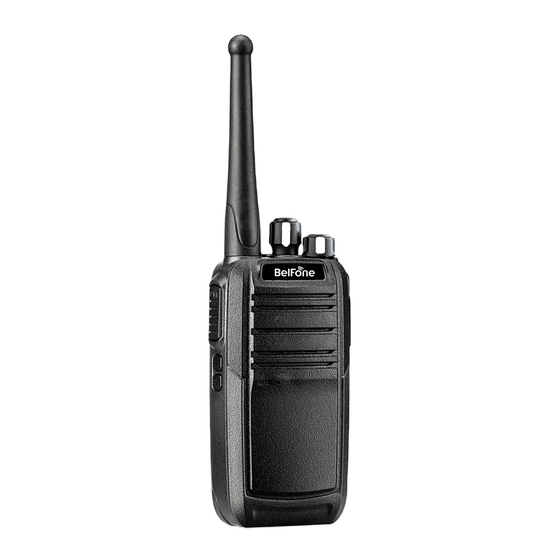
This manual is applicable to
UHF digital transceiver model: BF-TD506
Advertisement
Table of Contents

Related Manuals for BFDX BF-TD506

Summary of Contents for BFDX BF-TD506
-
Page 1: Thank You
Our products will satisfy you because of its excellent performance and outstanding communications strength. No matter what field you are in. You will be Satisfied with the radio. This manual is applicable to UHF digital transceiver model: BF-TD506... - Page 2 FCC radiation exposure statement This radio is intended for use in occupational/controlled applications where users have been made aware of the potential risks for exposure and can exercise control over their exposure. This product is not authorised for general population, consumer or similar use. This transmitter must not be co-located or operated in conjunction with any other antenna or transmitter.
- Page 3 Cette radio a été conçue pour un usage professionnel dans un environnement contrôlé, où les utilisateurs sont pleinement conscients du danger potentiel de l’exposition à laquelle ils sont soumis et peuvent exercer un contrôle sur cette exposition. Ce dispositif radio N’EST PAS autorisé...
-
Page 4: Table Of Contents
◆Don’t leave the transceiver in direct sunlight for a long time, don’t place the transceiver on extremely heat, damp, dusty area, and don’t put it on unstable surfaces; ◆When restriction or warnings are posted regarding the use of radio devices, please obey the regulation turn the transceiver power off;... -
Page 5: Supplied Accessories
One Touch Call ..................19 Talk Around ..................... 20 TX Power ....................21 Squelch Level ..................21 Digital Emergency ................... 21 Time out Timer (TOT) ................23 Voice Encryption ..................23 VOX ......................23 Warning Tones ..................24 Reject Stranger Call ................. 25 TX Permission .................. -
Page 6: Installation Of Accessories
Belt Clip Charger Li-ion Battery Screws Instruction Manual Warranty Card Certificate Antenna Strap Belt Clip Charger Li-ion Battery Screws Installation of Accessories Installation/ removing the antenna Hold the supplied antenna by its base, then screw it into the connector on the top panel of the radio until fasten. - Page 7 Attaching/Removing the belt clip Attach the belt clip using the two supplied3*4mm binding screws. Attaching/Removing the Strap Thread the hand strap to the loop back of your two-way radio.
- Page 8 Attaching/Removing the Battery Warning! Don’t short-circuit the battery, it may cause the battery damaged or burst into flame; Never attempt to remove the casing from battery, that avoid to short the battery terminal; Battery is flammable objects, don’t throw it into fire or don’t use it on dangerous area.
- Page 9 To remove the battery, please turn the power off then push the latch up to unlock the battery pull the battery away from the radio. Note: Don’t attach / remove the battery if the transceiver turned on. Li-ion battery features New batteries are activated from factory;...
- Page 10 for a long time, and store your battery in a cool, dry location. Charge your battery about 50% before you store it for a long time, so that ● can prevent to decrease the battery performance. As the battery is charged and discharged repeatedly, the battery capacity ●...
- Page 11 The charger indicator glows green when the battery is fully charged. Note: Mack sure the battery is connected to the charger, but the charger indicator not glow, Maybe the battery /charger has damaged or temperature out of the limit. Attaching the Speaker/Microphone Open the accessory jack cover, then align the plug with the accessory jack and tighten the screw on the plug.
-
Page 12: Getting Acquainted
Getting Acquainted Channel Selector Knob Turn the knob to select channel 1-16, if a channel is available, there will be a channel number sounds. Power switch/volume adjust keys Turn clockwise to switch the radio power on, when the radio is turned on, rotate clockwise to increased volume, counter- clockwise to decrease the volume. -
Page 13: Basic Operation
Speaker Microphone PTT Key Press and hold down the PTT key then speak into the microphone to transmit. Button 1 Press to activate the programmable function. (The detailed consult to basic operation) Button 2 Press to activate the programmable function. (The detailed consult to basic operation) MIC-SP Jack Connect to optional speaker/MIC and programming cable. - Page 14 Adjusting the volume After the radio is power on, you can rotate the power switch/volume adjust keys to adjust the volume level, rotate the knob clockwise to increase the volume, or rotate the knob anti-clockwise to decrease the volume. Selecting a Channel Turn the channel selector knob to select channel 1 to 16, rotate the knob clockwise to increase the channel number, or rotate the knob anti-clockwise to decrease the channel number.
- Page 15 1.) Group Call If you want to transmit a group call, the radio must be set with group call contact and preset a group call contact for current digital channel, press PTT key to transmit a group call. Or you can set the One Touch Call key as group call feature, then press programmed key to transmit a group call.
- Page 16 Unassigned:The key is not assigned with any function. ● One Touch Call 1~6: Allow user to initiate digital group call, digital private call, ● or send preset message or send call alert via the one touch call function. Emergency on/off: Allow user to make an emergency call. ●...
-
Page 17: Functions And Operations
activate the VOX feature a VOX on sounds; disable the VOX feature a VOX off sounds. Note: Plug the dedicated earpiece into the accessory jack of the radio, the VOX feature is effective. Nuisance Delete: While scanning on, If you don’t want to receive activities on ●... -
Page 18: Auto Scan
analog channel to select scan list Scan Hang Time : When a signal is detected on a channel, scan pauses on ● that channel, the radio will remain on the busy channel until the signal is no longer present. When the signal drop out the radio will remain on the channel momentarily before scan resumes. -
Page 19: Message
channel activities and receive weak signals. Press the programmed Monitor key to activate the monitor function, if a signal is detected, until the signal is no longer present the radio will exit monitor mode. Permanent Monitor: Permanent monitor feature is the same as monitor, but long press the Permanent Monitor key to enter monitor mode, the radio will remain on monitor mode until long press it again to exit. -
Page 20: Talk Around
type select short message, message text select from preset message list. Then the programmed key set as one touch call, press the programmed key to send a message to a group call. Private Call ● On one touch call menu, the call member select private call contact, and the call type select private call. -
Page 21: Tx Power
around sound; switch to repeater mode, a repeater sounds. Via programmable software to set it: → → Channel folder Zone a digital or analog → Allow Talk Around channel Note:To enable this function, TX frequency should be different from RX frequency, and the channel will set as allow talk around on the programming software. - Page 22 alarm, after send emergency information then press PTT key to exit emergency mode. Via programmable software to set it: Signaling Systems folder → Digital Red Alert → add system1 to set parameters → Channel folder → add Emergency system Emergency Type: Disable, Regular, Silent, Silent with voice, the Disable ●...
-
Page 23: Time Out Timer (Tot)
Time out Timer (TOT) The purpose of TOT is to prevent any user occupy a channel for an extended period. If a channel is busy, the time will be shorter. If the preset time expires, the radio will generate beep and terminate transmission automatically. Via programming software, you can set TOT as 15-495 second. -
Page 24: Warning Tones
transmitting when you stop talking with no need of PTT press. You may set VOX level as1~8 or disable (Off). When the environment too much noise, VOX level will be higher, when the environment is quiet, VOX level will be lower. It allow user to set VOX delay as 500 to 10000 milliseconds. -
Page 25: Reject Stranger Call
Voice Indication → Channel Free Indication → Talk Permit Indication Reject Stranger Call On digital mode, if enable reject strange call feature, while the call ID not exist in the contacts list, it’s unable to transmit or receive. When received group call or all call, the device ID of transmitter and group call ID or all call ID preset on address list. -
Page 26: Battery Saver
Battery Saver This feature allows an idler radio to automatically enter battery saver mode, the mode will extend battery service life, but response time may be delayed. You can set battery saver time ratio as : 1:1 1:2 1:3 1:4, the time rate is smaller, the power saving more evidently. -
Page 27: Statement
Statement Our Company endeavors to achieve the accuracy and completeness of this manual, if you have any question, you can contact with us, we will make a detailed answer to you in time.
Need help?
Do you have a question about the BF-TD506 and is the answer not in the manual?
Questions and answers