Table of Contents
Advertisement
Quick Links
Advertisement
Table of Contents

Summary of Contents for Hydrion 10
- Page 1 Manual Hydrion10 Ion Concentration Meter...
- Page 2 Manual Hydrion10 Ion Concentration Meter Hydrion bv Hesselink van Suchtelenweg 4 NL 6703 CT Wageningen P.O.Box 522 NL 6700 AM Wageningen The Netherlands T + 31 317 421711 (general information) T + 31 317 415551 (technical support) F + 31 317 415384 E info@hydrion.nl...
-
Page 3: Important Information
Important Information For proper use of the Hydrion10 Ion Concentration Meter, it is important to read the information in the manual first, or at least the following chapters: 2.4.6 Recommendations for Accurate Measurements Sensor-Unit Maintenance... -
Page 4: Table Of Contents
Table of Contents Measuring Equipment The Sensor-unit The Hydrion10 Program The Hydrion10 Program General 2.1.1 Starting the Hydrion10 Program 2.1.2 Menu of the Hydrion10 Program 2.1.3 Toolbar 2.1.4 Project Window Project 2.2.1 The Importance of Using Different Projects 2.2.2 Creating a Project 2.2.3 Opening an Existing Project Calibrate... -
Page 5: Measuring Equipment
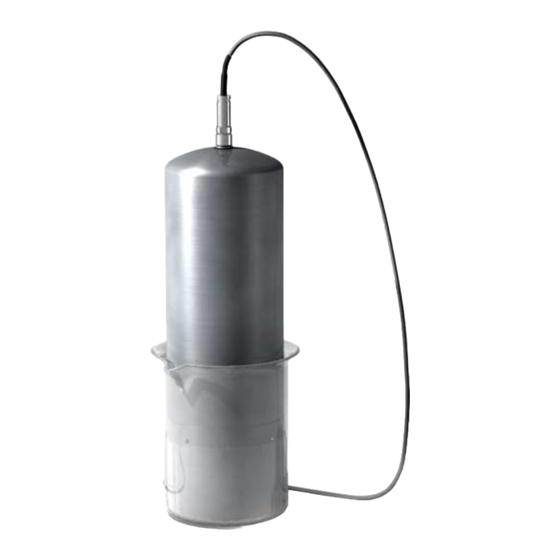
Measuring Equipment The Sensor-unit The Sensor-unit is the heart of the Hydrion10 and consists of a watertight, stainless steel tube containing ion-selective sensors, a small motor and pre-amplifiers plus data conversion. A serial cable handles all communication between the Sensor-Unit and the PC. There is a plug-in connector for the USB port of the PC that converts the serial signals from the Sensor-Unit to USB signals for the PC. -
Page 6: The Hydrion10 Program
The Hydrion10 Program The Hydrion10 program is compatible with all PC’s running Windows 95, 98 or (recommended) 2000 / XP. It is not recommended to run the software on Vista. It is also not recommended to run the software on dual cores, and if the processor supports hyperthreading; Hyperthreading should be disabled in the BIOS (refer to your mainboard/pc’s manual for instructions on how to disable hyperthreading. -
Page 7: The Hydrion10 Program
Create a new calibration set [New] Select a calibration set [Calibration set] Start a one-point calibration [One-point calibration] Start a multi-point calibration [Multi-point calibration] [Service] is only accessible by a certified Hydrion service engineer [Help] is used to solve problems. Toolbar Main menu bar... -
Page 8: Toolbar
2.1.3 Toolbar The toolbar makes it possible to easily carry out various procedures. These procedures are also available in the main menu bar. Start new sample Start multi-point calibration Start one-point calibration View saved data Close project Open project... -
Page 9: Project Window
2.1.4 Project Window When [Open project] is selected from the drop-down menu or toolbar button, a project window will open. The name of the active project will then be displayed in the title bar of the project window. The project window consists of three sections: 1. -
Page 10: Project
Project 2.2.1 The Importance of Using Different Projects The Hydrion10 program makes it possible for you to organize your measurement data in different ways which are stored in different, unique projects. For example, if you are measuring in different areas, you can make a separate project for each area with its own calibration set and sequence of measurement results. -
Page 11: Creating A Project
2.2.2 Creating a New Project Open the drop-down menu under [Project] and click on [New] and the ‘New Project’ window will appear. In the white bar next to ‘filename’, type the new project name (i.e. Example.prj) and click on [Open]. A validation window will then appear, asking if you want to use an existing project for the layout of the new project or not. -
Page 12: Opening An Existing Project
2.2.3 Opening a Project Open the drop-down menu under [Project] and click on [Open]. Next to ’filename’, type the name of the project and click on [Open]. You can also open a project by double-clicking directly on its name in the list. If you want to create a project or open a project, you must first close the active project. -
Page 13: Calibrate
Calibrating 2.3.1 Creating a Calibration Set First, click on [Calibrate] in the main menu bar and select [creating a calibration set] from the drop-down menu, then click on [New]. A menu will appear with the parameters for the new calibration set. First, fill in the name of the calibration set, the number of calibration fluids, the dilution factor and which fluid has to be used for the one-point calibration procedure. - Page 14 To finish this procedure, click on [Finished] in the Wizard window.
-
Page 15: Selecting A Calibration Set
Evian bottled water or a comparable mineral water with a stable composition. This control measurement should be performed after every one-point calibration and once every hour during measurement sessions. When results differ more than 10% from the actual values, you must repeat the one-point calibration. -
Page 16: Multi-Point Calibration
2.3.4 Multi-Point Calibration After selecting the desired calibration set, click on [Calibrate] in the menu bar and choose [multi-point calibration] from the drop-down menu. Click on [Start] to start the calibration procedure. The program will them prompt you to ‘’insert measuring tube in fluid 1’’. This is the fluid with the lowest concentration of the calibration set. -
Page 17: Standard Calibration Fluid
2.3.5 Standard Calibration Fluid Shown below is the recipe for making a standard calibration fluid for surface water and the like. This calibration fluid is especially useful for the measurement of drinking water in most areas. General Remarks • The EC is adjusted to 20 ° C. •... -
Page 18: Measuring
Measuring 2.4.1 Measuring a New Sample Click [New] in the measurement window to start the measurement. Handling Procedure: Rinse the tube (Sensor-unit) with sample fluid. Shake off the remaining fluid. Place the tube in fresh sample fluid and click on [New]. Fill in the sample name and click on [OK] to start the measurement. -
Page 19: Box Colors
2.4.3 Box Colors The measurement boxes can have different colors: green, brown, gray, blue or black. When the color of the box is green, then the measurement is stable and reliable, provided that the result bar is white and no prefixes appear. If the box is brown, then the measurement is not yet stable. -
Page 20: Symbols In The Result Bar
2.4.4 Symbols in the Result Bar The measurement is not yet stable (the color of the box is brown). < The measurement is below the lower limit of the calibration range. > The measurement is above than the upper limit of the calibration range. <<... -
Page 21: Recommendations For Accurate Measurements
2.4.6 Recommendations for Accurate Measurements If the Sensor-unit has been stored in the storage vessel for more than 12 hours, rinse the Sensor-unit with calibration fluid 2 and put it in calibration fluid 2 for conditioning for at least 15 minutes. For rinsing and conditioning, it is sufficient to use old calibration fluid. -
Page 22: Results
Results 2.5.1 Viewing Stored Data/Results The project data can be viewed by clicking on [View] under [Project]. You can choose to view just today’s results or the total results. Only results that belong to the current project will be shown. Close View Project Save data file as…... -
Page 23: Processing Data/Results
2.5.2 Processing Stored Data/Results Click on [View] in the menu bar to make a new selection, remove an existing selection, save the results, or print the results. New Selection: if only a part of the results must be removed, printed or saved; select the desired lines. Remove Selection: click this option in order to remove the selection. -
Page 24: Printing Stored Data/Results
2.5.3 Printing Stored Data/Results If [Print table] is selected, a print preview will appear. Use the icons in the menu bar to adjust the columns so that they fit on either A4 or Letter format paper. To actually print out the results, click on the printer icon in the menu bar. Zoom to fit 100% zoom Zoom to width... -
Page 25: Specifications
ISE sensors as does high ionic strength. (**) Reference electrode needs refill after 3 months Total ionic strength must not exceed 0.5 M. Maximum inaccuracy is +/-10% of the measuring value over the entire calibration range. -
Page 26: Sensor-Unit Maintenance
Sensor-Unit Maintenance Always store the Sensor-unit in the provided storage vessel. To prevent the sensors from drying out, move the Sensor-Unit directly from the fluid to the storage vessel. A thorough cleaning of the Sensor-unit should be performed once a month. This cleaning should also be performed if the Sensor-unit has come in contact with polluted water (i.e. -
Page 27: Appendix
The complete Smart-Sensor can also be replaced, if that is more convenient. Smart-Sensors contain the most recent calibration data, so a factory delivered Smart-Sensor is immediately ready for use. Replacement of a Smart-Sensor should only be done by certified personnel or a Hydrion distributor.
Need help?
Do you have a question about the 10 and is the answer not in the manual?
Questions and answers