Advertisement
®
Covered by one or more of the following patents: 3,828,942 5,368,429 5,586,619 5,984,605 7,556,464 7,726,901 7,828,506 7,726,901 Other patents pending.
O P E R A T O R ' S M A N U A L
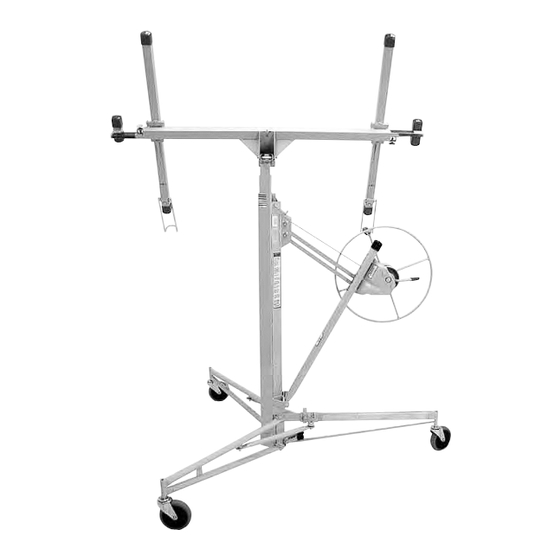
For Model 138-2
WAR N IN G
Re a d a nd b ecome f amilia r wit h t his m an ua l BEFO RE op erating u n it.
Before operating this equipment, thoroughly read this set of instructions, make sure you
understand them, and only then follow the step-by-step directions. Failure to do so could
result in serious property damage and / or serious bodily injury.
MADE BY
Form 42-01-00-00 version 6
© 2013 Telpro Inc. All Rights Reserved.
Advertisement
Table of Contents

Summary of Contents for PanelLift 138-2
- Page 1 Covered by one or more of the following patents: 3,828,942 5,368,429 5,586,619 5,984,605 7,556,464 7,726,901 7,828,506 7,726,901 Other patents pending. O P E R A T O R ’ S M A N U A L For Model 138-2 WAR N IN G Re a d a nd b ecome f amilia r wit h t his m an ua l BEFO RE op erating u n it.
-
Page 2: Table Of Contents
CONTENTS Warning / Instructional Information ......Pages 1 User Components & Product Specifications ....Page 2 Care &... - Page 3 • Use only factory authorized replacement parts. Installation of other parts can compromise the safe design of the PANELLIFT ® • INSPECT THE CABLE BEFORE EACH USE. REPLACE AT Drywall Lift and may cause failure of the unit possibly resulting in THE FIRST SIGN OF WEAR.
-
Page 4: User Components & Product Specifications
USER COMPONENTS & SPECIFICATIONS Complete frame assembly with winch and standard telescoping sections Cradle assembly - less detachable cross arms Cradle cross arms (1 pair) . Complete tripod base assembly SHEET QUANTITY CAPACITY Single LOAD RATING 150 lbs. (68 kg) DO NOT EXCEED. 11’... -
Page 5: Care & Maintenance
Apply household paraffin to the surfaces of the telescoping sections, for smoother action. Take reasonable care to avoid damaging the PANELLIFT ® Drywall Lift when transporting it. Do not hammer on any members or components of the ®... -
Page 6: Assembly
ASSEMBLY 1. Begin by setting up the tripod base: press down on the slide yoke pin clip and swing the outer legs out until they lock in the working position (note the holes 2C. To hold the tripod base in position during this on the bottom of the slide tube). - Page 7 ® engaged slide bar lock. NOTE: DO NOT tighten the slide loading the unit. DO NOT use the PANELLIFT with the outriggers extended beyond the 33” point. bar lock nut assembly. This will make it impossible to col-...
-
Page 8: Operation
1. To Load: Set the backstop on the tripod base to hold the unit in position. Extend the cradle outriggers to properly support the drywall, tilt the cradle, and swing out the cross arm support hooks. Load the PANELLIFT Drywall Lift ®... -
Page 9: Disassembly
DISASSEMBLY Disassemble the PANELLIFT® Drywall Lift as follows for transport and compact storage. Push 1. Slide the cradle outriggers all the way in. 5. Raise up on the slide bar with your left hand while rotat- 2. Remove the cross arms by pressing the spring tab on the ing the slide bar lock counter-clockwise with your right hand. - Page 10 DISASSEMBLY continued 8. hold the retaining hook in this position with your left hand and rotate the winch forward with your right hand. This will cause the winch assembly to fold up against the frame. When the slide bar contacts the frame, tighten the cable just sufficiently to hold the winch in the collapsed position.
Need help?
Do you have a question about the 138-2 and is the answer not in the manual?
Questions and answers