
Summary of Contents for HanYang C&C FreeJet 320
- Page 2 HanYang C&C and FreeJet 290, 320 (TX) are a trade mark of HanYang C&C Co. Ltd. Copyright © 2000 - 2007 by HanYang C&C Co. Ltd. All rights reserved The specifications and materials contained herein are subject to change without notice. If you have any question, comments, and suggestions, Please address a mail to: HanYang C&C Co.
-
Page 3: Precautions And Safety Information
Precautions and Safety information Before using the printer, please read this manual carefully. When using FreeJet machine, these safety precautions should always be observed to reduce serious or fatal risk. 1. Read and understand all manual carefully to use FreeJet safely and properly prior to the installation. - Page 4 Make contact with a HanYang C&C certified technician or local dealer when need any help. 10. Keep this manual in a place where you can quickly access it at any time. Thank you very much for your purchasing FreeJet 320 / TX flat bed inkjet printer. - 3 -...
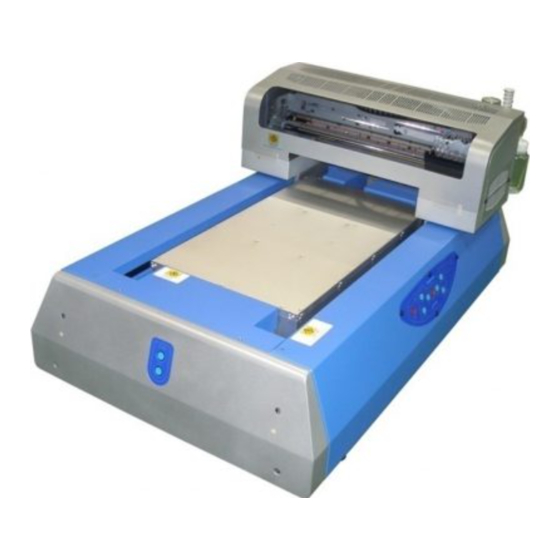
- Page 5 1. Overview (X-CR part) - 4 -...
- Page 6 (rear of 320) <Ink feeding system> 1. Ink bottle & Cleaner bottle connector a. structure of bottle connector The bottle connector consists of inlet part and outlet part. Inlet part covers the bottle as a cap and it is connected with outlet for ink feeding as well. It has a stopper which consists of diaphragm, piston and spring.
- Page 7 2. Syringe pump & Waste ink bottle New ink feeding system introduces a built-in syringe pump. It is connected with waste ink bottle and capping ass’y so that it could draw an ink, waste ink (in the cap) or cleaner into the waste ink bottle.
- Page 8 2. Setting up Observe following guideline and indicated printing procedure to minimize hazard what it would be caused by hardened ink. (A) Unpacking the Printer <1> Uncover the main paper box. Remove all protective materials (the foam blocks) and the optional components (ink bottles, cleaner bottle, manual, driver CD etc.) Uncover the vinyl wrapper from the printer and remove other foam blocks.
- Page 9 Release the inlet from outlet and replace the bottle cap with inlet part tightly. Then fix the inlet of bottle to outlet of connector by tool. Set the rest ink and cleaner bottle to connector, as stated above, according to the indication sticker on the ink bottle station. <03>...
- Page 10 To fill each feeding tube and each damper and print-head, push the syringe pump fully and release. Make sure the ink feeding line under the feeding bottle. If the feeding tube is not being filled with ink, you may push the syringe pump one more. Do not push syringe pump too much.
- Page 11 <01> Make sure FreeJet is connected with your computer and turned off. Do not turn on the printer until it is indicated to do so in the driver install program. <02> Insert the FreeJet 320 software CD-ROM in your CD-ROM or DVD drive. Open 320 printer driver file.
- Page 12 4. Setup Printing Conditions <01> Open the FreeJet 320 Printer driver Windows XP : Click Start > Control Panel > Printers and Other Hardware > Printers and Faxes. Widows 2000, Me, NT, 98se, 98 : Click Start > Settings > Printers.
- Page 13 <06> If you want to save your custom settings as a group, click Save Settings. Then enter a name for your settings in the Custom Settings window and click Save. When you want to use a settings again, you can select this group of settings in the Custom Settings list on the Advance menu.
- Page 14 - 13 -...
- Page 15 - 14 -...
- Page 16 - 15 -...
- Page 17 5. Operation (recommended) <Power on machine and driver board> 1) Make sure all clamps and tubes are open. 2) Connect power cable to the socket and turn on power switch. 3) Press each of buttons (Stand-by & Y-JOG & Z-JOG buttons) to make sure their working. 4) Press power button about 5 sec.
- Page 18 <Printing> 1) Place a paper on the bed and press Z-up button to lift bed up. Z-UP button: (When it is pressed,) lift the bed up. If it is pressed over 3 seconds, the bed will be lifted up continuously until upper height sensor discontinues the lifting. - 17 -...
- Page 19 2) Put a paper on the right corner and front of bed. And adjust a gap between the paper (or bed) and nozzle by using of Z-UP button. FreeJet 320 machine detects a maximum distance (3mm, approx.) from nozzle to bed (or media) automatically by ‘upper height sensor’.
Need help?
Do you have a question about the FreeJet 320 and is the answer not in the manual?
Questions and answers