Table of Contents
Advertisement
Advertisement
Table of Contents

Related Manuals for Newworld NW61F


Summary of Contents for Newworld NW61F
- Page 1 Instructions for use, installation and connection...
- Page 2 New World Many thanks for buying this New World appliance. We hope that it will make a stylish and useful addition to your kitchen. Should you need it..Along with this handbook there is also leaflets for applying for our warranty, you can apply by sending in the cards, calling the number supplied, or registering on line www.newworldappliances.co.uk...
-
Page 3: Table Of Contents
Please check that your appliance has not If further assistance is required, please been damaged during transit. contact the Customer Care Centre, using If the appliance is damaged in any way, the number on the cover of this please contact your retailer - DO NOT handbook. -
Page 4: Intended Use
continue to run for some time after use. Intended use The symbol on the product or on This appliance is intended for use in your its packaging indicates that this household. Never use the appliance for product may not be treated as any other purpose! household waste. -
Page 5: Prior First Use
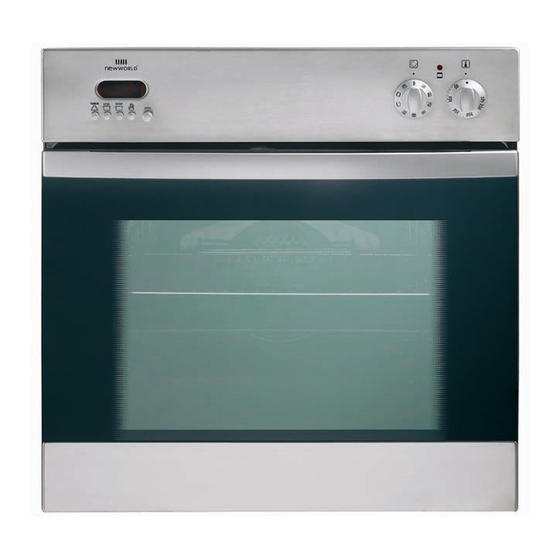
1 Program timer 3 Oven neon (on during heating, off when the set temperature is 2 Oven function knob (also acts as an reached). ON/OFF) 4 Oven temperature regulation Prior first use this will also reduce cooking times for Oven certain items. -
Page 6: Oven
Oven Important warnings! Grill • Never put aluminum foil to the bottom of Heat comes directly from the infrared heater, located at the oven ceiling. It is the oven, and do not place any crockery especially suitable for preparing steaks, upon it. -
Page 7: Oven Guide Levels
taste, please feel free to adjust any Oven guide levels temperatures and times to suit your purposes. Baking pans and accessories (oven grid, • This appliance is a high performance grease receptacle, baking tray, etc.) may oven, as there may be differences be inserted into the oven in 5 guiding between this appliance and your old one, levels. - Page 8 Pastry is undercooked Use a dark coloured baking tray / tin next time. Use the base heat function towards the end of cooking time to crisp off the base. Cheesecake is undercooked Next time reduce the baking temperature and extend the baking time. Cooking guide - notes.
- Page 9 Pastry Baking Table Type of pastry Shelf position Temp. Baking time (Counted up from the (°C) (in min.) bottom) Sweet pastry Raisin cake 150-160 55-70 Cheese cake (tart form) 150-160 60-80 Fruit cake 160-170 50-70 Fruit cake with icing 160-170 60-70 Sponge cake* 150-160...
-
Page 10: Roasting Table
• Always follow any instructions, which condensation on the inside of the oven door - which is perfectly normal. have come with you roasting meat, or if • If you need the meat juices for gravy or you are in doubt, a local butcher can offer sauces, you may need to add water to tips for roasting specific meats. -
Page 11: Defrosting
• Where given always follows the • Place the food evenly onto the grid and instructions on packaging and ensure select the grill function and the foods are piping hot before serving. temperature you wish to use. • During grilling, food will require turning - Tips for grilling: please do when necessary as carefully •... -
Page 12: Cleaning And Maintenance
Cleaning and maintenance • Cool the oven completely before ALWAYS allow the appliance to cool before cleaning! cleaning. NEVER use a steam cleaner on this • The oven and the accessories must be appliance. cleaned after each use; otherwise stains might get burned in. -
Page 13: Troubleshooting Guide
Now open the door completely and turn the removable locks into their original position. Close the door slowly and check if they close properly (fig. 4). If you have trouble closing the door, check if the hinges are properly inserted into their slots. -
Page 14: Replacement Of Parts
Replacement of parts WARNING: Danger of electric shock! Oven light bulb Always make sure that the appliance is disconnected from the electricity supply The bulb for replacement should meet the before replacing the bulb. following specifications: Remember that the bulb is regarded as E 14, 230 V, 25 W, 300°C. -
Page 15: Installation Of Electric Oven
Installation of electric oven • Before installation you must remove the rear careful not to tighten the screws excessively because you may damage the cabinet sides panel from the kitchen cabinet in the area of or the enamel of the appliance. installation. -
Page 16: Installing Appliance Under A Worktop
Remove the fixing screws from the be read in conjunction with these polythene bag on the top of the instructions appliance, but leave the appliance in the Step 2: Connect to the electricity base tray packaging until you are ready to install it. -
Page 17: Electric Connection
Electric connection WARNING: This appliance must be earthed! Electric connection may be carried out by qualified service personnel only! Wrong connection may permanently damage parts of the appliance and render your warranty void! Mains voltage of the user (230 V) must be verified with the measuring device! Colour code L1 = live, usually coloured black, black,... -
Page 18: Technical Information
Technical information Type-model NW61F Dimensions of the appliance 588x555x548 (height/width/depth) (mm) Dimensions for mounting 600x560x550 (height/width/depth) (mm) AC 230 V Electric connection 230 V, 50 Hz Nominal voltage of heaters Max. temperature 275°C Oven Temperature regulator/ function mode switch Guide levels (telescopic guides in 3... - Page 19 Service Record Date of purchase Installers stamp / Printed Date of installation name Place of purchase Date Part(s) Replaced Signature / Engineer Stamp Instructions for use, installation and connection...
- Page 20 Please record your model and serial number in the spaces above. Having these numbers to hand will help us to help you quickly and more efficiently should you need to call us for any reason. 08 26379 00r. 05.07. NW61F. Instructions for use, installation and connection...
- Page 21 Návod k použití...
- Page 22 Návod k použití...
- Page 23 Instructions for use, installation and connection...
- Page 24 182734/en (06-07) Instructions for use, installation and connection...
Need help?
Do you have a question about the NW61F and is the answer not in the manual?
Questions and answers