Table of Contents
Advertisement
Rating:
Amperes:
RPM:
Collet:
Weight:
Need Assistance?
Call us on our toll free customer support line:
1-866-349-8665 Monday – Friday from 9am to 5pm
Eastern Standard Time
Technical questions
Replacement parts
Parts missing from package
Manufactured For and Distributed By
True Value® Company, Chicago, IL
©2012 True Value Company
Made in China
PRODUCT SPECIFICATIONS
120V AC, 60 Hz
1.3A
10,000–35,000 RPM (no load)
1/16", 3/32 & 1/8" (1.6, 2.4 & 3.2 mm)
1 lb 6 oz (0.68 kg)
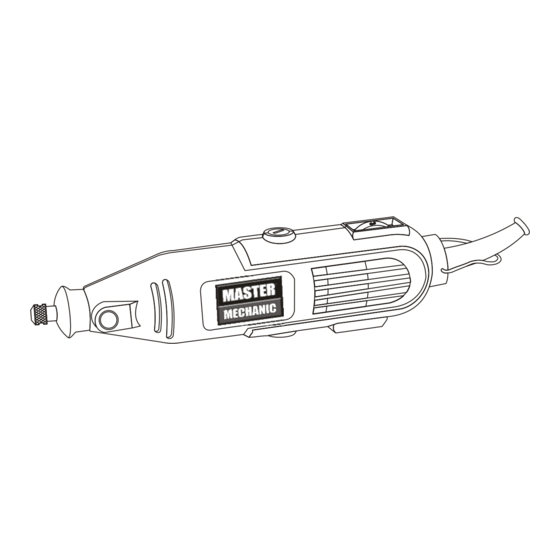
1.3A Rotary Tool
Owner's Manual
152294
Advertisement
Table of Contents

Summary of Contents for master mechanic 152294
-
Page 1: Product Specifications
1.3A Rotary Tool 152294 Owner’s Manual PRODUCT SPECIFICATIONS Rating: 120V AC, 60 Hz Amperes: 1.3A RPM: 10,000–35,000 RPM (no load) Collet: 1/16", 3/32 & 1/8" (1.6, 2.4 & 3.2 mm) Weight: 1 lb 6 oz (0.68 kg) Need Assistance? Call us on our toll free customer support line: 1-866-349-8665 Monday –... -
Page 2: Table Of Contents
TABLE OF CONTENTS Product specifications ………….……………………………………………………. Table of contents ……………………………………………………………………... General safety warnings …………………………………………………………….. 3–4 Eye, ear & lung protection …………………………………………………………… 3–4 Electrical safety ………………………………………………………………………. Power tool safety ……………………………………………………………………... 5–6 General safety rules ………………………………………………………………….. Work area …………………………………………………………………....Electrical safety ………………………………………………………………………. Personal safety ……………………………………………………………………….. -
Page 3: General Safety Warnings
GENERAL SAFETY WARNINGS WARNING: Before using this tool or any of its accessories, read this manual and follow all Safety Rules and Operating Instructions. The important precautions, safeguards and instructions appearing in this manual are not meant to cover all possible situations. It must be understood that common sense and caution are factors which cannot be built into the product. -
Page 4: Electrical Safety
GENERAL SAFETY WARNINGS WEAR A DUST MASK THAT IS DESIGNED TO BE USED WHEN OPERATING A POWER TOOL IN A DUSTY ENVIRONMENT. WARNING: Dust that is created by power sanding, sawing, grinding, drilling, and other construction activities may contain chemicals that are known to cause cancer, birth defects, or other genetic abnormalities. -
Page 5: Power Tool Safety
POWER TOOL SAFETY Do not abuse the cord. Never use the WARNING: Read all safety warnings cord for carrying, pulling or unplugging and instructions. Failure to follow the the power tool. Keep cord away from warnings and instructions may result in heat, oil, sharp edges or moving parts. -
Page 6: Tool Use And Care
POWER TOOL SAFETY Store idle power tools out of the reach PERSONAL SAFETY – cont’d of children and do not allow persons unfamiliar with the power tool or these Remove any adjusting key or wrench instructions to operate the power tool. before turning the power tool on. -
Page 7: Specific Safety Rules
SPECIFIC SAFETY RULES SPECIFIC SAFETY RULES Always use the correct collet size. If the collet size is larger than the accessory Hold the tool by its insulated gripping shank size it will not grip the shank surfaces when performing an operation properly, leading to possible injury to the where the cutting tool may contact hidden operator or damage to the tool. -
Page 8: Extension Cord Safety
EXTENSION CORD SAFETY WARNING: Keep the extension cord MINIMUM GAUGE (AWG) clear of the working area. Position the EXTENSION CORDS (120V use only) cord so it will not get caught on the Amperage workpiece, tools or any other obstructions rating Total length while you are working with the power tool. -
Page 9: Symbols
SYMBOLS WARNING: Some of the following symbols may appear on the rotary tool. Study these symbols and learn their meaning. Proper interpretation of these symbols will allow for more efficient and safer operation of this tool. volts direct current amperes no load speed alternating or direct hertz... -
Page 10: Know Your Rotary Tool
KNOW YOUR ROTARY TOOL Variable speed control dial Brush cap Hanging loop ON/OFF switch Spindle lock button Collet nut Umbrella... -
Page 11: Accessories
ACCESSORIES & CONTENTS AVAILABLE ACCESSORIES CARTON CONTENTS WARNING: Use only accessories Carefully unpack the rotary tool. Compare against the “Rotary Tool Components” recommended for this rotary tool. Follow instructions that accompany the chart below. accessories. Improper use of NOTE: See illustration of rotary tool accessories may cause injury to the accessories on Pages 13, 14 &... -
Page 12: Contents
CONTENTS... - Page 13 ACCESSORY KIT CONTENTS Illustration Description Shape Aluminum oxide 3/8” Radial grinding stone Aluminum oxide 5/8” Radial grinding stone Aluminum oxide Parabolic 3/8” grinding stone Aluminum oxide Abrasive wheel 3/4” grinding stone Silicon carbide 3/8” Radial grinding stone Silicon carbide 5/8” grinding stone Silicon carbide wheel Abrasive wheel 3/4“...
- Page 14 ACCESSORY KIT CONTENTS Illustration Description Shape 1/2” Axial Brass brush 1/4” Axial Brass brush Felt polishing 1/2” wheel Felt polishing 1” wheel 3/8” Pointed tip Felt polishing tip 1” Cloth wheel Rubber polishing 7/8” wheel 1/4” 60 grit Sanding band 1/4”...
- Page 15 ACCESSORY KIT CONTENTS Illustration Description Shape 5/32” Ball Diamond point 3/64” Taper Diamond point 3/16” Cylinder Diamond point 1/8” Cylinder HSS cutter HSS cutter Point 1/16” Cylinder Diamond point 1/8” Cylinder Multi-purpose bit 3/32” Cylinder Multi-purpose bit 1/16” Cylinder Multi-purpose bit 1/8”...
-
Page 16: Accessory Description & Use
ACCESSORY DESCRIPTION & USE NOTE: Not all accessories listed below are included with this tool. Please refer to Pages 13, 14 & 15 for a listing of those accessories included with this tool. Accessory Description Accessory Use Aluminum oxide (pink) Use on metals, castings, welded joints, rivets and ... -
Page 17: Assembly And Operation
ACCESSORY DESCRIPTION & USE Accessory Description Accessory Use Stainless steel brush Stainless steel brushes do not cause "after-rust" when used on corrosive-resistant materials like pewter, aluminum and stainless steel. Mandrel for emery-impregnated Use with emery-impregnated polishing wheel. polishing wheel Carbide grout cutter Ideal for use on wall and floor grout. -
Page 18: On/Off Switch
ASSEMBLY AND OPERATION ON/OFF SWITCH To turn the switch ON, push on the lower part of the ON/OFF switch (1) (Fig. 2). To turn the switch OFF, push on the upper part of the ON/OFF switch (2). CHANGING THE COLLET Some accessories require the use of different sized collets. -
Page 19: Installing Accessories
ASSEMBLY AND OPERATION CHANGING THE COLLET – cont’d NOTE: Do not tighten the collet nut without an accessory installed in the collet. You will damage the collet. INSTALLING ACCESSORIES Turn the switch OFF and disconnect the tool from the power source. Depress the spindle lock button (1) and slowly turn the collet nut (2) until the spindle lock button locks the... -
Page 20: Connecting The Flexible Shaft To The Tool
ASSEMBLY AND OPERATION CONNECTING THE FLEXIBLE SHAFT TO THE TOOL The flexible shaft is designed to facilitate working in confined spaces where otherwise using the rotary tool may be awkward. WARNING: Never bend the flexible shaft with a radius of less than 6”... -
Page 21: Changing The Collet & Accessories In The Flexible Shaft
ASSEMBLY AND OPERATION CONNECTING THE FLEXIBLE SHAFT TO THE TOOL – cont’d This should allow the outer casing to slide over the inner cable, and then allow the casing to rest against the threaded spindle. Screw flexible shaft head nut (6) onto the threaded spindle by turning it clockwise. - Page 22 ASSEMBLY AND OPERATION ASSEMBLING & INSTALLING THE STAND – cont’d Clamp the C-clamp (1) onto a work table (horizontal surface) or other appropriate vertical surface by tightening the clamp screw (2) clockwise (see Fig. 7a & 7b). NOTE: Do not over tighten to avoid breaking the clamp.
-
Page 23: Selecting Proper Speeds
ASSEMBLY AND OPERATION WARNING: For safety reasons, the operator must read the sections of this Owner’s Manual entitled "GENERAL SAFETY WARNINGS", "POWER TOOL SAFETY", "SPECIFIC SAFETY RULES", "EXTENSION CORD SAFETY" and "SYMBOLS" before using this rotary tool. Verify the following every time the rotary tool is used: The accessory is in good condition and not damaged in any way. -
Page 24: Maintenance
MAINTENANCE WARNING: When servicing, use material, wallboard, spackling compounds only identical replacement parts. Use of or plaster. During any use on these any other part may create a hazard or materials it is extremely important that the cause product damage. tool is cleaned frequently by blowing out with an air jet. -
Page 25: Parts Diagram
EXPLODED VIEW... -
Page 26: Parts List
PARTS LIST WARNING: When servicing, use only original equipment replacement parts. The use of any other parts may create a safety hazard or cause damage to the rotary tool. Any attempt to repair or replace electrical parts on this rotary tool may create a safety hazard unless repair is performed by a qualified technician. -
Page 27: Warranty
3-Year Limited Warranty: This product is warranted for 3 years against any defects in material and workmanship. If defective the product will be repaired or replaced free of charge. Simply provide proof of purchase and return the tool to your place of purchase.
Need help?
Do you have a question about the 152294 and is the answer not in the manual?
Questions and answers