Table of Contents
Troubleshooting

Summary of Contents for Malibu Boats Wakesetter 20VTX 2018
- Page 1 2018 Owners Manual malibu boats australia tennessee california 5075 Kimberly Way 813 Hope Court One Malibu Court Loudon, TN 37774 Albury, N.S.W. 2640 Merced, CA 95341 (865) 458-5478 (02) 6040-1174 (209) 383-7469...
- Page 2 Congratulations on your purchase of a new, high-performance recreational tow boat. Your Malibu Boats, LLC (“Malibu”) boat has been constructed to meet and/or exceed all U.S. Coast Guard (USCG) and National Marine Manufacturers Association (NMMA) requirements applicable at the time of its manufacture. However, it is still your responsibility as the boat owner to ensure the boat is operated in a safe manner and is properly maintained.
- Page 3 ’ about this owner s manual The recommended practices and warnings in this manual represent sound advice for recreational boating and identify common risks encountered by boaters engaging in towed watersport activities. Read and understand the contents of this manual. Ask questions of a boating professional if anything in this manual does not make sense to you.
- Page 5 about your new boat Malibu is proud to provide you with the most exciting, cutting-edge technology available in the towing-boat industry. The boat you have purchased represents the state of the art at the time of manufacture. As you may expect from the industry’s leader since 1982, Malibu expands and innovates continually.
- Page 6 every circumstance that could arise in the operation or care of the boat when not in use. Malibu strongly recommends reading any and all additional information provided by component manufacturers’ and supplied with the boat at time of purchase. Also check out websites for Malibu and its component manufacturers periodically to stay abreast of any changes, updates, service bulletins and general information.
-
Page 7: Table Of Contents
TABLE OF CONTENTS SAFETY Embracing Safety ....................................1-2 Signal Words and Symbols Used in This Manual ................................1-2 Basic Safety Rules ............................................1-3 Pre-Operation Check List–Before Leaving the Dock .................................1-3 Precautions While Underway ........................................1-4 Safety While Maintaining the Vessel .....................................1-5 Owner Responsibility and Boating Education ............................1-6 Important Safety Information ........................................1-6 Responsibilities of Boat Owner and Operators ...................................1-6 Registration ..............................................1-6... - Page 8 Tow Line Guidelines ..........................................1-28 Fallen Skier or Rider ..........................................1-28 Develop Water Sense ..........................................1-29 Emergency Procedures ................................1-32 Explosion and Fire .............................................1-32 Swamping and Flooding ..........................................1-32 Capsizing ..............................................1-32 Staying Afloat ..............................................1-33 Collisions ..............................................1-33 Grounding ..............................................1-33 Person Overboard ............................................1-33 Drowning ..............................................1-33 Medical Emergency ...........................................1-34 Operation Failure ............................................1-34 Towing ................................................1-34 QUICK REFERENCE GUIDE...
- Page 9 Stereo Screen ...............................................3-19 Media Screen ...............................................3-21 Controls Screen ............................................3-22 Settings Screen ............................................3-22 Maps Screen ...............................................3-26 3-in-1 Event Screen ...........................................3-29 Navigation Features ..........................................3-29 GPS Information ............................................3-29 Zero Off GPS Speed Control ........................................3-30 Three Event Information .........................................3-30 Slalom Settings ............................................3-31 Buzzer Volume ............................................3-31 Timing Recap ..............................................3-31 Slalom Wait Time ............................................3-31 Jump Settings .............................................
- Page 10 Cup Holders ............................................... 4-12 Removable Trash Receptacle ......................................... 4-12 Carpets and Mats ............................................4-12 Cockpit Table ............................................4-12 Grab Handles ..............................................4-13 Heater ................................................4-13 Tower, Canvas & Accessories ...............................4-14 G3.5 Tower ..............................................4-14 G4 Tower ..............................................4-14 Tower Accessories ..................................4-15 Tower Lights .............................................. 4-15 Bimini Top ..............................................
- Page 11 Pre-Tow Check List ..........................................5-12 Underway ..............................................5-12 Launching and Re-Loading the Boat from the Trailer ........................5-12 When the Trailer Is Not in Use ..............................5-13 GET READY Get Ready ...................................... 6-1 Malibu Fuel System ........................................... 6-2 Final Checks Before Starting ........................................6-2 Starting and Operation ..........................................
- Page 12 For Extended Storage of One (1) Month or More and Winterization .........................7-15 WARRANTY Malibu Boats, LLC Limited Warranty ............................8-2 Warranty Transfer ..................................8-10 Malibu Boats, LLC Trailer Limited Warranty ..........................8-12 Troubleshooting the Boat ................................8-19 Troubleshooting the Trailer ................................8-21 Service Log ....................................8-22...
-
Page 14: Safety
Safety... -
Page 15: Embracing Safety
Embracing Safety SIGNAL WORDS AND SYMBOLS USED IN THIS MANUAL Throughout this manual specific precautions and symbols identify safety-related information. You will find DANGER, CAUTION, WARNING, NOTICE and SAFETY INSTRUCTIONS symbols which require special attention. Please read them carefully and follow these precautions as indicated! They will explain how to avoid hazards that may endanger you, your passengers, towed participants, and other boaters. -
Page 16: Basic Safety Rules
BASIC SAFETY RULES Make sure you understand all of the operating instructions prior to attempting to operate this boat. Boating-related accidents are generally caused by the operator’s failure to follow basic safety rules or written precautions. Most accidents can be avoided if the operator is completely familiar with the boat and its operation, follows recommended practices, and is able to recognize and avoid potentially hazardous situations. -
Page 17: Precautions While Underway
PRECAUTIONS WHILE UNDERWAY Failure to follow these precautions will result in serious injury or death. The operator shall: • Check that the area behind the boat is all clear before starting the engine to AVOID PROPELLER INJURY to persons in the water behind the boat or on the swim platform. -
Page 18: Safety While Maintaining The Vessel
become entangled in the line and could cause significant injury, such as amputations. • Keep track of tow lines and dock lines so that they do not become entangled in the propeller. A tow line will wrap quickly around a spinning propeller and is capable of immobilizing the boat and dragging a person entangled in the tow line underwater or causing amputations. -
Page 19: Owner Responsibility And Boating Education
Owner Responsibility and Boating Education IMPORTANT SAFETY INFORMATION Your safety, the safety of your passengers, and the safety of other boaters is dependent on how you operate and maintain your boat. As operator or owner of this boat, you are responsible for the safety of those with and around you while boating. RESPONSIBILITIES OF BOAT OWNER AND OPERATORS It is the owner’s responsibility to ensure that the operator of the boat has been properly instructed in the lawful and safe operation of this vessel. -
Page 20: Operation By Minors And Licensing
Boat smart from the start: take a boating safety course and get a free vessel safety check annually for your boat. For more information, contact: United States Coast Guard Auxiliary, www.cgaux.org; United States Power Squadrons, 1-888-FOR-USPS, www.usps.org. The following is a list of some other agencies and organizations that offer Water Safety, First Aid and CPR courses or information. -
Page 21: Emergency Safety Stop Switch
EMERGENCY SAFETY STOP SWITCH Your boat is equipped with an Emergency Safety Lanyard (cutoff switch). We recommend that the lanyard be secured to the operator and the lock plate attached to the emergency cutoff switch prior to starting the engine and anytime the engine is operating. The Emergency Safety Lanyard is designed to turn off the engine whenever the operator moves far enough away from the helm to activate the switch. -
Page 22: Fire Extinguisher
Type II PFD – Near Shore Buoyant Vest: This “classic” PFD comes in several sizes for adults and children and is for calm inland water where there is chance of fast rescue. It is less bulky and less expensive than a Type I, and many will turn an unconscious person face-up in the water. -
Page 23: Bilge Pump(S)
BILGE PUMP(S) Bilge pump(s) are installed in your boat to remove water that may accumulate in the bilge. Know the location of the pump(s), where they discharge, and where switches are located. Typically there are manual switch and/or an automatic switch position(s). On boats equipped with the Viper II system, the bilge pumps are controlled via the touch screen for manual operation. -
Page 24: General Boating Safety Topics
General Boating Safety Topics SAFE SPEED Navigation rules state that a boat be operated at a safe speed at all times. Determination of a safe speed involves consideration of many factors, such as, but not limited to: • Boating activity (tubing, water skiing, wakeboarding, wake surfing, etc.) •... -
Page 25: Carbon Monoxide Safety
CARBON MONOXIDE SAFETY Carbon Monoxide (CO) is a deadly, colorless and odorless gas produced by all engines and fuel-burning appliances. Even with the best boat design and construction, plus the utmost care in inspection, operation and maintenance, hazardous levels of carbon monoxide may be present in or near the boat under certain conditions. -
Page 26: Proper Loading
For the most current information on carbon monoxide, you may call, write or visit online any of the following: United States Coast Guard Office of Boating Safety (CG-5422) 2100 Second Street SW STOP 7581, Washington, DC 20593-7581 (ww.uscgboating.org/safety/carbon_monoxide.aspx) NMMA 231 S. LaSalle St., Suite 2050 Chicago, IL 60604 312-946-6200 www.nmma.org... -
Page 27: Visibility Of The Operator
When loading your boat, give attention to the effect that the load distribution has on the boat’s trim angle. Trim angle is the technical term for the up or down pitch angle of your boat (also known as the “bow up” or “bow down” angle). The fore and aft load distribution of weight, passenger, and gear can affect the running trim angle of the boat. -
Page 28: Product Misuse
Boating under the influence of alcohol or drugs can be deadly. Alcohol and/or drug use is the leading contributing factor to all recreational boating fatalities. Alcohol and drugs can increase your reaction time and impair your judgment. Combined with the sun, wind, waves, and noise of other watercraft, the effects of drugs and alcohol can be increased and can significantly increase your reaction time. -
Page 29: Environmental Concerns
Weeds Weeds can generally be a threat to a boat’s engine and other components on the boat. If weeds wrap around the propeller, they can create vibration in the engine. They also can restrict water intakes or clog the water filter, causing the engine to overheat. -
Page 30: On Product Warning Labels
Speed/ Wake/Wash Be alert for NO WAKE zones. You are responsible for any damage or injury caused by your wake/wash. Prior to entering a NO WAKE zone, reduce throttle, come off plane to the slowest steerable speed. Use caution when operating around smaller crafts, in channels and marinas, and in congested areas. -
Page 31: Wakesetter Label Locations
WAKESETTER LABEL LOCATIONS all labels on this page appear on the port side of the walk-through between the bow and observer seat in ALL wakesetter models. all of the warning labels above are the same on all models; the two labels below will be specific to the individual model. - Page 32 Shown is a Malibu Wakesetter model. All Wakesetters will have warning labels in the same locations, regardless of model and bow style. NOTE: this warning label will be model-specific. Malibu Owners Manual • 2018 • Safety • Page 1-19...
-
Page 33: Response Txi Label Locations
RESPONSE TXI LABEL LOCATIONS NOTE: ThE clOsEd bOw mOdEls will NOT havE This labEl NOTE: This labEl will appEar ONly ON ThE OpTiONal TOwEr fOr aNd iT will bE lOcaTEd iN ThE sTarbOard lOwEr iNsidE cOrNEr Of ThE TOwEr Malibu Owners Manual • 2018 • Safety • Page 1-20... -
Page 34: Basic Rules Of The Road
Basic Rules of the Road BOATING REGULATIONS The U.S. Coast Guard (USCG) is the governing authority of the United States waterways and serves to help the boating public. State boating regulations are enforced by local authorities. Owners and users outside of the United States must be cognizant of that country’s laws and regulations. -
Page 35: Meeting Head-On
All vessels approaching your vessel from the directions depicted by the red vessels must yield to your boat. Conversely, the following illustration depicts a situation in which you are the boat in the center and you are the burdened vessel. You must give right-of-way to all vessels coming towards you from the directions shown in green. - Page 36 There are two primary marking systems in use in the U.S.: the Uniform State Waterway Marking System (USWMS), used on inland waters and maintained by each state, and the Federal Waterway Marking System (FWMS), used on coastal waters and rivers and maintained by the USCG.
-
Page 37: Night Running
controlled area danger boats Keep out information Uniform State Waterway Marking System (USWMS) Diver’s Flag Distress Flag Alpha Flag Used by recreational Indicates fellow boater Worldwide vessels divers–indicates engaged in diving is in need of assistance. position. Stay far operations–does away from diver flags. - Page 38 (NOTE: Information is included here that does not apply to Malibu boats. However, the information is included here to assist Malibu operators in being aware of the navigational lights that may appear on other vessels you may encounter.)
-
Page 39: Watersports Safety
Watersports Safety Skiers or riders are obligated to be aware of the same fundamental safety rules as boat operators. If you are new to water skiing, wakeboarding, wake surfing, and other towed watersports, seek certified training before starting. You will find it especially helpful to join a local ski club, World Wakeboard Association, and/or USA Water Ski, when possible. -
Page 40: Towed Person Safety Responsibilities
TOWED PERSON SAFETY RESPONSIBILITIES Most injuries and fatalities that occur on high-performance recreational tow boats occur to the persons being towed (water skiing, kneeboarding, wakeboarding, wake surfing, tubing, etc.). It is the responsibility of the boat operator to pay attention to a multitude of things while utilizing the boat for water tow sports. The towed person has little or no control over their path nor do they have much in the way of protection from impact with obstacles or other boats. -
Page 41: Tow Line Guidelines
the boat into gear. • Slowly take up slack in tow lines before accelerating to watersports speeds. Jerking the slack out of a tow line can cause high forces on the rope and towing equipment. This may cause the rope or equipment to break and the rope to snap back at occupants of your boat and at the towed person. -
Page 42: Develop Water Sense
DEVELOP WATER SENSE The Watersports Responsibility Code and the Watersports Safety Code have been developed by WSIA and industry equipment manufacturers. These Codes are reproduced here for your reference. Watersports Responsibility Code Familiarize yourself with and follow The Watersports Responsibility Code. WATERSPORTS SAFETY CODE Before you get in the water: Skiing or riding instruction is recommended before... - Page 43 • Whether you plan to be in a watercraft, or skiing/riding behind one it is important you are wearing a properly fitted life jacket (PFD) approved by your country’s agency, USCG Type III, ISO, etc. • Inspect all equipment prior to each use, check bindings, fins, tube, attachment, tow rope and flotation device. Do not use if damaged.
- Page 44 Carbon Monoxide: The exhaust from the engine on a watercraft contains Carbon Monoxide (CO) which is a colorless, odorless and poisonous gas. Excessive exposure to CO can cause severe injury or death. Follow this advice to avoid injury. • Never “Platform Drag” by holding onto the boarding platform or being dragged directly behind the watercraft. This is where CO will be.
-
Page 45: Emergency Procedures
Emergency Procedures In an emergency situation, you may have to resort to measures which are not commonly practiced. Always assess the dangers of being in harm’s way versus the protection of equipment. Keep a sound mind during an emergency and always use common sense. EXPLOSION AND FIRE Many boat fires and explosions involve flammable liquids such as gas or oil, which are used in your boat’s propulsion engine(s) and generator. -
Page 46: Staying Afloat
• Immersion in water speeds the loss of body heat and can lead to hypothermia (the abnormal lowering of internal body temperature). STAYING AFLOAT • Remain calm. Do not thrash about or try to remove clothing or footwear. This leads to exhaustion and increases the loss of air that may keep you afloat. -
Page 47: Medical Emergency
• Keep the victim warm. • Use care in handling. Spinal injury may exist if the victim fell overboard. • Call and signal for help. MEDICAL EMERGENCY In an emergency, you may be far from professional medical assistance. Be prepared and know how to use your first aid kit. Be aware of any special medical conditions of your passengers. -
Page 48: Quick Reference Guide
Quick Reference Guide... -
Page 49: Response Txi
Response TXi (Available also as Malibu Open Edition; open or closed bow) Specifications ......20’6”/6.25 m length ......95”/2.41 m beam ......22”/0.6 m draft .......40 gal/151 l fuel ......3,100 lbs/1,406 kg weight ......T-cut diamond hull type .......7 people total (2 in bow), open bow capacity ........5 people total, closed bow 987 lbs., open bow;... - Page 50 docking lights & port starboard forward hull bow light — storage where equipped standard or — where equipped under bow seating bow point on deck glove box bilge thru hull outlets forward of observer seat on panel starboard side of hull auxiliary audio port gps puck zero off...
-
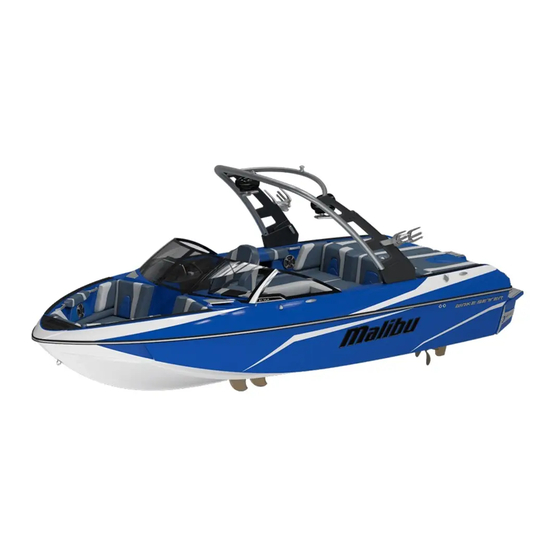
Page 51: 20Vtx
Wakesetter 20VTX Specifications ......20’/6.10 m length ......98”/2.50 m beam ......27”/0.7 m draft .......36 gal/136 l fuel ......3,500 lbs/1,769 kg weight ......T-cut diamond hull type .......11 people total (2 in bow) capacity 1,588 lbs., including people 350 lbs., maximum in bow Malibu Owners Manual •... - Page 52 storage bow light standard or pop where equipped under bow seating except when optional bow tank installed under observer seat docking lights ’ under interior seating under driver — where equipped also on port side seat watertight box on shifter panel thru hull outlets g3.5...
-
Page 53: 21Vlx
Wakesetter 21 VLX Specifications ......21’/6.40 m length ......98”/2.49 m beam ......27”/0.7 m draft .......48 gal/182 l fuel ......4,000 lbs/1,814 kg weight ......Wake-plus diamond hull type .......13 people total (3 in bow) capacity 1,833 lbs., including people 500 lbs., maximum in bow Malibu Owners Manual •... - Page 54 storage under bow seating except when optional bow light bow tank installed under observer seat standard or pop where equipped ’ under interior seating under driver seat watertight box on shifter panel thru hull outlets & bilge ballast additional outlets aft g3.5 port starboard and transom...
-
Page 55: 22Vlx
Wakesetter 22 VLX Specifications ......21’10”/6.65 m length ......102”/2.60 m beam ......27”/0.7 m draft .......48 gal/182 l fuel ......4,300 lbs/1,950 kg weight ......Wake-plus diamond hull type .......14 people total (3 in bow) capacity 1,974 lbs., including people 500 lbs., maximum in bow Malibu Owners Manual •... - Page 56 storage bow light standard or pop where equipped under bow seating except when optional bow tank installed under observer seat docking lights ’ under interior seating under driver — where equipped also on port side seat watertight box on shifter panel thru hull outlets g3.5...
-
Page 57: 23Lsv
Wakesetter 23LSV Specifications ......23’/7.01 m length ......102”/2.60 m beam ......27”/0.7 m draft .......67 gal/254 l fuel ......4,500 lbs/2,041 kg weight ......Wake-plus diamond hull type .......15 people total (3 in bow) capacity 2,175 lbs., including people 500 lbs., maximum in bow Malibu Owners Manual •... - Page 58 storage bow light standard or pop where equipped under bow seating except when optional bow tank installed under observer seat docking lights ’ under interior seating under driver — where equipped also on port side seat watertight box on shifter panel thru hull outlets g3.5...
-
Page 59: 25Lsv
Wakesetter 25LSV Specifications ......25’/7.62 m length ......102”/2.60 m beam ......32”/0.8 m draft .......77 gal/291 l fuel ......5,600 lbs/2,540 kg weight ......Wake-plus hull type .......19 people total (3 in bow) capacity 2,679 lbs., including people 500 lbs., maximum in bow Malibu Owners Manual • 2018 • Quick Reference Guide • Page 2-12... - Page 60 storage bow light standard or pop where equipped under bow seating except when optional bow tank installed under observer seat docking lights ’ under interior seating under driver — where equipped also on port side seat watertight box on shifter panel thru hull outlets g3.5...
-
Page 61: 22Mxz
Wakesetter 22 MXZ Specifications ......22’5”/6.83 m length ......102”/2.60 m beam ......27”/0.7 m draft .......48 gal/181 l fuel ......4,850 lbs/2,199 kg weight ......Wake hull type .......15 people total (4 in bow) capacity 2,115 lbs., including people 600 lbs., maximum in bow Malibu Owners Manual •... - Page 62 storage anchor locker under bow seating except when optional center top deck bow tank installed under observer seat ’ docking lights under interior seating under driver where equipped seat watertight box on shifter panel g3.5 cleat tower or tower where equipped may also include tower accessories such as g force wet sounds speakers and amps...
-
Page 63: 24Mxz
Wakesetter 24MXZ Specifications ......24’5”/7.44 m length ......102”/2.60 m beam ......32”/0.8 m draft .......77 gal/291 l fuel ......5,500 lbs/2,495 kg weight ......Wake hull type .......18 people total (4 in bow) capacity 2,538 lbs., including people 600 lbs., maximum in bow Malibu Owners Manual • 2018 • Quick Reference Guide • Page 2-16... - Page 64 storage anchor locker under bow seating except when optional center top deck bow tank installed under observer seat ’ docking lights under interior seating under driver where equipped seat watertight box on shifter panel g3.5 cleat tower or tower where equipped may also include tower accessories such as g force wet sounds speakers and amps...
-
Page 65: M235
M235 Specifications ......23’5”/7.14 m length ......102”/2.60 m beam ......32”/0.8 m draft .......78 gal/295 l fuel ......6,200 lbs/2,812 kg weight ......Wake plus hull type .......17 people total (4 in bow) capacity 2,397 lbs., including people 600 lbs., maximum in bow Malibu Owners Manual • 2018 • Quick Reference Guide • Page 2-18... - Page 66 storage anchor locker under bow seating except when optional center top deck bow tank installed under observer seat ’ docking lights under interior seating under driver where equipped seat watertight box on shifter panel g3.5 cleat tower or tower where equipped may also include tower accessories such as g force wet sounds speakers and amps...
-
Page 67: Recommended Seating
Recommended Seating The seating chart is provided to aid in safer boating. What In instances in which fewer than the maximum number of is shown is the maximum capacity in terms of people on people are on-board, it is important to redistribute seating board. - Page 68 DO NOT overload the boat. Overloading or uneven loading can cause loss of control, capsizing or swamp- ing, which may lead to death or serious injury. Adhere to the load capacity plate restrictions and always account for persons, gear and all non-factory-installed ballast or other equipment. 23 LSV 25 LSV 22 MXZ...
-
Page 70: Dashes & Video Screens
Dashes and Video Screens... -
Page 71: Wakesetter Command Center
Wakesetter Command Center The Malibu dash features two video screens, through which most of the functionality of the boat operation is controlled. On the lower left will be either the standard storage area or the optional Sport Dash, which is explained in the How It Works section of this Owner’s Manual, as well as in this section. -
Page 72: Depth Screen
current water depth engine hours 8-point compass heading go home mode button night mode button speed input engine temperature gauge oil pressure gauge viper ii bluetooth information voltage gauge save button fuel gauge dock mode button Instrumentation: The gauges are always on the top level and in view of the driver. -
Page 73: Ballast Screen
BALLAST SCREEN Touch the BALLAST button at the top of the screen to view a graphical representation of the ballast system on the boat. The percentage data represented on the boat image indicates the amount of water filling the individual tanks, port (left), starboard (right) and forward (front). The buttons on the right allow for adjustments to percentages, as well as filling, draining and stopping the process. -
Page 74: Surf Gate Control
1. With the engine running and in neutral, turn the speed control on by touching the SPEED CONTROL button. The button will turn green and ON will be displayed. SPEED READY is displayed above the throttle bar. Touching the speed control button yet again turns the speed control off. 2. -
Page 75: Power Wedge Control
POWER WEDGE CONTROL Tune the ideal wake for surfing and wakeboarding with the Power Wedge. The Power Wedge is not intended for use at speeds greater than 26 mph. An alarm will sound and a NOTICE will be displayed if the Power Wedge is in a deployed position at speeds exceeding 26 mph. The boat speed must be below 26 mph to dismiss the alarm. -
Page 76: Media Screen
Delete a Preset: 1. View the available presets in the list box. Use the UP/DOWN to scroll the list. 2. Select a preset by touching one in the list box. It will highlight. 3. Touch EDIT to make changes using the same steps as creating a new one. Load a Preset: 1. -
Page 77: Controls Screen
AM/FM Radio/Weather: source select stereo menu equalization adjustment save seek forward back Satellite Radio: Touch SATELLITE for satellite radio stations. (A subscription is required to access satellite radio stations.) Viper II Bluetooth: Touch BLUETOOTH to play songs held on your phone or mobile device, using Bluetooth technology. -
Page 78: Advanced Lighting Controls
ADVANCED LIGHTING CONTROLS Touch the RGB button to access the Advanced Lighting Controls screen. They system allows individual or simultaneous control of three separate lighting zones on the boat. On/Off Toggle: Touch the ON/OFF toggle switch to power up or shut off the system. -
Page 79: Settings Screen
Jump Mode: Touch JUMP to have the lighting cycle through multiple colors. Select between four or seven different colors with the 4 and 7 buttons. Touch the BRIGHTNESS sliders to control the brightness level of the lighting, and the SPEED slider for the rate of cycling. SETTINGS SCREEN Touch the SETTINGS button on the CONTROLS page to manage the system settings, options, troubleshooting, and software updates here. - Page 80 Touch DEPTH ALARM to adjust the shallow depth alarm setting. Touch SPEED CALIBRATION to calibrate the paddlewheel speed signal. Use a portable GPS such as a smartphone app or navigation product to determine the actual speed, and then adjust the speed displayed. Touch UNITS to choose from either English or Metric units.
- Page 81 Touch SYSTEM DIAG to view on-screen system diagnostic information concerning bat sensors and GPS signal. Touch RESET to restore the system factory default settings. All previous calibration and settings, including RIDER PRESETS, will be lost. It will be necessary to calibrate the Surf Gates and enable all optional outputs after completing a RESET.
-
Page 82: Maps Screen
MAPS SCREEN The Navionics Navigation System uses GPS (Global Positioning System) satellites and a map database to calculate and display route directions. An SD card with map data is required. When a Navionics SD card is loaded into the Viper II SD slot, map data for the region will appear as a bunch of purple boxes on the map. -
Page 83: Gauges
To begin, touch COURSE, then NEW, then NEW COURSE. Touch SELECT WAYPOINT LOCATION, and position the cursor on the map for the first waypoint. Touch the WAYPOINT button. Choose an icon and map for the waypoint. Continue with this same procedure to create all remaining waypoints. The last waypoint must be a “COURSE COMPLETE”... -
Page 84: Keypad
The lower right side of the gauge shows the approximate level of the fuel in the fuel tank. Note that movement of the boat can affect the reading, especially as fuel levels lower. Be certain to read the Fueling information in the Get Ready section of this Owner’s Manual before operating the boat for important information KEYPAD A keypad is provided to assist in manuevering among the functions controlled from... -
Page 85: Depth Screen
DEPTH SCREEN ALERTS WARNINGS Auto Bilge Oil Pressure Check Transmission Service Engine Coolant Temperature Shallow Water Low Battery Trasmission Temperature Low Fuel Low Oil Level NO ECM Malibu Owners Manual • 2018 • Dashes and Video Screens • Page 3-16... -
Page 86: Lights Menu
LIGHTS MENU Turn OFF or ON interior, navigation and anchor lights on the boat in the LIGHTS menu. CONTROLS MENU Turn OFF or ON the bilge, blower, heater and heated seats in the CONTROLS menu. SETTINGS MENU Manage system settings, options, troubleshooting, and software updates in the SETTINGS Menu. Changes will automatically be saved upon exit. -
Page 87: Video Screens (Optional Malibu Open Edition)
UPDATE SOFTWARE Update current software. AIR TEMP CALIBRATION Allows for offset of DISPLAYED AIR TEMPERATURE. LAKE TEMP CALIBRATION Allows for offset of DISPLAYED LAKE TEMPERATURE. DIAGNOSTIC View system diagnostic information concerning boat ZERO OFF sensors and GPS signal. Follow on-screen instructions Select if ZERO OFF gauge is installed or to run DIAGNOSTIC SELF-TEST. -
Page 88: Night Mode
1. Night Mode On/Off 2. Speed Control On/Off 3. Speed Up/Down 4. Power On/Off 5. Stereo Screen 6. Media Screen 7. Controls Screen 8. Maps Screen 9. Gauge View 10. Source Select 11. Seek/Track 12. Mute On/Off 13. Volume Adjust 14. - Page 89 Auxiliary Input Weather AM/FM Radio/Weather Touch AM RADIO or FM RADIO or WEATHER for AM/FM stereo channels/ weather bans. Source Select Mixer Adjustment Equalization Adjustment Seek Forward/Back Satellite Radio Touch SATELLITE RADIO for satellite radio stations. USB Input Touch USB to access USB input ports. ViperII Bluetooth Touch BLUETOOTH to play songs on your phone or mobile device with Bluetooth technology.
-
Page 90: Media Screen
Volume Adjustment Touch VOLUME UP or VOLUME DOWN to bring up the VOLUME CONTROL menu. Control the volume of the interior or tower speakers with the INTERIOR or TOWER adjustment sliders. Control the volume of all the boat speakers with the MASTER adjustment slide. The AUTO VOLUME feature increases volume as the boat speeds up. -
Page 91: Controls Screen
CONTROLS SCREEN Manage navigation and accent lighting, bilge pumps, blower, heater, and settings. If the buttons for any equipment are not shown, touch SETTINGS and verify that the output is ACTIVE. Touch NAV to toggle the NAVIGATION LIGHTS ON/OFF. Touch ANC to toggle the ANCHOR LIGHT ON/OFF. Touch INTERIOR to toggle the INTERIOR LIGHTING ON/OFF. - Page 92 Touch GPS to change the speed signal source from ZeroOFF to PADDLEWHEEL. The default is ZeroOFF. The boat must be at idle throttle when changing this setting. Throttle Touch THROTTLE to select the change the THROTTLE sensitivity from STANDARD to AGGRESSIVE. Depth Alarm Touch DEPTH ALARM to adjust the SHALLOW DEPTH ALARM setting.
- Page 93 Accessory Outputs Touch ACCESSORY OUTPUTS to ENABLE/DISABLE on-screen touch control buttons for optional equipment. When enabled, the buttons will appear on the screen. Lighting Outputs Touch LIGHTING OUTPUTS to enable optional tower, swim, and docking lights. Engine Diagnostics Touch ENGINE DIAG to view on-screen ENGINE DIAGNOSTIC information.
- Page 94 Alarms Touch ALARMS to view all ACTIVE and INACTIVE engine alarms. Debug Assist Touch DEBUG ASSIST to access controls for TRAINED SERVICE TECHS ONLY. Stereo SXM Reset Touch STEREO SXM RESET to restore stereo factory default settings. Set the mode to SXM before proceeding. Cruise Option Touch 3-EVENT CRUISE to enable/disable the Cruise Control Option.
-
Page 95: Maps Screen
MAPS SCREEN The Navionics Navigation System uses GPS (Global Positioning System) satellites, and a map database to calculate and display route directions. SD Card with Map Data is required. The MAP button shows actual current bearing from the GPS. “..” is displayed if the data is not available. When a Navionics SD card is loaded into the ViperII SD Slot, map data for the region will appear as a bunch of purple boxes on the map. - Page 96 Course Touch the CURSE button to SELECT, CREATE, STOP or CANCEL a course. NEW AUTO COURSE records the actual route the boat is traveling to be saved and recalled later. NEW COURSE allows the user to build a future course of NEW user- created waypoints.
- Page 97 Touch SELECT WAYPOINT LOCATION, and then position the cursor on the map for the first waypoint. Touch the WAYPOINT button. Choose an icon and name for the waypoint. Continue with this same procedure to create all remaining waypoints. The last waypoint must be a “COURSE COMPLETE” waypoint to finalize the course.
-
Page 98: 3-In-1 Event Screen
3-in-1 Event Screen Available as an option on some TXi models, the 3-in-1 Event Screen is a combination touch and push button control. The display unit is a multi- functional tool that provides GPS tracking and multi-media functions. It also enables operators to view various engine parameters and service codes. CARE AND MAINTENANCE General maintenance is not required. -
Page 99: Three Event Information
THREE EVENT INFORMATION The unit is named for the three events that can be monitored: Slalom, Jump, and Trick. Touch the right arrow and the screen will shift to show the following Change Event options: Slalom When Slalom is chosen, the screen shifts again and the following appears: When in Training mode, the Set Speed may be set to any value. -
Page 100: Slalom Settings
When in Tournament mode, the buoy times will be displayed while running a course: SLALOM SETTINGS Select Slalom, then touch the symbol in the upper left corner of the screen. The following will appear: BUZZER VOLUME The buzzer volume adjustment compensates for increased engine noise. -
Page 101: Jump Settings
JUMP SETTINGS Select Jump, then touch the symbol in the upper left corner of the screen, and the following will appear: BUZZER VOLUME The buzzer volume adjustment compensates for increased engine noise. As the boat speed increases, and therefore the noises from the engine increase, the volume of the buzzer will increase proportionately to the boat’s speed between 0 and 25 mph (40.2 km/h). No further increase occurs at speeds above 25 mph (40.2 km/h). The buzzer emits a sound when the... -
Page 102: Trick Settings
recommended that it be left at 1.8 in nearly all instances. Touch Back to return to the Jump Settings screen. TRICK SETTINGS Select Trick, then touch the symbol in the upper left corner of the screen. The following will appear: BUZZER VOLUME The buzzer volume adjustment compensates for increased engine noise. -
Page 103: Auto Detect
Touch Continue, and the following screen will appear: Follow the prompts as you run the course. The blue bar will show the progress through the expected course. Press the End Gate button when crossing the final gate. If the mapping was unsuccessful, this screen will appear. If the remap was successful, this screen will appear. Touching Continue will display a keyboard for the user to name the course that was just mapped. -
Page 104: Pull Type
PULL TYPE Touch the Pull Type Off (which means it is currently not operating) to turn this feature on, and the following screen will appear: No two skiers are alike. Therefore the pull types exist to customize the ride to the skier. Keep in mind the concepts of Pull and Release. As you begin your pull, the boat speed begins to drop below the set/target speed. As you let up on your pull, the boat speed begins to rise higher than the set/target speed. -
Page 105: Basic Electrical Components
Basic Electrical Components All major boat circuits are protected from shorting and overload by resettable circuit breakers. If a problem develops with one of the circuits, switch OFF the circuit and wait about one (1) minute. Then push the appropriate breaker button fully and switch on the circuit. If the circuit continues to trip, there is a problem somewhere in the system. Take your boat to an authorized Malibu dealer to locate and safely correct the issue. -
Page 106: Battery Charger
If it becomes necessary to re-charge a battery from an external source, DO NOT attempt to charge using automotive battery cables or use another boat battery as the source for charging. Some amounts of hydrogen gas are emitted during the charging process. This can be very dangerous. It is critical to keep all sparks, including smoking cigarettes, lighters or any type of flame, well away from a charging battery. -
Page 107: Inverter
1. Place the Surf Band securely on the wrist of your non-dominate hand. 2. To adjust the Power Wedge, press the UP ARROW to raise the Power Wedge. Press the DOWN ARROW to lower the Power Wedge. 3. To adjust the Surf Gates, press the LEFT ARROW (<) above the word “Surf” to surf left (increase the wave on the left, or port, side of the boat). Press the RIGHT ARROW (>) to surf right (increased the wave on the right, or starboard, side of the boat). 4. To increase the speed of the boat, press the UP ARROW above the word “Speed.” To reduce speed, press the DOWN ARROW. The Surf Band will TEMPORARILY override the driver’s control of these elements of the boat operation. However, you should be aware that the driver can always resume control of all aspects at any time. - Page 108 SURF GATE RETRACT LEFT OR RIGHT Over current alarm when gate is trying to retract. SURF GATE EXTEND LEFT OR RIGHT Over current alarm when gate is trying to extend. SURF GATE SWITCH LEFT OR RIGHT SEE DEALER Failure of Surf Gate switch. If any alarm occurs, the Surf Gate will be locked out from operation. The lock-out can only be cleared by pressing the “either” button on the tachometer and the error corrected.
-
Page 110: How It Works
How It Works... -
Page 111: Safety First
(1) B1-rated, hand-held fire extinguisher on-board and fully charged, unless there is an automatic fire extinguishing system installed. An automatic system is available as an option on Malibu boats. Hand-held units are not included in standard equipment so that the consumer can choose from a wide range of fire extinguishers, many of which exceed the minimum requirements. If the boat does not have an automatic fire extinguishing system installed, the boat owner MUST purchase and install at least one (1) B1-rated fire extinguisher. -
Page 112: Lighting
lanyard clip. The engine will not start and/or run if the toggle is in the OFF position. Malibu recommends the clip always be inserted in the toggle switch. Connected to the operator, if (s)he moves away from the controls, the clip will pull free, pulling the switch to the OFF position. If the engine needs to be shut down very quickly, it can be done so by pulling on the lanyard to release it from the switch. To reset the switch after activation, reinstall the lanyard clip and flip the switch to the UP position. The emergency engine stop switch lanyard should always be connected between the switch and the operator when the engine is running. The purpose of the switch is to immediately shut OFF the engine if the operator moves away from the driver’s helm. -
Page 113: Tie-Ups
Tower Lights: All boats equipped with towers will also have a 360-degree light on top for use at anchor. This white light provides additional visual assistance ahead of the bow; however, note that all forward and aft lighting cannot be used while the boat is underway as it could impair other boaters’ vision. Tower lights also include optional forward and aft-facing lights, and optional RGB lights are also available. All tower lights are controlled through the video screen. Models: All Wakesetter boats are equipped with towers. If the standard tower has been deleted, there is a covered, two-pronged connector found on the top of the transom of boats without a tower. -
Page 114: Anchor Locker
Bow eye and transom eyes: All boats are equipped with a single bow eye near the apex of the hull under the bow, and two transom eyes, which are located one each on the port and starboard sides of the transom. These semi-circular or U-shaped metal connections are made from stainless steel to reduce the effects of rust and corrosion. On boats that are not equipped with cleats, these eyes are used to tie-up the boat, and no other part of the boat, including any interior components such as the windshield extrusions or grab handles should ever be used. Never tie up the boat, even temporarily, using any component of the boat except the bow eye, transom eyes and/or cleats (where equipped). Using any other component could result in damage to the boat that is not covered under warranty. Models: All models are equipped with a bow eye and transom eyes. -
Page 115: Fuel Fill
extended for use, and also for when it is folded up and put away. On the bow, the ladder folds upward and fits inside the anchor locker. The aft ladder folds up and under the swim platform for stowing. The ladders should always be stowed when the boat is underway. Excessive force of the body of water as the boat is in motion can damage the ladder, and such damage is not covered under warranty. Failure to properly stow the ladder prior to getting underway can result in damage to the ladder, and potentially to the boat, which would not be covered under warranty. Models: Bow ladders are available on the 22MXZ and 24MXZ. Swim platform ladders are available on all models. FUEL FILL Malibu boats are equipped with fuel fill fittings and vents to provide state-of-the-art safety protection in the process of adding fuel to the tank. While most of the fuel system on the boat is inaccessible to... -
Page 116: Shifter/Throttle
lever snug against the steering column. Never force the lever. If it will not move with relative ease back into place, the steering wheel is not in one of its acceptable levels. Adjusting slightly should allow proper action of the tilt mechanism. Steering Wheel Controls: As an option, steering wheel controls will offer redundant control for the Surf Gates, Power Wedge, cruise control speed and audio controls. Operators should always review the Dashes and Video Screens section of this Owner’s Manual for important information about operational requirements that may be necessary for proper function of these systems. Note that the most-recently touched component will override other control components. Depending on the configuration, control of the cruise system, Surf Gates and Power Wedge can be managed from the video screen, the controls on the steering wheel (including audio), and the Surf Band, where equipped. Communication is key to maintaining proper control of the boat. In models equipped with the optional steering wheel controls and/or the Surf Band, either of these devices, as well as the video screen, can take control of the boat, affecting maneuverability and safety. -
Page 117: Electronic Throttle Control (Etc)
Improper shifting and use of the throttle can result in damage to the system that is not covered under warranty. The shifter/throttle manufacturer has included additional instructions that are part of the owner’s packet. Be sure to read and follow the instructions and additional information to ensure long and safe operation of the boat. Do not shift from forward to reverse while the engine is at high RPM. -
Page 118: Back-Up Camera
• A water-resistant storage box with a USB charging port; • An intuitive, analog rotary knob for Surf Gate, Power Wedge II, speed control and stereo (volume, song selection and mute). The dial allows the boat operator to keep his/her eyes on the water ahead while adjusting the controls. • Whenever the power button and dash are ON, the rotary knob is activated to work. It offers redundant controls for the features controlled on the dash touch screen. • Surf Gate and Power Wedge are controlled by the button. • Speed UP/DOWN and song selection are controlled by moving the center joystick UP/DOWN and LEFT/RIGHT. • Pushing the center knob will mute any audio. • Twisting the knob will change the audio volume to louder or softer. Models: (Optional) All Wakesetter models. BACK-UP CAMERA When the shifter/throttle is put into reverse, an image from behind the transom will appear in the center of the 12” video screen display. This does not replace the driver’s responsibility for verifying that there are no impediments to either side or behind the boat! The back-up camera serves as a redundant visual indicator. At any time, the operator can go to the “Media” tab on the 12” video screen and select the “Camera” icon to view images on the camera. Otherwise, the camera operates automatically, as indicated, when the shifter/throttle is in reverse. Models: (Optional) All Wakesetter models. Interior Luxury STEREO COMPONENTS One of the most enjoyable aspects of boating is the stereo system, and Malibu offers a range of optional media opportunities. Most of these systems are controlled through the main stereo head unit but a stereo transom remote is available as an option. Beyond the information provided regarding controls in the Dashes and Video Screens section of this Owner’s Manual, all devices and software come with separate manuals and information. Review these materials prior to use. Models: (Optional) All models have a variety of stereo options. -
Page 119: Heated And/Or Powered Driver's Seat
Never attempt to jump into the body of water from any of the seating in the boat. It can be difficult to determine water depth, and it could be possible to misjudge clearance of the deck and gunwales. Malibu offers WakeView transom seating, which is standard on some models and optional on others. This padded, comfortable individual seating on each side of the transom area is intended for use ONLY when the boat is fully stopped, without the engine running. Sitting in this area while the boat is underway could result in individuals falling off, which could result in... -
Page 120: Glove Box
Models: All models have a glove box located forward of and adjacent to the observer seat. STORAGE COMPARTMENTS Malibu boats have multiple storage compartments available throughout the boat. In general, storage is available in the bow, gunwale and floor. Some models will also have transom storage. -
Page 121: Cup Holders
but Malibu recommends marine-grade coolers as they use stainless-steel hardware, which is advisable in the type of atmosphere in which it will be used. Although the supplied cooler has a liner that reduces odor absorption, it is a good idea to clean out the cooler after each use. -
Page 122: Grab Handles
When the cockpit table is installed for use, be certain that both ends of the leg are secure. If either is not, the table could dislodge, possibly resulting in injury to anyone close by. DO NOT sit on the table, even when it is securely installed. -
Page 123: Tower, Canvas & Accessories
Tower, Canvas & Accessories G3.5 TOWER The standard tower on Wakesetters is the G3.5 tower. The G3.5 can be raised to its full height for extraordinary boating enjoyment, or lowered for towing and storage. On each interior side of the tower legs is a large lever. -
Page 124: Tower Accessories
Up and locked, port and starboard sides: Release the locking mechanism on BOTH sides, port side first, and then the starboard side. Push in until handles are flush with the tower. When the locking mechanisms are flush with the tower, it is locked in the fully upright position. -
Page 125: Bimini Top
BIMINI TOP One of the most popular options is the Bimini top, which provides protection from the sun for the driver, observer and may also offer shade to others on-board, depending on the sun’s angle. It also provides storage for ropes. The deluxe version also offers surfboard storage. -
Page 126: On And Under The Water
On and Under the Water BLOWER SYSTEM One of most critical elements of the boat is the blower system. There are important things to remember when operating the boat: Always operate the blower for several minutes prior to starting the engine, ensuring the engine compartment is open. This should also be done when idling or running at low speed. -
Page 127: Bilge System
Always allow the exhaust manifolds to cool before touching them. (The manifolds are on the upper side of the engine on both sides.) Engine operation will result in the manifolds becoming very hot, and touching could result in burns to the skin. Some engines are equipped with catalyst exhaust manifolds that may produce an unusual odor. - Page 128 The bilge system plugs should be removed at the conclusion of any boating outing in which the boat is removed from water. This assists in the draining process. Malibu recommends keeping the handles stored in a designated storage compartment on a routine basis so that they are always easy to locate prior to the next outing. Never launch a boat without ALL the drain plugs reinstalled;...
-
Page 129: Ballast System
The tanks also provide accurate level readings, which are displayed on the Maliview 12” display screen. All Malibu boats are equipped with at least three (3) ballast tanks and have an optional bow (4”) tank, plus optional plumbing for Plug ‘n Play. -
Page 130: Power Wedge Ii
POWER WEDGE II The Power Wedge II has up to 1,500 pounds of wake-creating water displacement. The upward angle radically increases lift, allowing the driver to get a fully loaded boat on plane much more quickly. The Power Wedge II is frequently teamed with Surf Gate to maximize the wake experience. -
Page 131: Underwater Gear (Rudder, Fins, Strut, Propeller, Paddlewheel And Raw-Water Intake/Sea Strainer)
Never place objects on a Surf Gate or try to use a Gate to support a person’s weight. The Surf Gates are not manufactured or mounted to accept additional weight. Never add any weight to a Surf Gate, nor use one to hold a person’s weight. The Surf Gate cannot sustain added weight on it, and subsequent damage to the Surf Gate or transom of the boat as a result will not be covered under warranty. -
Page 132: Shower/Wash Down
Never allow anyone to be in the water forward of the bow or behind the boat when the boat engine is running, even if the boat is in neutral gear. If the shifter/throttle is inadvertently put into gear, the boat could potentially run over persons in the water. A moving propeller is extremely dangerous and could cause serious injury or death. -
Page 133: Salt Water Series
Additional information regarding the routine maintenance of the swim platform is available in the Care and Maintenance section of this Owner’s Manual. Models: All Malibu boats are equipped with a swim platform. Under-swim platform ladders and bow ladders are optional on all models. SALT WATER SERIES Boats that will be operated in salt water—or brackish fresh water—require several alterations to ensure that they will continue to... -
Page 134: Trailers
Trailers... -
Page 135: Reporting Safety Defects
If you believe that your vehicle has a defect which could cause a crash or could cause injury or death, you should immediately inform the National Highway Traffic Safety Administration (NHTSA) in addition to notifying Malibu Boats, LLC. If NHTSA receives similar complaints, it may open an investigation, and if it finds that a safety defect exists in a group of vehicles, it may order a recall and remedy campaign. -
Page 136: Connections To The Tow Vehicle
Connection to the Tow Vehicle PREPARATION Never tow the trailer and contents, including the boat, behind a vehicle that is not rated to tow this weight. Also be certain that the tow hitch is correct. More information follows regarding this important factor. The Gross Vehicle Weight Rating (GVWR) is the total estimated weight that a road vehicle loaded to capacity (including the vehicle weight itself) can be expected to tow safely. -
Page 137: Breakaway Cable
through which the safety cables can be attached. Holes or rings should be on both sides of the hitch ball. Most states require that the safety cables should be criss-crossed under the trailer tongue prior to being attached to the other hole or ring location. If the trailer should disengage, these cables should be able to prevent the trailer tongue from falling onto the tow surface. -
Page 138: How To Connect To The Tow Vehicle
How to Connect to the Tow Vehicle ATTACHING TO THE TOW VEHICLE • Open the coupler mechanism. (Instructions follow.) • If necessary, use the trailer jack to have the trailer at the proper height, just above the height of the hitch on the tow vehicle. •... -
Page 139: Connecting To The Boat
Connecting to the Boat TRAILER WINCH The trailer winch is a manually operated device to assist loading the boat onto the trailer and maintaining it in position for proper towing. The following information is important in assuring control and protection for you and the boat: •... -
Page 140: Trailer Components And How They Function
Trailer Components and How They Function TRAILER JACK The trailer is equipped with a trailer jack, which serves several purposes. The trailer jack can hold and lift the trailer to position for lowering on the hitch ball of the tow vehicle. -
Page 141: Wheels And Hubs
rear of the hub is sealed. The slight pressure inside the hub is needed to keep water out of the hub chamber when the hub is submerged underwater during loading and unloading. Inspection or replenishment of the lubricant is not required as part of the routine maintenance. -
Page 142: Tires
TIRES Always keep tires to the specified inflation. The tire manufacturers will indicate the proper air pressure on the sidewall of the tire; this information is also available on the tire manufacturer’s website. Be sure to have a spare tire on all outings. Even new tires can be damaged or lose air. Follow the tire manufacturer’s requirements to properly maintain tires. - Page 143 1. Remove the master cylinder reservoir plug and fill the reservoir with brake fluid. a. Use either DOT 3 Premium (preferred) or DOT 3 regular automotive brake fluid. Follow the instructions on the brake fluid container. b. Avoid shaking the brake fluid container and pour fluid slowly to minimize air entrapment. c.
-
Page 144: Optional Storage Compartment
Do not use brake fluid drained from the brake system to refill the master cylinder reservoir as such fluids contain contaminants from the system that may result in brake failure or costly repairs. Periodic inspection should be made of the electrical connector, wiring, brake lines and hose for the entire brake system to insure there are no abraded or bare wires, damaged steel lines, or cracked and damaged hoses. -
Page 145: Pre-Tow Check List
PRE-TOW CHECK LIST • Verify the coupler, hitch and hitch ball are the correct, specified size and fit. • Be certain the safety cables and breakaway cable are correctly attached. • Check that tie-downs and the winch strap are secure. •... -
Page 146: When The Trailer Is Not In Use
wheel, it would appear that you are actually turning the steering wheel to the left. Back up in the water until the trailer’s back tire is about half-submerged in the water. If the ramp has a shallow drop, it will be necessary to back in further;... -
Page 148: Get Ready
Get Ready... -
Page 149: Malibu Fuel System
Malibu Fuel System All Malibu models are equipped with the most up-to-date fueling system available in the marine industry. The boats feature pump-in-tank (PIT) fuel systems, which means the fuel pump is located securely inside the fuel tank rather than at the engine. There are many benefits to the PIT system, most significantly in the prevention of vapor lock and improved filtration of contaminants. -
Page 150: Starting And Operation
q A float plan or outing information has been left with someone ashore. This means that if any issues arise, there is a person to raise an alarm if you do not return as planned. (Cell phones are great, but sometimes service is not available, so this should not be the only plan in the event of problems.) q Ensure there is sufficient fuel in the fuel tank for the outing or have a plan for re-fueling. -
Page 151: Starting The Engine-Wakesetters
STARTING THE ENGINE—WAKESETTERS Step 1: Be certain the boat’s shifter/throttle is fully upright in the neutral position. Additional information follows regarding shifting and throttle response. Step 2: Perform the pre-start routine, including the bilge inspection and engine compartment inspection. (Details are provided in the How It Works section.) Leave the engine compartment open for the starting process. -
Page 152: To Turn Off-Response
Ignition Slot ONLY (Response base model) Step 5: Turn the key first to ON. Check that power to the electrical system appears by way of the gauge sweep. Step 6: If the electrical system has responded, turn the key to Start. Hold the key in the Start position for approximately one (1) second and then release the hold on the key. -
Page 153: Smart Operations
SMART OPERATIONS Newcomers to boating, especially boats the size of the Malibu models, are strongly encouraged to take a U.S. Coast Guard boating class before using the boat. Reading about boating conditions and operations from websites such as the National Marine Manufacturers Association (NMMA) and the many yachting association sites can be very helpful. -
Page 154: High Speed Maneuvers
Under normal circumstances, Malibu boats should not be used to tow other boats. Towing other boats should be undertaken only as a last resort, when other, more appropriate, towing is unavailable. The stress caused by towing lines, along with the difficulty in controlling the disabled boat, could cause damage to the towing boat as well. - Page 155 Never insert a hand, arm or other body part between the dock and the boat, or attempt to keep the boat from hitting the dock. The boat could push against the dock, pinning the appendage and causing severe injury. The following are recommended guidelines for docking: •...
- Page 156 Care and Maintenance...
-
Page 157: On-Going Care
On-Going Care GENERAL CLEANING Malibu recommends keeping the boat clean at all times. Immediately after an outing, the boat’s exterior and interior should get a thorough rinsing with clear, fresh water, and then should be allowed to air dry prior to covering with canvas. If this is not possible, the boat’s cover should be removed as soon as you arrive at your destination and allowed to dry. - Page 158 • If growth is established, vacuuming with a HEPA filter unit would be the first step followed by cleaning. • For fabric and vinyl surfaces, shampoo lightly with an upholstery shampoo. Focus on Prevention: The key in eliminating mold growth is controlling moisture. Remove it as a factor and growth simply will not occur, so maintaining a cool and dry condition with clean surfaces is paramount.
-
Page 159: Upholstery
Maintenance Tips: The real key to canvas longevity is like all things in life: maintenance. Keep the canvas clean of dust, dirt and environmental residue on a regular basis. • Top fabrics should be cleaned of any dirt buildup at regular intervals. •... -
Page 160: Approved Cleaners For Malibu Upholstery
The Solutions: As in most complex problems, there are a variety of actions once can take to prevent microbial problems. These actions must be directed to the components of the product and the total construction. Working together, they will assure the highest probability of success in eliminating quality problems associated with mildew contamination. -
Page 161: Carpets And Mats
CARPETS AND MATS The carpets and mats available through Malibu are constructed of durable, marine-grade material. Occasionally washing with a mild detergent (such as Dawn dishwashing soap) and warm water is required. Commercial carpet cleaners (such as Woolite Spray Carpet Cleaner) are also acceptable. After cleaning, thoroughly rinse the detergent or cleaner out of the carpet or mat and into the bilge. - Page 162 attached in several locations, including the transom, driveshaft and rudder. (Check with your authorized Malibu dealer to be certain that you are aware of all locations of these anodes as they will require periodic replacement.) The anodes serve to significantly reduce the potential for corrosive damage to the permanent metal components on the boat.
-
Page 163: Routine Maintenance
Routine Maintenance Attention to the mechanical components of the boat are as critical as any matter in ensuring a long, enjoyable ownership. Some boat maintenance is required prior to and following every outing, some must be done on a regular schedule, and some has to be done in accordance with proper storage and winterization. -
Page 164: Before Starting The Engine
Before Starting the Engine INSPECT THE SEA STRAINER Raw water from the lake/river/sea is drawn into the boat to cool the engine and drive train. Even in closed cooling systems, it is necessary to circulate water in part of the system. To protect the system, a sea strainer is installed near the raw water intake and serves the purpose of keeping debris from entering the cooling system and causing eventual engine failure. -
Page 165: Check For Odors
Inside the battery is an electrolyte fluid that allows the chemical reaction to provide power. The fluid is comprised of several components, one of which is sulfuric acid. As with most acids, this is caustic and corrosive. If it comes in contact with skin, immediately flush the area with copious amounts of fresh, clean water. -
Page 166: After The Outing
readings are usually a sign of low voltage or loose connection(s). Even if the reading appears correct, if there were any symptoms of voltage insufficiency or error during a previous outing, check with an authorized Malibu dealer before undertaking another outing. You do not want to become stranded with a dead battery away from the dock. -
Page 167: After 50 Hours On The Hourmeter
After 50 Hours on the Hourmeter CHECK THE SAFETY EQUIPMENT If you have not done so previously, check the fire extinguishers and personal flotation devices. Check the condition of (and replace as necessary) drain plugs, bilge pumps, and exhaust flaps. Repair or replace anything that appears damaged or incapable of performing its function. -
Page 168: Battery
BATTERY Your authorized Malibu dealer can check to see that the battery(ies) appear to be holding charge properly. Unless a battery has fully expended its life cycle, it’s impossible to guarantee that the battery will continue to serve, but experience helps the dealer to anticipate whether there is still service to be expected from the battery. -
Page 169: Storage And Winterization
Zinc anodes are affixed to the boat in several different areas. As noted in the How It Works section of this Owner’s Manual, the anodes are self-sacrificing to preserve the boat. Although the anodes should be regularly checked for deterioration, during annual maintenance it may be necessary to replace one or all of the anodes. -
Page 170: For Extended Storage Of One (1) Month Or More And Winterization
twenty-five (25) feet, and at least 600 square inches on boats greater than twenty-five (25) feet. Protect all underwater gear protruding from the boat hull from damage. None of these components is rated to support any of the boat’s weight. For Extended Storage of One (1) Month or More and Winterization There are multiple steps required to prevent damage to the boat when it will not be used for an extended period, especially during colder-weather months. - Page 171 Malibu Owners Manual • 2018 • Care and Maintenance • Page...
- Page 172 Malibu Limited Warranty Statement...
-
Page 173: Malibu Boats, Llc Limited Warranty
RESULTING FROM BREACH OF THIS WRITTEN WARRANTY OR ANY IMPLIED WARRANTY, OR OTHERWISE, EVEN IF MALIBU BOATS, LLC HAS BEEN ADVISED OF OR SHOULD HAVE FORESEEN THE POSSIBILITY OF SUCH DAMAGES, AND EVEN IF ANY MALIBU BOAT OR COMPONENT PART THEREOF FAILS OF ITS ESSENTIAL PURPOSE. - Page 174 All repairs performed by Malibu Boats, or its authorized service facilities, will be performed using either new or re-manufactured parts. Malibu Boats may, at its option, install parts which have substantially similar or greater performance characteristics if an identical replacement part is no longer available. No person or entity is authorized to make any additional or revised statement or warranty, express or implied, on behalf of Malibu Boats or any component supplier beyond what appears within this Limited Warranty. Limited Warranty Summary: Coverage Type Coverage Period (from date of original retail purchase or initial use of the Malibu Boat, whichever first occurs) Structural Limited Warranty Lifetime...
- Page 175 limited to the specific laminates or bonding of laminates for the hull, deck, floor liner, or stringer only. Section 2.2. Base Limited Warranty. For a period of sixty (60) months for fresh water boats and thirty-six (36) months for salt water boats, beginning on the date of the original retail purchase or the initial use of the Malibu Boat, whichever occurs first, Malibu Boats will repair or replace materials or workmanship supplied by it during construction of the Malibu Boat, including parts and labor, which are determined by Malibu Boats to contain substantial manufacturing defects. This Limited Warranty does not provide coverage for any component part that is at any time covered by any warranty provided by any third party, other than Malibu Boats, including, but not limited to the manufacturer of the component part.
- Page 176 Section 5: International Exclusions/Requirements Importing or exporting any Malibu Boat manufactured in the United States by Malibu Boats (“US Malibu Boat”) into Australia or New Zealand (the act of importing or exporting any US Malibu Boat into Australia or New Zealand immediately and completely voids any and all coverage provided under this Limited Warranty and any and all obligations owed by Malibu Boats relative to the US Malibu Boat). This Limited Warranty does not provide coverage to any Malibu Boat purchased from a dealer in another country Malibu Owners Manual • 2018 • Warranty • Page 8-5...
- Page 177 where the primary use of the Malibu Boat will require the Malibu Boat to cross an international border. The Limited Warranty will not be honored by Malibu Boats for any Malibu Boat that is acquired by the Purchaser through an international cross-border purchase. All repairs that are covered under this Limited Warranty must be performed in the country where the Malibu Boat was originally purchased. Section 6: Commercial Use Exclusions/Restrictions The use of any Malibu Boat for commercial purposes, including but not limited to as a demonstrator, or in connection with any promotional program, ski, wakeboard, or surf school or show (“Commercial Purposes”) shall alter the Limited Warranty as set forth herein. The Limited Warranty applicable to any Malibu Boat used for any Commercial Purpose may not be transferred to any subsequent owner of the Malibu Boat. The Limited Warranty coverage periods for any Malibu Boat that has been used for Commercial Purposes, while owned by the original purchaser, are as follows: Coverage Type Coverage Period (from date of original retail purchase or initial use of the Malibu Boat, whichever first occurs) Structural Limited Warranty Five (5) years Base Limited Warranty Twelve (12) months Gel Coat Limited Warranty Six (6) months Section 7: Warranty Voiding Events The following events will automatically void and discharge Malibu Boats from its obligations under this Limited Warranty and discharge Malibu Boats from any obligations herein: • the unauthorized disconnection, tampering with, or altering of the Malibu Boat’s hour meter;...
- Page 178 Section 9.1. Warranty Claim Procedure. To obtain warranty service and/or repairs, the following steps are required: (a) Notify a service facility or dealership authorized by Malibu Boats to perform service or repairs to Malibu Boats (“Authorized Service Dealer”) or Malibu Boats of the substantial defect in materials or workmanship attributable to Malibu Boats, within thirty (30) days of discovery of the defect (which must be in the applicable Coverage Period); (b) P romptly schedule an appointment with and deliver the Malibu Boat to an Authorized Service Facility for repairs. Warranty service must be performed by Malibu Boats or an Authorized Service Dealer. For assistance in locating an Authorized Service Dealer, please visit www.malibuboats.com, select the “Find a Dealer” tab, and utilize Malibu Boats’ Dealer Locator, or call Malibu Boats at (865) 458-7110; and Malibu Owners Manual • 2018 • Warranty • Page 8-7...
- Page 179 * Malibu Boats reserves the right to require further evaluation and/or information regarding a warranty claim against a Malibu Boat prior to its repair as well as designate the place of repair. Subject to the terms of this Limited Warranty, any covered Malibu Boat or component part with a substantial defect in materials or workmanship that is returned to an Authorized Service Dealer during the appropriate Limited Warranty period will be repaired or replaced, in Malibu Boats’ sole discretion, without charge to the Purchaser for parts and labor. This provision is subject to the...
- Page 180 Section 9.4. Dispute Resolution. EXCEPT TO THE EXTENT PROHIBITED BY ANY APPLICABLE STATE OR FEDERAL LAW, PRIOR TO INITIATING ANY LEGAL ACTION AGAINST MALIBU BOATS, (1) YOU ARE REQUIRED TO PROVIDE MALIBU BOATS WRITTEN NOTICE, AT THE ADDRESS ABOVE, OF ANY SUBSTANTIAL DEFECT IN MATERIALS OR WORKMANSHIP THAT REMAINS UNRESOLVED TO YOUR SATISFACTION UNDER THE TERMS OF THE LIMITED WARRANTY; AND (2) TO THE EXTENT PERMITTED BY ANY STATE OR FEDERAL LAW, YOU MUST FIRST USE AN AVAILABLE DISPUTE SETTLEMENT MECHANISM OR ARBITRATION.
-
Page 181: Warranty Transfer
Warranty Transfer INSTRUCTIONS: Please enter ALL information below. This boat must be inspected and pass the Work Order at the bottom of this form by an authorized Malibu Boats Dealer. Send this form and check: Malibu Boats LLC, 5075 Kimberly Way, Loudon TN 37774; (865)458-5478 All requests must be submitted within 10 days of Date of Resale. ____________________________________________________________________________________________________________________________ ORIGINAL OWNER INFORMATION NEW OWNER INFORMATION NAME _______________________________________ NAME ______________________________________ ADDRESS ____________________________________ ADDRESS ______________________________________ ____________________________________ ______________________________________ PHONE _______________________________________ PHONE ______________________________________ EMAIL ADDRESS ______________________________________ BOAT INFORMATION Boat Hull Identification Number: Boat Model: Engine Serial Number: Engine Hours: Name of Dealership submitting the transfer: The remainder of any transferable warranties may be transferred to the second owner within sixty (60) months, subject to other limitations pursuant to Section 10, from the earlier of (i) the original date of retail sale or (ii) the date of first use. This transfer is subject to a boat inspection fee and applicable fees to be determined by an authorized Malibu Boats Dealer. In addition, a transfer fee of $750 payable to Malibu Boats LLC is required along with this transfer form. Original Purchaser New Owner Signature: _______________________________________ Signature: __________________________________________ Original Date of Sale: _______________________________ New Date of Resale: __________________________________ SERVICE MANAGERS WORK ORDER Description: Inspected Visual inspection of exterior structure (in include all underwater gear and hardware) q Visual inspection of interior structure ... -
Page 183: Malibu Boats, Llc Trailer Limited Warranty
IF ANY MALIBU TRAILER OR COMPONENT PART THEREOF FAILS OF ITS ESSENTIAL PURPOSE. THIS EXCLUSIVE REMEDY SHALL NOT BE DEEMED TO HAVE FAILED OF ITS ESSENTIAL PURPOSE AS LONG AS MALIBU BOATS, IS WILLING AND ABLE TO REPAIR OR REPLACE ANY DEFECTIVE GOODS SUBJECT TO THE TERMS PROVIDED HEREIN. - Page 184 Boats Trailer Limited Warranty. This policy applies only to circumstances in which both boat and trailer ownership is transferred to the same second owner at the same time. Note: This Limited Warranty is expressly conditioned upon the timely completion and return of the warranty registration card to Malibu Boats. Although not obligated to and without creating such an obligation, this will enable Malibu Boats to notify you of any necessary performance or safety modifications to your Malibu Trailer and to verify ownership in case a warranty claim is filed on your Malibu Trailer. The Limited Warranty is expressly subject to the following terms, conditions and limitations. All warranty applications are dependent upon the Purchaser following the guidelines established for appropriate and reasonable care and maintenance of the Malibu Trailer, and operating his or her Malibu Trailer reasonably and as directed in this Owner’s Manual, and as directed in any...
- Page 185 • damages caused by defects in materials, components or parts not supplied by Malibu Boats; • damages or needed adjustments caused by items that are added, altered or changed after the Malibu Trailer leaves the possession of Malibu Trailer; • modification, alteration, unauthorized repair or replacement of components on the Malibu Trailer; • damages caused by accident (including impacts and collisions with any object), abuse, misuse, neglect, negligence, mishandling or alteration, including any damages caused by or during trailering or towing; • damages caused by heat, fire, explosion or freezing (including the failure to perform proper winterization or preparations for storage or lack of use for periods in excess of thirty [30] days); • damages caused by the installation of materials, components or parts not supplied and/or purchased from Malibu Boats; • damages caused by atmospheric fallout, chemical treatments, tree sap, salt, ocean spray, mold, or animal droppings, lightning, hail, rain, flooding, wind, sand, floods or other environmental or natural conditions or Acts of God; • damages caused by vandalism or theft; • damages due to insufficient or improper maintenance, lack of maintenance, or delay of repair (unless specifically and directly authorized by Malibu Boats warranty department in writing); • damage or contamination resulting from leaking or spilled fluids including, but not limited to, fuel or drive train fluids; • manufacturing variations or imperfections in cosmetic, convenience or aesthetic components or features of the trailer, which have no effect on use or safety; • any material, component or part of the boat that has a warranty period and/or conditions as specified by the producing entity which differs from this Limited Warranty; • any and all consequential damages including, but not limited to, costs incurred for launching, towing, storage charges, telephone, expedited shipping of replacement parts, or rental charges of any type, inconveniences, or loss of time or income;...
- Page 186 Section 5.2. Trailer Operation, Care and Maintenance. To ensure the maximum benefit from ownership of this trailer, Malibu Boats requires that you follow all of the instructions in this Owner’s Manual, including all accompanying maintenance or service schedules and support material. Because questions may sometimes arise relating to the cause of a particular failure, Malibu Boats strongly recommends keeping detailed records of any and all maintenance or service performed on the trailer to assist, if necessary, in the determination of whether a failure is covered under this Limited Warranty. Damages to a Malibu Trailer caused by improper operation, care and maintenance are not covered by this Limited Warranty. Section 5.3. Design and/or Manufacturing Changes. Malibu Boats reserves the right to implement changes in the construction or components of any Malibu Trailer at any time, without incurring any obligation to make the same or similar changes on Malibu Trailers previously built and/or sold. Section 5.4. Other Warranties. Some manufacturers of component parts included in a Malibu Trailer may provide limited warranties. Please refer to component part manufacturer’s limited warranty disclosures, if any, for details, including their terms, conditions and limitations, of which Malibu Boats makes no representations or warranties. Among other warranties, note that certain items are explained and set forth in materials supplied by the component part manufacturer. Any and all claims or defects should be submitted directly to the manufacturers of those particular component parts.
- Page 187 (b) Malibu Trailers warrants authorized repairs or replacements made by or on behalf of Malibu Trailers only for the remainder of the applicable Coverage Period; (c) The Purchaser shall be responsible for all costs associated with the transportation of the Malibu Trailer, towing bills, trailer or component part(s) to Malibu Trailers’ facility and/or to the Authorized Service Dealer, as well as for any return transportation. Note that Authorized Service Dealers, generally, are independently owned and operated businesses. Malibu Trailers does not control the scheduling of service work. However, if you encounter any material delays in obtaining service at one of Malibu Trailers’ Authorized Service Dealers, please call Malibu Trailers for assistance at (865) 458-7110. Section 6.2. Direct Contact Information for Warranty Issues. Malibu Boats and Trailers 5075 Kimberly Way Loudon, TN 37774 (865) 458-5478 Malibu Boats’ and Trailers’ Internet Site: www.malibuboats.com Section 6.3. Procedure Regarding Concerns with Covered Warranty Repairs. Concerns related to a Malibu Trailer can normally be addressed by an Authorized Service Dealer. If concerns are not satisfied, the following steps should be followed: (a) Ask to discuss concerns with a member of the Authorized Service Dealer’s management. Ordinarily this will be the Authorized Service Dealer’s service manager or service foreman. If resolution of the issue is not achieved, request to speak with the Authorized Service Dealer’s general manager or owner. (b) I f concerns are not resolved by the representatives of the Authorized Service Dealer, contact Malibu Trailers’ Customer Service Department at the address noted above. Be prepared to provide the customer service representative with your name, address...
- Page 188 Malibu Owners Manual • 2018 • Warranty • Page 8-17...
- Page 189 Malibu Owners Manual • 2018 • Troubleshooting • Page 8-18...
-
Page 190: Troubleshooting The Boat
Troubleshooting the Boat If any of the following issues cannot be rectified by using the suggested remedies, take your boat to an authorized Malibu dealer for assistance. Do not attempt to correct problems by methods not recommended in this Troubleshooting Guide. Utilizing other attempts to correct issues could result in additional problems or damage to a system, which would not be covered under warranty. General The boat will not start. • Verify that the battery switch is ON. • Be certain the Emergency Safety Stop Switch is attached to the connection point on the driver’s panel and to the boat operator. • Be certain the engine electrical system is ON. Generally, this requires turning the ignition key ON or pressing the ON button. • It is possible the display is in a “sleep” mode. Press a key or touch the screen to see if the affected display activates. • Verify that the battery connections are secure. • Refer to the Engine Owner’s Manual for additional suggestions. The boat will not shift into gear. • When engaging the transmission from neutral either forward or backward into reverse, pull up on the safety collar located directly below the throttle lever knob. The safety collar helps avoid unintentional movement into gear. • When shifting gears, always do so smoothly and briskly. Being either too hard and slamming the gears, or too tentative is hard on the shifter/throttle system and can result in damage that is not covered under warranty. - Page 191 another boat as there is a potential for overload that could significantly damage the boat’s electrical system, which is not covered under warranty! Read the battery information provided in the Dashes and Video Screens section of this Owner’s Manual before undertaking any attempt to replace, use both batteries simultaneously, or replace the battery. Alarms The low voltage alarm sounds. • Most often, this signals the need to turn OFF and leave OFF the stereo component or similar electronics that require substantial support from the batteries. Start the engine and allow the alternator to recharge the batteries, which will require a fairly short period of time if there is no additional drain occurring during the recharging time. If this does not work, it may be that the battery or batteries are nearing their terminal life span. Another alarm sounds. • These occur when a sensor detects that the engine or transmission temperature range or oil pressure range have exceeded programmed limits. The boat’s main system may begin shutting off peripheral activity to retain proper operation as long as possible. It is usually in the operational best interest to return to shore as soon as possible to avoid being stranded. Even if the ranges return to acceptable operating range, this matter should be shared with the service department of your authorized Malibu dealer to determine the cause and avoid a repeat. Bilge and Ballast The bilge pumps are not operating. • The bilge pump(s) should operate automatically. If it does not, use the manual switch. If it still does not operate, return to shore IMMEDIATELY and terminate the outing. Failure to pump water out of the bilge can result in the boat swamping and sinking.
-
Page 192: Troubleshooting The Trailer
Troubleshooting the Trailer Whenever possible, it is advisable to have issues with the trailer addressed by a trained service technician at an authorized Malibu Trailer dealer. However, there can be instances when this is not feasible, particularly in cases of emergency or distance from the dealer. The following troubleshooting advice is not guaranteed to fix the issue, and Malibu Trailers does not warrant any repair effected by other than a trained service technician at an authorized Malibu dealership. If you must troubleshoot the trailer and/or its components while the trailer is under warranty, we recommend having a follow-up consultation with the dealer. Here are some of the more common issues that may arise: Issue: The coupler latch handle does not open or close, or does not open/close smoothly and easily. Consider: • Verify that the hitch ball is the specified, correct size. • The hitch ball may not be fully seated within the socket. • The trailer and tow vehicle may not be level. • Ensure there is no debris or foreign objects interfering with the match. • Ensure there is sufficient lubrication in the moving parts. • Verify that there is little to no corrosion on any of the metal parts. Issue: The tongue actuator is making unusual noises, including, but not limited to, clunking or squawking. -
Page 193: Service Log
Service Log Service Performed Date Date Date Oil Change, Including Replace Oil Filter Wax Exterior Thoroughly Clean Interior Replace Battery Charge or Replace Fire Suppression Equipment Check/Repair PFDs and Other Safety Equipment Check/Repair Engine Mounts Check/Repair Exhaust Flaps Check/Repair Steering System Check/Repair Shift &... - Page 194 Date Date Date Date Date Date Date Date Malibu Owners Manual • 2018 • Service Log • Page 8-23...
-
Page 195: Index
Index 100 Hours or Annually, After .............7-12 Boating Education, Owner Responsibility and .......1-6 12-Volt Receptacle ................3-37 Boating Regulations ..............1-21 20VTX ....................2-4 Boating Safety Education Opportunities ........1-6 21VLX ....................2-6 Boating Safety Topics, General........... 1-11 22MXZ ....................2-14 Boating Under the Influence ............1-14 22VLX ....................2-8 Brakes ....................5-9 23LSV ....................2-10 Breakaway Cable ................5-4 24MXZ ....................2-16 Breaker Board, Port Rear . - Page 196 Controller (Sport Dash), Optional Joystick ......3-2 Features, Navigation ..............3-29 Controls Menu ................3-17 Final Checks Before Starting ............6-2 Controls Screen ..............3-8, 3-22 Fins ....................4-22 Controls, Advanced Lighting ............3-9 Fire Extinguisher ................1-9 Controls, TXi..................3-14 Fire Extinguishing Equipment ........... 4-2 Cooler, Removable ................ 4-11 Fire, Explosion and ...............1-32 Coupler, To Close the ..............5-5 Flap, Exhaust .................7-12 Coupler, To Open the ..............
- Page 197 Manager, Course ................3-33 Important Safety Information ............1-6 Maneuvers, High Speed ..............6-7 Information, GPS ................. 3-29 Maps Screen .................3-13, 3-26 Information, Important Safety .............1-6 Mats, Carpets and ..............4-12, 7-6 Information, Three Event ............3-30 Media Screen ................3-7, 3-21 Inspect the Sea Strainer ..............7-9 Medical Emergency ..............1-34 Insurance ...................1-6 Meeting Head-On .................1-22 Interior Luxury ................4-9 Menu, Controls .
- Page 198 Port Rear Breaker Board ..............3-37 Power Wedge Control ..............3-6 Safe Speed ..................1-11 Power Wedge II ................4-21 Safety Cables ..................5-3 Power Wedge Manual Extension and Retraction ....7-13 Safety Defects, Reporting ............5-2 Powered Driver’s Seat, Heated and/or ........4-10 Safety Education Opportunities, Boating .........1-6 Precautions for Towed Skier/Rider, Additional ....1-27 Safety Equipment, Check ..........7-12, 7-13 Precautions While Underway .............1-4 Safety Equipment, Recommended ........... 1-10 Pre-Operation Check List-Before Leaving the Dock ..... 1-3 Safety First ..................4-2 Preparation (Trailer) ..............5-3 Safety Information, Important .............1-6 Preset Screen ...................
- Page 199 Speed Control ................. 3-4 Tower, Canvas & Accessories ..........4-14 Speed Control, Gauge View and ..........3-18 Tower, G3.5 ................... 4-14 Speed Control, ZeroOff GPS ............. 3-30 Tower, G4 ..................4-14 Speed, Safe ..................1-11 Towing Advice ................5-11 Sport Dash, Optional Joystick Controller ....... 3-2 Towing and Interaction..............6-7 Sports Dash ..................4-8 Towing .....................1-34 Stainless Steel, Chrome and Aluminum Components ..7-6 Towing, Legal Requirements for ..........5-2 Standard Gauges & Screen ............3-14 Towing, Prior to ................5-11 Start Code, Engine .
- Page 200 Wash Down, Shower ..............4-23 Water Sense, Develop ..............1-29 Watersport Activities, Weighting Your Boat During ..1-13 Watersports Safety ...............1-26 Weight Distribution (Trailer) ............ 5-4 Weighting Your Boat During Watersport Activities ...1-13 Wheels and Hubs ................5-8 When the Trailer Is Not in Use ..........5-13 Whistle, Horn or ................1-9 Winch, Trailer ................5-6 Winterization, Storage and ............7-14 Words and Symbols Used in This Manual, Signal ....1-2 Z5 Cargo Rack with Bimini ............4-16 ZeroOff GPS Speed Control .