Table of Contents
Advertisement
Available languages
Available languages
Quick Links
DO NOT RETURN YOUR UNIT
TO THE STORE
Contact us first
www.sauder.com
For immediate service,
our website is available
24 hours a day, 7 days a week
to order replacement parts,
access assembly tips,
register your product,
and view Sauder products.
Mon-Fri -- 9am-5:30pm ET
United States and Canada (except holidays)
Consumer Services 1--800--523--3987
Most replacement parts ship from our
facility in one or two business days.
The center pages of this book are French and Spanish
instructions.
Les instructions en français et en espagnol sont situées
dans liencart au milieu de ce manuel. Pour plus de
commodité, celles-ci sont facilement détachables.
Se incluyen las instrucciones en español y francés en el
centro de este folleto. Para facilitar su uso, se puede
desprenderlas fácilmente.
register your new purchase online
register your new purchase online
www.sauder.com
www.sauder.com
Model # 109871
Assembly Instructions
This instruction booklet contains important safety information.
Please read and keep for future reference.
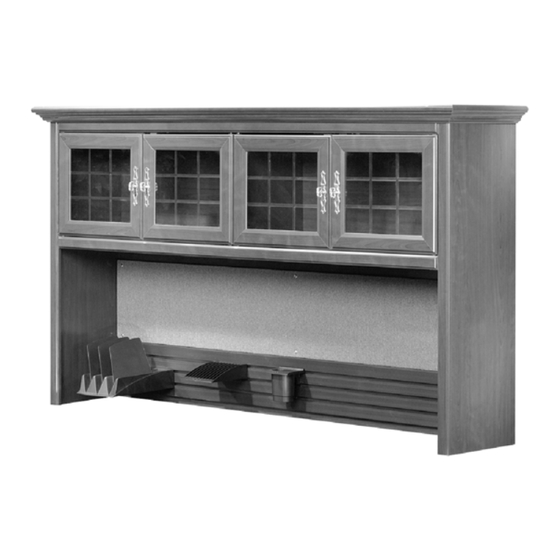
Hutch
NOTE
Record the date you purchased this unit and save the booklet
for future reference.
If you ever need to contact Sauder about this unit, refer to the
lot # and the model # when calling our toll-free number. For more
information about our furniture, company, or to order replacement
parts, please visit our web site.
Lot #: 337501
Date Purchased:
03 / 23 / 11
Advertisement
Table of Contents

Subscribe to Our Youtube Channel
Summary of Contents for Saunder 109871
- Page 1 Hutch Model # 109871 Assembly Instructions NOTE This instruction booklet contains important safety information. Please read and keep for future reference. DO NOT RETURN YOUR UNIT TO THE STORE Contact us first www.sauder.com...
-
Page 2: Parts Identification
(T) CD HOLDER - - 1 (Z) TWIST-LOCK (AA) MINI TWIST-LOCK (BB) MOLDING (CC) PIVOT (DD) CORD (EE) MAGNETIC CATCH FASTENER - - 4 FASTENER - - 12 CONNECTOR - - 2 HINGE - - 8 CLIP - - 4 BRACKET - - 2 109871... - Page 3 (GG) STRIKE (HH) METAL (II) ANGLE (JJ) PLASTIC PLATE - - 4 BRACKET - - 4 BRACKET - - 11 WASHER - - 4 (KK) METAL (WW) PULL - - 4 (XX) BACKPLATE - - 4 WASHER - - 6 109871...
- Page 4 You may receive some extra hardware. This is done to assure you receive at least the amount required. ASSEMBLY TOOLS REQUIRED TIP SHOWN ACTUAL SIZE NO. 2 PHILLIPS SCREWDRIVER HAMMER 109871...
- Page 5 FASTENERS at this time. NOTE: If you need to remove a TWIST-LOCK FASTENER from a hole, pull the FASTENER back out of the hole. Pull at the front and back edges, slowly working the FASTENER out of the hole. www.sauder.com/services 109871...
-
Page 6: Molding
The MOLDINGS should overhang the surface with holes on the LEFT END and RIGHT END. If the MOLDING overhangs the wrong surface, remove it and slide it on again. Slide the MOLDING off the notched edge in the same direction that it was slid on. * U.S. Pat. No. 5,499,886 www.sauder.com/services 109871... -
Page 7: Connector
MOLDING CONNECTORS are even with the top surfaces of the MOLDINGS. NOTE: Be sure to insert the MOLDING CONNECTORS rounded end first. You should be tapping on the flat ends of the MOLDING CONNECTORS. Follow the diagram closely. www.sauder.com/services 109871... - Page 8 Be sure the surface with larger holes of the MOLDINGS are facing up. Follow the diagram. - Now, be sure the pointed corners of all three MOLDINGS line up with each other. Tighten the SCREWS in all the MOLDINGS. Do not overtighten the SCREWS. www.sauder.com/services 109871...
- Page 9 - Fasten the UPRIGHT (G) to the TOP (C) as shown. Use two 1- -7/8” FLAT HEAD SCREWS (LL) through the TOP and into the pre- -drilled holes in the edge of the UPRIGHT. NOTE: Be sure the finished edge of the UPRIGHT is facing up. www.sauder.com/services 109871...
- Page 10 - Fasten the LOWER BACK (F) to the SHELF (D). Tighten six MINI TWIST-LOCK FASTENERS in the long edge of the LOWER BACK. NOTE: Be sure the unfinished surface of the LOWER BACK is positioned as shown. Follow the diagram. www.sauder.com/services 109871...
- Page 11 FASTENERS in the LOWER BACK until step 12. - Fasten the RIGHT END (A) to the TOP (C) as shown. Use two 1- -7/8” FLAT HEAD SCREWS (LL) through the TOP and into the pre- -drilled holes in the edge of the RIGHT END. www.sauder.com/services 109871...
-
Page 12: Bracket
- Now, fasten two MAGNETIC CATCHES (FF) to each MAGNETIC CATCH BRACKET (EE) on the TOP (C) as shown. Use a 1- -1/8” PAN HEAD SCREW (NN) through each MAGNETIC CATCH and into the BRACKET. NOTE: Be sure to position the MAGNETIC CATCHES as shown. Follow the enlarged diagram closely. www.sauder.com/services 109871... -
Page 13: Liste De Pieces
109871 SURMEUBLE NE PAS RAPPORTER L’ÉLÉMENT AU MAGASIN Utilisez les instructions d’assemblage en français avec les schémas étape par étape du manuel d’instruction en anglais. Nous contacter en premier Chaque étape en français correspond à la même étape en www.sauder.com anglais. - Page 14 écrit à Sauder Woodworking Co., 502 Middle Street, Archbold, OH 43502 USA. Veuillez joindre votre ticket de caisse ou toute autre preuve d’achat ainsi qu’une description spécifique du défaut de produit. 109871 Fr...
- Page 15 VIS. Serrer six PETITE FIXATIONS TWIST–LOCKR dans le chant long de l’ARRIÈRE INFÉRIEUR. REMARQUE : S’assurer que la surface non finie de l’ARRIÈRE INFÉRIEUR est dirigée comme l’indique le schéma. Suivre les indications du schéma. 109871 Fr...
- Page 16 1000 LOQUETEAU MAGNÉTIQUE (EE) situé sur le optionnel contre la TABLETTE. DESSUS (C) comme l’indique le schéma. Utiliser une VIS TÊTE GOUTTE DE SUIF 28 mm (NN) à travers chaque LOQUETEAU MAGNÉTIQUE et dans la CONSOLE. 109871 Fr...
- Page 17 REMARQUE : S’assurer de bien enfoncer les CLOUS dans les trous qui sont alignés sur le milieu de l’ARRIÈRE SUPÉRIEUR. Des lignes de découpe perforées sont prévues dans l’ARRIÈRE SUPÉRIEUR. Avec précaution, découper le trou à la taille désirée. 109871 Fr...
- Page 18 IMPORTANT : Les CHARNIÈRES et les PLAQUES DE BUTÉE doivent être fixées aux PORTES dans les indiqués exactement comme l’indique le schéma. Le chant sur lequel les CHARNIÈRES sont maintenant fixées sera le chant supérieur de la PORTE. 109871 Fr...
- Page 19 Suivre attentivement les indications du schéma. Pulvériser de l’encaustique sur un chiffon et utiliser Répéter cette opération pour le PLATEAU POUR ensuite le chiffon pour essuyer la surface. DOSSIERS (R) et le PORTE- -CRAYONS (U). 109871 Fr...
- Page 20 Le surmeuble devrait être retiré du dessus de bureau avant de déplacer le bureau. Ne pas pousser le mobilier, surtout sur la moquette. Se faire aider par une autre personne pour soulever l’élément et le mettre en place. 109871 Fr...
-
Page 21: Lista De Partes
109871 ORGANIZADOR NO DEVUELVA SU UNIDAD A LA TIENDA Use estas instrucciones de ensamblaje en español junto con las figuras paso-a-paso provistas en el folleto inglés. Cada Comuníquese con nosotros primero paso en español corresponde al mismo paso en inglés. Se www.sauder.com... - Page 22 Sauder Woodworking Co., 502 Middle Street, Archbold, OH 43502 EE.UU. Por favor incluya su recibo de venta u otra prueba de compra y una descripción detallada del defecto del producto. 109871 Sp...
- Page 23 Fije el DORSO INFERIOR (F) al ESTANTE (D). Apriete seis MINI- -SUJETADORES TWIST–LOCKR dentro del borde largo del DORSO INFERIOR. NOTA: Asegúrese de que la superficie sin acabado del DORSO INFERIOR esté colocado como se muestra. Siga el diagrama. 109871 Sp...
- Page 24 Siga el diagrama. Ahora, empuje las GRAPAS DE CABLE (DD) dentro de los agujeros indicados del ESTANTE (D). Las GRAPAS DE CABLE son utilizadas para mantener el cable de lámpara contra el ESTANTE si la ha comprado. 109871 Sp...
- Page 25 CLAVOS (UU). NOTA: Asegúrese de clavar ligeramente los CLAVOS dentro de los agujeros atravesando el medio del DORSO SUPERIOR. En el DORSO SUPERIOR se encuentran provistas áreas prerrecortadas indicadas con líneas rotas. Cuidadosamente corte el agujero que necesita. 109871 Sp...
- Page 26 PLACAS DE CONTACTO como se muestra. Siga los diagramas ampliados. IMPORTANTE: Las BISAGRAS y las PLACAS DE CONTACTO deben fijarse a las PUERTAS en las posiciones correspondientes indicadas. El borde con las BISAGRAS será el borde superior de la PUERTA. 109871 Sp...
- Page 27 ANAQUEL PARA DISCOS CD (T) como se Rocíe el producto sobre un paño, y utilice el paño muestra en el diagrama inferior. Siga el diagrama para limpiar la superficie. atentamente. Repita este proceso para la BANDEJA PARA ARCHIVOS (R) y el SOPORTE LAPICERO (U). 109871 Sp...
- Page 28 El organizador debe ser retirado de la superficie de escritorio antes de intentar mover el escritorio. No empuje la unidad, especialmente sobre un piso alfombrado. Pide la ayuda de otra persona para levantar la unidad y colocarla en lugar. 109871 Sp...
-
Page 29: Bracket
Be sure to position the LIGHTS as shown. Follow the diagram. - Now, push the CORD CLIPS (DD) into the indicated holes in the SHELF (D). The CORD CLIPS are used to hold any light that you may purchase for the unit. www.sauder.com/services 109871... -
Page 30: Washer
SCREW (PP) through a METAL WASHER (KK), through the BULLETIN BOARD, and into the pre- -drilled holes in the LOWER BACK. NOTE: Pay close attention to the enlarged diagram of the METAL WASHER. Be sure not to fasten the BULLETIN BOARD over the Light cord. www.sauder.com/services 109871... - Page 31 - Continue fastening the UPPER BACK (E) to your unit using the NAILS (UU). NOTE: Be sure to tap NAILS into the holes across the middle of the UPPER BACK. Perforated cut- -out lines have been provided in the UPPER BACK. Carefully cut out the hole needed. www.sauder.com/services 109871...
- Page 32 - Fasten the Hutch to the Tops. Use a 9/16” LARGE HEAD SCREW (RR) through each BRACKET and into the Tops. NOTE: There are no pre- -drilled holes in the Tops for the METAL BRACKETS. Use a little extra force while starting these SCREWS. NOTE: The Hutch must be properly attached as shown in this step. www.sauder.com/services 109871...
- Page 33 STRIKE PLATES as shown. Follow the enlarged diagrams. IMPORTANT: The HINGES and STRIKE PLATES must be fastened to the DOORS in the positions shown. The edge to which the HINGES are now fastened will be the top edge of the DOOR. www.sauder.com/services 109871...
- Page 34 Be sure the post on the back of each BACKPLATE inserts into the small hole in the DOORS. The small hole will be above the large hole on the left DOORS and below the large hole on the right DOORS. www.sauder.com/services 109871...
- Page 35 Only the Hutch is shown in this step. - Fasten the ACCESSORY WALL (P) to the LOWER BACK (F) as shown. Use six 5/8” PAN HEAD SCREWS (QQ) through the ACCESSORY WALL and into the pre- -drilled holes in the LOWER BACK. www.sauder.com/services 109871...
- Page 37 NOTE: Be sure the angled edges of the DIVIDERS are positioned as shown. Follow the diagram. - Slide two HANGERS (V) onto the back of the CD HOLDER (T) as shown in the bottom diagram. Follow the diagram closely. Repeat this process for the FOLDER TRAY (R) and PENCIL CUP (U). www.sauder.com/services 109871...
- Page 38 This completes assembly. Use your favorite type of furniture polish on all finished surfaces to enhance the beauty of the finish. Do not spray the polish directly onto the furniture. Spray the polish onto a cloth, then use the cloth to wipe the surface. www.sauder.com/services 109871...
-
Page 39: Limited 5-Year Warranty
Some states do not allow the exclusion or limitation of incidental or consequential damages, so the above limitation or exclusion may not apply to you. 109871... - Page 40 2. This certificate applies to compliance of this product with the CPSC Ban on Lead--Containing Paint (16 CFR 1303). 3. This product is manufactured by: Sauder Woodworking Company 502 Middle Street Archbold, Ohio 43502 (419) 446--2711 4. Date of Manufacture: ________________ March 2014 www.sauder.com 1- -800- -523- -3987 109871...
Need help?
Do you have a question about the 109871 and is the answer not in the manual?
Questions and answers