
Subscribe to Our Youtube Channel
Summary of Contents for Rosemount 1420
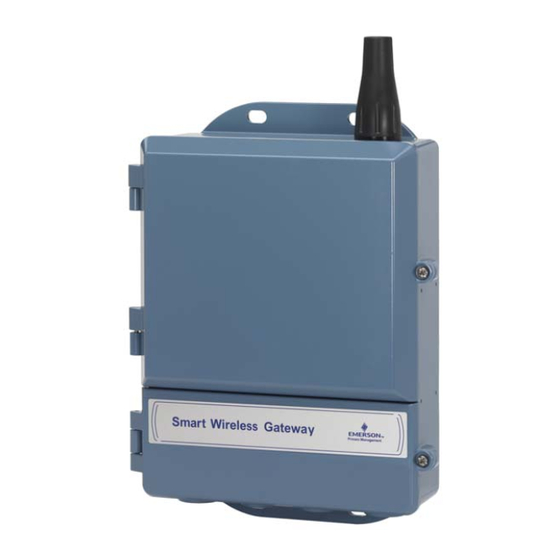
- Page 1 Quick Start Guide 00825-0200-4420, Rev GB June 2017 ™ Emerson Smart Wireless Gateway 1420...
-
Page 2: Table Of Contents
June 2017 Quick Start Guide NOTICE This guide provides basic guidelines for the Smart Wireless Gateway. It does not provide instructions for diagnostics, maintenance, service, or troubleshooting. Refer to the Smart Wireless Gateway Reference Manual (document number 00809-0200-4420) for more information and instructions. This guide and the manual are available electronically on www.emersonprocess.com. -
Page 3: Wireless Considerations
Quick Start Guide June 2017 1.0 Wireless considerations 1.1 Power up sequence The Smart Wireless Gateway (Gateway) should be installed and functioning properly before power modules are installed in any wireless field devices. Wireless field devices should also be powered up in order of proximity from the Smart Wireless Gateway beginning with the closest. -
Page 4: Initial Connection And Configuration
June 2017 Quick Start Guide 3.0 Initial connection and configuration ™ 3.1 DeltaV ready If the Gateway was ordered DeltaV Ready (Data Protocols Code 5), then skip to 4.0 Physical installation, and connect the Gateway to a DeltaV 10.3 or newer control network. - Page 5 The Gateway enclosure case should always grounded in accordance with national and local electrical codes. The most effective grounding method is a direct connection to earth ground with minimal impedance. Figure 3. 1420 PoE Jumpering Matrix (Located on 1420 Board) Black fill below indicates jumper. PoE PD on port 1 (Default jumpering for production.
-
Page 6: Establishing A Connection
June 2017 Quick Start Guide Note Electrostatic discharge (ESD) protection required when swapping PoE jumpers. Note Only one port and one mode of operation (PD or PSE) can be selected at a time; any other combination of jumpers is invalid. Note IEEE 802.3af-2003 PoE standard provides up to 15.4 W of DC power (minimum 44 V DC and 350 mA) to each device. - Page 7 Quick Start Guide June 2017 2. To establish the PC/laptop settings, navigate to Start>Settings>Network Connections. a. Select Local Area Connection. b. Right click to select Properties. c. Select Internet Protocol (TCP/IP), then select the Properties button. Note If the PC/laptop is from another network, record the current IP address and other settings so the PC/laptop can be returned to the original network after the Gateway has been configured.
- Page 8 June 2017 Quick Start Guide Note Connecting to the Gateway's secondary Ethernet port requires different network settings. Refer to Table 1 for additional network settings. Table 1. Default IP Addresses Gateway PC/laptop Ethernet 1 192.168.1.10 192.168.1.12 Ethernet 2 192.168.2.10 192.168.2.12 Ethernet 1 (DeltaV Ready) 10.5.255.254 10.5.255.200...
- Page 9 Quick Start Guide June 2017 3.4 Configure the Smart Wireless Gateway To complete initial configuration for the Gateway: 1. Access the default web page for the Gateway at https://192.168.1.10. a. In the User name field, enter admin. b. In the Password field, enter default. Figure 5.
-
Page 10: Physical Installation
June 2017 Quick Start Guide 4.0 Physical installation 4.1 Pipe mount Tools needed: 2-in. (51 mm) mounting pipe or mast -in. (7,9 mm) u-bolts supplied with Gateway -in. socket-head wrench For installing the Gateway with a pipe mount: 1. - Page 11 Quick Start Guide June 2017 4.2 Remote antenna (optional) The remote antenna options provide flexibility for mounting the Gateway based on wireless connectivity, lightning protection, and current work practices. When installing remote mount antennas for the Smart Wireless Gateway, always use established safety procedures to avoid falling or contact with high-power electrical lines.
- Page 12 June 2017 Quick Start Guide Figure 6. Installation of WL2/WN2 Option A. Control building E. Lightning arrestor B. Remote antenna F. Gateway C. Cable G. Ground D. Drip loop H. Earth 4.4 Installation of WL3/WL4 option (indoor to outdoor applications) 1.
- Page 13 Quick Start Guide June 2017 Figure 7. Installation of WL3/WL4 Option A. Control building E. Lightning arrestor B. Remote antenna F. Gateway C. Cable G. Ground D. Drip loop H. Earth Note Weather proofing is required! The remote mount antenna kit includes coaxial sealant for the cable connections for the lightning arrestor, antenna, and Gateway.
- Page 14 June 2017 Quick Start Guide Table 3. Remote Antenna Kit Options Antenna Cable 1 Cable 2 Lightning arrestor option Wavelength Dipole Head mount, jack to plug 50 ft. (15,2 m) Omni-Directional Gas discharge tube LMR–400 +6 dB Gain 0.5 dB insertion loss Wavelength Dipole In-line, jack to jack 30 ft.
-
Page 15: Connect To The Host System
Quick Start Guide June 2017 5.0 Connect to the host system 1. Wire the Gateway’s Ethernet 1 (Primary) or Serial Output connection to the Host System Network or Serial I/O. 2. For serial connections, connect A to A, B to B, making sure all terminations are clean and secured to avoid wiring connection problems. -
Page 16: Software Installation (Optional)
June 2017 Quick Start Guide Power Power the Gateway as directed in Step 6.0 Software installation (optional) The 2-disk software pack contains the Security Setup Utility (only required for secure host connections or OPC communications) and AMS Wireless Configurator. The Security Setup Utility is located on Disk 1. To install the software: 1. -
Page 17: Product Specifications
Quick Start Guide June 2017 Figure 11. Gateway Log In Screen The Gateway is now ready to be integrated into the host system. If wireless field devices were ordered with the Gateway, they were preconfigured with the same network ID and join key information. Once the field devices are powered, they will appear on the wireless network and communications can be verified under the Explore tab using the web interface. -
Page 18: Physical Specifications
June 2017 Quick Start Guide 8.3 PoE Input voltage Normal Operation (no PSE or IEEE 802.3af): 10.5 – 30 VDC PoE + PSE Operation (IEEE 802.3at): 17.5 – 30 VDC PSE mode 50 V – 57 VDC Output (per IEEE 802.3at 2009) 25.5 W Maximum 8.4 Radio frequency power output from antenna Maximum of 10 mW(10 dBm) EIRP... - Page 19 Quick Start Guide June 2017 8.7 Communication specifications Isolated RS485 ® 2-wire communication link for Modbus RTU multidrop connections Baud Rate: 57600, 38400, 19200, or 9600 Protocol: Modbus RTU Wiring: Single twisted shielded pair, 18 AWG Wiring distance: up to 4,000 ft. (1,524 m) Ethernet 10/1000base- TXEthernet communication port ™...
- Page 20 June 2017 Quick Start Guide Network size/latency 100 Devices: less than 10 sec 50 Devices: less than 5 sec Data reliability > 99%...
-
Page 21: Product Certifications
Markings: NI CL 1, DIV 2, GP A, B, C, D T4; Suitable for use in CL II, III, DIV 2, GP F, G T4;T4(–40 °C ≤ T ≤ +60 °C); Nonincendive outputs to remote antenna when connected per Rosemount drawing 01420-1011; Type 4X Special Condition for Safe Use: 1. Explosion Hazard. Do not disconnect equipment when a flammable or combustible... - Page 22 CSA C22.2 No. 61010-1 - 2012 Markings: Suitable for Class 1, Division 2, Groups A, B, C, and D, T4; when connected per Rosemount drawing 01420-1011; Type 4X Special Condition for Safe Use: 1. Explosion Hazard. Do not disconnect equipment when a flammable or combustible atmosphere is present.
- Page 23 Quick Start Guide June 2017 NF IECEx Dust Certificate: IECEx BAS 07.0013X Standards: IEC 60079-0: 2011, IEC 60079-31: 2008 Markings: Ex tc IIIC T135 °C Dc, (–40 °C ≤ T ≤ +65 °C) Special Condition for Safe Use (X): 1. The surface resistivity of the antenna is greater than 1 GΩ. To avoid electrostatic charge build-up, it must not be rubbed with a dry cloth or cleaned with solvents.
-
Page 24: Eu Declaration Of Conformity
June 2017 Quick Start Guide Figure 12. Smart Wireless Gateway 1420 Declaration of Conformity EU Declaration of Conformity No: RMD 1067 Rev. N Rosemount, Inc. 8200 Market Boulevard Chanhassen, MN 55317-9685 declare under our sole responsibility that the product, Rosemount 1420 Smart Wireless Gateway manufactured by, Rosemount, Inc. - Page 25 Quick Start Guide June 2017 EU Declaration of Conformity No: RMD 1067 Rev. N EMC Directive (2014/30/EU) Harmonized Standards: EN 61326-1: 2013 Radio Equipment Directive (RED) (2014/53/EU) Harmonized Standards: EN 300 328: V2.1.1 EN 301 489-17: V3.2.0 EN 60950-1: 2006+A11+A12+A1+A2 EN 50371: 2002 ATEX Directive (2014/34/EU) Baseefa07ATEX0056X –...
- Page 26 June 2017 Quick Start Guide EU Declaration of Conformity No: RMD 1067 Rev. N ATEX Notified Body SGS Baseefa Limited [Notified Body Number: 1180] Rockhead Business Park, Staden Lane Buxton, Derbyshire SK179RZ United Kingdom ATEX Notified Body for Quality Assurance SGS Baseefa Limited [Notified Body Number: 1180] Rockhead Business Park, Staden Lane...
- Page 27 Quick Start Guide June 2017 China RoHS Rosemount 1420 List of Rosemount 1420 Parts with China RoHS Concentration above MCVs / Hazardous Substances Hexavalent Polybrominated Polybrominated Part Name Lead Mercury Cadmium Chromium biphenyls diphenyl ethers (Pb) (Hg) (Cd) (Cr +6)
- Page 28 The Emerson logo is a trademark and service mark of Emerson Asia Pacific Regional Office Electric Co. Emerson Automation Solutions DeltaV, Rosemount, and Rosemount logotype are trademarks of 1 Pandan Crescent Emerson. Singapore 128461 Windows, Microsoft, and Internet Explorer are registered...
Need help?
Do you have a question about the 1420 and is the answer not in the manual?
Questions and answers