
Related Manuals for Silver Star X6

Summary of Contents for Silver Star X6
- Page 1 ROBOT VACUUM CLEANER Model X6 With Remote Control USER MANUAL Thank you for purchasing the product. Please read the Manual carefully before using.
-
Page 2: Table Of Contents
Thank you for purchasing X6 intelligent vacuum cleaner. I hope you will enjoy your utilization! If you have any questions about the product during use, please dial our helpline. -
Page 3: Safety Instructions
1. Safety Instructions 1.1 Use Instructions Please observe the following safety precautions prior to the use of this product: * Please operate this product in accordance with the steps indicated in the User Manual after perusing such a manual. * Keep the User Manual properly in order to be able to refer to it at any time in the future. * If you need to have any third party use this product, please hand it over together with the User Manual. -
Page 4: About Children's Safety
Caution Use it only indoors. Stop water, oil or others Arrange the scattered Please take away wires on the floor something frangible from enter the cleaner before use to avoid before use. for fear of damage. hindering the work of the cleaner. -
Page 5: Scope Of Use For The Product
1.5 Scope of Use for the Product This product applies to the ground environments as follows: Applicable Scope Wood floor Ceramic Tiles Undercoat Carpet Inapplicable Scope * It is inapplicable to the extremely hot or cold places. * It can only be used indoors. * Please don’t use it in the midair without the protective fence to avoid personal injury arising out of accidental fall. -
Page 6: Product Composition
2. Product Composition 2.1 Main Body and Parts Charging Stand Battery Adapter Main Body Intelligent Vacuum Cleaner Side Brush Dust Brush User Manual Filter 感 谢 您 购 买 本 产 品 使 用 前 请 仔 细 阅 读 用... -
Page 7: Names Of Components And Parts
2.2 Names of Components and Parts Front View of the Cleaner Top cover Dust Box START Control Buttons Front Shell Sensor Window Bottom View of the Cleaner Charging Pole Shoe Side Brush Front wheel Battery Compartment Right wheel Left wheel Floor brush Power switch Charging hole... -
Page 8: Product Installation
3. Product Installation Please tear the protective film on the front laser glass before the first use of this cleaner. The work of each time starts from charging status! Please tear the protective film before use! Before the use of a new cleaner, please start it for use after the protective film on the front laser glass is torn. Installation of Charging Stand Top Cover of Charging Stand Charging-stand... - Page 9 Danger! High Voltage! Please operate it after drying hands. 1. No obstacles appear within 3 meters in front and 0.5 meter left and right! 2. Connect the adapter to the charging stand and power supply. Please arrange the cable of adapter to prevent the cleaner from being winded when it works.
-
Page 10: Product Use
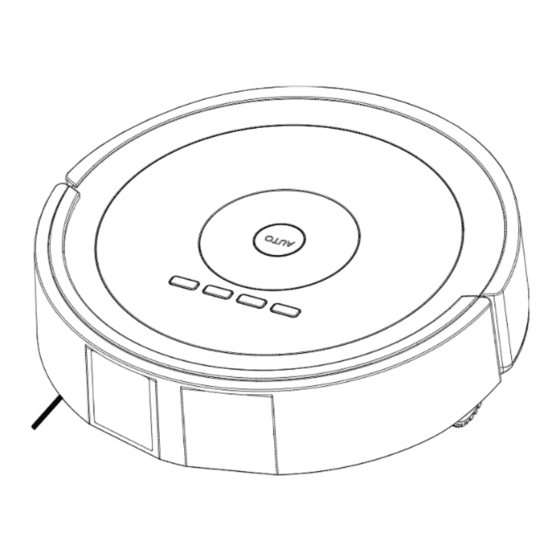
4. Product Use 4.1 Use of Main Body 4.1.1 Explanatory Chart of Indicators and Controls Buttons Button Introduction AUTO Auto Cleaning Su Mo Tu We Th Fr DOCK Auto Recharge HOUR DOCK CLOCK SPOT The indicator for this part Cur. Time Setting will light only in the time or CLOCK presetting mode. - Page 11 4.1.3 Operational Guideline of Main Body Function In the standby mode, press this button and the cleaner will start auto cleaning; re-press this button and it will stop working; in the clock/preset mode, press this button and this setting will be AUTO deleted.
-
Page 12: Charging Methods
4.2 Charging Methods 4.2.1 Manual Charging: Danger! High Voltage! Please operate it after drying hands. 1. Charge the battery with the adapter: Connect the adapter plug with the charging hole of cleaner first and then power it on. Danger! High Voltage! Please The position of central line operate it after drying hands. -
Page 13: Product Maintenance
Tips: 5. Product Maintenance Please clean and maintain the cleaner regularly as actually used. 5.1 Daily Storage If the cleaner lies idle Please close the power for a long time, please switch without fail when take the battery out and the cleaner lies idle for store it in a cool and dry fear of battery damage. -
Page 14: Filter Cleaning
5.4 Filter Cleaning 2. Press the button on the dust box and the fan 1. Dismantle the dust box by following the steps of assembling and disassembling the dust box first, assembly will automatically pop up. and then open the baffle through moving the (Note: The fan assembly can’t be washed directly with buckles on both sides. -
Page 15: Side-Brush Cleaning
Rubber Sleeve Rubber Sleeve Bearing 4. Take out the rubber sleeves separately from the 3. Take out the main brush and mid-brush. main brush and mid plastic brush. (Note: there is a bearing in the rubber sleeve. Don’t let it fall off during dismounting and cleaning. -
Page 16: Sensor Cleaning
5.7 Wheel Cleaning Please clean the front wheel and left-right wheels with the dust brush regularly. (Note: The wheel spindle may be entangled by hair and cloth strips. If so, please remove them without delay.) 5.8 Sensor Cleaning After the cleaner completes cleaning each time, please scrape clean its transparent board with a piece of dry all-cotton cloth... -
Page 17: Common Faults
6. Common Faults 6.1 Alarm and Prompt Note: 1. The cleaner will stop working or can’t be started in the following cases. 2. Please pay attention to the fault codes on the display screen. Please remove abnormalities by reference to the following table. Fault Code Interpretive Code Fault Forms... -
Page 18: Technical Parameters
Faults Solutions 1. Check the APP for correct installation. The cleaner can’t sense APP. 2. Check the cleaner and iPad or mobile for normal connection. 1. Check if the cleaner starts “Local Cleaning” mode. “Local Cleaning” mode works The cleaner will halt 3-5 minutes. -
Page 19: App Installation
8. Use of APP 8.1 How to download APP? Scan the two-dimensional code on the color box or on the right for APP downloading. 8.2 How to install APP? Install APP, register a new account and connect the machine as prompted. 8.3 How to use APP? 1. - Page 20 2. Click “Refresh” and the Main Body AP address will appear. Click “CONNECT” after selecting the Main Body AP address first and then enter the password of the Main Body at the area shown in Figure 2 (each Main Body has a label). Click “NEXTA” TO ENTER THE NEXT STEP.
- Page 21 4. Click “RETURN” on the mobile as shown in Figure 1 first and then enter the next APP operating phase by clicking “OPEN MAP” as shown in Figure 2. The operation interface of APP is shown as the following figure. Full Show of Map Local Show of Map Local...
- Page 22 Shenzhen Silver Star Intelligent Electronic Co., Ltd Address: Block D, Huiqing Technical Park, Dafu Industrial Zone, Aobei Community, Guanlan Street, Baoan District, Shenzhen City Post-sale service hotline:400 6671 909 Http://www. yxrobot.com Caution: This device complies with Part 15 of the FCC rules and Industry Canada license-exempt RSS standard(s).
Need help?
Do you have a question about the X6 and is the answer not in the manual?
Questions and answers