
Related Manuals for Avvio 361S


Summary of Contents for Avvio 361S
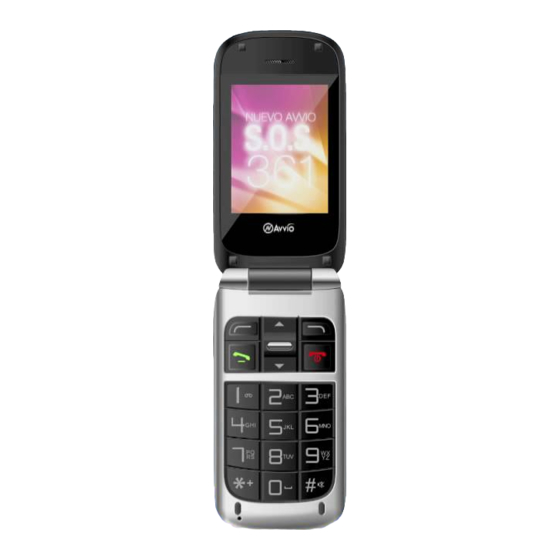
- Page 1 GSM Digital Mobile Phone User Manual Model: Avvio 361S, Avvio 361, Pulsare 361S, Pulsare361...
-
Page 2: Table Of Contents
Contents 1. Basic Information ............. 5 1.1 Introduction ............5 1.2 Safety precautions ..........5 1.3 Safety warnings and precautions ......6 2. Before Using ..............8 2.1 Keys description ............. 8 2.2 Lateral key description .......... 9 2.3 Lateral key description .......... 9 2.4 Battery .............. - Page 3 2.6.9 Urgency call ..........15 2.6.10 Receive the telephone ......16 3. Function Menus ............. 16 3.1 Using function menus .......... 16 3.2 Call log ..............16 3.2.1 Call logs ............ 16 3.2.2 Call Settings ..........17 3.3 Phonebook ............17 3.4 Multimedia ............
- Page 4 3.7 Games ..............22 3.8 Messaging ............22 3.8.1 Write message ........... 22 3.8.2 Inbox ............23 3.8.3 Drafts ............23 3.8.4 Outbox ............23 3.8.5 Sent messages ........... 24 3.8.6 Broadcast message ........24 3.8.7 SMS templates .......... 24 3.4.8 SMS Setting ..........
- Page 5 5.1 Installing and removing T-flash card ....32 5.2 Using T-flash card ..........32 6. Troubleshooting ............. 33...
-
Page 6: Basic Information
1. Basic Information Introduction Thanks for choosing this color digital mobile phone. With this user manual, you can understand the operation of the mobile phone and enjoy its perfect function and simple operation. This color screen mobile phone is designed for GSM network. Besides basic messaging function, it also provides various practical functions, including dual SIM card, SMS and, FM radio, Calendar, schedule power on/off and T-flash.In addition, the... -
Page 7: Safety Warnings And Precautions
ask you the IMEI number (It is printed on the label in the rear of the mobile phone and you will find it after removing the battery). Please write down this number and keep it properly for future use. To avoid illegal operation, please take the preventative measures, for example: ... - Page 8 near TV set, radio or other electric apparatus (may affect video and audio quality.
-
Page 9: Before Using
2. Before Using 2.1 Keys description The Number keys: Input numbers and characters; customize number keys 2-9 as the shortcuts of quick dial. The Right soft key: Execute the functions displayed in lower right corner of the screen. And you can use it to delete the anterior letter near the cursor which you have input in the message or exit the interface of editing when there is no letter in the message. -
Page 10: Lateral Key Description
to camera,move cursor while editing. The * key: Input special symbols, Chinese punctuation; in standby state, quickly press the button to switch to achieve *,+,P,W character input.press and hold this key to call the female number witch you presented(Please pay respects to 3.5.8 “Emergency settings-Female number")... -
Page 11: Battery
close the cell phone flashlight. The Volume Slide key: In the standby interface,according to the two keys to achieve the sound volume adjustment; in some cases, according to the two key parameters of certain menu. SOS key: On the back of the phone, there is a SOS key. If the SOS number and the SOS message have been edited and saved, pressing and holding this key, and then the phone will dial the SOS number after sending out an SOS message... -
Page 12: Connecting To Network
phone is still used when battery is low, the charging indicator will appear after the charging has started for a while. When the charging is finished, there will be one image displayed on the screen which indicates that charging has finished. And if the mobile phone is power on, the battery status indicator on upper right corner of the screen is complete and won’t flash. -
Page 13: Installing/Removing Sim Card
mobile phone. SIM card is the key for you to access digital GSM network. All information about network connection and call initialization, as well as the names and telephone numbers of Contacts and short messages you have received and saved, are recorded in the metal surface area of the SIM card. -
Page 14: Connecting To Network
Press and hold the Hung_Up key to switch on/off the mobile phone. If you switch on the mobile phone before inserting the SIM card, it prompts you to insert the SIM card. The mobile phone checks whether the SIM card is valid automatically after it is inserted. -
Page 15: Make A Phone Call
about the network, but you can still make an emergency call according to the signal intensity. 2.6.5 Make a phone call When the operator symbolize of the network appear in the screen, you can make or answer calls. The manifestation in the left top cape of the screen shows the signal strength of the network. -
Page 16: Stir To Make International Call
password is 8888, you can stir these number as follows: 8880000 P 6666 P 8888 The first part of this number is used for dialing a conversation to voice-mail system. After answering the call, it will send out 6666 to choose mailbox. Before the password 8888 is sent out, the second pause sign will delay 5 seconds (the first P means waiting for connecting successfully, the later P means postponing 5 seconds). -
Page 17: Receive The Telephone
no SIM card. 2.6.10 Receive the telephone If you have chosen On about Any key in the answer mode, you can press arbitrarily key to answer the call; otherwise you need press the Dial key or the Left soft key to answer the call. If the earphone has already been inserted, you can also use the button of the earphone to answer the call. -
Page 18: Call Settings
received call. Delete call logs: There are four menus in deleting the call history, Dialed calls, Missed calls, Received calls and All calls. The customer can choose clearing and vacating certain list of call history. Call Timers: Check the last call to answer the call of the time; You can also reset the counter to zero. -
Page 19: Multimedia
accessing the Phonebook, enter the Options to you can see these submenus as follows: Select: You can choose the station of storage to SIM1 or phone. Mark several:One or more tags, and send a message. Phonebook settings: It is divided into six tiny parts, including Preferred storage, Speed dial, Memory status, Copy contacts, Move contacts and Delete all contacts. -
Page 20: Image Viewer
3.4.3 Image viewer Enter it and select the picture you need, then press the Left soft key to choose Options, you can see the submenus: View, Browser style, Send, Rename, Delete, Sort by, Delete all files and Storage. 3.4.4 Video recorder Select [Video recorder] to get into the interface of recording directly, and then press the Up/Down key to adjust the focus, press the lateral key +/- to adjust the brightness, press the number key 0 to... -
Page 21: Sound Recorder
detailed list is empty, you can only see Refresh list and Settings. On the audio playing interface, press the Up key can open or close the music player, or stop it for short time; press the Down key to stop broadcasting music;... -
Page 22: Camera
automatically. Settings: Set the function of Background play or Loudspeaker as On or Off. Attention: The listening effect will be influenced while listening indoors or the phone is shield. You can use the following ways to improve the effect: close to the window, change the position of headphones line or adjust the channels by hand. -
Page 23: Calendar
completely. 3.6.2 Calendar Enter submenu of Calendar and you can see the interface of date. Press the direction keys to select date and month; press Option to access submenus: View, View all, Add event, Delete event, Jump to date, go to today and go to weekly. 3.6.3 Tasks Press the Left soft key to enter the task list interface. -
Page 24: Inbox
press the # Key in editing interface, and select symbol with the * Key or the number key 1, the information on the editing interface, press the left soft key can proceed as follows: Send to: Choosing this means this message is completed; you can send the message by SIM1 or SIM2 according to your own need. -
Page 25: Sent Messages
3.8.5 Sent messages Check that you have successfully sent and saved SMS. 3.8.6 Broadcast message Receive mode: Choose On to open the function of receiving sub-district broadcast; choose Off to get into the state of refusing the sub-district broadcast. ... -
Page 26: Settings
Delivery report: Enable or disable report. If report is enabled, you can receive a report when the message is sent successfully. Reply path: Set the replying path. Save sent message: After activing this function, the SMS which have sent automatically. ... -
Page 27: Network Settings
menus. Pref. input method: Choose the original input method when you just begin to edit some contents such as SMS, the name of the contacts, the name of the files and so on. Display: Wallpaper: Select the wallpaper showed in the standby state. ... -
Page 28: Security Settings
3.9.4 Security settings Use this function to set the security options to avoid your phone or SIM card be used illegally. SIM security settings: PIN lock: PIN code. PIN code can prevent your SIM card from illegal operation. If the PIN code is disabled, choose Enable and you can start PIN code protection. -
Page 29: Connectivity
press the Dail key to access Phone lock and input the password again to disable phone lock. Note: The default phone lock password is 1234. Please change into your own private password as soon as possible. Phone lock: The phone lock can prevent your mobile phone from illegal operation. -
Page 30: Restore Factory Settings
the address of this Bluetooth. 3.9.6 Restore factory settings The default password of Restore factory settings is 1234. 3.9.7 Emergency settings Switch: Open or close the SOS function. Content: Edit the content of the SOS message which will be sent out automaticly when the SOS function is using. -
Page 31: Input Methods
4. Input Methods This mobile phone supports these input methods: ABC/abc, Multitap NL/Multitap nl, mumeric, FR/fr, DE/de,Numeric, Insert symbol and so on. 4.1 Key definitions The general definition of keypad is as follows (please refer to Chapter 4.2 “Text input” for the keypad definition in specific input method): ... - Page 32 Keys Characters or functions Number key 1 Input symbols Number key 2 ABCabc2 Number key 3 DEFdef3 Number key 4 GHIghi4 Number key 5 JKLjkl5 Number key 6 MNOmno6 Number key 7 PQRSpqrs7 Number key 8 TUVtuv8 Number key 9 WXYZwxyz9 Number key 0 0 and space...
-
Page 33: About T-Flash Card
corresponding number appears when the current input method is ABC/abc. Change the input method as Numeric and press [0]-[9] to input corresponding numbers directly. 5. About T-flash Card This mobile phone supports T-flash card to extend the memory space. The operations are as follows: 5.1 Installing and removing T-flash card ... -
Page 34: Troubleshooting
way of U-Disk. 6. Troubleshooting Refer to the following table to eliminate faults. Problem Reason Solution Use the mobile phone in bad receiving area, for example, near tall building or in basement, the Try to avoid. radio waves can’t reach these areas effectively. - Page 35 If the phone can not receive signal, Please move to area it will transmit continuously to with strong signals or search for base station, with which switch off the mobile it will consume a lot of battery and phone temporarily. shorten the standby time.
-
Page 36: Fcc Regulations
Move to a place with Weak signal. strong signal and try again. Change the battery Battery or charger is damaged. or charger. Change Charge in the environment with normal charging Can’t charge extreme temperature. environment. Check whether the Bad contact. plug connected properly. - Page 37 radio frequency energy and, if not installed and used in accordance with instructions, cause harmful interference to radio communications. However, there is no guarantee that interference will not occur in a particular installation If this equipment does cause harmful interference to radio or television reception, which can be determined by turning the equipment off and on, the user is encouraged to try to correct the interference by one or more of the following...
- Page 38 RF Exposure Information (SAR) This phone is designed and manufactured not to exceed the emission limits for exposure to radio frequency (RF) energy set by the Federal Communications Commission of the United States. During SAR testing, this device was set to transmit at its highest certified power level in all tested frequency bands, and placed in positions that simulate RF exposure in usage against the head with no separation, and near the body with the separation...
- Page 39 This device is complied with SAR for general population /uncontrolled exposure limits in ANSI/IEEE C95.1-1992 and had been tested in accordance with the measurement methods and procedures specified in IEEE1528. This device has been tested and meets the FCC RF exposure guidelines when tested with the device directly contacted to the body.
- Page 40 SAR compliance for body-worn operation is based on a separation distance of 15 mm between the unit and the human body. Carry this device at least 15 mm away from your body to ensure RF exposure level compliant or lower to the reported level.
Need help?
Do you have a question about the 361S and is the answer not in the manual?
Questions and answers