Table of Contents
Advertisement
Advertisement
Table of Contents

Summary of Contents for Retina VISION-800
- Page 1 Instruction VISION-800...
- Page 2 © 2015. All rights are reserved. No part of this document may be reproduced without permission. While all efforts have been made to ensure the accuracy of all contents in this manual, we assume no liability for errors or omissions or statements of any kind in this manual, whether such errors or omissions or statements resulting from negligence, accidents, or any other cause.
-
Page 3: Table Of Contents
Content Welcome............. 3 Your Video Glasses........... 5 Key Descriptions..........6 Start to Use............7 Charge the Battery..........7 1. Settings............7 2. File Manager..........8 3. Camera............8 4. Bluetooth............9 5. WLAN.............. 9 6. Browser............9 7. Music............... 9 8. Gallery............. 9 9. -
Page 4: Welcome
Welcome Congratulations on your purchase of the video glasses. Your glasses provides many functions which are practical for daily use, such as a video player, camera, MP3 player, video recorder, and more. Your glasses can also connect mouse, or other device using a USB data cable. You can read the manual to understand how to use the glasses and experience the well-established functions and simple operation method. - Page 5 Turn off around explosive Area Please observe location-specific applicable limitations. Do not use your glasses near an area where explosions can occur. Proper use As described in this manual, your glasses can be used only in the locations free from glasses usage restrictions.
-
Page 6: Your Video Glasses
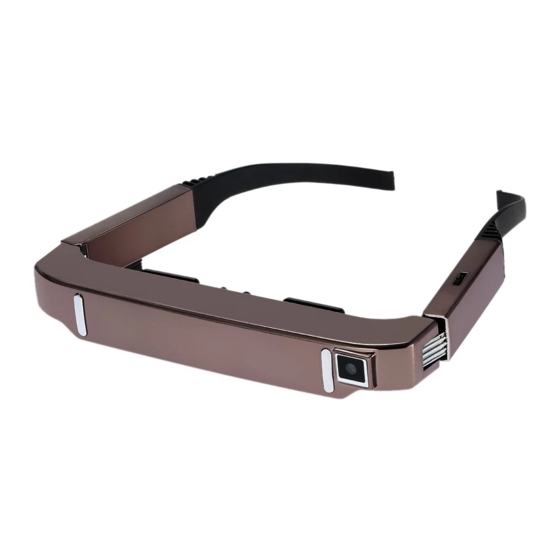
Your Video Glasses The glasses appearance is shown as below. The picture is for reference only; your glasses may be different. Please take your actual glasses as the standard. -
Page 7: Key Descriptions
Key Descriptions Description Long press the key to turn on the glasses. Power Key In the power on status, press the key to lock screen. Press the key to disconnect battery. Reset Key Plug the earphone into the earphone Earphone connector. -
Page 8: Start To Use
Start to Use Remove or install the Memory Card Insert the external micro SD card into the slot with the gold contact facing down. To remove the micro SD card, gently press and slide it out. Charge the Battery Plug one end of the charger into glasses. Connect another end of the charger to the socket. -
Page 9: File Manager
Personal Location Access Select whether to access to my location, whether to turn on GPS satellites, or whether to use Wi-Fi & mobile network location. Security You can select SCREEN SECURITY, PASSWORDS, DEVICE ADMINISTRATION, and CREDENTIAL STORAGE in this menu. Language &... -
Page 10: Bluetooth
or recorder. 4. Bluetooth In the menu, you can turn on or off the bluetooth. 5. WLAN In the menu, you can turn on or off the WIFI. 6. Browser You can use your glasses to access Wireless Application. To browse pages, you must subscribe to the data service from your service provider and use Wifi function. -
Page 11: Mx Player Pro
12. Player You can use Video player to view or manage videos. 13. Sense flip clock Press the icon in main menu. And you can update the time and the weather forecast. Widgets Long press the mouse,you can enter the widgets. In the widgets list, you can select desired widget to add to idle screen. - Page 12 • Battery performance is particularly limited in temperatures below freezing. • Do not dispose of batteries in a fire! Dispose of batteries according to local regulations. Please recycle when possible. Cellphones are not considered household waste. Video Glasses maintenance •...
- Page 13 Frequently Asked Questions Frequently Asked Cause and Solution Questions Fail to turn Press the power key for over 2 second. In case of Weak signal, please try and move to a location with strong signal and try connecting to the network again; Fail to connect Please ensure that you are not beyond the...
Need help?
Do you have a question about the VISION-800 and is the answer not in the manual?
Questions and answers