Table of Contents
Advertisement
Advertisement
Table of Contents

Related Manuals for Studebaker SB6080

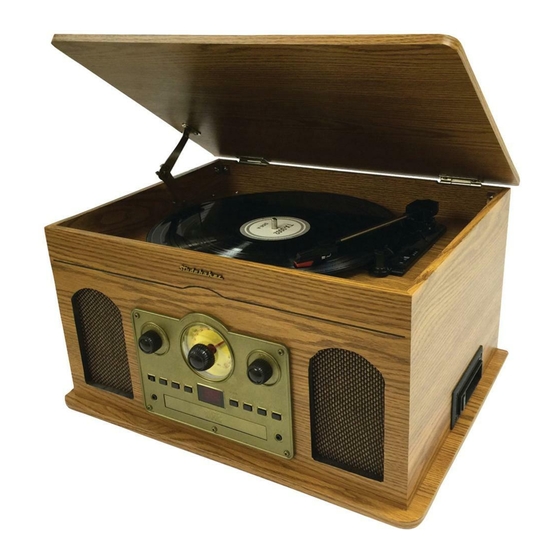
Summary of Contents for Studebaker SB6080
-
Page 2: Important Safety Instructions
TO PREVENT FIRE OR SHOCK HAZARD, DO NOT USE THIS PLUG WITH AN EXTENSION CORD, RECEPTACLE OR OTHER OUTLET UNLESS THE BLADES CAN BE FULLY INSERTED TO PREVENT BLADE EXPOSURE. TO PREVENT FIRE OR SHOCK HAZARD, DO NOT EXPOSE THIS APPLIANCE TO RAIN OR MOISTURE. The Caution Marking and rating label are located at the back enclosure of the apparatus. - Page 3 16. Do not overload wall outlet. Use only power source as indicated. 17. Use replacement part as specified by the manufacturer. 18. Upon completion of any service or repairs to this product, ask the service technician to perform safety checks. 19.
-
Page 4: Important Notes
• DO NOT CONNECT THE UNIT TO THE MAINS BEFORE CHECKING THE MAINS VOLTAGE AND UNTIL ALL OTHER CONNECTIONS HAVE BEEN MADE. • DO NOT COVER ANY VENTS AND MAKE SURE THAT THERE IS A SPACE OF SEVERAL INCHES AROUND THE UNIT FOR VENTILATION. IMPORTANT NOTES Avoid installing the unit in locations described below: •... -
Page 5: Getting Started
Serial Number: ____________________ GETTING STARTED CONNECTING THE AC POWER CORD 1. Unwind the AC POWER CORD (#34) fully and connect it to any convenient household 120V~ 60Hz AC outlet 2. Rotate the POWER/VOLUME ON/OFF SWITCH (#5) clockwise to turn on the SB6080. - Page 6 SPEAKERS FUNCTION SELECTOR DIAL SCALE TUNING KNOB POWER/VOLUME ON/OFF SWITCH REPEAT BUTTON PLAY/PAUSE BUTTON CD DOOR OPEN/CLOSE BUTTON STOP BUTTON 10. AUX-IN JACK 11. LED DISPLAY 12. CD DOOR 13. EARPHONE JACK 14. B. (BACKWARD) SKIP BUTTON 15. AM/FM SELECTOR...
-
Page 7: Radio Operation
This unit should not be adjusted or repaired by anyone except qualified service personnel. RADIO OPERATION 1. Rotate the POWER/VOLUME ON/OFF SWITCH (#5) to turn on the SB6080. 2. Rotate the FUNCTION SELECTOR (#2) to select Radio mode. The dial scale LED will light. -
Page 8: Repeat All
Rotate the FUNCTION SELECTOR (#2) to select CD mode. Press CD DOOR OPEN/CLOSE BUTTON (#8) to open the disc tray. Carefully place an audio CD with its label side upward on the tray. Press CD DOOR OPEN/CLOSE BUTTON (#8) to close the tray, the disc will start playing the first track once loaded and the PLAYBACK LED INDICATOR (#21) will light. - Page 9 1. During program play, press REPEAT BUTTON (#6) once will repeat the specifically programmed tracks. 2. Press the REPEAT BUTTON (#6) again will repeat all the programmed tracks. 3. Press the STOP BUTTON (#9) twice to cancel program playback. PHONO OPERATION Please Note - Before Use Remove the stylus protector.
-
Page 10: Auxiliary Input
1. Use an audio cable (not included) with one 3.5 mm stereo plug on each end of the cable. 2. Plug one end into the AUX IN JACK (#10) on the front of the SB6080 and the other end of the cable into the Line-out Jack or Headphone Jack of your external audio device. -
Page 11: Care And Maintenance
Inserting the plug of your headphones into the EARPHONE JACK (#13) will enable you to listen in private. READ THIS IMPORTANT INFORMATION BEFORE USING YOUR HEADPHONES 1. Avoid extended play at very high volume as it may impair your hearing. 2. -
Page 12: Head Cleaning
1) Tape Jamming – Leading to uneven speed in playback, and 2) Tape Tangling – Where the tape wraps itself around vital parts of the mechanism. To reduce the likelihood of these problems occurring, the following precautions should be observed: •... - Page 13 NO ADDITIONAL STYLUS IS SUPPLIED WITH THE SYSTEM. RECORD CARE AND MAINTENANCE To ensure the best sound and the least amount of wear on your records, it’s essential that they are kept clean. Make sure your records, especially older ones, are sufficiently cleaned prior to playing them.
-
Page 14: Troubleshooting Guide
used. 2. Avoid leaving your unit in direct sunlight or in hot, humid or dusty places. 3. Keep your unit away from heating appliances and sources of electrical noise such as fluorescent lamps or motors. 4. If drop-outs or interruptions occur in the music during CD play, or if the CD fails to play at all, its bottom surface may require cleaning. -
Page 15: Specification
distorted sound wire antenna AM mode, Rotate or change the position of the unit for better reception TAPE PLAYER Playback Tape head dirty Clean tape head using head muffled or fuzzy cleaning cassette Tape head magnetized Demagnetizing must be carried out by service engineer Playback Tape too tight in cassette... - Page 16 non-SPECTRA approved modifications. c. Claims are made within the warranty period. 2. This warranty does not cover damage or equipment failure caused by electrical wiring not in compliance with electrical codes or SPECTRA user manual specifications, or failure to provide reasonable care and necessary maintenance as outlined in the user manual.
Need help?
Do you have a question about the SB6080 and is the answer not in the manual?
Questions and answers