
Summary of Contents for Viascope ipscan probe 600
- Page 1 IPScan Probe 600 User’s Guide Version : 3.5.0.0 ViaScope Int. Tel. 82-2-3412-9700 http://www.viascope.com Technical Support: help@viascope.com...
-
Page 2: Table Of Contents
IPScan Probe 600 User’s Guide Contents 1. INTRODUCTION.................... 3 1.1. A ..................4 BOUT 1.2. IPS ................5 RODUCT AMILY 1.3. IPS 600 C ........6 ROBE OMPOSITION AND NSTALLATION 1.3.1. Introduction and Composition ............6 1.3.2. Installation..................8 1.3.3. Accessing the Probe Using HyperTerminal ........9 2. -
Page 3: Introduction
1. Introduction This chapter contains overall information about IPScan and its composition. 1.1. About IPScan 1.2. IPScan Product Family 1.3. IPScan Probe 600 Composition and Installation 1.3.1. Introduction and Composition a. Features b. Probe Specification c. IPScan Probe 600 Composition d. -
Page 4: About Ipscan
IPScan Probe 600 User’s Guide 1.1. About IPScan IPScan is IP/MAC resource management and Layer 2 network security solution that empowers IT managers to increase work efficiency and network security. IP based networking environment offered the easiness to access the network, but at the same time, it became a management issue for IT manager. -
Page 5: Ipscan Product Family
IPScan Probe 600 User’s Guide 1.2. IPScan Product Family IPScan product family is composed of the followings: ① IPScan Server : Communication module that receives data from IPScan Probe and stores in the database. ② IPScan Console : Actual user interface to monitor and manage data. -
Page 6: Ipscan Probe 600 Composition And Installation
1.3. IPScan Probe 600 Composition and Installation 1.3.1. Introduction and Composition IPScan Probe 600 is installed in multi segment and/or a regional office up to 2,500 active IP devices. It communicates with IPScan Server in the central location to store data and receive commands. -
Page 7: Ipscan Probe 600 Composition
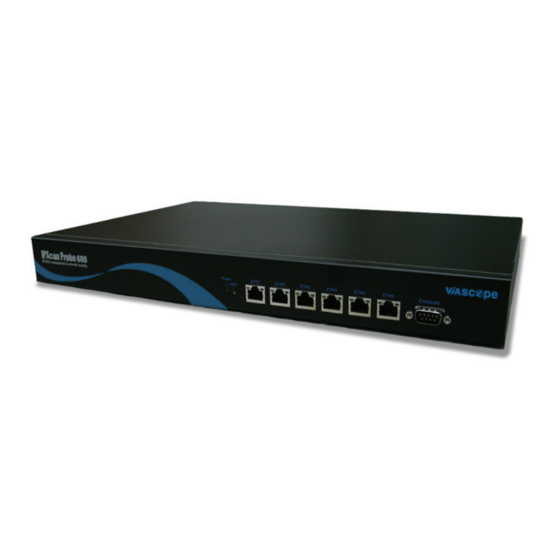
IPScan Probe 600 Composition The package contains the following items. ① IPScan Probe 600 1 each ② IPScan Probe 600 User’s Guide 1 each ③ Power cable 1 each ④ RS232 serial console cable 1 each ⑤ RJ45 cable for Ethernet connection 2 each ⑥... -
Page 8: Installation
IPScan Probe 600 User’s Guide 1.3.2. Installation IPScan Probe 600 deployment does not require network reconfiguration or upgrade. PLEASE KEEP IN MIND THAT ONLY ONE PROBE IS RECOMMENDED WITHIN ONE BROADCASTING DOMAIN. DO NOT INSTALL MORE THAN ONE PROBE WITHIN A SAME SEGMENT. -
Page 9: Accessing The Probe Using Hyperterminal
IPScan Probe 600 User’s Guide 1.3.3. Accessing the Probe Using HyperTerminal After the installation, you may access IPScan Probe 600 using a standard terminal or HyperTerminal program provided by Windows based PC. Define below values, and select [OK] to connect to IPScan Probe. -
Page 10: Getting Started
IPScan Probe 600 User’s Guide IP/MAC resource Management and network security solution www.scope.co.kr 2. Getting Started This chapter describes how the functions of the IPScan Probe 600 are configured and applied. 2.1. Main Menu 2.2. System 2.2.1. Password 2.2.2. System Configuration by Ethernet Port 2.2.2.1. -
Page 11: Main Menu
IPScan Probe 600 User’s Guide 2.1. Main Menu [Main Menu] contains necessary components to manage and operate IPScan Probe 600. All menus can be accessed by entering the number located in the left. Main Menu System Return to Default Save Save &... -
Page 12: System
IPScan Probe 600 User’s Guide 2.2. System You can configure the Password and communication interval for each Ethernet Port. Select 1. [System] from [Main Menu]. Step1 Main Menu Select a number : 1 Step2 System Password Ethernet Port 1 Ethernet Port 2... -
Page 13: System Configuration By Ethernet Port
IPScan Probe 600 User’s Guide 2.2.2 System Configuration by Ethernet Port You can define data forwarding and communication intervals between the probe and the server. Step1 Select 2. [Ethernet Port 1] from [System]. When the menu is shown, select a number you wish to configure and then press [Enter]. -
Page 14: Arp Check Interval [Online](Min)/[Offline](Min)
IPScan Probe 600 User’s Guide 2.2.2.1. ARP check Interval [Online](min)/[Offline](min) It is to define the intervals for IPScan Probe 600 to send out ARP packets to online or offline IP within the managing segment for the update. Step1 For Online IP, select 1, [ARP check Interval [Online](min)] from [Ethernet Port No] menu. -
Page 15: Automatic Private Ip Addressing Detection
IPScan Probe 600 User’s Guide 2.2.2.3. Automatic Private IP addressing detection If your network is using DHCP server to assign IP address, there are instances that some users are unable to obtain IP addresses. When a host is unable to obtain an DHCP IP, Microsoft Windows OS automatically assigns an IP (169.254.X.X.). -
Page 16: Excess Arp Packet Suspension Period (Sec)
IPScan Probe 600 User’s Guide 2.2.2.5. Excess ARP Packet suspension period (sec) If the probe exceeds the maximum number defined at [2.2.4. Maximum ARP Packet per sec], you can suspend and control the ARP packet generation for a brief period to prevent traffic overflow. -
Page 17: Lan
IPScan Probe 600 User’s Guide 2.3. LAN LAN is a must configuration for IPScan Probe 600 to be connected to the network. . Step1 Select 2. [LAN] from [Main Menu]. Below screen will appear. Choose Ethernet Port number you wish to define, and then Step2 define the network configuration. -
Page 18: Master Port
This is the function to define the Ethernet Port for communication between the IPScan Server the Probe. IPScan Probe 600 has 6 Ethernet Ports; among them you can choose one communication Port, and assign other 5 Ports for gathering and monitoring the information. - Page 19 IPScan Probe 600 User’s Guide b. Using Multi Ethernet Ports Assign Ethernet Port 1 as the Master Port, and other Ports are for gathering information and send it to the Ethernet Port1 (Master Port). ① Ethernet Port 1 [192.168.101.20] Netmask [255.255.255.0]...
- Page 20 IPScan Probe 600 User’s Guide c. Master Port is only for the communication Assign Ethernet Port1 as a Master Port. This Master Port is not for the gathering, but just communicates with the server. ① Ethernet Port 1 [192.168.101.20] Netmask [255.255.255.0]...
-
Page 21: Return To Default
Note IPScan Probe 600 uses different system type with other IPScan Probes, thus when you shutdown the Probe 600 you must take a step of [6.System Shutdown] to terminate the system safely. -
Page 22: System Status
IPScan Probe 600 User’s Guide 2.8. System Status It shows the system status information of the Probe. This information is changed or configured by selecting functions and options from the Probe as well as the IPScan Server and the Console. -
Page 23: Operating Config
IPScan Probe 600 User’s Guide 2.9. Operating Config Enables you to choose different blocking methods and defines an interval for the probe send SNMP query to the switch. Step1 Select 8. [Operating Config] from [Main Menu] Step2 Operating Config Main Menu... -
Page 24: Take Over
IPScan Probe 600 User’s Guide 2.10. Take Over IPScan Probe 600 supports H.A. (high availability) feature to backup the probe in case of any failure. It is necessary if you want to use two probes (Master Probe and Slave Probe) to minimize probe downtime. -
Page 25: Ping Test
IPScan Probe 600 User’s Guide Step4 Checking Interval configuration Define interval that the Slave Probe checks the Master Probe’s status Select 4. Checking Interval and enter value from 0 to 1440 seconds. Default interval is 10 sec. > Select a Number : 3 >... -
Page 26: Ping Test
IPScan Probe 600 User’s Guide 2.11. Ping Test You can run ping tests to check for the probe’s connection to the network. Select 10. [Ping Test] from [Main Menu]. Step1 Main Menu. Select a number : 10 Enter the target IP address. : 192.168.101.1 192.168.101.1 is alive. -
Page 27: Appendix
IPScan Probe 600 User’s Guide IP/MAC resource Management and network security solution www.scope.co.kr 3. Appendix This chapter contains the port description and Q&A. 3.1. Port Description 3.2. Network Configuration 3.3 Q&A... -
Page 28: Port Description
IPScan Probe 600 User’s Guide 3.1. Port Description In order for IPScan to properly monitor and manage the network, IPScan uses below port numbers. If your network has firewall and/or security related products, be sure to check if there are conflicting ports in order to prevent any network problem. -
Page 29: Network Configuration
IPScan Probe 600 User’s Guide 3.2. Network Configuration a. Install the Probe in each segment and assign Ethernet Port 1 as a Master Port VLAN 0 10.10.10.1 – 10.10.30.254 IPScan Probe 600 Backbone VLAN 1 10.10.40.1 – 10.10.60.254 VLAN 2 10.10.70.1 – 10.10.90.254... - Page 30 IPScan Probe 600 User’s Guide . Install the Probe to Trunk Port in multi VLAN environment VLAN 0 VLAN 1 VLAN 2 IPScan Probe 600 Backbone Trunk Port 802.1q VLAN 0,1,2 VLAN 3 VLAN 4 VLAN5 Trunk Port 802.1q IPScan...
-
Page 31: Q&A
IPScan Probe 600 User’s Guide 3.2. Q&A When you get some troubles running the IPScan Probe, see the Questions and Answers down below. Q) There is an unexpected IP/MAC blocking by IPScan when the [IP block] function has been applied on the network.
Need help?
Do you have a question about the ipscan probe 600 and is the answer not in the manual?
Questions and answers