Advertisement
Advertisement

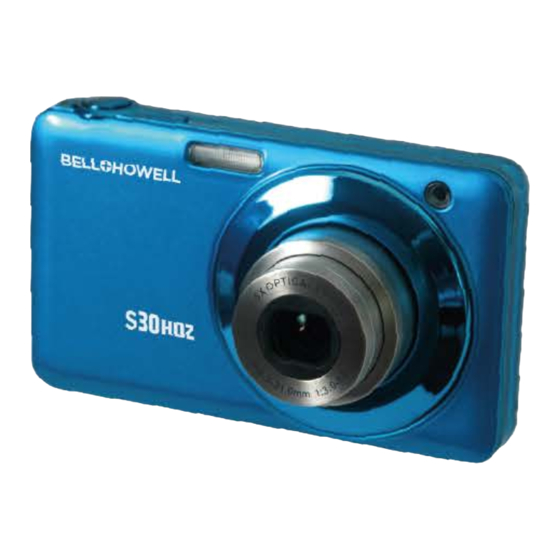
Related Manuals for Bell and Howell S30 HDZ


Summary of Contents for Bell and Howell S30 HDZ
-
Page 2: Table Of Contents
Contents Safety Precautions................. 1 The Components Guide................. 2 Specifications..................4 User instruction..................6 Operation Instructions................12 Other functions..................21 Maintenance and security..............23 Breakdown maintenance..............25... -
Page 3: Safety Precautions
1. Safety Precautions Ease stop operations the equipment if anything abnormal exists. The user is going to the take the responsibility if not operate according to the manual. Do not allow the equipment to come into contact with, or become immersed in, water or other liquids. -
Page 4: The Components Guide
2. The components guide... -
Page 6: Specifications
3. Specifications 4480*3360 、 4416*3312 、 4000*3000 、 3648*2736 、 3456*2592 、 3264*2448 、 Picture definition 3072*2304 、 2592*1944 、 2048*1536 、 1600*1200 、 1280*960 、 640*480 Storage material External SD card(1GB – 32GB) File format JPEG、AVI photos:single, continuous shooting Timing self-taking (2 seconds, 5 seconds, 10 Shooting model seconds) - Page 7 zoom 5 x optical zoom plus 4 times digital zoom Automatic, sunny, cloudy, tungsten lamp, White balance fluorescent lamp. Exposure value (+ 3, + 2, + 1, 0, 1, 2 and 3) exposure control Automatic, anti- red -eye , flash, flash closed Flash mode Light sensibility automatic,100,200,400...
-
Page 8: User Instruction
WIN98/2000/ME/XP Operating system 4.User instruction Installing the lithium battery 1) Open the battery cover by the direction of the arrow. 2) Insert the battery according to the instruction on it and close the battery cover. Warning: Take out the battery if the camera won’t be used for long. The installation of SD memory card 1) Insert and remove SD memory cards (while no inserting SD card, the camera can take only one photo.) - Page 9 4) Push the SD card with a finger when you hear a click, then release it. Notice: inserting or pulling out the cards, in the process if you can hear the” click" sound, namely that represents the SD card has been installed or removed.
- Page 10 Indicator instruction 1) When the camera opens, the red light is on. Entering into the previewing interface, the red indicator will be off. When the camera is in charging, the red indicator light will be flashing. 2) When the camera is shuttled, using the USB line to the computer for charging, the red indicator light will be on, when the charging is finished, the indicator light will be off or flashing.
- Page 11 model used to shoot video of AVI format. Operating tips: Keys functions: 1) Power key: click this button to switch on/off. 2) Shutter Button: Shot, Record video and audio play/pause. 3) W key: Zoom out the photo& Zoom out 4) T key: Zoon in the photo & Zoon in 5) Photo preview button: entering and exiting the photo preview 6) MENU button: turn on/off the MENU 7) UP button(Micro)...
- Page 12 12) DISP key: shut down, shut off the screen, and shut the OSD display; Taking pictures by the MENU button in the MENU mode, in the title bar you can see photo taking and set up two options, press the right/left button around can switch between each other.
- Page 13 shaking, micro, priority, the smiling face film, even clap, shooting mode, white balance” these nine options; Video model includes” White balance, size, and micro” three options. Setting option includes, "Exposure mode, sharpness, image quality, digital zoom, date label, the date/time, automatic shutdown, language, frequency, formatting, the default Settings, key voices”...
-
Page 14: Operation Instructions
Put the camera to the point of the people and things you need, pressing the photo button, while you hearted the sound of the camera, it means you have already taken one picture, (when the camera is store photos, move the camera can lead to photo blur, need to wait my camera into the preview after state again, move the camera) In video mode according to the key to start taking pictures video/stop video, video and sound, sound will record to within 1.0... - Page 15 night: used for low lighting shoot the scene people: used for filming in soft background figures Scene: apply to the photograph sports: used for taking the fast photos in bright clear place Party: suitable for candle environment to shoot the beach: used for filming with a distinct blue water scene shore high sensitivity: suitable for the low lighting shot 1.2) Image size...
- Page 16 9M: 3456*2592 8M: 3264*2448 7M: 3072*2304 5M: 2592*1944、 3M: 2048*1536、 2M: 1600*1200 1M: 1280*960 VGA:640*480 Choice of video size: VGA (640*480) and QVGA (320*240) .Other setting of mane, pals refer to photo shooting mode. 1.3) Avoiding flutter Enter “Anti Shake” menu to select ON/OFF. Once power on the Anti shakes function, the photo exposure time could be reduced to avoid fuzziness of image due to flutter.
- Page 17 1.4) Macros hot Enter “macros hot” menu, selection/OFF to turn on or off macros hot. 1.5) Face Priority Enter Face Priority interface to select ON/OFF. There will appear green face recognize focus frame after power on the face priority function. And when take the photos it is will refer to face brightness of photos and background to make the face more clearly.
- Page 18 button to take several photos after power on the Continuous. 1.8) Shooting mode Enter shooting mode menu, there are: Off, 2 Sec, 5Sec. 10Sec Self-timer, which could be used in Continuous Shooting mode. After setting finished, count-down, sound, and self-timer indicator light will be synchronized display on the screen.
- Page 19 can be manually set according to the environment, to achieve the best shooting results. 2.2) ISO ISO: auto, 100, 200, 400. The higher ISO settings, the more clear and bright pictures taken in dark sconce (side effects: noise photos noise Increase) 2.3) Sharpness sharpness menu: standard, sharp, soft, the higher sharpness settings, the outlines of object clearer.
- Page 20 2.5) Digital zoom Enter digital zoom menu, could turn on/off digital zoom. 2.6) Date Stamp Enter Stamp menu, choose “ON/OFF” to set the date to be showed or not on the photo. Date will be showed on the picture after you choose ON, and will not be showed when you choose OFF.
- Page 21 operation to avoid losses caused by battery power 2.9) Language Select the language in the menu, such as Italian, Spanish etc 2.10) Power Frequency Choose 50HZ or 60HZ (The incorrect setting of the mains frequency result in stripes in the photo and video when reviewing.) 2.11) Formatting Format the built-in flash memory or SD card inserted in.
- Page 22 camera will enter mute mode. After setting “Exposure, ISO, Image quality”, according icon will be showed when preview. Video recording 1) White balance Auto, Sun light, cloudy, fluorescent, Tungsten 2) Size Choose”640*480” VGA or 320*240QVGA 3) Macro Choose ON&OFF in the Macro Menu. This function is the same in the capture model and DV model Playback The file can be rotate, protect, delete in the playback model.
-
Page 23: Other Functions
1.1) Rotate Press FUNC SET and select Rotate(90°, 180°, 270°), Save, Return. The function cannot work without SD card or when playing video file. 1.2) Protect Photo / video file can be locked or unlocked in the protect menu, Locked picture can not be deleted, but will be formatted. Locked files will display a key icon at the top 1.3) Delete the File Erase the photo/video in the Delete menu while the locked file... - Page 24 In drake scenes, flash can be used to increase. Exposure compensation. In preview mode, press the flash button to open, you can switch between auto-flash, anytime flash, red-eye reduction flash, flash off. And the flash will work according to environment when using the automatic flash model. Optical Zoom/Digital zoom function Press T/W to make the optical zoom.
-
Page 25: Maintenance And Security
Camera Connect USB, keep pressing shutter button, and then click the power button, release shutter button when the screen display PC Camera., Open My Computer on the desktop and open USB video device, 7. Maintenance and Safety Camera 1) Keep the lens and the LCD screen from hard object and clean with soft cloth. - Page 26 Li-battery Li-battery has a life span. Please renew the battery once it’s not in Memory card Do not expose memory card to high temperature, wet or static place otherwise the data in it will be distorted. Safety Precaution Do not disconnect or fix the device by yourself to avoid danger of electric shock.
-
Page 27: Breakdown Maintenance
8. Breakdown maintenance No response to the operation Can not be turned on or cameras functions do not work Possible reasons solutions Camera powers off pressing the key Power to start Wrong installation Install the Lithium correctly Lithium lithium Power runs off Recharge the battery Battery work... - Page 28 Moisture has condensed in the Power on after the camera becomes cameras system make the camera connected while connected with the computer, to computer camera doesn’t work Moisture condensation: water vapor in the air quickly cooled into the water droplets when air is cold outside. No response when pressing the shutter Possible reasons solutions...
- Page 29 Remove the video and insert the new card The card is full Before deleting, please download the main image to computer. Power runs off (battery icon shinning)when picture or video Recharge the battery is writing into the card change a card or empty the memory The card is full card inserting the new card or put the”...
- Page 30 Possible reasons solutions the fleshing light is set as choose the flesh outside unflashy mode unflashy mode set the fleshing mode as the force The object is lightened mode if you want the Light flash The LCD is not clear Possible Reasons Solutions Adjust the distance between the...
- Page 31 The camera powers off press the key Power to start The camera is in shooting Press key Picture Review to mode switch to the playback mode Something wrong with the Change the card or format the card card Disconnected the video wire from make the cameras connected TV(connect the video wire to the to the TV...
- Page 32 Bad quality of the picture/video Picture/video is too bright possible reasons solutions the flash is set as the force choose the flash mode except the flashing model force flashing mode Change the white balance mode or The object is too bright the position of the object The exposure setting is too Adjust the exposure...
- Page 33 choose the flash model except the The flash is set as unflashy unflashy mode mode The object is too small and set the flash mode as the force back from the light flashing mode The color is unnatural when shooting indoor possible reasons solutions Adjust the white balance according...
Need help?
Do you have a question about the S30 HDZ and is the answer not in the manual?
Questions and answers