Table of Contents
Advertisement
Thank you for your iRULU purchase.
We pride ourselves on high-quality, affordable
products that give you the
best user experience possible!
Please read all instructions carefully before use and keep for future reference.
The design and features are subject to change without further notice.
Please download French, German, Spanish, Italian user manual from
http://www.irulu.com/download/lists.html.
1
Advertisement
Table of Contents

Related Manuals for IRULU V3


Summary of Contents for IRULU V3
- Page 1 Thank you for your iRULU purchase. We pride ourselves on high-quality, affordable products that give you the best user experience possible! Please read all instructions carefully before use and keep for future reference. The design and features are subject to change without further notice.
-
Page 2: Table Of Contents
Contents 1 . A ......... 3 PPEARANCE AND EYPAD PERATIONS 2. U ............. 4 SING EMORY ARD AS 3. WLAN....................5 4. B ..................7 LUETOOTH 5. M ......................8 6. D .................... 10 IALLING 7. M ..................13 ESSAGING 8. C ..................15 ONTACTS 9. -
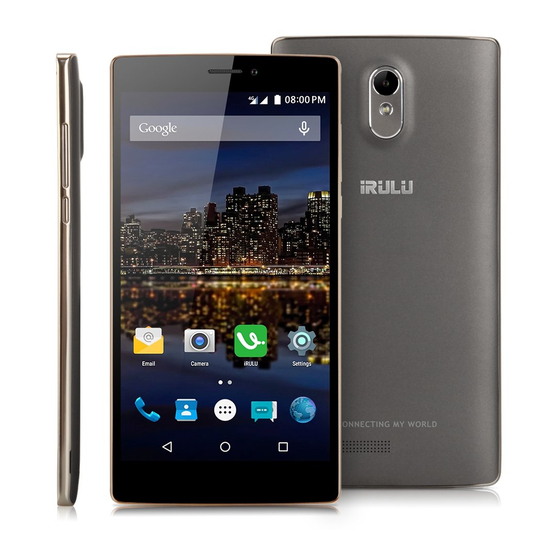
Page 3: Ppearance And Eypad Perations
1 . APPEARANCE AND KEYPAD OPERATIONS Keys Functions Press this button to return home from any application Press it to open 1 Home recently opened application Press it to open the menu 2 Menu Press it to return to the previous interface, or to close a dialog box, 3 Return options menu, notification panel or the keypad 4 Power... -
Page 4: Using Memory Card Asu Disk
7 Rear Entering the camera interface Camera 8 Front Entering the camera interface, switched to the front camera can Camera photo yourself. 2. Using the Memory Card as a U Disk If you want to send music, pictures or other files to the phone memory card from the computer, you must first set the memory card as a U disk. -
Page 5: Wlan
• How to use the U disk on different PC operating systems 1) WIN7: It can be used directly. 2) XP: Update the Windows Media Player version to “Windows Media Player 11.” 3) Install the “wpdmtp.inf” driver. 4) Vista: Unconfirmed Notice: When operate an app such as “Phone assistant”... - Page 6 to connect it. 5) When the phone is connected to the wireless network, the status box will show this Wi-Fi icon and the approximate signal strength (display in the number of bars). If you touch the connected network, the phone will display the name, status, speed, signal, strength, security, information and IP address of Wi-Fi network.
-
Page 7: Bluetooth
3) Touch Bluetooth settings, all the devices founded will display in the list under the icon. (Touch the “iRULU V3” box and set it to be “visible to all nearby Bluetooth devices.” The other Bluetooth devices will be able to find the phone.) -
Page 8: Mail
does not exceed two minutes. • Pairing and connection of Bluetooth headset 1) Go to home>menu> settings. 2) Touch wireless and network>Bluetooth settings, then select Bluetooth box. Your phone will scan for the Bluetooth devices within range and show the found devices in the list. - Page 9 new e-mail account. a. Go to Gmail, and the Google account setting interface appears. Touch “New” to create an account, and then enter first name, last name and e-mail account. b. Google servers will determine whether the e-mail address can be used. If so, a new interface appears to prompt you to enter the password.
-
Page 10: Dialling
rule, and then click “Next.” To complete the setting, synchronize the mailbox. • Create and send e-mail When creating mails, select Mails > Create mails. Enter the address (recipient), theme and contents. Press MENU you could choose “Append” or “Add Cc/Bcc,” select “Send,”... - Page 11 • Call logs Every call in and out via a SIM card will be recorded in the call log. The top-left portion of every call record will show the corresponding SIM number. All phone numbers in the call log can be dialed by clicking the button ”dial” on the right side of the screen.
- Page 12 automatically, which could save batteries and prevent an inadvertent touch. • Refuse to answer the phone a. When the phone is standby, and calling comes, press “refuse” button and slide leftward to the middle button. You can then refuse the call. b.
-
Page 13: Messaging
5) Additional Settings: a. My phone number b. Call waiting Internet call 1) Account 2) Use Internet calling Other Settings 1) Fixed Dialing Numbers 2) Minute Reminder: Turn on the minute reminder to signal at 50s of every minute 3) Quick Response 7. - Page 14 When creating a message, it defaults as SMS but will switch to MMS when the following operations are performed. You can send MMS by clicking “Send” after editing. 1) In the interface of “Edit,” click the “+key” button. 2) Click “Attach,” you can add the following attachments, then it will automatically switch to MMS.
-
Page 15: Contacts
When a message is sent or re-sent, a little yellow letter will appear. The number “1” or “2” on the letter refers to the SIM card. When a message fails to send, a red triangle with an exclamation point (!) will appear. -
Page 16: Internet Explorer
in the "Type person's name" column. It can be used in contact search, and then you can add the contact to the group. Finally, click “Finish" to complete. 3) In a group, click the Menu button, open the menu functions. a. -
Page 17: Sound Recorder
b. Click the bookmark in the bookmark list to open the URL. 5) Menu>More a. Add bookmarks: Save the current URL as a bookmark. b. Find on page: Search what you need in the current page. c. Select text: Click and drag to select a piece of text on a page. d. -
Page 18: Calculator
• Alarm After the alarm is set, the phone will alert you by ringing or vibrating when it is time. Press Menu to add an alarm, or add it from the adding interface. You can freely set the alarm according to your needs. You can edit the current alarm. -
Page 19: Camera
13. Camera 13.1. Camera • Prior preparation Install memory card before using the camera or video camera. All photos or videos taken by the phone are stored in the memory card. • Open camera Go to Home> Menu>Camera 1) Touch the “Shutter” button on the screen. 2) The photos you take will be saved to the camera’s galley folder with the time they were taken. -
Page 20: Gallery
Install the memory card before using the camera or video camera. All photos and videos taken by the phone are stored in the memory card. • Take video 1) Aim your object with the screen. 2) Touch the “Shutter” button on the screen. 3) After taking, videos will be saved to the galley folder with the time they were taken. - Page 21 2) Use images After taking pictures, you can view them and share them with your friends. a. Use E-mail to send pictures: choose Gmail or E-mail, pictures will be automatically added to an E-mail. Write your message, click send. b. Use Messaging to send pictures: Select the message, and pictures will be additional to the MMS.
-
Page 22: Music
15. Music The phone can play digital audio files stored in the memory card. The following formats are available: AMR, M4A, MIDI, MP3, WAV and OGG. • Open Music Go to home>applications>music. The interface of Music Media appears. • Music Media Your music files are classified according to the following four categories: Artists, Albums, Songs and Playlists. -
Page 23: Fm Radio
page according week. 4) Today interface displays a day's schedule. In the interface of month or week use gray to highlight the day. 5) Month interface displays a month's schedule (last clicked date). Slide around to turn the page according to the month. •... -
Page 24: Settings
4) You must insert wired headphones as an antenna, but if you click the “Horn” button you can also open the FM radio. 5) Click the five-pointed star icon on the rear of the frequency, and the channel will be added to the collection channel list. •... - Page 25 5. More… a. Airplane mode: Touch it to open or close. b. Default SMS app c. Tethering & portable hotspot d. VPN e. Mobile networks f. USB Internet • Sound & Display 1. Audio profiles This option gives the phone tones settings under the status of receiving calls or notification, including: vibration, volume, ring tones, ring tones notification and feedback (button operation tone, Select Sound, screen lock tone, touch).
- Page 26 b. Touch PIN: Enter a PIN to unlock the screen. c. Touch password: Set a password to unlock the screen. d. Touch “No”: Stop this application. 2) Set up SIM card lock: Enter a PIN (4-8 digits) to set the lock of SIM. The SIM card PIN (Personal Identification Number) is to prevent unauthorized use of SIM cards.
- Page 27 4. Accessibility 1) Large text 2) Power button ends call: Select to set the Power button to end the call. You can press "Power" to end the call but not shut down the screen. 3) Auto-rotate screen 4) Speak passwords 5) Touch &...
- Page 28 • Device manager 1. Date and Time 1) Automation: Use date and time provided by Network. 2) Setting Date: Touch “+” and “-” to set date. 3) Selecting Time Zone: Select Time Zone according to where you are. For China please select “GMT+08:00, China Standard Time.” 4) Setting Time: Touch “+”...
-
Page 29: Notices For The Use Of Phone
19. Notices for the use of phone Your phone is a product of superior design and craftsmanship and should be treated with care. The following suggestions can help you comply with the terms of repair kits, to extend the life of mobile phone. 1) Keep the mobile phone, parts and components out of the reach of children. - Page 30 Check the battery power if it is too low. Connect the adapter and power on again. After powering on, the screen starts blinking and powering off suddenly. When the battery power is low, please charge it in time. CAUTION! Please charge the battery fully when using the unit for the first time. Notes: Please charge only by using the supplied AC power adapter.
- Page 31 Menu icon in the upper-right corner and choose “Remove account.” If you have any questions, please contact us. Website: http://www.irulu.com E-mail: sales@irulu.com Tel: 800-542-179 FCC Statement 1. This device complies with Part 15 of the FCC Rules. Operation is subject to the following two conditions: (1) This device may not cause harmful interference.
- Page 32 FCC and can be found under the Display Grant section of http://www.fcc.gov/ oet/fccid after searching on FCC ID: 2ADOV-V3 Additional information on Specific Absorption Rates (SAR) can be found on the Cellular Telecommunications Industry Asso-ciation (CTIA) web-site at http://www.wow-com.com. * In the United States and Canada, the SAR limit for mobile phones used by the public is 1.6 watts/kg (W/kg)
Need help?
Do you have a question about the V3 and is the answer not in the manual?
Questions and answers
mein irulu v3 habe ich zurückgesetzt ohne gmailadresse zu entfernen (verknüpfung) nun kann ich es **** mehr einrichten da die FPR noch aktiviert ist wie bekomme ich das wieder entsperrt?