Advertisement
Quick Links
6/16/2017
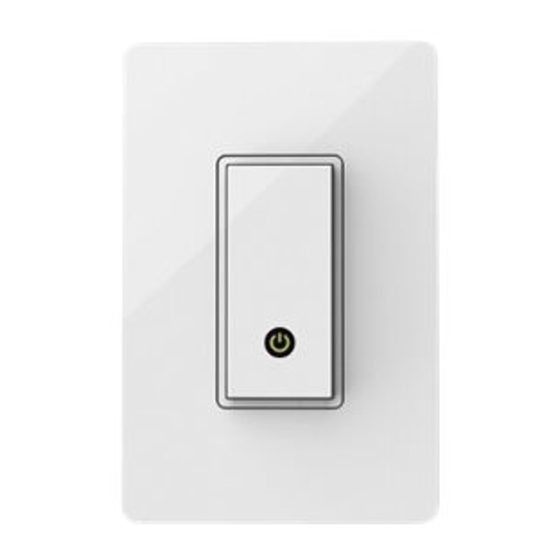
Setting up the Wemo® WiFi Smart
Light Switch, F7C030
Setting up the Wemo® WiFi Smart Light Switch, F7C030 requires two procedures:
ii.
Installation of the Wemo Light Switch to the electrical line
If you're familiar and comfortable with basic electrical work, it only takes a few minutes to
set up your Wemo Light Switch. Otherwise, do not try and do it yourself, please call a
professional electrician.
Electrical Installation Requirements
http://belkin.force.com/Articles/articles/en_US/Troubleshooting_and_Tutorials/9342/p?pubstatus=o#Electrical
Installation of the Wemo Light Switch to the electrical line
i.
Wemo App and Wemo Light Switch Setup
A Neutral wire (requires all three AC electrical connections at the wall switch)
A single pole light switch (not compatible with lights controlled by more than one
switch)
Knowledge Article
1/14
Advertisement

Related Manuals for Belkin Wemo F7C030


Summary of Contents for Belkin Wemo F7C030
- Page 1 6/16/2017 Knowledge Article Setting up the Wemo® WiFi Smart Light Switch, F7C030 Setting up the Wemo® WiFi Smart Light Switch, F7C030 requires two procedures: Installation of the Wemo Light Switch to the electrical line Wemo App and Wemo Light Switch Setup Installation of the Wemo Light Switch to the electrical line If you’re familiar and comfortable with basic electrical work, it only takes a few minutes to set up your Wemo Light Switch. Otherwise, do not try and do it yourself, please call a professional electrician. Electrical Installation Requirements A Neutral wire (requires all three AC electrical connections at the wall switch) A single pole light switch (not compatible with lights controlled by more than one switch) http://belkin.force.com/Articles/articles/en_US/Troubleshooting_and_Tutorials/9342/p?pubstatus=o#Electrical 1/14...
- Page 2 6/16/2017 Knowledge Article The light switch box must be 2 inches deep IMPORTANT: The Wemo Light Switch is not designed to work with metal faceplates because they interfere with the WiFi signal. It is recommended to use the light switch for residential and dry indoor locations only. Once these electrical requirements are complete, proceed with the electrical installation instructions below. Step 1: Shut OFF the power at the circuit breaker for the switch you are replacing. You may need to shut OFF more than one circuit breaker/switch to make sure the switch you're working on is powered OFF. IMPORTANT: USE A NONCONTACT VOLTAGE DETECTOR OR FLIP YOUR LIGHT SWITCH A FEW TIMES TO MAKE SURE THAT THE POWER IS OFF. Step 2: Unscrew and disconnect the wires from the old switch using a screw driver. Step 3: Identify the wires on your Wemo Light Switch. Switch (Live/Load) wires On this light switch, the Switch wires are the two black wires. Every light switch will have both of these wires. But they could be either red or black in color. Neutral wire The Wemo Light Switch requires this wire, but isn't always present in your electrical wiring at home. If present, the neutral wire is normally found within the wall box with a wire nut on top of it. http://belkin.force.com/Articles/articles/en_US/Troubleshooting_and_Tutorials/9342/p?pubstatus=o#Electrical 2/14...
- Page 3 6/16/2017 Knowledge Article Ground wire If present, it should be plugged into the top of the light switch here. It's normally green or copper in color. Don't worry if you can't find the ground wire, Wemo Light Switch doesn't require one. WARNING! THE FOLLOWING WIRING SCENARIOS MAY BE DANGEROUS OR ILLEGAL. NOTE: For more details, see Wiring your Wemo® WiFi Smart Light Switch, F7C030 Step 4: Install the Wemo Light Switch. Connect each of the two black wires from the Wemo Light Switch to the available Switch (Live/Load) wires. In case you found more than one wire, just place them into the wire nut. NOTE: The wire nut is the caplike object connecting the wires. http://belkin.force.com/Articles/articles/en_US/Troubleshooting_and_Tutorials/9342/p?pubstatus=o#Electrical 3/14...
- Page 4 6/16/2017 Knowledge Article Step 5: If you have a Ground wire (optional), disconnect it from the old switch and connect it to the green wire on the Wemo Light Switch. Step 6: Unscrew the wire nut that is holding together the existing Neutral wires. Connect the white wire from the Wemo Light Switch to the outlet's exposed Neutral wires. Securely screw them together inside the wire nut. IMPORTANT: Wrap electrical tape around the wire nuts to make sure the copper conductor is fully concealed. Step 7: Screw in the Wemo Light Switch and attach the faceplate. Push all the wires back into the wall box and try to allow as much space for the switch as possible. Align the two screw terminals and screw in the Wemo Light Switch. Attach the faceplate. NOTE: Belkin discourages using metal faceplates as they may interfere with your WiFi signal. http://belkin.force.com/Articles/articles/en_US/Troubleshooting_and_Tutorials/9342/p?pubstatus=o#Electrical 4/14...
- Page 5 6/16/2017 Knowledge Article Step 8: Turn the power back ON at your circuit breaker. QUICK TIP: To verify that the Wemo Light Switch has been successfully installed to your electrical line, manually switch it ON. You have now installed the Wemo Light Switch to your electrical line. Wemo App and Wemo Light Switch Setup Before setting up the Wemo Light Switch with the Wemo App, make sure you have the following: A Wemo Light Switch that is already installed to your electrical line and is functioning. Active WiFi and internet connection. The WiFi name (SSID) and password of your router. To know how to get them, click here. An iOs 9.0 device or higher; or an Android™ 4.4 device or higher. Once these requirements are complete, proceed with the instructions below. Step 1: Download and install the Wemo App on your mobile device from ® the App Store if you are using an iOS device or from the Google Play™ Store if you are using an Android™ device. Step 2: Enable the WiFi feature of your mobile device and make sure it is connected to your WiFi. This is required to ensure no error is encountered upon installation. NOTE: If you have a dualband router, Wemo can only connect to your 2.4 GHz band. http://belkin.force.com/Articles/articles/en_US/Troubleshooting_and_Tutorials/9342/p?pubstatus=o#Electrical 5/14...
- Page 6 6/16/2017 Knowledge Article Step 3: Once connected to WiFi, look for the WiFi Name of the Wemo Light Switch which will be WeMo.Light.xxx and tap it to connect your device. NOTE: If you have multiple Wemo devices, connect to the one with the same Wemo ID at the back of the device. The Wemo ID is the word WeMo, followed by Wemo model, and then three alphanumeric characters. http://belkin.force.com/Articles/articles/en_US/Troubleshooting_and_Tutorials/9342/p?pubstatus=o#Electrical 6/14...
- Page 7 6/16/2017 Knowledge Article QUICK TIP: If the Wemo Light Switch does not show up in the WiFi search, you can try setting up with your mobile device near the Wemo Light Switch. Alternatively, you can press the Reset button on the faceplate of the light switch. For stepbystep reset instructions, click here. Step 4: Once connected to the Wemo Light Switch, launch the Wemo App. Then, on the Let's get started! screen, tap Next. http://belkin.force.com/Articles/articles/en_US/Troubleshooting_and_Tutorials/9342/p?pubstatus=o#Electrical 7/14...
- Page 8 6/16/2017 Knowledge Article Step 5: Enter your email address then tap Next. http://belkin.force.com/Articles/articles/en_US/Troubleshooting_and_Tutorials/9342/p?pubstatus=o#Electrical 8/14...
- Page 9 6/16/2017 Knowledge Article Step 6: Select your WiFi and enter your password. http://belkin.force.com/Articles/articles/en_US/Troubleshooting_and_Tutorials/9342/p?pubstatus=o#Electrical 9/14...
- Page 10 6/16/2017 Knowledge Article Wait while the Wemo App connects to your WiFi. http://belkin.force.com/Articles/articles/en_US/Troubleshooting_and_Tutorials/9342/p?pubstatus=o#Electrical 10/14...
- Page 11 6/16/2017 Knowledge Article QUICK TIP: If the Wemo encounters difficulty connecting to the WiFi , try refreshing your mobile device’s WiFi and try connecting again. For more troubleshooting instructions, click here. The Remote Access Enabled message will then pop up. By default, this feature is enabled. http://belkin.force.com/Articles/articles/en_US/Troubleshooting_and_Tutorials/9342/p?pubstatus=o#Electrical 11/14...
- Page 12 6/16/2017 Knowledge Article Step 7: When the Wemo Light Switch setup is complete, the Wemo App will look for devices. If you have multiple Wemo devices, the Wemo App will display all these. You should see the Wemo Light Switch on the list. QUICK TIP: You can customize the Name, Device Picture, and Reset Options of your Wemo Light Switch by tapping the pencil icon and then selecting the Wemo Light Switch. http://belkin.force.com/Articles/articles/en_US/Troubleshooting_and_Tutorials/9342/p?pubstatus=o#Electrical 12/14...
- Page 13 6/16/2017 Knowledge Article You should now have successfully installed the Wemo Light Switch with the Wemo App. With the Wemo App, you can create different rules for your Wemo Light Switch. To learn how, click here. Related Articles: Wiring your Wemo® WiFi Smart Light Switch, F7C030 Meet the Wemo® WiFi Smart Light Switch, F7C030 Wemo® WiFi Smart Light Switch, F7C030 Frequently Asked Questions http://belkin.force.com/Articles/articles/en_US/Troubleshooting_and_Tutorials/9342/p?pubstatus=o#Electrical 13/14...
Need help?
Do you have a question about the Wemo F7C030 and is the answer not in the manual?
Questions and answers