
Related Manuals for Crux 31865


Summary of Contents for Crux 31865
- Page 1 15-Bar Pump Espresso Maker Instruction Manual Styled for Life Designed & Engineered in New York City SZ-314289_CRUX006_15 bar Espresso maker_IM_R3.indd 1 2017-05-17 5:02 PM...
- Page 2 Thank you for Purchasing this Product You may already be familiar with using a similar product, but do please take the time to read these instructions – they have been written to ensure you get the very best from your purchase. Safety is Important To ensure your safety and the safety of others, please ensure you read the Product Safety and Electrical Safety Information before you operate this...
-
Page 3: Table Of Contents
Table of Contents Product Safety ..........................2-3 Electrical Safety ..........................4-5 Guide to the Perfect Espresso ....................6 Features.............................7-8 Before Using for the First Time ....................9 Brewing Fresh Espresso .......................10 Frothing Milk ............................. 12 Servicing ............................. 14 Care & Cleaning Instructions ..................... 14 Descaling ............................ -
Page 4: Product Safety
Product Safety When using electrical appliances, basic safety precautions should be followed including the following: Read all instructions before use. IMPORTANT • This appliance can be used by children aged from 8 years and above and persons with reduced physical, sensory or mental capabilities or lack of experience and knowledge if they have been given supervision or instruction concerning use of the appliance in a safe way and understand the hazards involved. - Page 5 • Never immerse the appliance, cord or plug into water or any other liquid. This is to protect against electrical shock. • Never use this appliance for other than intended use. This appliance is for household use only. Do not use outdoors. •...
-
Page 6: Electrical Safety
Electrical Safety Read these instructions thoroughly before using this appliance or connecting it to the mains supply. A 13 amp BS1362 ASTA approved fuse must be fitted. This appliance must be earthed. There are no user-serviceable parts inside this appliance. Always refer servicing to qualified service personnel. - Page 7 The wires in the power cable of this product are coloured in accordance with the following code: Blue = Neutral Brown = Live Green/Yellow = Earth If the markings on the terminals of your plug do not correspond to the colours of the wires in the power cable, proceed as follows: •...
-
Page 8: Guide To The Perfect Espresso
Guide to the Perfect Espresso Water • Make sure to use clean, cold water when filling the removable water tank. Water Flow • If you are making an espresso, ensure that the water flows through the espresso filter at the correct speed. If it is too slow, the espresso will be over extracted – too dark and bitter, with a blotchy and uneven crema on top. -
Page 9: Features
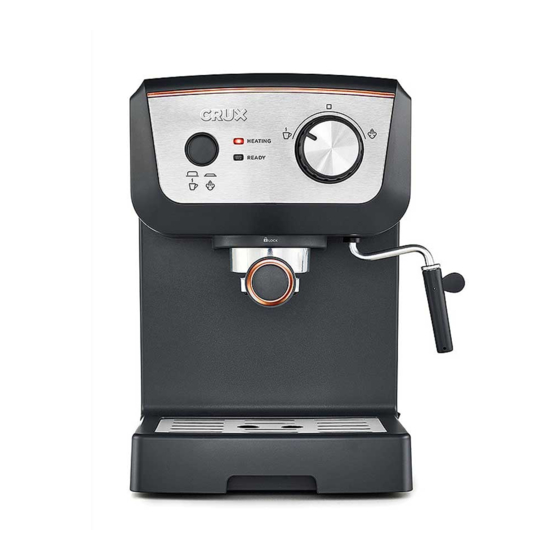
Features Fig. 1 Getting To Know Your 15-Bar Pump Espresso Maker Product may vary slightly from illustration 1. Removable 5. Removable Drip Tray 7. Filter Holder Water Tank Cover 8. Brew Head 2. Water Tank Handle 6. Steam Wand 10. ON/OFF Button with removable 3. - Page 10 Fig. 1a HEATING READY Control Panel 1. ESPRESSO/STEAM 3. STEAM position 6. Red HEATING Button Indicator Light 4. OFF position 2. Control Dial 7. White READY 5. ESPRESSO position Indicator Light Fig. 2 Accessories 1. 1 Cup Filter 2. 2 Cup Filter 3.
-
Page 11: Before Using For The First Time
Before Using for the First Time Fig. 3 1. Before brewing your first cup of espresso, we suggest you pre-clean the machine and prime the pump. Place the Espresso Maker on a level surface. 2. Make sure the Espresso Maker is turned to the OFF position. 3. -
Page 12: Brewing Fresh Espresso
Pre-Warming Cups For the optimal espresso temperature, it is recommended to warm the espresso cups. Simply place them on the warming plate on top of the unit when the machine is in use, or fill them with hot water prior to use, then empty. Brewing Fresh Espresso 1. - Page 13 6. To change or remove filter basket, line the notch in the filter holder with the indicator on the 1 or 2 cup filter basket. (See Figure 4.) Pull basket up and out of the filter holder. 7. Use the measuring spoon to measure ground espresso coffee and add to the filter basket. (See Figure 5.) Use the flat side of the measuring spoon to gently tamp the coffee and pack it.
-
Page 14: Frothing Milk
NOTE: To prepare cappuccino, refer immediately to the Frothing Milk section in this instruction manual. CAUTION: To avoid scalding or burns, do not remove the filter holder handle during the brewing process, or when either the red HEATING or white READY indicator light is illuminated. - Page 15 Fig. 8 Fig. 9 HEATING HEATING READY READY 10. Angle the jug so that the tip of the steam wand is sitting right below the surface of the milk. This will cause the milk to begin to create a whirlpool effect. 11.
-
Page 16: Servicing
Servicing This appliance requires little maintenance. It contains no user-serviceable parts. Any servicing requiring disassembly other than cleaning must be performed by a qualified appliance repair technician. Care & Cleaning Instructions 1. Always make sure the Espresso Maker is unplugged and allow to cool before attempting to clean. -
Page 17: Descaling
Descaling Lime-scale build-up will reduce the efficiency of your Espresso Machine. Regular cleaning every 6-8 weeks is essential to prevent lime- scale build-up and prevent reducing the Espresso Machine’s working life. More frequent cleaning will be required depending on the quality of water where you live and how often the Espresso Maker is used. -
Page 18: Storage
Storage 1. Unplug unit and allow to cool. 2. Store Coffee Maker in its box or in a cool, dry place. 3. Never store unit while it is still plugged in. SZ-314289_CRUX006_15 bar Espresso maker_IM_R3.indd 16 2017-05-17 5:02 PM... -
Page 19: Recipes
Recipes Cappuccino Makes 1 serving • 100ml milk • 1 measured scoop of finely ground espresso • Cocoa power or Cinnamon (optional) Make sure the I/O button is in the OFF position (O) and the control dial is in the OFF position ( ). - Page 20 Café Latte Makes 1 serving • 150ml milk • 2 measured scoop of finely ground espresso Make sure the I/O button is in the OFF position (O) and the control dial is in the OFF position ( ). Plug the Espresso Maker into an electrical socket. All indicator lights should be OFF.
- Page 21 Affogato Makes 2 servings • 2 measured scoops of finely ground espresso • 2 scoops vanilla ice cream Make sure the I/O button is in the OFF position (O) and the control dial is in the OFF position ( ). Plug the Espresso Maker into an electrical socket. All indicator lights should be OFF.
- Page 22 Frozen Cappuccino Makes 1 serving • 1.5 - 2 cups crushed ice • 1 measured scoop of finely ground espresso • 100ml milk Make sure the I/O button is in the OFF position (O) and the control dial is in the OFF position ( ).
- Page 23 Mocha Makes 1 serving • 1 measured scoop of finely ground espresso • 100ml milk • 1-2 tablespoons of hot chocolate mix • Whipped cream (optional) • Cocoa powder for dusting (optional) Make sure the I/O button is in the OFF position (O) and the control dial is in the OFF position ( ).
-
Page 24: Troubleshooting
Troubleshooting PROBLEM POSSIBLE CAUSES SOLUTION The machine does not turn on or coffee is • The machine is not turned On or plugged in. • Connect the machine to the electrical network. brewed in drips only • Water tank is empty. •... -
Page 25: Guarantee
Guarantee This product is guaranteed for 3 years from the date of original purchase against mechanical and electrical defects. Please register at http://mpl.direct/cruxwarranty within 28 days of purchase. Any defect that arises due to faulty materials or workmanship will either be replaced or refunded where possible during this period by the dealer from whom you purchased the unit. -
Page 26: Disposal Information
Disposal Information Waste electrical products should not be disposed of with household waste. Please recycle where facilities exist. Check with your local authority for recycling advice. This symbol on appliance, instruction manual and packaging puts your attention to this important issue. The materials used in this appliance can be recycled. - Page 27 SZ-314289_CRUX006_15 bar Espresso maker_IM_R3.indd 25 2017-05-17 5:02 PM...
- Page 28 For customer service questions or comments 0345 467 6743 cruxkitchen.co.uk crux.kitchen CRUX is a trademark of 8479950 Canada Inc. All rights reserved. SZ-314289_CRUX006_15 bar Espresso maker_IM_R3.indd 26 2017-05-17 5:02 PM...
Need help?
Do you have a question about the 31865 and is the answer not in the manual?
Questions and answers