Table of Contents
Advertisement
Advertisement
Chapters
Table of Contents

Related Manuals for Visio-Tek visio-tek series

Summary of Contents for Visio-Tek visio-tek series
- Page 1 Wi-Fi DIGITAL MICROSCOPE USER’S MANUAL...
- Page 2 Visio-tek Wi-Fi Microscope User’s Manual WARNING! READ MANUAL CAREFULLY BEFORE USING THE DEVICE. 2017...
-
Page 3: Table Of Contents
Visio-tek Wi-Fi Microscope User’s Manual Summary UNPACKING ............................4 PACKAGING CONTENTS ......................... 4 SYMBOLS ..............................5 WARNINGS............................. 7 GENERAL GUIDELINES FOR HANDLING....................7 GENERAL MAINTENANCE ........................8 CLEANING THE DEVICE .......................... 8 DISPOSAL ............................... 9 WARRANTY ............................10... -
Page 4: Unpacking
USB transmission. Visio-tek can be connected to iOS and Android smartphones or tablets via the Visio-tek App, as well as through a WiFi/USB connection to Windows and Mac computers or laptops. Using Visio-tek dedicated software, you can capture pictures, shoot videos, and take measurements. -
Page 5: Symbols
Visio-tek Wi-Fi Microscope User’s Manual 3. SYMBOLS NOTE: The following symbols may be used be on the Visio-tek device, packaging, box or in this manual. WARNING SYMBOLS WARNING This symbol indicates there is a problem which may present risk to the patient or damage the instrument. - Page 6 Visio-tek Wi-Fi Microscope User’s Manual IDENTIFICATION SYMBOLS Followed by an Followed by an alphanumeric code alphanumeric indicates the lot code. code and date indicates the serial number and the production Year OTHER SYMBOLS Indicates that the product meet the directive 2002/95/CE related to the reduction of the use of dangerous substances in electrical and electronic devices Indicates that the product must be properly disposed of at the end of its life.
-
Page 7: Warnings
• To avoid electric shock, remove all electricity source before removing PC GENERAL GUIDELINES FOR HANDLING Do not use the device with wet hands Do not use the device if damaged or not in proper working order Do not subject the Visio-tek device to sudden shocks... -
Page 8: General Maintenance
Visio-tek Wi-Fi Microscope User’s Manual GENERAL MAINTENANCE Check the device and accessories before each use. The product is made of materials resistant to corrosion and environmental conditions under normal use. When not In use, store device in a closed, clean and dry storage container or drawer. -
Page 9: Disposal
Visio-tek Wi-Fi Microscope User’s Manual 8. DISPOSAL Indicates that the product must be properly disposed of at the end of its life. The user is responsible for disposing of the product at a specific collecting point dedicated to electronic and electric devices. -
Page 10: Warranty
Visio-tek Wi-Fi Microscope User’s Manual 9. WARRANTY Congratulations for purchasing our product. This product HAS BEEN MANUFACTURED TO THE HIGHEST QUALITY AND STANDARDS. Distributor guarantees this product against any defects due to materials or workmanship for a period of 1 year from the date of original purchase. To take advantage of the guarantee, you have to retain your purchase invoice. - Page 11 3.2 Calibration on iPhone / iPad ............................5 3.3 Measurement on iPhone / iPad ........................... 6 “Visio-tek” on Android Tablet /Phone ......................6 4.1 Installation on Android Tablet / SmartPhone ......................6 4.2 Calibration on Android Tablet / Phone ........................9 4.3 Measurement on Android Tablet / Phone .........................
-
Page 12: Use Of The Microscope
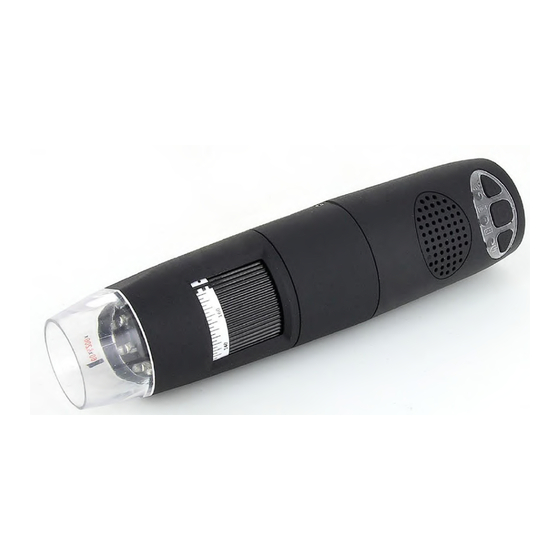
Visio-tek Wi-Fi Microscope User’s manual Use of the Microscope WARNING : IMPAIRMENT OF IMAGE OR SLOW VIDEO ARE THE RESULT OF A LOW BATTERY. BEFORE FIRST USE OF THE MICROSCOPE, PLEASE CHARGE THE BATTERY FOR AT LEAST 12 HOURS. ... -
Page 13: Working In Wi-Fi Mode
“12345678” and click OK. Once connected, please wait for about 5 seconds to open the “Visio-tek” application to see your images. If there is no video display, please close and restart the “Visio-tek” app again. When the Wi-Fi indicator LED flashes the video stream signal should be displayed in the app. -
Page 14: Wi-Fi Security Setup
3. ”Visio-tek” on iPad/iPhone Installation on iPhone / iPad Search “Visio-tek” in the App Store to download and install it. Click the icon to display Video. Warm-up Tips: If the live video is blank or slow, please restart the “Visio- tek”... -
Page 15: Calibration On Iphone / Ipad
Visio-tek Wi-Fi Microscope User’s Manual IP Adress Resolution setting. (When changing the resolution, please wait until the illumination LED is off and lights up again – it takes about 5 seconds). Resolution setting and Default: : Enable the button snapshot. -
Page 16: Measurement On Iphone / Ipad
4. “Visio-tek” on Android Tablet /Phone Installation on Android Tablet / SmartPhone Install the “Visio-tek” app and run it by first clicking the icon and then the icon. If the live video is blank or slow, please restart the “Visio-tek” app again. page 6... - Page 17 Visio-tek Wi-Fi Microscope User’s Manual Capture photo Navigation icon—moving a dot left/up/down/right for calibration or measurement operation Photos folder Calibration and measurement Cross guides Reset sketches Setting menu Setting Menu 1. Resolution Setting (when changing the resolution, please wait until the illumination LED is off and lights up again – it takes about 5 seconds).
- Page 18 Visio-tek Wi-Fi Microscope User’s manual 2. Unit Setting 3. Line Setting: for editing line size and color 4. Font Setting: for editing text size and color page 8...
-
Page 19: Calibration On Android Tablet / Phone
Visio-tek Wi-Fi Microscope User’s Manual Calibration on Android Tablet / Phone To obtain accurate measurement data for each magnification, please calibrate before performing measurements. 1. To calibrate, select a known measuring tool, such as the enclosed calibration ruler, as to- be-observed object. -
Page 20: Measurement On Android Tablet / Phone
Visio-tek Wi-Fi Microscope User’s manual 6. Now the calibration is complete. By clicking on screen again, mark measurements on the live video using the same focus. (Please, do not adjust the “Focus & Magnification wheel!”). If the new photo object is not in focus, please only adjust the distance between the microscope and the object until the image becomes clear. -
Page 21: Wifi Visio-Tek" On Windows Computers
Click on the icon to run it. The download is available from www.visio-tek.net Click the “Preview” icon and the Visio-tek main screen will display video (see illustration): (It takes about 5 seconds for video to display; if the live video image is blank or slow, please click the “Preview”... -
Page 22: Setting
You need to check both boxes for “Private networks” and “Public networks”, and then click “Allow access” to allow the “Snapshot” program to communicate on these networks, otherwise the button snapshot will not work. If the Allow access field is missing, please click “Control panel->Windows firewall->Restore defaults”, and then restart Visio-tek and “Snapshot Enable” to reset it. -
Page 23: Help
Visio-tek Wi-Fi Microscope User’s Manual Language: The language selection allows you to select the Visio-tek interface language. Take Picture: Capture photos. Take/Stop Video: In the active live video window, click to start/stop recording. Recorder Setting Capture Setting Frame rate: The number of frames per second that are displayed. -
Page 24: Images On Windows
Visio-tek Wi-Fi Microscope User’s manual Images on Windows You can double-click the selected Photo for viewing and taking measurements, as shown below. Photo file name: yyyy-mm-dd_hhmmss_nnnx_Nxxxx is a combination of date, time, magnification and serial number. For example, Still_2009-03-06_102949_060X_N0002 records: Image 0002, at magnification 60, from Mar-06-2009, at AM10:29:49. -
Page 25: Measurement On Windows Systems
Visio-tek Wi-Fi Microscope User’s Manual 9. In the live video window click on the calibration button and then click and extend to a specific length; a small window will pop up. 10. Enter the actual length (in the example, 2mm) and click the “OK”... - Page 26 Visio-tek Wi-Fi Microscope User’s manual Allows the measurement of the circumference, area, and radius of a Three Point Circle Measurement circle. Simply click on any three points on the circle you wish to measure. Allows a measurement of an arc. Click on three consecutive points on an Three Point Arc Measurement arc to measure.
-
Page 27: Visio-Tek" On Mac Computers
Visio-tek Wi-Fi Microscope User’s Manual 6. “Visio-tek” on Mac Computers Installation on Mac Computers Installing “Visio-tek” using the OS X 10.8 or a later version; a pop-up message will appear, as illustrated. You need to adjust the following settings: Click the Apple icon to pop up the window on the right, and click “System Preference”... - Page 28 Visio-tek Wi-Fi Microscope User’s manual Input “Name” and “Password” of your system, and click “Unlock”. Select “Anywhere” to finish the setting. Now you may install the “Visio-tek” software. Double-click the “WiFi Visio-tek” icon after completing installation. Click “Preview” and after a short delay the WiFi main screen will display video (it takes about 5 seconds to display the live video;...
-
Page 29: Images On Mac Computers
Visio-tek Wi-Fi Microscope User’s Manual Images on MAC Computers Preview (Connect the Wi-Fi microscope and display video) Capture photo Photo folder: Open the folder which contains the captured photos Setting (Show / Hide) “About” Enable the Button Snapshot feature. When changing any item of the Setting or enabling the button snapshot, you have to wait until the illumination LED is off and lights up again - this takes about 5 seconds. -
Page 30: Measurement On Mac Computers
Visio-tek Wi-Fi Microscope User’s manual a line (but do not click the “line” button) of 2mm length, and the calibration is complete. The application software is now ready for making measurements in in new target videos using the calibrated magnification at this focal setting. -
Page 31: Circle Measurement
Visio-tek Wi-Fi Microscope User’s Manual 6.4.2 Circle Measurement Click on the Circles icon button and a circle will display in the video preview window. The circle can be moved by selecting the center point and dragging the mouse. Selecting the right OR top point of the circle and dragging the mouse will increase or decrease the size of the circle. -
Page 32: Keys
Visio-tek Wi-Fi Microscope User’s manual 6.4.5 Keys A double click on the captured image gives access to the list of keys enumerated below: Save as: Rename the file and save in different path. Measurement Line: The line measurement allows you to measure the linear distance between two points. Simply left click and drag to the desired length, and click again to finish. - Page 33 Visio-tek Wi-Fi Microscope User’s Manual Delete: Delete all measurement. Redo: Redo the previous action. page 23...
-
Page 34: Working In Wired Usb Mode
Available USB 2.0 or later port Running “USB Visio-tek” Note: Before starting the USB Visio-tek program, please make sure the USB digital microscope has been connected to the PC via a USB line and Power is on. After installing USB Visio-tek.exe, double-click the USB Visio-tek icon... -
Page 35: File
Visio-tek Wi-Fi Microscope User’s Manual 8.3.1 File Selection of a photo or video in the Photo or Video folder; click “File” on the menu bar or right key of mouse to pop up the drop-down menu for operating it. Open: Opens the selected picture or video to be viewed. - Page 36 Snapshot Enable and Snapshot Disable: The default is ´enable snapshot´. If you notice video delay and wish to improve performance of the video preview, please disable the snapshot feature. Change Language: The language selection allows you to select the USB Visio-tek interface language. page 26...
-
Page 37: Capture
Visio-tek Wi-Fi Microscope User’s Manual 8.3.3 Capture Take picture : You can take a photo of the image by clicking the snapshot Button or pressing the button on the USB DigitalMicroscope. Take Video/Stop Video: 1. Frame Rate: The number of frames or images that are projected or displayed per second. -
Page 38: Help
Running “USB Visio-tek” Install the “USB Visio-tek” software from www.visio-tek.net. Once the USB Visio-tek installation is completed, please plug the microscope into an available USB port on your Mac OSX PC, and turn the microscope on with the switch on the side. The system will automatically search and install the driver. When the software installation is complete you will see a transmission from the microscope on your screen, as shown below. -
Page 39: Setting
Click “Controls->Format” to select your desired resolution as shown on the screen shot below. The default resolution is 640X480. If your Visio-tek screen freezes on an image, this may be because capture resolution was set too high. Set it back to Medium and the video display will return. -
Page 40: Capturing Image
Tool bar of the main screen to capture an image. The Captured image will be saved in the folder (../users/local user name/Visio-tek/Image). The filename of the captured image is a .jpg file with unique time stamp. -
Page 41: Calibration
Visio-tek Wi-Fi Microscope User’s Manual Calibration See Chapter 8.3 Measurement See Chapter 8.4 10. Product Specifications Operation system:Windows /Mac/IOS and Android Wi-Fi Spec: Photo and Video Resolution: 1.3MPixel-- 1280x1024(MJPG),640x480(MJPG), 320x240 Frame Rate:15fps@1280x1024,30fps@640x480, 320x240 IEEE 802.11 b/g/n standards compliant ... -
Page 42: Troubleshooting
Unplug or Power off USB DigitalMicro from PC, close USB Visio-tek program. After waiting for 1 minute, plug and power on USB Digital Microscope and open USB Visio-tek program to try. After PC resume from standby or hibernate, maybe USB Visio-tek will not work properly, please close it and re-open to try.
Need help?
Do you have a question about the visio-tek series and is the answer not in the manual?
Questions and answers