Table of Contents
Advertisement
Quick Links
Advertisement
Table of Contents

Related Manuals for Fujitsu Siemens Computers WF2H


Summary of Contents for Fujitsu Siemens Computers WF2H
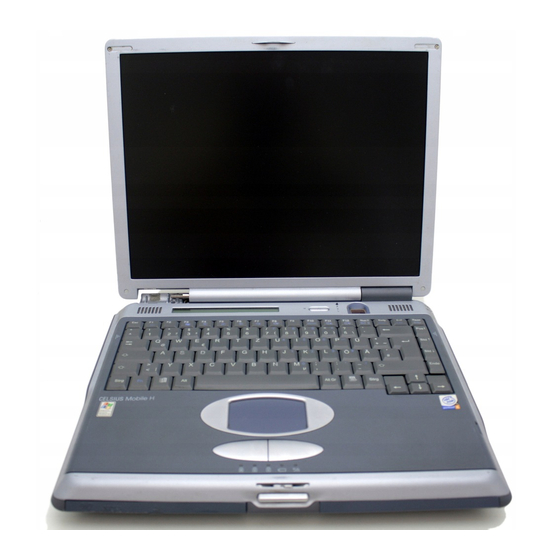
- Page 1 CELSIUS .com EasyGuide CELSIUS Mobile H E n g l i s h...
- Page 2 Are there ..any technical problems or other questions which you would like to be clarified? Please contact: · your sales partner · your sales outlet Further information can be found in the "Safety, Warranty and Ergonomics" booklet. The latest information on our products, tips, updates, etc., can be found on the internet under: http://www.fujitsu-siemens.com...
- Page 4 Questo manuale è stato stampato su carta da riciclaggio. Denna handbok är tryckt på recyclingpapper. Dit handboek werd op recycling-papier gedrukt. Herausgegeben von/Published by Fujitsu Siemens Computers GmbH A26391-K115-Z120-1-19 Bestell-Nr./Order No.: Printed in the Federal Republic of Germany AG 1001...
- Page 5 Introduction Important notes CELSIUS Mobile H Preparing the workstation for use Working with the workstation Operating Manual Connecting external devices Settings in BIOS Setup Troubleshooting and tips Memory expansion Technical data Index August 2001 edition...
- Page 6 All other trademarks referenced are trademarks or registered trademarks of their respective owners, whose protected rights are acknowledged. Copyright ã Fujitsu Siemens Computers GmbH 2001 All rights, including rights of translation, reproduction by printing, copying or similar methods, in part or in whole, are reserved.
-
Page 7: Table Of Contents
Contents Introduction .............................1 Notational conventions ........................2 Important notes ..........................3 Safety ..............................3 Notes on installing and removing boards and modules ..............5 Manufacturer’s notes .........................6 Copyright-protected technology ....................6 Energy saving..........................6 Disposal and recycling.......................7 CE marking............................7 GS symbol............................7 Battery storage ..........................7 Transporting the workstation......................7 Before you travel ........................8 Transporting the workstation......................8 Cleaning the workstation ........................9... - Page 8 Contents Inserting and removing modules ..................... 38 Removing modules......................38 Installing modules ......................39 Optical drives ..........................40 Optical drive indicator......................40 Inserting or removing a CD/DVD ..................... 40 Floppy Disk Drive..........................41 Working with floppy disks ......................41 56k-Modem ............................. 42 Connecting workstation modem to telephone connection............
- Page 9 Contents Troubleshooting and tips......................63 Installing new software ......................63 Saving and restoring system files ....................63 Restoring the hard disk contents under Windows ..............63 The workstation's date or time is incorrect ................64 Battery indicator does not illuminate ..................64 The LCD screen of the workstation remains blank ..............64 The workstation's LCD display is difficult to read ..............64 The external monitor stays blank .....................65 The external monitor is blank or the image is unstable ............65...
-
Page 11: Introduction
Introduction Your CELSIUS Mobile H is a versatile and ergonomic workstation. Innovative technology and ergonomic design make this workstation the ideal user-friendly and reliable travel companion. To simplify the initial start-up of your workstation, one or two operating systems are preinstalled on the hard disk (dual-installation). -
Page 12: Notational Conventions
Introduction Notational conventions Notational conventions The following symbols are used in this manual: Indicates information which is important for your health or for preventing physical damage. Failure to follow the instructions may lead to loss of data, invalidate your warranty, destroy the notebook, or endanger your life. Indicates important information which is required to use the system properly. -
Page 13: Safety
Important notes Most of the safety information is contained in the "Getting Started" manual. Some of the most important information is outlined below. The manufacturer's notes contain helpful information on your device. Safety This CELSIUS Mobile Workstation complies with the relevant safety regulations for data processing equipment. - Page 14 Do not use the radio keyboard near to flammable gases as they can cause an explosion or a fire. The company Fujitsu Siemens Computers GmbH cannot be held responsible for radio or television faults arisng from unauthorised changes made to this device. Fujitsu Siemens is, furthermore, not responsible for replacing and / or exchanging connector cables and devices which have not been specified by Fujitsu Siemens Computers GmbH.
-
Page 15: Notes On Installing And Removing Boards And Modules
Safety Important notes Notes on installing and removing boards and modules Only qualified technicians should repair the device. Unauthorised opening or incorrect repair may greatly endanger the user (electric shock, fire risk). Boards with electrostatic sensitive devices (ESD) are identifiable by the label shown. When you handle boards fitted with ESDs, you must, under all circumstances, observe the following points: ·... -
Page 16: Important Notes
20 million tons of carbon dioxide into the atmosphere - the equivalent of 5 million automobiles. As an Energy Star Partner, Fujitsu Siemens Computers GmbH has determined that this product meets the Energy Star guidelines for energy efficiency. -
Page 17: Fcc Class B Compliance Statement
This device and its antenna(s) must not be co-located or operating in conjunction with any other antenna or transmitter. Fujitsu Siemens Computers GmbH is not responsible for any radio or television interference caused by unauthorised modifications of this equipment or the substitution or attachment of connecting cables and equipment other than those specified by Fujitsu Siemens Computers GmbH. - Page 18 Important notes CE marking Radio and Telecom Terminal Equipment Directive 1999/5/EC as per - CTR21 (if fitted with a modem device) - ETS 300 328-2 (if fitted with a 2.4 GHz band embedded wireless device) - ETS 301 489-1 (if fitted with a 2.4 GHz band embedded wireless device) - ETS 301 489-17 (if fitted with a 2.4 GHz band embedded wireless device) European radio approval information (for products fitted with EU-approved radio devices) This Product is a Notebook computer;...
-
Page 19: Copyright-Protected Technology
Important notes CE marking 4. If your system came equipped with an internal embedded wireless device, do not operate the wireless device unlessall covers and shields are in place and the system is fully assembled 5. Wireless devices are not user serviceable. Do not modify them in any way. Modification to a wireless device will voidthe authorization to use it. -
Page 20: Ce Marking
CE marking Important notes Declaration of Conformity (DoC) according to the Directive 99/5/EC (R&TTE) Intended use: Notebook PC with Bluetooth keyboard To be used in: Austria, Belgium, Denmark, Finland, France, Germany, Spain, Italy, Luxembourg, The Netherlands, Switzerland, Greece, Norway, Sweden UK, Portugal, Iceland, Ireland Use may be subject to licensing Usage may be constrained in certain countries NOTE:... -
Page 21: Disposal And Recycling
Do not throw lithium batteries into the household waste. They must be disposed of in accordance with local regulations concerning special waste. If you have any questions on disposal, please contact your local office, our Hotline/Help Desk, or: Fujitsu Siemens Computers GmbH Recyclingcenter D-33106 Paderborn... - Page 22 Important notes Transporting the workstation Before you travel As the removable keyboard is operated by a radio connection ,your workstation may not be switched on during a flight. Switch off the keyboard also (see chapter " Switching the keyboard on and off"). ·...
-
Page 23: Cleaning The Workstation
Cleaning the workstation Important notes Cleaning the workstation Ê Switch off the workstation. Ê Pull the power plug of the network adapter out of the mains outlet. Ê Remove the battery. How to remove the battery is described in the section "Inserting and removing the battery". Do not clean any interior parts yourself;... -
Page 24: Preparing The Workstation For Use
Preparing the workstation for use Please read the chapter "Important notes". Before you can work with your workstation, you need to charge the battery and install and configure the delivered software. The operating system and drivers required are preinstalled. Upon delivery, the battery can be found in the battery compartment and is not charged. You need to charge the battery if you want to operate your workstation with a rechargeable battery. -
Page 25: Switching On The Workstation For The First Time
Preparing the workstation for use Unpacking and checking the delivery Switching on the workstation for the first time When you switch on your workstation for the first time the supplied software is installed and configured. You should plan some time for this, as this process must not be interrupted. Do not place the workstation on a soft surface (e.g., a carpet or soft furnishings). -
Page 26: Connecting The Power Adapter And Switching On The Workstation
Unpacking and checking the delivery Preparing the workstation for use Connecting the power adapter and switching on the workstation Use only the the power adapter provided. Ê Plug the DC output connector on the power adapter into the DC input connector (DC IN) on the workstation (1). -
Page 27: First-Time Software Installation
Preparing the workstation for use Unpacking and checking the delivery First-time software installation Leave the external power adapter connected to your workstation during the initial installation. Once the installation has been started the workstation must not be switched off! During installation the workstation may only be rebooted when you are requested to do Ê... -
Page 28: Working With The Workstation
Working with the workstation This chapter describes the basics for operating your workstation. The chapter on "Connecting external devices" has instructions on how to connect external devices (e.g. mouse, printer) to the workstation. Please take note of the information in the chapter "Important notes". Switching the workstation on Ê... -
Page 29: Switching Off The Workstation
Working with the workstation Switching off the workstation Switching off the workstation Ê Shut down the operating system properly. If the workstation is not switched off automatically, press the Suspend/Resume button (1) and release it again. Ê Immediately press the Suspend/Resume button again once, and hold it down for approximately four seconds until you hear an acoustic signal. -
Page 30: Indicators
Indicators Working with the workstation Indicators The following icons appear in the display field of your workstation: The meanings of the symbols are as follows: Power-on indicator · The indicator lights up:The workstation is on. · The indicator flashes (1 second on / 1 second off): The workstation is in energy-saving mode. - Page 31 Working with the workstation Indicators Indicator PC card 2 The indicator lights up when a PC card disk in slot 2 is being accessed. You must not remove the PC card from the slot when this indicator is lit. Hard disk indicator The indicator lights up when the hard disk drive is being accessed.
-
Page 32: Keyboard
Keyboard Working with the workstation Keyboard The following description of keys refers to Windows. Additional functions supported by the keys are described in the relevant manuals supplied with your application programmes. The figure below shows how to access the different characters on keys with overlaid functions. The example applies when the CapsLK indicator is not lit. - Page 33 Working with the workstation Keyboard Fn key The [Fn] key enables the special functions indicated on overlay keys (see "Key combinations"). If the external keyboard does not feature an [Fn] key, you can simultaneously press the [Ctrl] + [Alt Gr] keys or the [Ctrl] + [Alt] keys. Cursor keys The cursor keys move the cursor in the direction of the arrow, i.e.
-
Page 34: Key Combinations
Keyboard Working with the workstation Key combinations The following description of key combinations refers to functions when using Microsoft Windows. Some of the following key combinations may not function in other operating systems and with some device drivers. Other key combinations are described in the relevant manuals supplied with your application programmes. - Page 35 Working with the workstation Keyboard Decreasing screen brightness This key combination decreases screen brightness. Halting the current operation This key combination can be used to halt an operation instantly without Ctrl clearing the keyboard buffer. Backtab (Shift+Tab) This key combination moves the cursor back to the previous tabular stop.
-
Page 36: Preparing The Removable Radio Keyboard For Use
Keyboard Working with the workstation Preparing the removable radio keyboard for use Before using your CELSIUS Mobile H workstation, you must fit or connect a battery in the removable keyboard. You do this as follows: Ê Lift the keyboard at the two positions indicated (1). Ê... - Page 37 Working with the workstation Keyboard Ê Plug the battery connector into the connector in the battery compartment. Ê Close the battery compartment. Ê Hold the keyboard at an angle and ensure that the pins (1) fit into the matching recesses. A26391-K115-Z120-2-7619...
-
Page 38: Operating The Removable Radio Keyboard For Use
Keyboard Working with the workstation Operating the removable radio keyboard for use The keyboard can be removed as described above. The keyboard is permanently linked to the workstation by means of a wireless connection. The right- hand indicator on the keyboard lights as soon as a wireless connection is established. No keyboard input is possible until the indicator lights. -
Page 39: Switching The Keyboard On And Off
Working with the workstation Keyboard Switching the keyboard on and off Ê Switch the keyboard ON or OFF with the ON/OFF switch. Switch off the keyborad whenever you do not intend to use it for a prolonged period of time or whilst on board a flight. -
Page 40: Indicators On The Keyboard
Keyboard Working with the workstation Indicators on the keyboard NumLK indicator (Num Lock) CapsLK indicator (Caps Lock) Scroll indicator (Scroll Lock) Rechargeable battery indicator keyboard Radio connection Rechargeable battery indicator keyboard Shows how much charge the battery has left. · The indicator lights up: The battery is charging. -
Page 41: Touchpad And Touchpad Buttons
Working with the workstation Keyboard Touchpad and touchpad buttons The touchpad enables you to move the mouse pointer on the screen. The two touchpad buttons allow the selection and execution of commands. They correspond to the buttons on a conventional mouse. -
Page 42: Display Settings
Display settings Working with the workstation Display settings Setting the desktop area You can change the screen resolution under Start - Settings- Control Panel - Display - Settings and then selecting from the Resolution field. Adjusting the font size Under Start - Settings - Control Panel - Display - Settings you can choose between a larger and a smaller font in the Font size field. -
Page 43: Battery
Working with the workstation Battery Battery The battery is one of the most important components of your workstation. When not plugged into a mains outlet, the workstation runs on its built-in battery. You can increase the life of the battery by caring for the battery properly. -
Page 44: Charging The Battery
Battery Working with the workstation Charging the battery The battery indicator displays the remaining battery charge (see the section "Indicators"). When you switch on the workstation, it takes a few seconds before the battery status is displayed. You can charge the battery by connecting the workstation to the power adapter (see "Connecting the power adapter and switching on the workstation"). -
Page 45: Removing The Battery
Working with the workstation Battery Removing the battery Ê Push the slide in the direction of the arrow up to the stop (1). Ê Pull the battery out of the casing in the direction of the arrow (2). A26391-K115-Z120-2-7619... -
Page 46: Installing The Battery
Battery Working with the workstation Installing the battery Ê Push the slide in the direction of the arrow up to the stop (1). Ê Position the battery at the edge of the casing (2) and then press it into the workstation. A26391-K115-Z120-2-7619... -
Page 47: Using The Power-Management Features
Working with the workstation Using the power-management features Using the power-management features The workstation uses less power when the power management features are enabled. You will then be able to work longer when using the battery before having to recharge it. If you are connected to a network or use the integrated modem, PC LAN card, or PC modem card, we advise against enabling an energy saving mode. -
Page 48: Energy-Saving Modes Of Workstation
Using the power-management features Working with the workstation Energy-saving modes of workstation You can set two energy-saving modes with your workstation. In the Suspend mode (Suspend to DRAM/Standby) all current data (active programmes, files) are buffered in the main memory, and in the Save-to-Disk mode (Save to Disk/HibernateMode) all current data are saved on the hard disk. -
Page 49: Operating Systems With Apm (Windows 95, Windows Nt With Apm Extensions)
Working with the workstation Using the power-management features Operating systems with APM (Windows 95, Windows NT with APM extensions) For operating systems with APM (Advanced Power Management) you can set the energy- saving functions in the BIOS Setup (e.g. Suspend to RAM, Save to Disk, LCD off etc.). Setting energy-saving modes Ê... -
Page 50: Phdisk (For Windows 98 And Windows Nt Only)
Using the power-management features Working with the workstation PHDISK (for Windows 98 and Windows NT only) You will find a description of how to use the PHDISK programme on our internet page: www.mobile-cd.de. Select Tipps &Tricks - PHDISK Suspend to Disk. The PHDISK service programme reserves the memory space required for the use of Save-to-Disk mode. -
Page 51: Hard Disk
Working with the workstation Hard disk Hard disk The hard disk is the most important storage medium of your workstation. You can work considerably faster and more efficiently if you copy applications and files from floppy disks or CDs to your hard disk. -
Page 52: Installing Modules
Inserting and removing modules Working with the workstation To remove the left-hand module, push the slide to the right. To remove the right-hand module, push the slide to the left. Ê Remove the module the direction of the arrow (2). Installing modules Ê... -
Page 53: Optical Drives
Working with the workstation Optical drives Optical drives Depending on the model, your workstation is equipped with a CR-ROM drive, a CD-RW drive, a DVD-ROM drive or a combo drive (CD-RW/DVD). This device contains a light-emitting diode, classified according to IEC 825-1:1993: LASER CLASS 1, and must not be opened. -
Page 54: Floppy Disk Drive
Floppy Disk Drive Working with the workstation Manual removal (emergency removal) In the event of a power failure or damage to the drive it may be necessary to manually remove the CD/DVD. Ê Switch off the workstation. Ê Push a pen or a piece of wire (such as a paper clip) into the opening for manual ejection. The drive tray is unlocked. -
Page 55: 56K-Modem
Working with the workstation 56k-Modem To insert a diskette: Ê Push the floppy disk into the drive in the insertion direction (1) until it engages. The label should be facing upward. To remove a diskette: Ê Push the eject button (5). Protect the floppy disk against being overwritten or erased Ê... -
Page 56: Connecting Workstation Modem To Telephone Connection
Connecting IEEE1394 (FireWire) Working with the workstation Connecting workstation modem to telephone connection Ê Connect the modem cable supplied to the country-specific telephone adapter (1). Ê Connect the modem cable to the modem port of the workstation (2). Ê Connect the modem cable to your telephone wall socket (3). Connecting IEEE1394 (FireWire) Peripheral devices such as digital audio/video devices or other high-speed devices can be connected via IEEE1394 (FireWire). -
Page 57: Pc Cards
Working with the workstation PC cards PC cards Two PC card slots enable the notebook to operate two type II PC cards or one type III PC card (CardBus or PCMCIA) . Consult the documentation supplied by the PC card's manufacturer and follow the instructions provided. -
Page 58: Removing A Pc Card
SmartCards Working with the workstation Removing a PC card Ê Press the eject button (1). It will project further out of the workstation's case. If the eject buttons are pushed in flush with the workstation casing, they must first be snapped out. Press the eject buttons until they snap out. -
Page 59: Inserting A Smartcard
Working with the workstation SmartCards Inserting a SmartCard Ê Insert the SmartCard, contacts first, into the lower slot guide. The labelled side of the SmartCard must be facing upward. Ê Gently push the SmartCard into the slot until you feel it click into place. Consult the documentation supplied with the SmartCard for information on how to install the necessary device drivers. -
Page 60: Sliding Out A Smartcard
SmartCards Working with the workstation Sliding out a SmartCard Ê Slide the SmartCard out of its location (1). A26391-K115-Z120-2-7619... -
Page 61: Microphone And Loudspeakers
Working with the workstation Microphone and loudspeakers Microphone and loudspeakers 1 = built-in microphone 2 = built-in loudspeakers Your workstation contains a built-in microphone (1) and two loudspeakers (2). If you attach an external microphone, the built-in microphone is disabled. The internal loudspeakers switch off when you attach headphones or external loudspeakers to the audio jack. -
Page 62: Fingerprint Reader
Fingerprint reader Working with the workstation Fingerprint reader The workstation is equipped with a fingerprint reader. Instead of entering a user password, you can also log on to the system with a fingerprint. A26391-K115-Z120-2-7619... -
Page 63: Property And Data Protection
Working with the workstation Property and data protection Property and data protection Your workstation enables you to protect your system and personal data against unauthorised access in a number of ways. By combining these options, you can achieve maximum protection for your system. -
Page 64: Setting Passwords
Property and data protection Working with the workstation Setting passwords A user password can only be set if a supervisor password has been assigned. The supervisor or user password prevents unauthorised callup of BIOS Setup. Only those who know one of the two passwords can call BIOS Setup. -
Page 65: Canceling Passwords
Working with the workstation Property and data protection Canceling passwords Supervisor / User password If you cancel the supervisor password, you automatically deactivate the user password. To cancel a password (without setting a new password): Ê Call BIOS Setup and select the Security menu (see chapter "Settings in BIOS Setup"). Ê... -
Page 66: Kensington Lock
Property and data protection Working with the workstation Kensington Lock a = Kensington Lock You can protect your workstation from theft with the Kensington Lock device (a) and a Kensington MicroSaver. A26391-K115-Z120-2-7619... -
Page 68: Connecting External Devices
Connecting external devices Under all circumstances, please observe the safety notes provided in the "Important notes" chapter. Read the documentation on the external device before connecting it. Do not connect or disconnect cables during a thunderstorm. Do not pull on the cable when disconnecting a cable. Always take hold of the actual plug. Adhere to the order described in the following when you connect external devices to the workstation or separate them from the workstation: Connecting devices to the workstation... - Page 69 Connecting external devices Ports Line In Connections on the left side Modem Connections on the right side A26391-K115-Z120-2-7619...
-
Page 70: Connecting An External Monitor
Connecting an external monitor Connecting external devices The ports are marked with the following symbols (or with similar symbols): DC In LAN-port Port for power adapter (Local Area Network, for Network connection) PS/2 port (for keyboard or Headphones port mouse) Parallel port Microphone connector Monitor port... -
Page 71: Connecting An External Keyboard
Connecting external devices Connecting an external keyboard Connecting an external keyboard You do not need to switch off your workstation. Ê Simply connect the external keyboard to the PS/2 port on your workstation. Connecting an external PS/2 mouse You do not need to switch off the workstation. Ê... -
Page 72: Establishing An Infrared Connection
Establishing an infrared connection Connecting external devices Establishing an infrared connection Using the infrared software for Windows, you can communicate with another PC or printer equipped with an infrared interface. Before you can establish an infrared connection, you must have activated the infrared software. -
Page 74: Settings In Bios Setup
Settings in BIOS Setup In BIOS Setup you can set the system functions and the hardware configuration of the workstation. The settings can only be changed via the keyboard. When it is supplied, the workstation is set to factory default settings. You can change these settings in BIOS Setup. -
Page 75: Exiting Bios Setup
Settings in BIOS Setup Exiting BIOS Setup To exit BIOS Setup, select the Exit menu from the menu bar. You can then decide which settings you want to save. The Exit menu offers the following options. You must mark the required option and activate it with the Enter key. Exit Saving Changes Select Exit Saving Changes and Yes to save the current settings and exit the BIOS Setup. -
Page 76: Troubleshooting And Tips
Troubleshooting and tips Take note of the hints in the chapter "Connecting external devices", when you connect or disconnect cables. If a fault occurs in your workstation, try to eliminate it with the measures described in this chapter. If you fail to correct the problem, proceed as follows: Ê... -
Page 77: The Workstation's Date Or Time Is Incorrect
Troubleshooting and tips The workstation's date or time is incorrect Ê Double-click on the clock in the task bar and adjust the time. Ê Set the time and/or date in the BIOS Setup menu Main. If the date and time are repeatedly incorrect when you switch on the workstation, the buffer battery that supplies the internal clock is dead. -
Page 78: The External Monitor Stays Blank
Troubleshooting and tips The external monitor stays blank If your screen remains blank this may be due to the following: Monitor is switched off Ê Switch the external monitor on. Power saving has been activated (screen is blank) Ê Press any key to continue. Brightness is set too dark Ê... -
Page 79: The Workstation Does Not Start After Switch On
Troubleshooting and tips The workstation does not start after switch on If the workstation does not start after switch on, this may be due to one of the following: The battery is not installed correctly. Ê Switch off the workstation. Ê... -
Page 80: The Mouse Does Not Work
Troubleshooting and tips The mouse does not work If the connected mouse does not work, the following can cause it: Incorrect setting in BIOS Setup Ê Check the setting Hotplug in the BIOS Setup in the menu Advanced - Keyboard/Mouse Features. The setting must be set to Enabled. -
Page 81: Acoustic Warnings
Troubleshooting and tips Acoustic warnings A beep sounds every few seconds The battery is almost flat. Ê Charge the battery. Error messages on the screen This section describes the error messages generated by the BIOS-Setup. Error messages displayed by the operating system or programmes are described in the relevant manuals. CMOS Battery Bad If the error message occurs repeatedly, then the buffer battery in the workstation is dead. - Page 82 Troubleshooting and tips Extended memory failed at offset: xxxx Failing Bits: zzzz zzzz When testing the extended memory an error has resulted at the address xxxx. Ê Check whether the additional memory module has been inserted correctly. Should you receive this error message again, please contact your dealer. Failure Fixed Disk n The settings of the hard disk drive are incorrect.
- Page 83 Troubleshooting and tips Not enough Save-to-Disk partition or file exists on Fixed Disk - Save-to-Disk feature is disabled. The Save-to-Disk mode is not available to you, as no memory space has been assigned to this mode. Ê Use the PHDISK service programme to assign the memory space required for this mode. Press <F1>...
-
Page 84: Memory Expansion
Memory expansion The workstation must be switched off when installing/removing the memory modules and may not be in the Suspend mode. So that the current data can be saved in the Save to Disk suspend mode, sufficient memory space must be available on the hard disk (at least the size of the main memory +16 Mbytes). - Page 85 Memory expansion Installing memory modules Ê Carefully push the two mounting clips outwards (1). Ê Insert the memory module, contacts first, into the slot (2). Ê Carefully push the memory module downwards until you feel it latch into place (3). Removing memory modules Ê...
- Page 86 Memory expansion Mounting the cover Ê Place the cover on its mounting location (1). Ê Close the cover on the bottom of the workstation (2). Ê Fasten the cover with the screw (3). Ê Refit the battery. Ê Place the workstation right side up on a flat, stabile, nonslip surface. Ê...
-
Page 88: Technical Data
Technical data Workstation Processor: Intel Mobile Pentium III Tualatin 1.13 GHz Chipset: Intel 830 MP Socket: µFCPGA2 Main memory: Maximum 1 Gbyte PC 133 SO DIMM 2 slots for 512 Mbyte modules JEDEC 144 pin · Possible modules: Combo drive (CD-RW/DVD) ·... - Page 89 Technical data Workstation Modem (Mini PCI modem) Combo Modem with LAN 56K, V.90 / Ethernet 10/100, PME, AOL 2.0, Combo module: IEEE1394b Input devices Keyboard: 88 keys Touchpad: 3 keys Slots PC Card slots (CardBus/PCMCIA): PCMCIA 2 x Typ II or 1 x Typ III, PC card controller O2 Micro OZ711E1 and OZ6912 Ports...
-
Page 90: Battery
Battery Technical data Battery Rated voltage: 11,1 V Rated capacity 66 Wh Charging time (when not in operation): 3 hours Operating time with a battery: approx. > 3 hours (without power management) Power adapter Primary · Rated voltage: 100 V to 240 V (automatic) ·... - Page 91 Technical data Wireless Keyboard Product Specification Intended use purpose of the equipment Notebook with detachable keyboard which can communicate wireless with the notebook Type of modulation GFSK Channel spacing 1 MHz Designation of emission ETSI 300.328 ETSI 300 826 Transmit RF power or power range -6 dBm ~ 0 dBm Duty cycle 625us...
-
Page 92: Index
preventing access 50 Index preventing calling 50 settings 61 starting 61 Board 5 Buffer battery, load 64 1394 Firewire 43 CapsLK indicator 18, 27 56k modem 42 CardBus see PC-Card see PC-Card CD/DVD inserting 40 Access, preventing removing 40 floppy disk drive 50 CD-ROM drive 40 hard disk drive 50 indicator 18, 40... - Page 93 Index Date, not correct 64 Date/Time incorrect 64 Fingerprint 49 Desktop Area Firewire 43 setting 29 Floppy disk Devices cannot write 67 connecting 55, 59 inserting 42 Display removing 42 blank Display working with 41 image unstable 65 write-protection 42 difficult to read 64 Floppy disk drive 41 Display brightness...
- Page 94 Index reflected glare 64 Kensington Lock 53 remains blank 64 setting the Desktop Area 29 Alt Gr 19 setting the font size 29 Backspace 19 settings 29 Caps Lock 19 switch off 21 cursor control keys 20 technical data 75 Cursor key 20 LCD screen is blank 64 Enter 19...
- Page 95 Index external 58 does not print 67 PS/2 mouse 58 serial 58 serial mouse 58 Property protection 50 Mouse port 58 Protection 50 MS-DOS screen, enlarge 21 PS/2 port 57, 58 No picture 65 Recovery CD 63 Notational conventions 2 Recycling 7 Notes 3 battery 30...
- Page 96 Index Symbols, status indicator panel 17 Synchronisation, screen display 29 VGA port see Bildschirmanschluss System access Volume preventing unauthorised access 50 decreasing 21 System configuration 61 increasing 21 System expansion see Speichererweiterung System files 63 System settings, BIOS Setup 61 Warm boot 22 System startup Wireless data transfer 59...
Need help?
Do you have a question about the WF2H and is the answer not in the manual?
Questions and answers