Advertisement
Advertisement
Table of Contents

Related Manuals for Eskimo ES 8030

Summary of Contents for Eskimo ES 8030
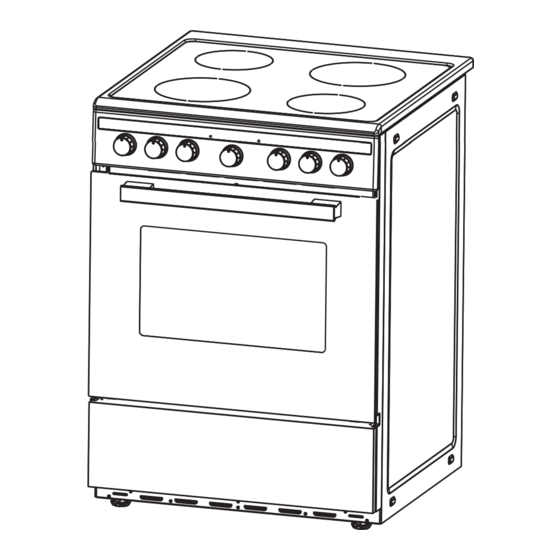
- Page 1 ELECTRIC COOKER ES 8030 INSTRUCTION MANUAL Product picture only for reference...
-
Page 2: Table Of Contents
IMPORTANT SAFETY WARNINGS........3 INSTALLATION...............7 PRODUCT DIMENSIONS............9 INTRODUCTION OF THE PRODUCT........10 USING THE OVEN..............13 USING THE HOB..............15 SAFETY REMINDING AND MAINTENANCE......16 FAILURE DISPLAY AND INSPECTION.........17 TOUBLE SHOOTING..............20 EN-2... -
Page 3: Important Safety Warnings
1-Important Safety Warnings THESE WARNINGS ARE PROVIDED IN THE INTEREST OF SAFETY, PLEASE READ THEM CAREFULLY BEFORE INSTALLING OR USING THE APPLIANCE To maintain the EFFICIENCY and SAFETY of this appliance, we commend: Call the Service Centers authorized by the store where you buy the cooker.Always use original Spare Parts. - Page 4 5. This appliance can be used by children aged from 8 years and above and persons with reduced physical, sensory or mental capabilities or lack of experience and knowledge if they have been given supervision or instruction concerning use of the appliance in a safe way and understand the hazards involved.
- Page 5 9. Ensure that the appliance is switched off before maintenance by switching off the main switches and turning all knobs to OFF position. 10. The openings and slots used for ventilation and dispersion of heat on the rear and below the control panel must never be covered.
- Page 6 16. To avoid accidental spillage do not use cookware with uneven or deformed bottoms on the burners or on the electric plates. 17. Special care should be taken when using chip pans etc. in order to avoid splashing or spillage of hot oil. They should not be used unattended since over heated oil may boil over and could also ignite.
-
Page 7: Installation
26. Any spillage should be removed from the lid before opening and the hob surface should be allowed to cool before closing the lid. 27. Use only hob guards designed by the manufacture of the cooking appliance or indicated by the manufacturer of the appliance in the instructions for use as suitable or hob guards incorporated in the appliance. - Page 8 e) The cut-out for the cooker cabinet should have the dimensions indicated in the figure below. Min.60 cm. Cooke r Hood EN-8...
-
Page 9: Product Dimensions
3-Product Dimensions Product dimensions: Height: 835 - 865 mm Width: 598 mm Depth: 595 mm Product specifications: 4 zone solid hot plates: 2 x 1.50 kW solid hot plates (Ø 160mm) 2 x 2.00 kW solid hot plates (Ø 180 mm) ... -
Page 10: Introduction Of The Product
4-Introduction of the Product A. Cooktop B. Induction Hotplates C. Control Panel Wire Grid E. Drip Pan or Baking Tray F. Adjustable Feet Common accessories Drip Pan or Baking Tray Wire Grid EN-10... - Page 11 Control Panel Hob control Hob control Oven Function Oven temperature knobs knob Timer Setting knob knobs EN-11...
- Page 12 Oven controls - the function and temperature controls To use an oven function, first select the function with the left hand dial and then set the temperature of the function with the right hand dial. Set the timer in the middle.The indicator light will illuminate. When the temperature inside your oven reaches the temperature you set, the thermostat will cut off...
-
Page 13: Using The Oven
Instructions for use 5.Using the oven When you first use your oven, odors may come from the insulation materials and the heating elements. For this reason, before using your oven for the first time, switch on the oven while empty, at its maximum temperature for 45 minutes. - Page 14 Working Principle The induction hob comprises a coil,a hotplate made of ferromagnetic material and a control system.Electrical current generates a powerful magnetic field through the coil.This procuces a large number of vortices which in turn generate heat which is then transmitted through the cookingzone to the cooking vessel. magnetic circuit ceramic glass plate induction coil...
-
Page 15: Using The Hob
1. 1800 W zone 1200 W zone 3. 1800 W zone 1200 W zone 5. Glass plate 6. Display Instructions for use Preparation before using: When the power is switched on,the buzzer will sound once and all the indicators will come on for one second and then go out.The hob is now in standby mode. -
Page 16: Safety Reminding And Maintenance
You may have a number of different cooking vessels 1. This induction hob can identify a variety of cooking vessels,which you can test by one of the following methods: Place the vessel on the cooking zone.If the corresponding cooking zone displays a power level,then the vessel is suitable.If “U”flashes,then the vessel is not suitable for use with the induction hob. -
Page 17: Failure Display And Inspection
The surface of the induction hob may be easily cleaned in the following way: Type of Method of cleaning Cleaning materials contamination Light Immerse in hot water and Cleaning sponge wipe dry Rings and lime Apply white vinegar to the Special adhesive for area,wipe with a soft cloth or scale... - Page 18 Hints and tips Baking tips 1. Always place baking tins in the centre of the wire shelf. 2. Make sure you use bakeware that is oven proof. 3. Do not place bakeware too close to the rear or sides of the oven walls. 4.
- Page 19 Hints and tips Energy Saving 1. During use of electrical cookers, it is required to use saucepans having flat bases. 2. Choose a cookware of proper size. 3. Using a lid will reduce cooking times. 4. Minimize the amount of liquid or fat to reduce cooking times. 5.
-
Page 20: Touble Shooting
Hints and tips Warning: To avoid possible electric shock,disconnect the power supply before replacing the lamp. Only use 25-40W/230V type E-14, T300 C halogen lamps,or 25-40W/230 V type G9, T300 C halogen lamps. Replacing the oven light 1. Switch off and disconnect the power from the oven. Ensure that the internal parts are cool before touching internal parts. - Page 21 2012/19/EU We decline liability for any d damage or accide ent derived from any use of this p product which is not in co onformity with the e instructions co ontained in this b ooklet. EN-21 P/N:16171100A12685...
Need help?
Do you have a question about the ES 8030 and is the answer not in the manual?
Questions and answers