Philips WACS700 User Manual
Wireless music
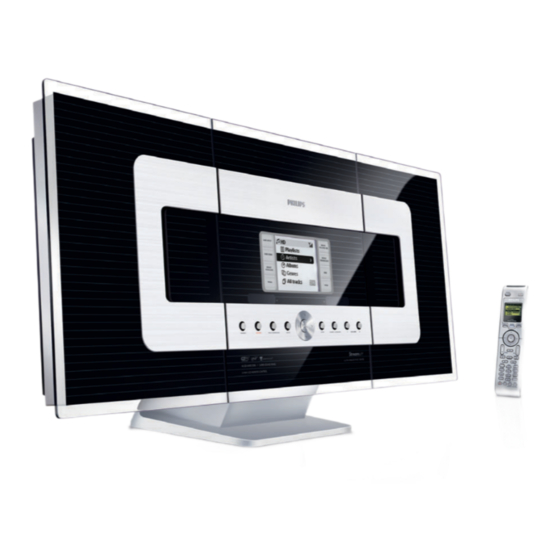
center + station
Hide thumbs
Also See for WACS700:
- Service manual (66 pages) ,
- User manual (51 pages) ,
- Software manual (20 pages)

Related Manuals for Philips WACS700


Summary of Contents for Philips WACS700
- Page 1 Wireless Music Center + Station CS700 User manual March 28, 2005 www.philips.com/support philips...
- Page 2 D. M. 28 Agosto 1995 n. 548 lead - not simply over the two wires. Fatto a Eindhoven Philips Consumer Electronics Copyright in the U.K. Philips, Glaslaan 2 Recording and playback of material may require 5616 JB Eindhoven,The Netherlands consent.
- Page 3 Index English________________________________2 Hereby Philips Consumer Electronics, BCU Audio Video Entertainment, declares that this product CS700 is in compliance with the essential requirements and other relevant provisions of Directive 1999/5/EC. CAUTION Use of controls or adjustments or performance of procedures other than herein may result in hazardous radiation exposure or other unsafe operation.
-
Page 4: Philips Online Support
Philips online support Philips products have been designed and manufactured to the highest quality standards. If your Philips Connected Planet product is not working correctly, we recommend you check your User Manual to verify that your product is properly connected and configured. - Page 5 Philips Philips Consumer Electronics WRR.xxxx EC DECLARATION OF CONFORMITY Philips Consumer Electronics (manufacturer’s name) Philips… declare under our responsibility that the electrical product: Philips CS700/22 (name) (type or model) Wireless Music Center + Station (product description) to which this declaration relates is in conformity with the following standards:...
- Page 6 Gracenote CDDB logo, and the “Powered by Gracenote” logo are trademarks of Gracenote. IMPORTANT! RETAIN YOUR ORIGINAL FILES Please ensure that you retain the original files transferred to your STATION. Philips is not responsible for any loss of content if the product becomes damaged or the hard disk not readable.
-
Page 7: Table Of Contents
Helpdesk contact __________________2 Selecting a track when playback is stopped Philip online support_______________2 ______________________________ Selecting a track during playback ______ About your WACS700 Searching for a passage during playback System requirements _______________ 3 ______________________________ Additional selecting and searching (on MP3-CDs... -
Page 8: Safety
Disc handling ______________________44 uPnp Playback___________________39 Setup___________________________ 44 Technical data __________________ 45 SLEEP Timer Activating or deactivating Troubleshooting ________________46 the SLEEP timer ___________________40 Frequently asked questions _______46 Extras Glossary________________________48 Demonstration mode _______________41 Mounting kit______________________42 Index__________________________ For computer users: Philips Media Manager DMM)_________43... -
Page 9: System Requirements
About your Wireless Music Center + Station CS700 CS700 This all-in-one system comprises of 2 units: , your Wireless Music Center and – your Wireless Music Station. CS700 CS700 is capable of wirelessly streaming audio content to up to five Stations via –... - Page 10 C700 Fig.1 Wireless Music Center,...
- Page 11 S700 Fig.2 Wireless Music Station,...
-
Page 12: Center
Controls Center Station Features are same on both & unless stated (See fig. 1 & 2. Top & Front STANDBY ON - press briefly for standby on/ off (green light indicator when streaming) -press and hold to activate ECO POWER standby (red light) Center only) EJECT... -
Page 13: Remote Control
Use this remote control to navigate menu options and operate all the features on your WACS700 system. By simply pressing REFRESH, the black and white display screen on this remote conveniently allows you to select viewing the information as displayed on your Station or Center. - Page 14 VOL -/+ - adjusts volume ALBUM /TITLE -fast search MP3 album and titles backwards/ forwards VIEW – display view options STOP – stops CD/ HD playback; - stops music broadcast; - stops recording; Center only) ejects disc II / - start /pause playback PROGRAM/ 1 - enters program menu;...
- Page 15 Fig. 4 Station 36-key card remote This remote is designed to operate all the features on the Station. Some features, e.g. recording (REC button), MUSIC BROADCAST, MARK/ UNMARK, selecting the CD source can only be operated on the Center and 2-way remote. Most of the controls are similar to the Center 2-way remote.
-
Page 16: Using The Remote Control
emote control Using the r Center remote control Inserting batteries Insert 4 x AAA alkaline batteries with correct polarity (+/-) as shown. Close the battery compartment. Center remote: 4 x AAA Low battery icon • When the Center remote display shows the battery low icon , replace your batteries for optimal performance. -
Page 17: Preparation Fm Antenna/ Power Supply
Basic connections: FM antenna, Ethernet and AC power In order to ensure a good wireless connection avoid placing the set close to microwave ovens and large metal objects. Never make or change connections with the mains supply switched on! Place the Center and Station close together on the same table for easy handling. Connect the FM antennae. -
Page 18: Wifi Auto Installation
Install the Station a After you plugged in the unit, the STANDBY ON LED lights up red. Wait a few seconds until the display shows the PHILIPS’ screen. b Press STANDBY ON on the unit. the STANDBY ON LED lights up green. -
Page 19: Installing Multiple Stations
Connect your new Station to the power supply. a After you plugged in the unit, the STANDBY ON LED lights up red. Wait a few seconds until the display shows the PHILIPS’ screen. b Press STANDBY ON on the unit. -
Page 20: Switching On
Basic Operation Basic playback controls Unless otherwise stated, all operations described are based on the use of Center remote control. Switching on from active standby To switch on, you can either: • On the set, press STANDBY/ON or SOURCE • On the Center remote control, press HARDDISK, CD-MP3-CD or TUNER/ AUX Server •... -
Page 21: Switching On, Switching To Standby
Switching off into active standby On the set, press STANDBY/ON or press briefly on the remote control. Display shows: Goodbye and then Set in Active Standby when you switch to standby mode. Display shows: NEWS OFF or SLEEP OFF and then Goodbye if you were using the NEWS or Sleep timer function. -
Page 22: Sound Control
Sound control Volume You can adjust the volume level from 0-32. • Press VOL -/+ Display shows volume bar briefly. MUTE • To switch off the volume temporarily, press MUTE on the remote control. If activated, display shows Mute ON and the mute icon •... -
Page 23: Understanding The Display Icons
Understanding the display icons What Main Sublevel header icon icon HD/ CD source Radio source Server source Playlists Artists Albums Genres All tracks *Raw (uncompressed) tracks *These are recordings created on the Center, specifically when you record a large Repeat once number of tracks/ large audio files. -
Page 24: Wacs700 Message Displays
CS700 message displays Interactive pop-ups and full-screen displays will guide you through the status of your system: information Confirmation progress screens warning/error messages Busy animation This appears for features that require a few extra seconds to perform and indicates your unit is busy. -
Page 25: Menu Options Overview
Menu options overview Navigate and explore. Check out plenty of features inside submenus on the Center and Station: CENTER submenus according to source Tuner/ Aux Equalizer Equalizer Auto Store Create Playlist Settings Equalizer Add to Playlist Information Settings Delete XXX Restore Information Previous... - Page 26 Navigation control Navigating tracks, menu options & settings Press MENU on the device/ remote control. A menu pop-up appears. Use the OK navigation up/ down, left/ right controls ( , ) to highlight and select your option/ setting. Press OK to confirm/ play. Example of options when you press MENU to select Settings submenu.
- Page 27 Multi-functional controls: searching… To fast scroll up/ down content: Long press …on the – remote control) Skip to next/ previous item: short press …on the remote – control) For speed, use the remote control to key in the number of a desired track. Display settings 2 options: Backlight (on/ off)
-
Page 28: Playing Cds On The Center
Playing CDs on the Center For playback on this set you can use: – All pre-recorded audio CDs – All finalised audio CDR and CDRW discs MP3-CDs (CD-ROMs with MP3 tracks) – Insert a music CD into the CD slot loader on the Center, CD printed side facing as shown. -
Page 29: Recording Cds On The Center
Recording CDs on the Center You can record and listen to your tracks at the same time, or if you are in a hurry, you can select the Fast ripping speed instead of Playspeed. copyright protection technologies CDs encoded with copyright protection technologies by some record companies may be unplayable. -
Page 30: Renaming Tracks
Renaming tracks... -
Page 31: Using Gracenote Cddb Database
The Album selection list displayed may vary from time to time according to CDDB Server updates – available via internet. If you wish to modify ID3 tags, please use the Philips DMM software for your computer (see the – Getting Connected manual). -
Page 32: Hd Music Playback
HD (hard disk) music playback Select HD function (press HARDDISK /JUKEBOX on the respective remote control OR press SOURCE once or more on WACS700.) Use the navigation control to select and access your desired music library option: Playlists, Artists, Albums, Genres, All tracks. -
Page 33: Match Genre
Playback stops when the last song is played from your selected genre/ artist (unless you have selected repeat playback mode). To enable MATCH GENRE/ LIKE GENRE/ LIKE ARTIST, – make sure you use Philips DMM to input the relevant ID3 track information. This sound feature is cancelled when you: –... -
Page 34: Music Follows Me
Music Follows Me (HD source) This feature allows your MP3/ WMA tracks stored on the HD source to follow you from one place and device to another: Center to the Station – Station to the Center – Station to another Station. –... -
Page 35: Broadcast Mode
BROADCAST (Center feature) In HD source, the Broadcast function allows you to play and share the same audio track on the Center with one or more Stations. Everyone at home then gets to listen in what’s playing on the Center and enjoy and share the same track simultaneously. - Page 36 To stop broadcast Press STOP/ on the Station, within the 5-second countdown or during broadcast. The Station resumes its previous status. Rejected broadcast icon appears. completely, on the Center press STOP/ To cancel Both the Center and Station will show the default HDD screen for 5 minutes.
-
Page 37: How To Create Playlists
How to create Playlists You can create a maximum of 99 playlists, each containing up to 300 tracks on both the Center and Station. Select your desired track/ album/ genre or artist to add Select the HD source. During playback of a track in Artist/ Album / Genres/ All tracks, press MENU. -
Page 38: Different Play Modes: Shuffle And Repeat
Different play modes: Shuffle & Repeat • During playback in HD / CD source, on the remote control press the Shuffle/ Repeat once or more to select a play mode. You can also combine Shuffle and Repeat. icons appear when you select a shuffle/ repeat mode option. Repeat options: a single current track –... -
Page 39: How To Tune To Radio Stations
Listening to FM Tuner Check you have connected the FM antenna to give you good radio reception. (see page xx) • Select TUNER function. Radio plays from the last station listened to. Display during radio playback shows: station frequency, manual tuning prompts and if available: the preset number, stereo /sound status, and RDS text information. -
Page 40: Programming Presets
Programming presets manually Program up to 40 stations. In tuner mode, press the left navigation key to return to the preset list screen, if necessary. Use the up/ down navigation control to select a preset frequency you want to overwrite. Tune to your desired station as described in Manual tuning. -
Page 41: Rds
(some /00c versions only) RDS (Radio Data System) is a service that allows FM stations to send additional information along with the regular FM radio signal. When you are receiving an RDS station, RDS and the station name are displayed. Switching through RDS information Tune to the desired RDS radio station (see “Listening to FM tuner”). -
Page 42: Changing The Tuner Grid
Changing tuner grid (/21 IFU versions only) • On your remote control, press and hold TUNER and X seconds. GRID 9 / GRID 10 appears respectively. -
Page 43: Recording Tuner /Aux
Recording in TUNER/AUX modes Record up to a maximum of 3 hours for each Aux/Radio recording. Depending on your recording file size(s), this is sometimes stored in temporary folder called Raw tracks for background encoding. Basic recording controls Select the source you want. (see the respective chapter, Recording from Tuner or Recording from AUX) Press RECORD at the point where wish to start recording. -
Page 44: Recording Tuner
Recording from Tuner Select Tuner source. Select your desired station. Press REC /OK to start recording. Display shows Recording... Recording from AUX Select AUX source, when you have connected another external device with a cable (not supplied) to AUX IN on the Center. -
Page 45: Backup Files
Backup files Upnp Playback As an alternative to music stored on your Center, you may wish to stream music direct from your PC music folder to your Station. Select your external server. Use the navigation control to browse for the folder you wish to access for playback. -
Page 46: Sleep Timer Activating Or Deactivating The Sleep Timer
SLEEP: How to use the built-in timer This function allows you to automatically switch the Center/ Station from an active mode standby after a preset period of time (in minutes). In any active mode, press SLEEP once or more, on the remote control, to select your preset time period: 15 (default) →... -
Page 47: Demonstration Mode
Demonstration mode In standby mode, activate the demo feature by pressing the STOP / key for 5 seconds. You will see a sequence of screens introducing you the some of the Station and Center features. Below are some sample screens: To exit the demo mode, press the STOP/ key during DEMO for 5 seconds. -
Page 48: Mounting Kit
– Philips cannot be held responsible for any personal injuries, accidents and breakages resulting from the system during and after mounting! Tools: What else you’ll need (not supplied): •... -
Page 49: For Computer Users
For computer users: Philips Digital Media Manager (DMM) and installer setup • Streaming music from your computer Installing and using the DMM music software • Play, stream and manage music stored on your computer by using the DMM software on the installer CD. -
Page 50: General Info Environmental Information
General info Environmental information – All redundant packing material has been omitted.We have done our utmost to make the packaging easily separable into three mono materials: cardboard (box), polystyrene foam (buffer) and polyethylene (bags, protective foam sheet). – Your set consists of materials which can be recycled if disassembled by a specialized company. Please observe the local regulations regarding the disposal of packing materials, exhausted batteries and old equipment. -
Page 51: Technical Data
Technical data Subject to modification without notice. General C700 S700 AC Power __________________ 230V / 50–60Hz_______________ 230V / 50–60Hz Power consumption Active ______________________ W_________________________ Standby ___________________ < W _________________________ < Eco Power Standby ___________ < W__________________________< Dimensions, (h) (d) ________ _________606 x 305 x 180mm __________ 360x 278 x130 ... -
Page 52: Troubleshooting
It is a technology for digital data transfer with wider range and bandwidth. Streaming is process describing data is pulling between places, can be multiple places. The Wi-Fi logo guarantees maximum interoperability among devices carrying this symbol. The Philips Streamium connects quickly and easily to any other Wi-Fi certified networking equipment. - Page 53 Yes, if your PC is internet-connected, you can basically download MP3 music from selected websites onto your PC. Transfer these tracks to the Music Center via the supplied Ethernet cable, using Philips Digital Media Manager (DMM). Alternatively, you can burn a CD-Rom and then record the music onto the Music Center.
-
Page 54: Glossary
Gracenote CDDB Music Recognition Service is a music CD database with access to ID3 tag information. Network Connections With WACS700 you can choose to make a wired or wireless (WiFi) connection to your Center or a computer. Both your Center or a computer act as a server device which can share data with your Station or other devices. - Page 55 Transmission Control Protocol/ Internet Protocol – a data coding system Wired Equivalent Privacy – a password or ‘key’ used for wireless networks, WEP is an encryption key for security. When prompted, you will need to enter your WEP to enable 2 or devices to share data.
- Page 56 Meet Philips at the Internet http://www.philips.com Need more help or information on installation? Visit: www.philips.com/support CS700 Printed in China LC wk513...
Need help?
Do you have a question about the WACS700 and is the answer not in the manual?
Questions and answers