Table of Contents
Advertisement
Advertisement
Table of Contents

Subscribe to Our Youtube Channel
Summary of Contents for ANCEL AD310
- Page 1 ANCEL AD310 User’s Manual AD310 ENTER EXIT...
-
Page 2: Table Of Contents
2.3 Location of the Data Link Connector (DLC) 2.4 OBD II Readiness Monitors 2.5 OBD II Monitor Readiness Status 2.6 OBD II Definitions 3. Using the Scan Tool 3.1 Tool Description ANCEL AD310 3.2 Specifications 3.3 Included 3.4 Language 3.5 Contrast 3.6 U nit of M eas ure... -
Page 3: Safety Precautions And Warnings
1. Safety Precautions and Warnings To prevent personal injury or damage to vehicles and/or the scan tool, read this instruction manual first and observe the following safety precautions at a minimum whenever working on a vehicle: Always perform automotive testing in a safe environment. Do not attempt to operate or observe the tool while driving a vehicle. -
Page 4: General Information
2. General Information 2.1 On-Board Diagnostics (OBD) II The first generation of On-Board Diagnostics (called OBD I) was developed by the California Air Resources Board (CARB) and implemented in 1988 to monitor some of the emission control components on vehicles. As technology evolved and the desire to improve the On-Board Diagnostic system increased, a new generation of On-Board Diagnostic system was developed. -
Page 5: Location Of The Data Link Connector (Dlc)
DTC Example P 0 5 2 0 Systems Last two digits identify individual component within the system B = Body C = Chassis P = Powertrain U = Network Sub -systems Code Type 1 = Fuel and air metering 2 = Ignition system or engine misfire Generic (SAE) : 3 = Auxiliary emissions controls 4 = Vehicle speed control and idle controls... -
Page 6: Obd Ii Readiness Monitors
2.4 OBD II Readiness Monitors Readiness Monitors are indicators used to find out if all of the emissions components have been evaluated by the OBD II system. They are running periodic tests on specific systems and components to ensure that they are performing within allowable limits. -
Page 7: Obd Ii Monitor Readiness Status
2.5 OBD II Monitor Readiness Status OBD II systems must indicate whether or not the vehicle’s PCM’s monitoring has completed testing on each emission component. Components that have been OBD II tested will be reported as “OK”. The purpose of recording readiness status is to allow inspectors to determine if the vehicle’... -
Page 8: Using The Scan Tool
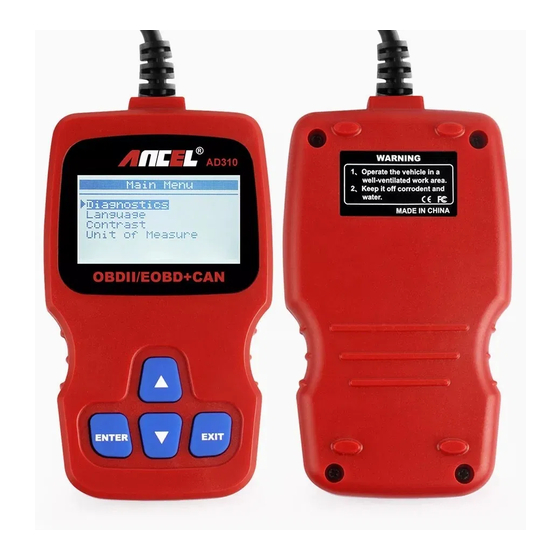
Freeze Frame Date and may include important engine parameters such as engine RPM, vehicle speed, air flow, engine load, fuel pressure, fuel trim value, engine coolant temperature, ignition timing advance, or closed loop status. 3. Using the Scan Tool 3.1 Tool Description - ANCEL AD310 OM 123... - Page 9 1. LCD DISPLAY - Indicates test results. Backlit, 128 x 64 pixel display with contrast adjustment. 2. ENTER BUTTON - Confirms a selection (or action) from a menu. 3. EXIT BUTTON - Cancels a selection (or action) from a menu or returns to the menu.
-
Page 10: Specifications
Storage Temperature: -20 to 70 癈 (-4 to 158 F? External Power: 8.0 to 18.0 V power provided via vehicle battery Dimensions: Length Width Height 125 mm (5.00”) 70 mm (2.80”) 22 mm (0.90”) NW: 0.23kg (0.51lb), GW: 0.32kg (0.74lb) 3.3 Included AD310 Scan Tool main unit User’s Manual... -
Page 11: Language
3.4 Language 1) From the Main Menu, use the UP/DOWN scroll button to select the Language and press the ENTER button. Main Menu D iagnos tic s Language Contrast U nit of M eas ure Contrast 1) From the Main Menu, use the UP/DOWN scroll button to select Contrast, and press ENTER. -
Page 12: U Nit Of M Eas Ure
U nit of M eas ure 1) From the Main Menu, use the UP/DOWN scroll button to select U nit of M eas ure, and press ENTER. Main Menu D iagnos tic s Language Contrast U nit of M eas ure 2) From the Unit of Measure menu, use the UP/DOWN scroll button to select the desired Unit of Measure. -
Page 13: Obd Ii Diagnostics
4. OBD II Diagnostics CAUTION: Don't connect or disconnect any test equipment with ignition on or engine running. 1) Turn the ignition off. 2) Locate the vehicle's 16-pin Data Link Connector (DLC). 3) Plug the scan tool cable connector into the vehicle's DLC. 4) Turn the ignition on. - Page 14 Pending Codes are also referred to as "maturing codes" or "continuous monitor codes". They indicate problems that the control module has detected during the current or last driving cycle, but are not considered serious, yet. Pending Codes will not turn on the malfunction indicator serious, yet. Pending Codes will not turn on the malfunction indicator up cycles, the code clears from memory.
-
Page 15: Erase Codes
The control module number, sequence of the DTCs, total number of codes detected and type of codes (Generic of Manufacturer specific) will be observed on the upper right hand corner of the display. 4) If more than one DTC is found, use the UP/DOWN scroll button, as necessary, until all the codes have been viewed. - Page 16 Diagnostic Menu R ead C odes Erase C odes Live D ata View F reez e F ram e I/M R eadines s Vehicle Info. 2) A warning message comes up asking for your confirmation. Erase codes Erase trouble codes! Are y ou s ure ? 3) Press ENTER to confirm.
-
Page 17: Live Data
4.3 Live Data The OBD II Scan Tool is a special diagnostic tool that communicates with the vehicle's computer. The Scan Tool lets you view "real-time" Live Data. This information includes values (volts, rpm, temperature, speed etc.) and system status information (open loop, closed loop, fuel system status, etc.) generated by the various vehicle sensors, switches and actuators. -
Page 18: View Freeze Frame
4.4 View Freeze Frame When an emission-related fault occurs, certain vehicle conditions are recorded by the on-board computer. This information is referred to as freeze frame data. View Freeze Data is a snapshot of the operating conditions at the time of an emission-related fault. if DTCs were erased, View Freeze Data may not be stored in vehicle memory depending on vehicle. -
Page 19: Vehicle Info
Select [I/M Readiness Test] and Press [ENTER], the screen will display the interface as shown below: Diagnostic Menu R ead C odes Erase C odes Live D ata View F reez e F ram e I/M R eadines s Vehicle Info. Press EXIT return to the Diagnostic Menu. - Page 20 3) Wait a few seconds while the scan tool reads vehicle information. 4) Press EXIT button to return Diagnostic Menu.
-
Page 21: Warranty And Service
5.1 Limited One Year Warranty THIS WARRANTY EXPRESSLY LIMITED PERSONS WHO PURCHASE ANCEL AD310 PRODUCTS FOR PURPOSES OF RESALE OR USE IN THE ORDINARY COURSE OF THE BUYER'S BUSINESS. ANCEL AD310 electronic product is warranted against defects materials and workmanship for one year (12 months) from date of delivery user.
Need help?
Do you have a question about the AD310 and is the answer not in the manual?
Questions and answers
I seem to be having trouble reading my 2013 mini cooper roadster. Can not clear codes.
To troubleshoot code clearing issues with the ANCEL AD310 on a 2013 Mini Cooper Roadster:
1. Plug the ANCEL AD310 into the OBD-II port with the engine running.
2. Turn the ignition to the ON position (do not start the engine again).
3. Wait for the scanner to link to the vehicle.
4. When the menu appears, select “Read Codes” to check for stored trouble codes.
5. To clear the codes, select “Erase Codes.”
6. Confirm by selecting “Yes,” then press enter.
7. Wait for the confirmation message that the codes have been erased.
If the codes do not clear, the issue may be with communication errors or unresolved problems with the vehicle.
This answer is automatically generated
will it work on a 2003 toyota tacoma
Yes, the ANCEL AD310 will work on a 2003 Toyota Tacoma because all Tacomas from 1996 and newer are OBD-II compliant, and the ANCEL AD310 is designed for OBD-II vehicles from 1996 or newer.
This answer is automatically generated
Will it work on 2013 Honda Accord
The ANCEL AD310 works with 1996 and newer US cars. Since the 2013 Honda Accord is a US vehicle made after 1996, it should be compatible with the ANCEL AD310. However, it is always recommended to check compatibility before purchasing.
This answer is automatically generated
Will this code reader work with @008 Lotus Elise SC
will it work on a 2014 subaru crosstrek
Can the AD 310 be used to reset Battery Management System on 2015 Jaguar F-Type V6S?