
Subscribe to Our Youtube Channel
Related Manuals for FLX F2


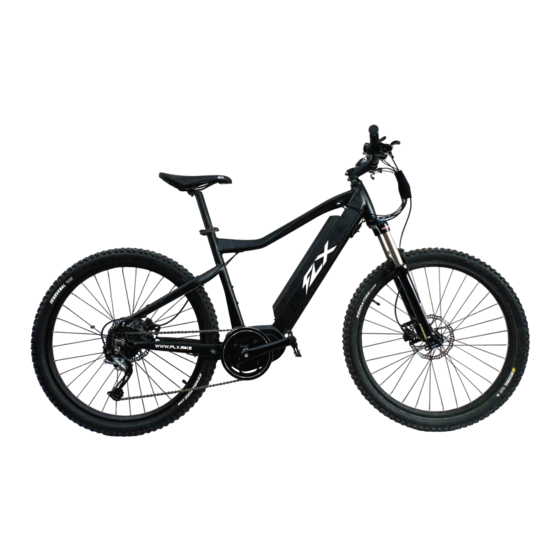
Summary of Contents for FLX F2
- Page 1 MANuAl ROADSTER TRAIL ATTACK FLX.BIKE...
-
Page 2: Table Of Contents
CoNteNts DeAr CustoMer QuiCk stArt GuiDe CoMpoNeNts proper use & sAfety iNfo AsseMbly iNstruCtioNs teChNiCAl speCs lCD sCreeN bAttery CAre CleANiNG & CAre useful tips leGAl reQuireMeNts leGAl DisClAiMer leGAl DetAils terMs & CoNDitioNs CoNtACt us FLX.BIKE... -
Page 3: Dear Customer
DeAr CustoMer Welcome to the FLX family! We’re so happy you’re here. We want to congratulate you on buying an FLX bike - you’ve picked a top-of-the-line model! In this manual, we’re going to break down the basics to make sure that your bike remains in top shape and performs to the highest standard. -
Page 4: Quick Start Guide
A full charge will take 5-8 hours depending on battery type. ASSEmbLE ThE hAnDLE bARS ATTACh ThE pEDALS • note: The left pedal has a reverse thread. To tighten, please turn counter-clockwise. mOunT ThE FROnT WhEEL flx.bike/manual FLX.BIKE... - Page 5 FLX assumes that all persons involved in using, repairing, maintaining, cleaning, or disposing of any FLX product must have fully read and understood the content and meaning of these operating instructions. FLX takes no responsibility for any injury or damage resulting from improper use of any FLX product.
-
Page 6: Components
CoMpoNeNts pArt 1 Saddle Stem Handlebars headset Seat post Front Wheel Derailleur/Cassette Rear Wheel Kickstand Cranks pedal FLX.BIKE... - Page 7 CoMpoNeNts pArt 2 Head Tube Top Tube Down Tube Seat Tube battery Seat Stay Forks motor R. brake Rotor F. brake Rotor Crankshaft Chain Stay F. Drop Out R. Drop Out FLX.BIKE...
- Page 8 CoMpoNeNts pArt 3 brake Levers Control pad Throttle Valve Quick Release LCD Screen Tire Shift Levers Spoke FLX.BIKE...
-
Page 9: Proper Use & Safety Info
At FLX, your safety, comfort, and happiness are of great importance to us and we can’t stress enough how important the use of proper safety equipment is. - Page 10 50 miles, and every 100 miles thereafter. They should be tightened to 40-50NM, failure to maintain this tightening torque may result in the crank arm falling off during a ride, which could cause a serious accident. flx.bike/faq FLX.BIKE...
-
Page 11: Assembly Instructions
15mm Wrench (For Roadster Pedals) Important notice: Please follow the instructions for assembly in the following pages carefully and properly. If you are unable or feel insecure about assembling the bike, please take it to a bike shop for assistance. FLX.BIKE... - Page 12 Locate the wheels in the front fork and rear dropouts (page 5) and make sure they are sitting flat on the hub. Use your hand to turn the quick release lever clockwise to tighten and assem- ble your wheels. FLX.BIKE...
- Page 13 To attach the left pedal, please turn counter-clockwise. Tool used: 15mm Wrench (Roadster) 6mm Allen Key (Trail and Attack) Insert the pedals carefully into the cranks and turn by hand in the direction shown. Tighten with the appropriate tool provided. FLX.BIKE...
- Page 14 To attach the right pedal please turn clockwise. Tool used: 15mm Wrench (Roadster) 6mm Allen Key (Trail and Attack) Insert the pedals carefully into the cranks and turn by hand in the direction shown. Tighten with the appropriate tool provided. FLX.BIKE...
- Page 15 Tool used: Allen key 4mm Insert the tool in the bolt located as shown in the picture. Press the handlebar against the stem. Insert and screw the bolts into the stem plate to assemble the handlebar, tighten the screws clockwise. FLX.BIKE...
- Page 16 5” (12.7cm) break and lead to a serious accident. If the seat post is not tall enough for you, please purchase an extra long seat post that can acommodate your height. FLX.BIKE...
- Page 17 Charging port is on the backside of the battery. Lift the rubber seal and you will see the USB outlet and battery charging port. Make sure you charge the battery fully before your first ride. FLX.BIKE...
-
Page 18: Technical Specs
• Kenda Koast 27.5 x 1.5 wire bead • 9 level pedal assist • Shimano 9 speed 11-34t • Thumb throttle ChAiN wheels fork • KMC 9 speed • Samson 27.5” alloy • Custom aluminum alloy fender eyelets ChAiNriNG • 44t FLX.BIKE... - Page 19 • Kenda Nevegal 27.5 x 2.1 wire • 9 level pedal assist • Shimano 9 speed 11-34t bead • Thumb throttle ChAiN wheels suspeNsioN • KMC 9 speed • Samson 27.5” alloy • SR Suntour XCR Oil Suspension /w Lockout ChAiNriNG • 40t FLX.BIKE...
- Page 20 • Shimano 9 speed 11-34t wire bead • Thumb throttle ChAiN wheels suspeNsioN • KMC 9 speed • Samson 27.5” alloy • Front: SR Suntour Epixon Air Suspension /w Lockout ChAiNriNG • Rear: SR Suntour Air Shock /w • 36t Lockout FLX.BIKE...
-
Page 21: Lcd Screen
The color LCD has many functions, here we will cover the essentials. For more information visit flx.bike/manual. The LCD has been pre-programmed to comply with your local speed regulations. For information on how to change this, please visit the URL above or go to page 22. - Page 22 TImE DISpLAy bATTERy InDICATOR SpEED SCALE DISpLAy SpEED SpEED unIT Power Button ( Headlights ( mODE DATA Mode ( RIDIng STyLE pOWER LEVEL CONTROLLER • Range • Trip distance • Energy consumption • Max speed • Time • Average speed FLX.BIKE...
- Page 23 )” button for 3 seconds, and it can be turned off the same way. To charge USB devices via the display’s USB port, remove the rubber seal on the bottom of the display and insert any USB charging cable. FLX.BIKE...
- Page 24 The options can be cycled through with “ + ” and “ - ” buttons and adjusted as you see fit. To save and exit navigate to “Exit” and press the “ i ” button on the controller. For the full list of features on the LCD display, please refer to the following: flx.bike/manual FLX.BIKE...
-
Page 25: Error Codes
Controller temperature sensor fault an error code. please refer to these error code definitions Current sensor fault to aid with troubleshooting and maintenance. Battery temperature fault Motor temperature fault Speed sensor fault BMS communication fault Communication fault FLX.BIKE... -
Page 26: Battery Care
Please consult a land or sea freight agent for transportation of the battery. If there appears to be an issue with the charger or battery, stop use immediately and contact either the manufacturer or us at hello@flx.bike. FLX.BIKE... - Page 27 Charging port battery Indicator battery Status button FLX.BIKE...
-
Page 28: Cleaning & Care
In general, wiping down your bike after a rough ride with a damp rag should be enough to keep it looking great, just make sure to be careful around the electronics. FLX.BIKE... -
Page 29: Useful Tips
Properly inflate your tires according to riding conditions. Under-inflated tires are prone to pinch flats, especially if riding off-road or over sharp edges. If you are unsure of the proper pressure, read the tire. Check the throttle connection underneath the neoprene sleeve if the throttle doesn’t work initially. FLX.BIKE... - Page 30 FLX.BIKE...
-
Page 31: Legal Requirements
For FLX ebikes, special legal provisions apply for their limit of use. As an ebike they can be used both as a purely mechanical bicycle or as a motor assisted means of transportation, in essence they can operate as a bicycle at times if desired/required. -
Page 32: Legal Disclaimer
FLX electric bike or any of the Seller’s other products. In the case that a modification approved by the Seller malfunctions due to user error, improper installation, lack of... -
Page 33: Legal Details
DetAils Technical details in the text and illustrations of the translation of these operating instructions are subject to change. For the most up to date version of this FLX User Manual visit flx.bike/manual or email hello@flx.bike. Any liability whatsoever by the publisher, editor and other third parties for contributions to this document, FLX User Manual, and any resulting damage - regardless of what type - is hereby fully excluded unless it involves a case of gross negligence. -
Page 34: Terms & Conditions
**Specifications.** Seller may, at its option, make changes in the designs, specifications or components of the Goods to improve the safety of such Goods, or if in Seller’s judgment, such changes will be beneficial to their operation, use, or image. FLX BIKE makes every effort to ensure that posted specifications, images, pricing and product availability are as correct and timely as possible. - Page 35 FLX, the component will be replaced during the warranty period. FLX will have no obligation under this limited warranty in the event the product is damaged or destroyed as a result of any of the following events: component use on a non FLX product, damage or destruction by abuse;...
- Page 36 **Limited Remedy.** Unless otherwise provided, the sole remedy under the above warranty, or any implied warranty, is limited to the replacement of defective parts at the sole discretion of FLX BIKE. In no event shall FLX BIKE be responsi- ble for direct, incidental or consequential damages, including, without limitation, damages for personal injury, property damage, or economic losses, whether based on contract, warranty, negligence, product liability, or any other theory.
-
Page 37: Contact Us
CoNtACt us! shAre your piCtures AND experieNCes with us At: hello@flx.bike flx.bike flx.bike/support facebook.com/flxbike FLX.BIKE... - Page 38 FLX.BIKE...
Need help?
Do you have a question about the F2 and is the answer not in the manual?
Questions and answers