Table of Contents
Advertisement
Advertisement
Table of Contents

Summary of Contents for KNP3D KLIC-N-PRINT 3D
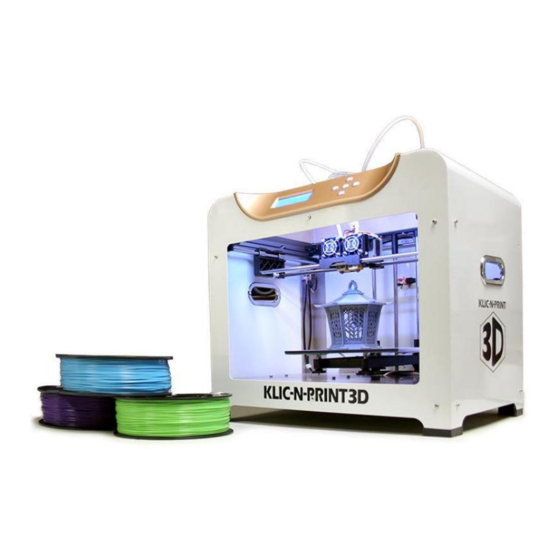
- Page 1 KLIC-N-PRINT 3D User Manual http://knp3d.com/ November 17, 2014...
-
Page 2: Table Of Contents
Hardware Setup .......................... 11 2.02 Software Setup ..........................13 2.02.1 Slic3r ............................ 13 2.02.2 KNP3D Converter ........................ 14 2.02.3 Slic3r Profiles for KNP3D ......................14 2.03 Control Panel..........................15 2.04 Leveling (Tramming) the Build Plate ................... 15 2.05 Loading Filament ......................... 17 Your First Print ............................ - Page 3 4.05.6 Scale ........................... 29 4.05.7 Split ............................. 30 4.05.8 View/Cut ..........................30 4.05.9 Settings ..........................31 4.05.10 File Info ..........................31 4.06 More Information on Slic3r ......................31 More About Printing ..........................32 Important – Read This! ........................ 32 5.01 5.02 Preheat ............................
- Page 4 Printer Settings > Extruder 1 (or Extruder 2) ..................64 Appendix C Control Panel - Utilities ......................65 Map of the Menus on the KNP3D Control Panel While Idle ..............65 Map of the Control Panel Menus During Printing..................66 C1 –...
- Page 5 C8 – Bot Statistics ..........................68 C9 – Filament Odometer ........................68 C10 – Profiles (for Preheating) ......................68 C11 – Jog Mode ..........................69 C12 – General Settings ........................69 C13 – Monitor Mode after Print Begins ....................70 C14 –...
-
Page 6: Introduction
1. Introduction Thank you for purchasing a KNP3D! At KNK USA we are committed to providing the very best customer support for our products. If you are new to 3D printing, remember that it’s not like using a regular printer. It’s not meant to be fast and it’s not meant to be used as a production machine. -
Page 7: Safety
Recommended Materials: Only use the recommended filament types sold at www.knp3d.com. If you are interested in trying a different filament, please contact KNK USA first to determine if the KNP3D is designed to print that material. 1.03 Warranty ... -
Page 8: Unpacking
Place the KNP3D on a work surface. A 3D printer should be operated in a dust-free, non-humid room with a temperature of 65°F (18°C) or warmer. If printing ABS filament, also make sure the room has adequate ventilation. -
Page 9: Parts Of The Knp3D
Sandpaper – Used to smooth any rough edges on the printed object Files – Used to smooth any rough edges on the printed object 1.08 Parts of the KNP3D SD Card Reader Control Panel Y Axis Extruders (2) - Page 10 Extruder Levers (2) Extruder Fans (2) Nozzles (2) Z Threaded Rod Interior of KNP3D Extruder Cable Filament Guide Tubes (2) Filament Guide Mounts (4) Filament Spool Spool Holders (2) Power Outlet and Power Switch USB Port Reset (do not press unless instructed to do so.)
-
Page 11: Setting Up
2. Setting Up 2.01 Hardware Setup Install the extruder: (1) Start by manually turning the large threaded screw counterclockwise to lower the build plate all the way down. (2) Open the box which contains the extruder and remove it from the plastic sleeve. Once positioned, bolt will The other bolt will pass pass through the mount and... - Page 12 (2) Slip each tube into the fasteners on the back of the KNP3D and screw the fasteners securely: (3) Place a roll of filament on the right spool of the KNP3D, making sure the filament will feed from the bottom side of the spools, straight up into the guide tubes: (4) Loading the filament into the extruder will be covered in Section 2.05.
-
Page 13: Software Setup
(3) Turn off the power when not using the printer. Unplug from your power outlet if the printer will not be used for a long period of time. 2.02 Software Setup There are a few pieces of software you’ll need in order to create files that the KNP3D uses: 2.02.1 Slic3r ... -
Page 14: Knp3D Converter
Alternatively, after creating the .gcode file in Slic3r, open the folder where the file was saved. Drag and drop this file onto the KNP3D Converter icon and it will automatically generate the .x3g file and save it in the same folder. -
Page 15: Control Panel
2.03 Control Panel When you initially power up the KNP3D, a welcome screen will appear for a few seconds, followed by the Main Menu: To maneuver through the menu, press the buttons on the panel to the right of the display: Move up the menu. - Page 16 For this process, you’ll need a single sheet of printer paper or even just a Post It note. (1) Turn on the power to the KNP3D. Place the sheet of paper on the build plate. (2) On the control panel, select Utilities and then select Level Build Plate. The current temperatures of the extruders and platform (build plate) will appear: (3) The extruder head will first move over to the right side and the build plate will rise up.
-
Page 17: Loading Filament
(5) The extruder head will now begin heating up to 230°C. This will be displayed on the control panel and, as the temperature increases, the progress bar will expand: (6) When the extruder reaches the preset temperature, the KNP3D will play a little tune, prompting you to load the filament. The display will show: (7) Press down on the small extruder lever on the right side of the right extruder and feed the filament firmly down into the hole on the top. - Page 18 5 - 8 seconds. (10) Press K to exit. Turn off the KNP3D. After a minute or so, you can remove and discard the extruded filament.
-
Page 19: Your First Print
Below is a flow diagram of the process used with the KNP3D. Most steps involve just a click or two, so do not fret over the number of steps. Once you’ve performed this procedure a few times, it will be... -
Page 20: Load Profiles Into Slic3R
We recommend you follow all of the steps in this chapter as a way to test your KNP3D. You can use either of the free PLA filaments that were shipped with your KNP3D. PLA (Polylactic Acid) is a popular filament to use because it readily sticks to the build plate, has a pleasant odor when heated,... - Page 21 Click on Convert (9) Turn on the KNP3D. (10) Insert the SD card into the 3D printer. The SD card slot is found on the top right corner of the KNP3D and the card is inserted with the label facing forward:...
- Page 22 (17) On the control panel, the following screen appears showing the length of time for that print, as well as the option to print another. If you are finished printing, turn off the power to the KNP3D. Amount of filament Printing time for most used for last print.
-
Page 23: More About Slic3R
Here’s a list of the key things to check when using Slic3r: Do not automatically upgrade to the latest version of Slic3r without seeing an announcement by KNK Forum. It’s important that any changes made in Slic3r not impact the KNP3D in USA at the User unexpected ways. -
Page 24: Slic3R Tabs
These settings will normally remain the same unless you change to a different type of filament, such as switching from PLA to ABS. Printer Settings are related to the KNP3D itself, such as the bed size, firmware type, and number of extruders. 4.03 Understanding Profiles ... -
Page 25: Changing And Saving Settings
A profile can contain settings for just one tab or for more than one tab: For example, one could have a profile of settings pertaining to ABS which was set up under Filament Settings. One might also set up Print Settings more suited for ABS than for PLA. These two profiles could be saved under separate names - ABS Print and ABS Filament. - Page 26 is a great way to not only learn the function of that setting, but also to better understand the 3D printing process itself. Also take note that Appendix B and the Slic3r User Manual cover these settings in more detail. ...
-
Page 27: Plater
As a safeguard, you should also save all of your settings by going to File > Export Config Bundle, and selecting a folder on your computer in which to save the configuration. Give it a new name, such as “My KNP3D Profiles”. ... -
Page 28: Delete And Delete All
You are not limited to adding and printing only one file at a time. For example, in the screen shot below, two different STL files have been imported using the Add button. Both files will be printed and the two files together can be saved as a single STL file by clicking on the Export STL button on the right side. -
Page 29: Rotate
4.05.5 Rotate There are three icons used for rotating: ° The first two rotate buttons will rotate a highlighted object in 45 degree increments, counterclockwise and clockwise as indicated by the icons. The Rotate button allows you to input the exact degree of rotation desired. ... -
Page 30: Split
4.05.7 Split Split is used to separate individual objects within an imported file. For example, let’s suppose the bat and “Boo” were created together in a 3D design program and imported as a single STL file. Then let’s also suppose you only want to print the bat. By highlighting the file and clicking on Split, the two objects are now separate: Two objects are listed after applying Split. -
Page 31: Settings
Another application for the Cut function is when your object is too large for the build plate or shaped where the bottom will not have sufficient contact area with the build plate to insure a good print. The Cut function can be used to dissect the file into two or more sections for printing. Then, after the individual parts are printed, they can be glued together. -
Page 32: More About Printing
One use for preheating is to save a little time. While you are finalizing your file in Slic3r, you can go ahead and begin preheating the KNP3D. It will be closer to target temperature once you are ready to load your file from the SD card. -
Page 33: Pausing The Print
There may be a reason to pause a print, such as the filament running out or discovering a small thread of filament caught in the object. The KNP3D can easily have printing paused and resumed. There are three kinds of pause modes available and are presented in this section. -
Page 34: Pause At Zpos
The following window will open indicating the current Z axis location. Change that setting to the location where you want the KNP3D to pause the print. Naturally, this will need to be a higher value than what’s shown in this window because a lower location has already been passed. -
Page 35: Cold Pause
5.03.3 Cold Pause Cold Pause is used to pause the printing process for an extended period of time. The KNP3D will remain powered on, however all heaters, stepper motors, and LED lights will be shut down. To access the Cold Pause option during a print, press the left arrow to bring up the following menu. -
Page 36: Changing The Extrusion Temperature During A Print
There are several reasons why you will need to unload the filament at some point: Changing to a new or different spool of filament Not planning to use your KNP3D for an extended period of time (remove filament and store in a dry location) Needing to unclog the extruder. -
Page 37: Changing Filament During A Print
(5) When the extruder reaches the set temperature, the KNP3D will play a little tune, prompting you to load or unload the filament. The feeder inside the extruder will begin to push the filament back out. The display will show: (6) If you are trying to clear a clog and get the filament flowing again, then immediately go back to Loading Filament on the control panel and proceed with those steps. -
Page 38: Printing With Abs And Other Filaments
Once the extruder is in the desired location, press K. Then press the down arrow to go to the second page of the menu and select Filament Loading. Press K to go to Filament Loading. Proceed with the instructions in Section 5.05 for unloading the current filament. Then load the next filament using the steps in Section 2.05. -
Page 39: Pva Support
Change to “PVA “ Save these new settings by going to File > Export Config Bundle, and select “My KNP3D Profiles”. These settings will be added to the same file with the other profiles you’ve downloaded into Slic3r and created yourself. -
Page 40: Skirt And Brim
KNP3D immediately begin a repeat of the last print. Option 2 – If you’ve already turned off the KNP3D, then just turn it back on and select the file again from the SD card. Option 3 - In Slic3r, use the Duplicate function to add copies of your object before exporting as a .gcode file. - Page 41 To use the Support function in Slic3r, click on the Print Settings tab and then, on the left side, select Support Material. Then check the box next to “Generate support material”: Slic3r will then determine where support material might be needed for that design. After exporting the .gcode file, you may wish to turn off that setting or you can save it as a new print setting and name it something appropriate.
-
Page 42: Two Color Printing
5.11 Two Color Printing To use both extruders during a print, it will be necessary to combine two .STL files into a single file. But even before doing that, the two files need to have the objects positioned so that, when combined, the different parts will print in the correct locations relative to one another. - Page 43 Then click on Settings Highlight file name (2) Select the top file, indicated as “0” and you’ll see that part turn green in the 3D preview. This helps you to make sure that the part that will printed on the default extruder is correct: Select the first part Click here to...
-
Page 44: Ooze Prevention
Change from 0 to 1. (5) Then repeat with the other part by clicking on “1” under Object, clicking on the green “+” icon, and then changing from 0 to 2 for the left side extruder. Second part is selected Selected part turns green. -
Page 45: Using The Left Extruder Only
The original configuration bundle you downloaded contains the profiles for this situation. From the Printer Settings, select the “KNP3D – Left Extr Only” profile which has the required change under Custom G-code. ... -
Page 46: Printing A Solid Object As A "Vase
5.13 Printing a Solid Object as a “Vase” The Spiral Vase feature in Slic3r will print a shape with solid bottom, but otherwise hollow. This is a quick way to turn any solid shape into a vase. Print Settings > Layers and Perimeters ... - Page 47 In the following example, three folders have been set up. Within “My Files”, two additional subfolders have been created: “Fun Files” and “Craft Files”. Then “Craft Files” is opened to a list of files, as shown. Files inside “Craft Files” Top level menu on SD Card Subfolders under My Files ...
-
Page 48: Post Processing
6. Post Processing 6.01 Removing the Object After the printing has stopped, wait a few minutes for the object to cool. If you attempt to remove the shape too soon, it can warp or be damaged. To remove the printed object from the build plate, use a sharp flat tool, such as a thin metal spatula or an artist’s palette knife. -
Page 49: Maintenance
However, please use the following steps: Turn off the power to the KNP3D. Make absolutely certain the printer is at room temperature. ... -
Page 50: Cleaning The Rods And Checking The Belts
If the clog is still present, either contact KNK USA for assistance or refer to this instruction file for disassembling the extruder to clear the clog: http://knp3d.com/manual/Tutorials/Clearing-A- Clog.pdf 7.04 Cleaning the Rods Frequency - H: once a month; M: once a month; L: once a month ... -
Page 51: Miscellaneous
Or your dog might get hold of it! IMPORTANT: If you have any questions or concerns about the condition of your KNP3D, please contact KNK USA using the following support ticket link: http://knp3d.com/contact-us/... -
Page 52: Appendix A Troubleshooting
Appendix A Troubleshooting The KNP3D starts printing without dispersing any filament. Verify that the filament is loaded properly by going to Utilities>Load Filament. Refer to Section 2.05 for additional instructions. _______________________________________ The Kapton tape on the build plate has torn. - Page 53 If necessary, preheat the bed back to 50°C. This should also help loosen the object as it warms up again. _______________________________________ After selecting the file to print, the KNP3D goes back to the main menu and doesn’t start heating or printing. ...
- Page 54 The tape on the build plate won’t stay down during the print. It curls up after a few minutes of printing. Cut the tape a little larger than needed and then pinch the excess at the corners, just beneath the plate.
-
Page 55: Appendix B Slic3R Settings
Appendix B Slic3r Settings There will be situations in which changing settings within Slic3r is needed. This appendix contains screenshots from the various settings windows in Slic3r with an indication of which settings are typically adjusted. As you try different settings, you may wish to save these as new profiles, especially if you plan to use them frequently or if you will want to return to the original profile before the changes were made. -
Page 56: B1 Print Settings
B1 Print Settings Print Settings are related to the print itself, such as the layer height, fill density, and a host of different speeds. This tab will be used each time a different type of printing is needed, such as changing the quality of the print or adjusting settings related to the type of model. -
Page 57: Print Settings > Infill
Print Settings > Infill 1. Can lower to 10, but use 25 – 35 for stronger objects (KU); use ≥ 20% to support flat ceilings and use 40% when more mechanical strength is needed (SM); use 10 – 20% for display objects (TB); If object is really small, may need to increase so that there’s enough material present (JH) 2. -
Page 58: Print Settings > Speed
Print Settings > Speed 1. Perimeters: Normally use 40 – 50 but lower to 30 if Layer height is 0.1.(KU); always slower than Infill speed (SM) 2. Small Perimeters: Decrease if there are small holes, islands, or small details (SM) (AR) 3. -
Page 59: Print Settings > Skirt And Brim
Print Settings > Skirt and brim 1. Use 2 (KU); Use 1 or 2 (PL) (RR); Use 2 but increase if switching from a dark colored filament to a light one (JH) 2. Use 6 (KU); Use 2 – 5 (PL); Use 6 (RR); Use 2 (JH) 3. -
Page 60: Print Settings > Notes
Print Settings > Notes 1. Use the Notes window for making any comments about the profile, such as what types of shapes print well with these settings. Maybe even list some specific file names you’ve used with this profile. Print Settings > Output Options 1. -
Page 61: Print Settings > Multiple Extruders
Print Settings > Multiple Extruders 1. These are set to 2 when using the left extruder only. (KU) (Note: this is already set in the “Left Extr Only” profiles.) When printing with a support material loaded into the left side, set the third and fourth settings only to 2. -
Page 62: B2 Filament Settings
(CB) Filament Settings > Cooling 1. KNP3D does not have a cooling fan, thus leave unchecked. (KU) 2. Same case; leave set to 0 (KU) 3. Increase to 40 or 50 if printing an object like a sphere where there is a small contact area on... -
Page 63: B3 Printer Settings
B3 Printer Settings Printer Settings are related to the KNP3D itself, such as the bed size, firmware type, and number of extruders. Printer Settings > General No changes recommended. Printer Settings > Custom G-code A small change was made for the “Left Extr Only” profile. Otherwise, no changes needed unless you wish to study on your own and try out. -
Page 64: Printer Settings > Extruder 1 (Or Extruder 2)
Printer Settings > Extruder 1 (or Extruder 2) 1. Only change if installing a different sized nozzle (KU). 2. Set within the firmware. KNK USA will advise if you are installing a different sized nozzle.(KU) 3. Usually 1 – 2 mm (SM); Can have a strong effect on print quality, increase if stringing is present, usually ≤... -
Page 65: Appendix C Control Panel - Utilities
Appendix C Control Panel - Utilities Map of the Menus on the KNP3D Control Panel While Idle Refer to location in parenthesis for information on each function. -
Page 66: Map Of The Control Panel Menus During Printing
To access the following additional settings, press the down arrow on the control panel after accessing the menu shown in Section C1: Raises build plate and moves extruder to origin; Info on KNP3D usage: displays current Refer to Section C8. temperatures... -
Page 67: C3 - Utilities Menu
C3 – Utilities Menu Page 3 To access the following additional settings, press the down arrow on the control panel after accessing the menu shown in Section C2: Set up preheat profiles. Do not change unless a Refer to Section C10. different sized nozzle is used. -
Page 68: C8 - Bot Statistics
C8 – Bot Statistics This function presents info on the KNP3D’s and filament usage. To access Bot Statistics, select from page 2 of the Utilities menu (refer to Section C2). Total hours of Duration of last print (assuming... -
Page 69: C11 - Jog Mode
Selecting Display Config will bring up a window with these settings. The down arrow will need to be used to access the Z Offset and temperatures: C11 – Jog Mode This function allows one to use the arrow keys on the key panel to move the extruder head or build plate to a different position. -
Page 70: C13 - Monitor Mode After Print Begins
P-Stop Control OFF (or ON) Leave set to OFF; not applicable to KNP3D C13 – Monitor Mode after Print Begins If the printing is underway, the Monitor Mode displays this information:... -
Page 71: Appendix D Specifications
Appendix D Specifications Printer Size: 22.4” x 19.7” x 23.2” (570 mm x 500 mm x 590 mm) Printer Weight: 39.7 lbs. (18 kg) Print Size: 6” x 6” x 9” (152 mm x 152 mm x 229 mm) Technology: Fused Filament Fabrication Number of Extruders: 2 Nozzle Diameter: 0.4 mm Minimum Layer Thickness: 50 microns (0.00196”) -
Page 72: Acknowledgements
Thank you to Ron Smith at KNK USA for his wealth of information on Slic3r settings and other useful tips for successful printing. Thanks also to Michele Harvey (http://cuttinupdesigns.com/) for providing technical input based on her experiences with the KNP3D. Thank you to my friends, Arlene Russell and Gloria Olmstead, for proof-reading this manual and saving... - Page 73 Click below to find more Mipaper at www.lcis.com.tw Mipaper at www.lcis.com.tw...
Need help?
Do you have a question about the KLIC-N-PRINT 3D and is the answer not in the manual?
Questions and answers