
Related Manuals for O2 Concepts, LLC Oxlife INDEPENDENCE

Summary of Contents for O2 Concepts, LLC Oxlife INDEPENDENCE
-
Page 1: User Manual
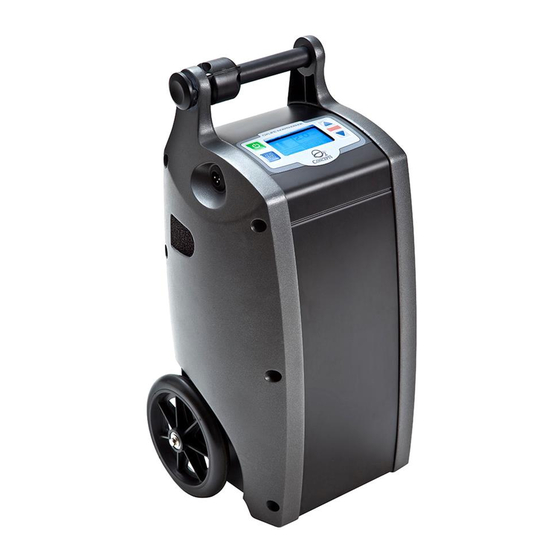
INDEPENDENCE Oxlife USER MANUAL P O R T A B L E O X Y G E N C O N C E N T R A T O R USER: READ THIS MANUAL BEFORE OPERATING THIS DEVICE. SAVE THIS MANUAL FOR FUTURE REFERENCE. - Page 3 PROUDLY MADE IN THE U.S.A.
- Page 5 PLEASE READ THIS OPERATION MANUAL CAREFULLY BEFORE USING THIS DEVICE. BE AWARE OF ALL WARNINGS AND SAFETY INFORMATION. ONLY USE ACCESSORIES APPROVED BY O2 CONCEPTS AND REFERENCED WITHIN THIS MANUAL. IF YOU DO NOT FULLY UNDERSTAND ALL THE WARNINGS, SAFETY PRECAUTIONS, AND OPERATING INSTRUCTIONS CONTACT YOUR AUTHORIZED DEALER OR PROVIDER FOR TECHNICAL SUPPORT.
-
Page 6: Table Of Contents
Table of Contents Table of Contents Section 1: Introduction ..........9 Symbols Reference ............. 9 How to Contact O2 Concepts ....... 11 Specifications ............12 Indications for Use ............ 14 Dynamic Network Analysis ........15 Section 2: Safety Guidelines........16 Device Safety Guidelines ........ - Page 7 AC Power Supply Home .......... 29 DC Power Supply Auto ..........30 DC Power Supply Information Guide for Use ..31 DC Power Supply Troubleshooting Guide for Use 32 Handling ..............34 Accessory Bag ............35 Cannula Use .............. 36 Humidifier Kit ..............
- Page 8 NOTES ................62...
-
Page 9: Section 1: Introduction
Section 1: Introduction Symbols Reference Icon Meaning Icon Meaning On/Off Button Use no grease or oils Mode Button Type BF Equipment Continuous Mode Do not dispose of in household waste Pulse Mode Keep dry in transport and storage Breath Detect Icon Not suitable for use in the presence of a flammable anesthetic mixture... - Page 10 Meaning Icon Meaning Do not disassemble Auto (as seen in manual) Home (as seen in manual) The Oxlife Independence protects against solid objects over 12mm and direct sprays of water up to 15° of vertical (IEC 60529) Refer to instructions...
-
Page 11: How To Contact O2 Concepts
How to Contact O2 Concepts Please contact your homecare provider if your Oxlife Independence requires service. Please call O2 Concepts Technical Support, at 1-(877)-867-4008, for support with your Oxlife Independence. Please call Customer Service to report any unexpected operation and events associated with the device. -
Page 12: Specifications
Specifications DIMENSIONS Device Dimensions H: 20.29 in H: 51.5 cm with Handle/Wheels W: 10.85 in W: 27.55 cm D: 9.45 in D: 24 cm WEIGHTS Device Weight 16.7 lbs. (7.57 kg) Cart Kit (Wheels & Pull Handle) 2.17 lbs. (0.98 kg) Battery 1.4 lbs. - Page 13 Additional monitoring may be required for patients using this device who are unable to hear or see alarms or communicate discomfort. The Oxlife Independence is not appropriate for any patient who would experience adverse health consequences as a result of a temporary interruption in oxygen therapy.
-
Page 14: Indications For Use
PRESCRIBED MODE AND FLOW SETTINGS SHOULD ONLY BE ADJUSTED UNDER THE ADVICE OF A PHYSICIAN The O2 Concepts Oxlife Independence is indicated on a prescription basis for the administration of supplemental oxygen. It is not intended for life support, nor does it provide any patient monitoring capabilities. -
Page 15: Dynamic Network Analysis
Dynamic Network Analysis This version of the Oxlife Independence contains Dynamic Network Analysis (DNA) technology that allows your health care provider to better serve your needs. This technology will allow your provider to ensure that your device continues to operate within specification. -
Page 16: Section 2: Safety Guidelines
Protect electrical power cords from sharp edges to avoid electrical shock and serious physical injury. Locate the Oxlife Independence in a well ventilated area to allow for adequate air intake. Avoid the intake of airborne pollutants, smoke, or fumes. - Page 17 DO NOT use the device with a damaged power cord or plug. DO NOT operate the device on wet surfaces or in standing water, and do not submerge or expose to water. If the Oxlife Independence has been dropped, damaged or exposed to water please contact your authorized dealer for inspection and possible repair of the device.
-
Page 18: Battery And Power Supply Safety Guidelines
Battery and Power Supply Safety Guidelines Use of non-approved battery or power supply may cause serious damage to the device and will void the warranty. Store the battery in a cool dry place when not in use. Remove the battery from the device if it will not be used for an extended period of time. -
Page 19: Section 3: Product Description
Section 3: Product Description Device and Accessories Information regarding how to operate the Oxlife Independence and its accessories can be found in the following sections: Product Description and Operating Instructions. The use of certain humidifiers and administration accessories not specified for use with this oxygen concentrator may impair performance. -
Page 20: Feature Identification
Feature Identification 1. Control Panel 2. LCD Display 3. Oxygen Outlet Port 4. Exhaust Port 5. Wheels 6. Rechargeable Battery Slots 7. FAA Approval Identification 8. Pull Handle 9. Air Intake Port Filter 10. External Power Input 11. Handle Lock / Release Button 12. -
Page 21: Understanding The Control Panel
Understanding the Control Panel 13. Power Button 14. Battery Status 15. External Power Source / Battery Charging Indicator 16. Increase / Up Button 17. Decrease / Down Button 18. System Status 19. Breath Detect (Pulse Mode Only) 20. Mode Setting 21. -
Page 22: Applied Parts
Applied Parts The applied parts, or components that a patient will come in contact with during normal operation of the device, are listed below: Handle Display Oxygen Port... -
Page 23: Section 4: Operating Instructions
Before Operating Your authorized dealer will and or should demonstrate proper operation of your Oxlife Independence. This manual should be saved for future reference to help you safely operate your device. If you have any further questions please contact your authorized dealer. -
Page 24: Locating Your Device
DO NOT locate the Oxlife Independence near any flammable materials or cleaning product or in the direct path of any heat source such as a stove, heat register or a car heater. Keep the Oxlife Independence at least 5 feet (1.6m) from hot sparking objects or open flame. -
Page 25: Device Settings
Device Settings Turn the device on by pressing the Power Button Press the Mode Button to select Continuous or Pulse Flow Mode. Press the Increase or Decrease buttons to select the correct flow rate. Turn the device off by pressing and holding the Power Button THE PROPER FLOW MODE AND FLOW RATE ARE PRESCRIBED BY YOUR PHYSICIAN. -
Page 26: Pulse Mode Bolus Volumes
CONTINUOUS FLOW MODE In Continuous Flow Mode a continuous flow of oxygen will flow through the cannula and into your nose. The oxygen is measured in Liters per Minute or LPM. PULSE FLOW MODE In Pulse Flow Mode the device will detect your breath and supply a measured pulse of oxygen or bolus. -
Page 27: Installing And Removing The Battery
Installing and Removing the Battery INSTALL REMOVE SLIDE INTO BACK OF DEVICE; BATTERY WILL PULL TAB AWAY FROM UNIT; LIFT BATTERY UP DROP DOWN SLIGHTLY AND CLICK INTO SLIGHTLY; THEN SLIDE STRAIGHT OUT POSITION Typical Battery Operation Times (@ 20 Breaths/Minute) PULSE FLOW CONTINUOUS FLOW FLOW RATE... -
Page 28: Battery Time Management
25% of the total battery charge. When the battery is fully charged (over 90%) the battery icon will appear solid. The Oxlife Independence battery includes a battery charge status indicator located on the front of the battery. Simply press the "PUSH" button on battery to display the remaining battery life in 25% increments. -
Page 29: Ac Power Supply Home
Oxlife Independence while simultaneously recharging the battery. To use the AC power supply, connect the power supply to a wall outlet and the Oxlife Independence. The external power icon will be displayed on the control panel. Recommendation for Use: Use no electrical outlets controlled by a switch. -
Page 30: Dc Power Supply Auto
DC Power Supply Auto Use only the power supplies provided with this device. The DC power cord allows you to power your Oxlife Independence from your vehicle's (car, boat, RV) 12/15 volt DC outlet, (cigarette lighter) in all settings. Use the DC outlet closest to the battery. Use no other DC outlets in the vehicle. -
Page 31: Dc Power Supply Information Guide For Use
DC Power Supply Information Guide for Use Starting the Device on DC Power Be sure that the vehicle’s engine is running PRIOR to plugging in your Oxlife Independence. Plug DC power cord into the device before plugging into the vehicle’s DC outlet. -
Page 32: Dc Power Supply Troubleshooting Guide For Use
DC Power Supply Troubleshooting Guide for Use Event Solution If there is no charging icon (lightning bolt symbol), reduce the device setting to 0.5LPM Continuous and wait for charging icon to Batteries Not appear. Charging Next, increase the flow rate by 0.5 increments until desired flow rate is reached. - Page 33 Handle Operation OPEN/CLOSE Press button to unlock handle. Begin rotating and release button. Handle will re-lock in open/close position automatically.
-
Page 34: Handling
Handling DO NOT LEAN ON UNIT To prevent damage to the unit, avoid resting excessive weight on handle. STAIRS While transporting the unit down stairs, it is recommended to allow unit to travel down first. -
Page 35: Accessory Bag
Accessory Bag The Accessory Bag is designed to carry your Oxlife Independence accessories including batteries, AC charger and cable, and DC charger. -
Page 36: Cannula Use
Cannula Use Your physician or dealer will recommend the proper cannula for your use Use of a cannula not specified for use with oxygen may impair the performance of your device. DO NOT use cannula tubing longer than 7 feet when using Pulse Flow Mode. -
Page 37: Humidifier Kit
DO NOT reverse the oxygen input and output connections. Water from the humidifier will travel through the cannula and back to the patient. DO NOT operate your O2 Concepts Oxlife Independence and ambulate while a humidifier is attached. Always remove the humidifier before walking. -
Page 38: Firesafe Tm Cannula Valve
Cleaning the Humidifier: Note: To clean the humidifier, follow the instructions provided by the manufacturer. If none are provided, follow these steps: Clean the humidifier daily. Wash it in soapy water and rinse it with a solution of ten parts water to one part vinegar. Rinse thoroughly with hot water. - Page 39 Refer to Instructions for Use for Part Number: 1109-2017 CE from Applied Home Healthcare Equipment. This includes intended use, warnings, installation instructions, cleaning, maintenance, disposal, and device specifications.
-
Page 40: Entering And Exiting Airplane Mode
Entering and Exiting Airplane Mode The cell must be deactivated prior to flight on a commercial aircraft. To enter and exit airplane mode, follow the steps listed in the procedure below. Step 1: Press and hold both the Up Arrow Button ( ) and Down Arrow Button ( ) simultaneously in order to enter the Service Mode screen. - Page 41 Step 3: The unit will exit Airplane Mode after 24 hours have passed or the user manually re-enters Normal Mode. Press the Up Arrow Button ( ) again to enter Normal Mode. Step 4: Press the Down Arrow Button ( ) in order to exit the service mode screen.
-
Page 42: Accessing The Provider Screen And Changing Languages
Accessing the Provider Screen and Changing Languages The Provider Screen shows information about the status and language setting of the unit. Within the Provider Screen, the language of the device can be changed to six different languages, including English, German, Dutch, Spanish, French, and Italian. Entering the Provider Screen: Press and hold the Mode Button ( ) and Down Arrow Button ( ) simultaneously to enter the Provider Screen. - Page 43 Changing Languages: Inside the Provider Screen, the user can change the device language by pressing the Down Arrow Button ( ). The current language is displayed in the bottom right corner. The language changes each time the Down Arrow Button ( ) is pressed in the order shown below.
- Page 44 Cell Status and Signal Strength: The cell signal strength is listed in the third row on a scale of 0 through 31 (ex. Sg:31). The cell status is listed in the eighth row (ex. Cell:Connected). Voltage In: The voltage in is the voltage that the unit is receiving from an external power source, such as the AC power supply or DC power supply (ex.
-
Page 45: Section 5: User Alerts And Alarms
Section 5: User Alerts and Alarms The functionality of the alarm system is verified automatically by the unit upon start up by the unit flashing the various visual display colors and audible indicators. There are delays that are greater than 10 seconds inherent to specific alarms, and these delays are explained in detail for each alarm in the tables below. -
Page 46: Alarm System Test
Alarm System Test Use this test to verify that the alarm system is working properly. This test includes screen color, screen flashing sequence, and audible alarm sequence. Follow the steps in the procedure listed below. Step 1: Press and hold both the Up Arrow Button ( ) and Down Arrow Button ( ) simultaneously in order to enter the Service Mode screen. - Page 47 Step 3: The system will begin by testing the High Priority Alarm. The High Priority Alarm consists of a 10 beep sequence separated by 2.5 seconds of silence, and the LCD screen flashes red. Step 4: The unit will automatically enter the Medium Priority Alarm test once the High Priority Alarm sequence has concluded.
- Page 48 Step 5: The unit will automatically enter the Low Priority Alarm test once the Medium Priority Alarm sequence has concluded. Pressing the Mode Button ( ) while the Medium Priority Alarm test is in progress will terminate the Medium Priority Alarm test and start the Low Priority Alarm.
- Page 49 Step 7: Press the Down Arrow Button ( ) in order to exit the Service Mode screen.
-
Page 50: How To Simulate Alarms And Alerts (Providers Only)
How to Simulate Alarms and Alerts (Providers Only) Alarm Name, How to Simulate Priority and Alarm Description Alarm Type When in PULSE mode, if a breath is not detected for 45 seconds the screen will Run unit in PULSE mode turn amber, sound one beep and the text No Breath with no cannula... - Page 51 Alarm Name, How to Simulate Priority and Alarm Description Alarm Type off the unit, or 15 seconds has expired. When the flow of oxygen is stopped for 45 Run the unit in 2.0 seconds, the screen will flash red at 2Hz, Continuous and allow it sound a 10 beep sequence repeated after No Flow Alarm...
- Page 52 Alarm Name, How to Simulate Priority and Alarm Description Alarm Type outline. The unit will continue to run if on present. (Medium AC, DC or a second valid battery is Priority) present. The screen will turn amber, sound a 3 beep sequence repeated after 15 (Technical) seconds of silence and the text “Unauthorized Battery”...
- Page 53 Alarm Name, How to Simulate Priority and Alarm Description Alarm Type the unit internally) the screen will flash red 20amps. Run unit on 2.0 (High Priority) at 2Hz, sound a 10 beep sequence continuous. Starting at repeated after 2.5 seconds of silence and 14 volts steadily increase (Technical) the text “High External Power”...
-
Page 54: How To Respond To Alarms
How to Respond to Alarms Alarm Name, Priority and Alarm Description Solution Type When in PULSE mode, if a breath is not Ensure cannula tubing detected for 45 seconds the screen will does not exceed 7 feet turn amber, sound one beep and the text No Breath (2.1m).Ensure user “No Breath”... - Page 55 Alarm Name, Priority and Alarm Description Solution Type replace tubing or seconds the screen will flash red at 2Hz, (High Priority) humidifier. Clean or sound a 10 beep sequence repeated replace air inlet filter. after 2.5 seconds of silence and the text Move device to ensure (Technical) adequate air flow.
- Page 56 Alarm Name, Priority and Alarm Description Solution Type Priority) battery outline. The unit will continue to run if on AC, DC or a second valid battery (Technical) is present. The screen will turn amber, sound a 3 beep sequence repeated after 15 seconds of silence and the text “Unauthorized Battery”...
- Page 57 Alarm Description Solution Type Power Alarm power source is above 26 volts (as Oxlife Independence and measured by the unit internally) the use an alternative power (High Priority) screen will flash red at 2Hz, sound a 10 source that is within the beep sequence repeated after 2.5...
-
Page 58: Section 6: Maintenance And Cleaning
Air Inlet Filter Cleaning Regular cleaning of the Air Inlet Filter is the only maintenance you will perform on your device. To keep your Oxlife Independence working properly, it is recommended you clean the Air Inlet Filter weekly. If the Oxlife Independence is used in a dusty environment, more frequent cleaning of the Air Inlet Filter may be required. - Page 59 Air Inlet Filter Cleaning (Continued) Follow these simple directions to clean the Air Inlet Filter: Remove the Air Inlet Filter Wash the filter by running under warm tap water using a mild detergent. Rinse thoroughly under warm, running water. Squeeze out excess water. It is important to allow the filter to dry completely before reinserting into the device.
-
Page 60: Battery Disposal
Battery Disposal Your battery is rechargeable and can be recycled. Always return to your authorized dealer for proper disposal. You can also contact your local city or town offices for proper disposal instructions for a lithium ion battery. Device Disposal This product may contain substances that could be harmful to the environment if disposed of in landfills that are inappropriate. -
Page 61: Section 7: Standards Compliance
Section 7: Standards Compliance This device is designed to comply with the following standards: ISO 8359 2 Edition; Oxygen Concentrators for Medical Use – Safety Requirements RTCA, DO 160, Section 21, Category M; Emission of Radio Frequency Energy ... - Page 62 NOTES...
- Page 64 Oxlife INDEPENDENCE O2 Concepts LLC 199 Park Road Extension, Middlebury, CT 06762 (877) 867-4008 www.o2-concepts.com PN: 800-1029 Rev B 10.26.2016...
Need help?
Do you have a question about the Oxlife INDEPENDENCE and is the answer not in the manual?
Questions and answers