Advertisement
Quick Links
ASSEMBLY INSTRUCTIONS
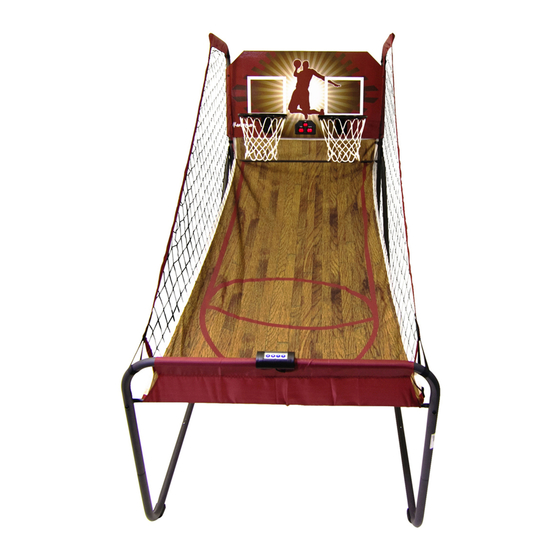
BB125
Double-Swish Electronic
Basketball Game
Thank you for your purchase of this Harvil product!
We work around the clock and around the globe to ensure that Harvil products
maintain the highest possible quality. However, in the rare instance that your
product is defective or missing parts, contact your retailer to submit parts
requests or warranty claims. Please read the warranty information at the back
of these assembly instructions for further details.
IMPORTANT! PLEASE READ THESE ASSEMBLY INSTRUCTIONS
IN ENTIRETY BEFORE ASSEMBLING YOUR PRODUCT.
The information contained in this manual is subject to change without notice.
BB125
1
Advertisement

Related Manuals for Harvil BB125

Summary of Contents for Harvil BB125
- Page 1 Basketball Game Thank you for your purchase of this Harvil product! We work around the clock and around the globe to ensure that Harvil products maintain the highest possible quality. However, in the rare instance that your product is defective or missing parts, contact your retailer to submit parts requests or warranty claims.
- Page 2 M6 x 50mm Bolt M6 x 45mm Bolt M6x50mm M6x68mm M6 x 45mm TIME HOME VISITOR Perno Placa Frontal Electronic Scorer M3.5 x 10mm Bolt Wrench Llave Inglesa Allen Key Llave Allen Face Plate de Marcador M3.5 X 10 mm BB125...
- Page 3 READ AND FOLLOW ALL ASSEMBLY, OPERATION AND SAFETY INSTRUCTIONS CAREFULLY. CHOKE HAZARD - THIS TABLE CONTAINS SMALL PARTS - NOT SUITABLE FOR CHILDREN UNDER 3 YEARS OF AGE. PINCH HAZARD - USE WITH CAUTION WHEN FOLDING AND UNFOLDING THE GAME. BB125...
- Page 4 3. Attach the other tube labeled #10 to tubes #8 and #9 via spring lock as shown in FIG. 2. FIG. 3 Spring Lock FIG.3 4. Next, attach tube #5 and tube #6 together using the spring lock as shown in FIG. 3. BB125...
- Page 5 5. Attach joined tubes #5 & #6 to joined tubes #3 & #4 using bolts (#26), washers (#22) and nuts (#28). 6. Then connect joined tubes #8 & #9 to joined tubes #5 & #6, using bolts (#26), washers (#22) and nuts (#28) as shown in FIG. 4, 4A and 4B. BB125...
- Page 6 FIG. 5. 11. Attach both tubes #5 (joined with #8 & #9) to tubes #2 using bolts (#24), washers (#22) and nuts (#28) as shown in FiG. 5A. Note: Make sure the spring lock is face down. BB125...
- Page 7 (#22) and nuts (#28) as shown in FIG. 6A. Then insert tubes labeled #1 to tube #2 as shown in FIG. 6. 13. Take out the tubes labeled #11. Make sure you have two. Attach both tubes to both ends of joined #5 & #6 using bolts (#27), washers (#22) and nuts (#28) as shown in FIG. 6 and 6B. BB125...
-
Page 8: Bb125
ASSEMBLY INSTRUCTIONS English FIG. 7 FIG.7 14. Attach the tubes labeled #12 to tubes #11 using the spring lock as shown in Fig. 7. 15. You’ve now completed assembling the main frame of the Harvil Double-Swish Electronic Basketball Game. BB125... -
Page 9: Bb125
17. Attach the Electronic Scorer Face Plate (#30) to the front of the backboard and connect the Electronic Scorer (#20) using bolts (#29) as shown in FIG. 9. 18. Install the net (#35) to the rim (#17) as shown in FIG. 9A, 9B, and 9C. BB125... -
Page 10: Bb125
Ball Return Net (#34) onto the top tubes (#1) as shown in FIG. 10A & 10B. 21. Attach tube #14 to tube #13 using bolts (#24), washers (#22) and nuts (#28) as shown in FIG.10C. Make sure to attach the tube over the net cloth. BB125... - Page 11 To set it up, secure the key ring to a side hole (found on tube #5) and then insert your lock pin in the middle hole. Do the same for the other side (tube #6) as shown in FIG. 11C. BB125...
- Page 12 Then, connect the Control Wire to the Electronic Scorer (#20) as shown in FIG. 13 and 13A. The electronic scorer operates using 3 AA batteries. Once the batteries are installed, you’re good to go! Please go to page 14 for further instructions on the electronic scorer and control box. BB125...
- Page 13 Note: The Lock Pin (#36) needs to be removed from its original position when the game is being used before insertion to the new position when folded. You have now assembled your Harvil Double-Swish Electronic Basketball Game. Please not the Care and Use Instructions below to ensure years of trouble-free use.
- Page 14 ELECTRONIC SCORER OPERATION BB125...
- Page 15 GAME OPTIONS AND INSTRUCTIONS BB125...
- Page 16 GAME OPTIONS AND INSTRUCTIONS BB125...
- Page 17 GAME OPTIONS AND INSTRUCTIONS BB125...
-
Page 18: Day Limited Warranty
Harvil reserves the right to make substitutions to warranty claims if parts are unavailable or obsolete. Harvil shall not be liable for loss of use of the product or other consequential or incidental costs, expenses or damages incurred by the consumer of any other use. The user assumes all risk of injury resulting from the use of this product.
Need help?
Do you have a question about the BB125 and is the answer not in the manual?
Questions and answers