Table of Contents
Advertisement
Advertisement
Table of Contents

Related Manuals for Zte BLADE A320


Summary of Contents for Zte BLADE A320
- Page 1 ZTE BLADE A320 User Manual...
- Page 2 About This Manual Thank you for choosing this ZTE mobile device. In order to keep your device in its best condition, please read this manual and keep it for future reference. Copyright Copyright © 2017 ZTE CORPORATION All rights reserved.
- Page 3 Google and Android are trademarks of Google, Inc. ® The Bluetooth trademark and logos are owned by the Bluetooth SIG, Inc. and any use of such trademarks by ZTE Corporation is under license. microSDXC Logo is a trademark of SD-3C, LLC. Qualcomm® Snapdragon™ processors are products of Qualcomm Technologies, Inc.
-
Page 4: Table Of Contents
Contents Getting Started ............7 Getting to Know Your Phone ..........7 Setting Up Your Phone ............9 Charging the Phone ............12 Powering On/Off ..............13 Locking/Unlocking the Screen and Keys ......13 Getting to Know the Home Screen ........14 Personalizing ............ - Page 5 Connecting to Your Computer via USB ......32 Using the microSDXC Card as Portable Storage ....34 Sharing Your Mobile Data Connection ......35 Phone Calls ............39 Placing and Ending Calls ........... 39 Answering or Rejecting Calls ..........40 Working With the Call History ..........
- Page 6 Messaging .............. 57 Opening the Messaging Screen ......... 57 Sending a Message ............57 Replying to a Message ............58 Browser ..............59 Opening the Browser ............59 Using Multiple Browser Tabs ..........60 Downloading Files ............. 61 Using Bookmarks ............... 61 Clearing Browsing History ..........
- Page 7 Product Handling ............... 80 Electrical Safety ..............84 Radio Frequency Interference ........... 85 Explosive Environments ............ 87...
-
Page 8: Getting Started
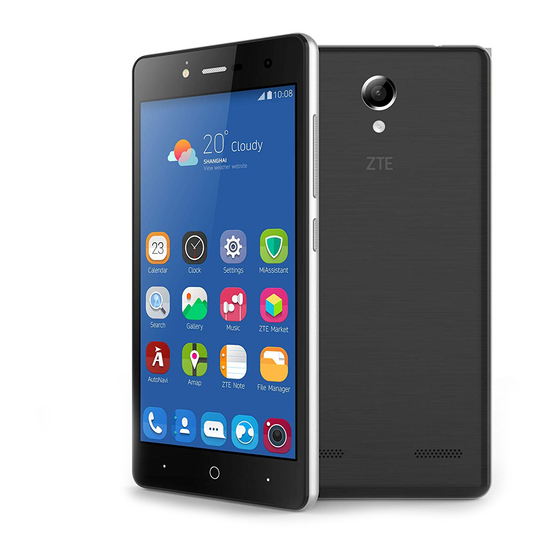
Getting Started Getting to Know Your Phone Indicator light Proximity & light sensor Front flash Front camera Earpiece Volume key Power key Back key Recent apps key Home key... - Page 9 Headset jack Back camera Back flash Speaker Charging/micro- Microphone USB jack Function Press and hold to turn on or off airplane mode, control sound and vibration, restart, or Power key power off. Press to turn off or on the screen display. Volume key Press or hold to turn the volume up or down.
-
Page 10: Setting Up Your Phone
Function Touch to return to the home screen from any application or screen. Home key Touch and hold to use Google Search or Now on Tap. Back key Touch to go to the previous screen. Recent apps key Touch to see recently used applications. - Page 11 1. Insert your fingernail into the slot at the bottom left of the back cover and lift it up gently. 2. Install the micro-SIM card 1/micro-SIM card 2 and the microSDXC card. The package does not contain the microSDXC card and the microSDXC card is sold separately. Slide the micro-SIM card 1/micro-SIM card 2 into the card ...
- Page 12 micro-SIM card 1 micro-SIM card 2 Hold the microSDXC card with the cut corner oriented as shown and slip it into the card slot. microSDXC card 3. Insert the battery. Make sure the connectors on the battery go into the battery compartment first and align with the connectors in it.
-
Page 13: Charging The Phone
You should fully charge the battery as soon as possible. WARNING! Use only ZTE-approved chargers and cables. The use of unapproved accessories could damage your phone or cause the battery to explode. -
Page 14: Powering On/Off
NOTE: If the battery is extremely low, you may be unable to power on the phone even when it is being charged. In this case, try again after charging the phone for at least 20 minutes. Contact the customer service if you still cannot power on the phone after prolonged charging. -
Page 15: Getting To Know The Home Screen
To save battery power, the phone automatically turns off the screen after some time of inactivity. You will still be able to receive messages and calls while the phone screen is off. To unlock the screen and keys: 1. Press the Power key to turn the screen on. 2. - Page 16 Status bar Widget Folder Shortcut Primary shortcuts To adjust the order of a home screen panel: 1. Touch and hold an empty area of the home screen and slide left or right at the top of the screen to view the home screen thumbnails.
- Page 17 NOTE: Touch at the top of a home screen thumbnail to set it as the main home screen.
-
Page 18: Personalizing
Personalizing Changing the System Language 1. Touch > Settings > Advanced settings > Languages & input > Languages. 2. Select the language you need. Setting the Date and Time 1. Touch > Settings > Advanced settings > Date & time. 2. -
Page 19: Turning On/Off System Sounds
Turning On/Off System Sounds 1. Touch > Settings > Sound. 2. Switch on or off Dial pad tones, Screen locking sounds, Touch sounds, Vibrate on tap, Silent boot, or Ringtone fade-in. Using Do Not Disturb Mode You can limit interruptions with Do not disturb mode. This mode silences your phone so that it doesn’t make sounds or vibrate when you don’t want it to. -
Page 20: Protecting Your Phone With Screen Locks
touch the switches next to the items you want to allow. Touch Messages or Incoming call and set who can alert you of their messages or calls. To set a Do not disturb rule: If you want to allow all notification alerts through most of the time, but want to limit alerts during certain times (like at night or on the weekends), you can set a rule for Do not disturb mode. -
Page 21: Using Split Screen
1. Touch > Settings > Security > Screen lock. 2. Touch Swipe, Pattern, PIN or Complex password. Touch Swipe to disable the screen lock. Anyone can unlock the screen by touching the display and swiping up. Touch Pattern to draw and redraw a pattern that you ... - Page 22 The Split Screen feature does not support all applications. If the app you want to put at the bottom half of the screen is not in recent apps, touch the Home key and find the app in the apps list. End Split Screen To end Split Screen, drag between the two app windows to...
-
Page 23: Knowing The Basics
Knowing the Basics Monitoring the Phone Status The status bar at the top of the home screen provides phone and service status icons on the right side. Below are some of the icons you may see. EDGE/2G connected 3G /HSPA+ connected 4G LTE connected No signal Silent mode or Do not... -
Page 24: Managing Notifications
Managing Notifications Notification Icons The status bar at the top of the home screen provides notification icons on the left. Below are some of the icons you may see. New SMS Upcoming event New Wi-Fi network New message(s) from detected the Email app New message(s) from Downloading data... - Page 25 To close the notification panel, swipe your finger up on the screen or touch the Back key. Use Quick Settings The Quick Settings make it convenient to view or change the most common settings for your phone. Open the notification panel and drag the panel downwards to find the following Quick Settings on the screen.
-
Page 26: Entering Text
Ultra power saving: Touch to turn on or off Ultra Power Saving Mode. Flashlight: Touch to turn on or off the flash. Lock: Touch to lock and turn off the screen. Dual SIM settings: Touch to open the Dual SIM settings menu in Settings. -
Page 27: Connecting To Networks And Devices
disable them. Change Input Methods 1. When you use the onscreen keyboard to enter text, open the notification panel and touch (Change keyboard). 2. Select the input method you need. NOTE: The Change keyboard notification appears only when more than one keyboard input method is installed and enabled. - Page 28 4. If the network is secured, enter the password and touch Connect. NOTE: Your phone automatically connects to previously used Wi-Fi networks when they are in range. Get Notified of Open Networks 1. Touch > Settings > Wi-Fi. 2. Slide the Wi-Fi switch to turn it on. 3.
- Page 29 4. Enter the network SSID (name). If necessary, enter security or other network configuration details. 5. Touch Save. Connect to a WPS Network Wi-Fi Protected Setup (WPS) is a feature that makes it easy to add your phone to the access points which support WPS. You can use one of the following methods to connect your phone to a wireless network using WPS.
-
Page 30: Using Wi-Fi Direct
® Using Wi-Fi Direct Wi-Fi Direct allows Wi-Fi devices to share files and data directly by connecting to each other without the need for wireless access points (hotspots). To connect via Wi-Fi Direct: 1. Touch > Settings > Wi-Fi. 2. If Wi-Fi is off, slide the Wi-Fi switch to turn it on. 3. -
Page 31: Pair With Another Bluetooth Device
Turn Bluetooth On/Off 1. Touch > Settings > Bluetooth. 2. Slide the Bluetooth switch at the top to turn it on or off. When Bluetooth is on, the icon appears in the status bar. Pair With Another Bluetooth Device 1. Touch >... -
Page 32: Send Data Via Bluetooth
1234 (the most common passkeys), or refer to the documents for that device. Forget (Unpair With) a Bluetooth Device You can make your phone forget its pairing connection with another Bluetooth device. To connect to the device again, you need to search it and enter or confirm a passkey again. 1. -
Page 33: Connecting To Your Computer Via Usb
2. Flick down the status bar and touch 3. Touch ACCEPT to start receiving the data. Received files are stored automatically in a dedicated folder (bluetooth, for instance) in the phone. You can access them with the FileManager app. Connecting to Your Computer via USB You can connect your phone to a computer with a USB cable and transfer music, pictures, and other files in both directions. - Page 34 Install driver: Install the driver needed for some USB connection modes (such as MTP). You only need to install the driver on the same PC once. NOTE: You can also install the driver on PC by running the executable file in the new CD-ROM drive. Connect to PC software: Connect your phone to the PC ...
-
Page 35: Using The Microsdxc Card As Portable Storage
1. Connect the phone with your computer via USB and choose Media device MTP. 2. Open Windows Media Player and synchronize music, picture, and video files. Using the microSDXC Card as Portable Storage You can use your microSDXC card as portable storage to save photos, music, videos, downloaded files, and more. -
Page 36: Sharing Your Mobile Data Connection
2. Touch the card name in the Portable storage section. 3. Touch Mount. To erase the microSDXC card: 1. Touch > Settings > Advanced settings > Storage. 2. Touch the card name in the Portable storage section. 3. Touch Format > Erase & format. 4. - Page 37 created on your computer. NOTE: To stop sharing your data connection, switch off USB tethering or disconnect the USB cable. Share Your Mobile Data Connection via Bluetooth If your computer can obtain an Internet connection via Bluetooth, you can configure your phone to share its mobile data connection with your computer.
- Page 38 Share Your Mobile Data Connection as a Wi-Fi Hotspot You can share your phone’s data connection with other devices by turning your phone into a portable Wi-Fi hotspot. The feature needs data connection on a mobile network and may result in data charges.
- Page 39 2. Touch and set the following options. Network name: Enter or edit a network SSID (name) that other devices see when scanning for Wi-Fi networks. Security: Choose a security option, None (not recommended) or WPA2 PSK (other users can access your Wi-Fi hotspot only if they enter the correct password).
-
Page 40: Phone Calls
Phone Calls You can place calls from the Phone app, the Contacts app, or other apps or widgets that display contact information. Wherever you see a phone number, you can usually touch it to dial. Placing and Ending Calls Place a Call by Dialing 1. -
Page 41: Answering Or Rejecting Calls
NOTES: To make an international call, touch and hold the 0 key to enter the plus (+) symbol. Next, enter the country code, followed by the city/area code and then the phone number. Touch to change the size of the dialpad. You can enter the phone number by a single hand via the small size dialpad. -
Page 42: Working With The Call History
Reject a Call When you receive a phone call, you can touch to reject the call. - or – If the screen is locked, slide up to reject the call. -or- You can touch to reject the call and select a preset text message or edit one to send to the caller. - Page 43 Add a Number From Call History as a Contact 1. Open the call history. 2. Touch behind the number you want to add. 3. Touch 4. Add a number as you need by the following ways. To add a new contact, touch New contact. You can ...
-
Page 44: Checking Voicemail
Checking Voicemail If you have set the phone to divert calls to voicemail, callers can leave voicemail messages when they cannot reach you. Here’s how to check the messages they left. 1. Touch > Phone > 2. Touch and hold the 1 key in the dialer. If prompted, enter your voicemail password. -
Page 45: Contacts
code (for example, the PIN for your voicemail or bank account) during the call. Touch to put the call on hold. Touch to make another call separately from the first call, which is put on hold. Touch to merge the separate calls into a single conference call. -
Page 46: Checking Contact Details
support contact syncing. To see your contacts, touch > Contacts. From there, you can touch the tabs on the top of the screen to quickly switch to contact groups or the Phone app. Checking Contact Details 1. Touch > Contacts to access your contact list. 2. -
Page 47: Importing, Exporting, And Sharing Contacts
Importing, Exporting, and Sharing Contacts You can import/export contacts from/to your micro-SIM cards or the storages. This is especially useful when you need to transfer contacts between different devices. You can also quickly share contacts using Bluetooth, Google Drive, Gmail, or Messaging. Import Contacts From the micro-SIM Cards 1. -
Page 48: Share Contacts
2. Touch > Import/Export contacts > Export contacts > Export to SIM1/ Export to SIM2. 3. Check the contacts you need and then touch Export. Export Contacts to the SD Card 1. Touch > Contacts. 2. Touch > Import/Export contacts > Export contacts > Export to an SD card. -
Page 49: Working With Groups
Working With Groups View Your Contact Groups 1. Touch > Contacts and touch the Groups tab. 2. Scroll through the list to view the groups you have created. 3. Touch a group to view its members. NOTE: To send a message or an email to all or some of the group members, open the group and touch Set Up a New Group 1. -
Page 50: Combine Duplicate Contacts
Delete a Group 1. Touch > Contacts and touch the Groups tab. 2. Touch a group and then touch > Delete. 3. Touch OK to disband the group. The contacts in the group will not be deleted. Edit a Group 1. - Page 51 contacts list. 1. Touch > Contacts. 2. Touch > Manage contacts > Combine duplicate contacts. 3. Touch OK. 4. Touch Done. Fully duplicate contacts and partially duplicate ones you select are combined.
-
Page 52: Web Accounts
Web Accounts Adding or Removing Accounts You can add multiple Google accounts and Microsoft Exchange ® ActiveSync accounts. You may also add other kinds of accounts depending on the apps installed on your phone. Add an Account 1. Touch > Settings > Accounts > Add account. 2. -
Page 53: Configuring Account Sync
Configuring Account Sync Configure Auto Sync Setting 1. Touch > Settings > Accounts. 2. Touch and check or uncheck Auto-sync data. When automatic sync is turned on, changes you make to information on your phone or on the web are automatically synced with each other. -
Page 54: Email
Email Touch Email in the home screen to receive and send emails from your webmail or other accounts, using POP3 or IMAP, or access your Exchange ActiveSync account for your corporate email needs. Setting Up the First Email Account 1. When you open Email for the first time, enter your email address and password. -
Page 55: Responding To An Email
You can also check new emails manually by dragging down on the message list. To check earlier emails for your IMAP or POP3 accounts, swipe upwards to the bottom of the email list and touch LOAD MORE. Responding to an Email You can reply to or forward a message that you receive. -
Page 56: Writing And Sending An Email
While in a message list (for instance, the Inbox), touch the sender images beside the messages and then touch Writing and Sending an Email 1. Open your email Inbox and touch NOTE: If you have more than one email account added on the phone, touch the sender line to select the account you want to use for sending the message. -
Page 57: Adding And Editing Email Accounts
Adding and Editing Email Accounts Add an Email Account After setting up your first email account, you can add more email accounts and manage them separately. 1. Open Email to get the Inbox screen. 2. Touch > Settings > Add account. 3. -
Page 58: Messaging
Messaging You can use Messaging to exchange text messages (SMS) and multimedia messages (MMS). Opening the Messaging Screen Touch Messaging in the home screen. The Messaging screen opens, where you can create a new message, search for messages, delete messages, or open an ongoing message thread. -
Page 59: Replying To A Message
Touch the To field and manually enter the recipient’s number or the contact name. If the phone presents a few suggestions, touch the one you want to add. Select recipients from your contacts or call log by touching 3. -
Page 60: Browser
3. Touch in single SIM card mode. -or- Touch in dual SIM card mode. Browser Use Browser to view web pages and search for information. Opening the Browser Touch > Browser in the home screen to launch the web browser. The browser also opens when you touch a web link - for example, in an email or a text message. -
Page 61: Using Multiple Browser Tabs
Touch on the tool bar at the bottom of the browser screen to go to the previous or the next webpage, or Touch to stop the present browser page. Using Multiple Browser Tabs You can open several web pages at the same time (one page in each tab) and switch between them freely. -
Page 62: Downloading Files
Downloading Files 1. Touch and hold an image or a link to a file or to another webpage. 2. In the menu that opens, touch Save image or Save link. The downloaded files are saved to your phone or the microSDXC card. -
Page 63: Clearing Browsing History
3. Edit the title and the URL of the bookmark in the fields, or change the folder to contain the bookmark if needed. 4. Touch OK. -or- Touch > Bookmarks tab. Touch and hold the bookmark, and touch Edit bookmarks. NOTE: Touch >... -
Page 64: Changing Browser Settings
Changing Browser Settings You can configure a number of Browser settings to customize the way you browse the web, including several that you can use to control your privacy. To open the Browser settings screen, touch > Settings in the web page screen. NOTE: Touch >... -
Page 65: Camera
Camera You can use your phone to take photos and record videos. Photos and videos are stored on the microSDXC card you have installed or in the phone storage. You can copy them to your computer or access them in the Gallery app. Capturing a Photo 1. - Page 66 Number Function Change the camera settings. Change the flash setting. Switch to PHOTO camera mode. Switch to VIDEO camera mode. Exit the camera. Select a color effect or other special effects.
- Page 67 Number Function Capture a picture. Turn on or off live photo function. View pictures and videos you have taken. Use special photo or video camera modes. Set a time delay before the camera takes a picture automatically after you touch the shutter icon. Switch between the front and back cameras.
-
Page 68: Recording A Video
exposure. Recording a Video 1. Touch > Camera > VIDEO. 2. Aim the camera at the subject. NOTE: You can spread or pinch on the screen to zoom in or out before and during recording. 3. Touch to start recording. Touch to pause/resume, and touch to stop. -
Page 69: Using Other Camera Modes
Drag the yellow square to any area on the screen where you want the camera to meter exposure so as to adjust the photo brightness. Touch and hold the square to lock exposure. Touch to unfold the options, including ISO, overall ... - Page 70 modes. Options in photo mode Resolution: Set the image size for your photo. Point-and-shoot: Turn on or off the point-and-shoot function, meaning that you can touch the screen to take photo while using the Camera app. Shutter tone: Turn on or off the shutter tone. ...
- Page 71 captured photos and videos. Anti-banding: Set the anti-banding value when you record videos of TV or computer screens to avoid stripes on the screen. Save location: Change the storage location for captured photos and videos when a microSDXC card is installed. Help: View help details or enable help icon on the ...
-
Page 72: Upgrading The Phone Software
Use the upgrade package on your microSDXC card. NOTE: Visit the ZTE official handset service support website (http://www.ztedevice.com/support) and select your country or region to learn more about the above upgrade methods, as well as which phones and methods are supported. -
Page 73: Troubleshooting
Troubleshooting If you encounter problems while using the phone, or if it performs abnormally, you can refer to the chart below. If your particular problem cannot be resolved using the information in the chart, contact the dealer where you purchased the phone. Problem Possible causes Possible solution... - Page 74 Problem Possible causes Possible solution End the call and dial again. The local telephone line You may be switched to a quality is poor. better-quality network link or phone line. Your service provider does Unable to not support these features, Contact your service select certain or you have not applied for...
- Page 75 Problem Possible causes Possible solution If you are not able to connect to the network, the phone will continue to send Change your location to one out signals as it attempts to where the network is locate a base station. Doing accessible, or temporarily so consumes battery power turn off your phone.
- Page 76 Problem Possible causes Possible solution You have activated the Disable this feature.. Fixed dialing numbers feature. Contact your service provider. If the service You have entered an PIN Code provider provides the incorrect PIN code three blocked micro-SIM card’s PUK code, consecutive times.
-
Page 77: For Your Safety
For Your Safety General Safety Don’t make or receive handheld calls while Don’t use at gas driving. Never text stations. while driving. Keep your phone at Your phone may least 5 mm away from produce a bright or your body while flashing light. -
Page 78: Radio Frequency (Rf) Energy
Avoid contact with Avoid extreme anything magnetic. temperatures. Keep away from Avoid contact with pacemakers and other liquids. Keep your electronic medical phone dry. devices. Turn off when asked to Do not attempt to in hospitals and disassemble your medical facilities. phone. - Page 79 communicate with your phone, the system handling your call controls the power level at which your phone transmits. Specific Absorption Rate (SAR) Your mobile device is a radio transmitter and receiver. It is designed not to exceed the limits for exposure to radio waves recommended by international guidelines.
-
Page 80: Body Worn Operation
Body Worn Operation Important safety information regarding radio frequency radiation (RF) exposure: To ensure compliance with RF exposure guidelines the phone must be used with a minimum of 5 mm separation from the body. Failure to observe these instructions could result in your RF exposure exceeding the relevant guideline limits. -
Page 81: Distraction
noted. Please find the section Declaration of RoHS Compliance and CE DOC in the end of this manual. Distraction Driving Full attention must be given to driving at all times in order to reduce the risk of an accident. Using a phone while driving (even with a hands-free kit) can cause distraction and lead to an accident. - Page 82 Always treat your phone and its accessories with care and keep them in a clean place. Keep the screen and camera lens clean. Unclean screen or camera lens may slow down the phone's reaction to your operations or lower image quality. ...
-
Page 83: Small Children
Please check local regulations for disposal of electronic products. Do not carry your phone in your back pocket as it could break when you sit down. Small Children Do not leave your phone and its accessories within the reach of small children or allow them to play with it. -
Page 84: Normal Use Position
Normal Use Position When placing or receiving a phone call, hold your phone to your ear, with the bottom toward your mouth. Air Bags Do not place your phone in the area over an air bag or in the air bag deployment area as an airbag inflates with great force and serious injury could occur. -
Page 85: Electrical Safety
Use the special features which are designed to minimize the times of pressing buttons, such as Message Templates and Predictive Text. Take frequent breaks to stretch and relax. Emergency Calls This phone, like any other wireless phone, operates using radio signals, which cannot guarantee connection in all conditions. -
Page 86: Radio Frequency Interference
rings, or allow them to contact or short-circuit the charging jack. Never puncture the surface of the phone with sharp objects. Connection to a Car Seek professional advice when connecting a phone interface to the vehicle electrical system. Faulty and Damaged Products Do not attempt to disassemble the phone or its accessories. -
Page 87: Hearing Aids
Pacemakers Pacemaker manufacturers recommend that a minimum separation of 15 cm be maintained between a mobile phone and a pacemaker to avoid potential interference with the pacemaker. To achieve this, use the phone on the opposite ear to your pacemaker and do not carry it in a breast pocket. Hearing Aids People with hearing aids or other cochlear implants may experience interfering noises when using wireless devices or... -
Page 88: Explosive Environments
Consult the airline staff about the use of wireless devices on board the aircraft and enable flight mode of your phone when boarding an aircraft. Interference in Vehicles Please note that because of possible interference to electronic equipment, some vehicle manufacturers forbid the use of mobile phones in their vehicles unless a hands-free kit with an external antenna is included in the installation.
Need help?
Do you have a question about the BLADE A320 and is the answer not in the manual?
Questions and answers