Advertisement
Quick Links
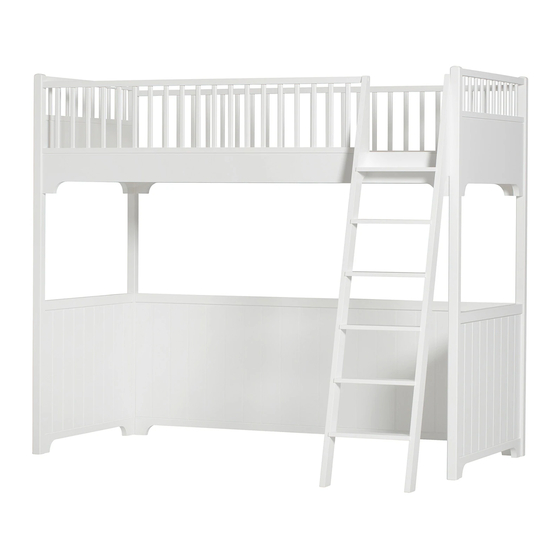
ASSEMBLY INSTRUCTION / LOFT BED 021218
READ THE ASSEMBLY INSTRUCTION CAREFULLY BEFORE YOU START / OCT.
OL I V E R F UR NI T UR E / GE PPE T T O A / S
N d r. S t r a n d v e j 119 A
D K- 3 15 0 H e l l e b æ k / D e n m a r k
Te l . + 4 5 4 9 7 0 7 3 17
i n f o @ o l i v e r f u r n i t u r e . d k
F a x + 4 5 4 9 7 0 7 3 18
w w w. o l i v e r f u r n i t u r e . d k
2010
Advertisement

Related Manuals for Oliver Furniture 021218


Summary of Contents for Oliver Furniture 021218
- Page 1 ASSEMBLY INSTRUCTION / LOFT BED 021218 2010 READ THE ASSEMBLY INSTRUCTION CAREFULLY BEFORE YOU START / OCT. OL I V E R F UR NI T UR E / GE PPE T T O A / S N d r. S t r a n d v e j 119 A Te l .
- Page 2 THE LOFT BED CONSISTS OF THE BOXES FOR THE LOFT BED CONSIST 6 BOXES: OF THE FOLLOWING PARTS: A. 2 end board pieces 1 x 031209 B. 2 short bars 1 x 031207 C. 1 slatted bed case 1 x 031218 D.
- Page 3 1 allen key 11. 18 small plastic covers 6 screws for fixture of the ladder 12. 16 large wooden dowels 22 screws for the slatted bed case 13. 14 small wooden dowels 1 top nut 14. 16 connection nuts 1 spanner 15.
- Page 4 In order to assemble the loft bed you will need 1 screw driver, 1 hammer, and the spanner and allen key which are both included. Screw the threads for the corner posts (19.) into the corner posts. Insert the wooden dowels (12.-13.) into the blind holes on the corner posts (only half- drilled holes).
- Page 5 Place 2 corner posts (D.), 1 end board piece (A.) and 1 short bars (B.) on the underlay. Mounting hole → The mounting holes must turn upwards on the end board piece (A.). The end board NOTE piece (A.), the short bars (B.) the lower NOTE No hole ↓...
- Page 6 Repeat the procedure with the other bed end and tighten all the connections screws. NOTE NOTE No hole ↓ Through hole → Connect 1 sidepiece (H.) on the rearmost part of the bedside. Before tightening the nuts for the threads in the mounting holes (15.) –...
- Page 7 Connect the other sidepiece (H.) in the front of the loft bed. Before tightening the nuts for the threads in the mounting holes (15.) - (picture 1.), you must connect the back bar (F.) with the large connection screw (18.) and the connection nut (14.).
- Page 8 The loft bed can now be tightened com- pletely. IMPORTANT: Start with the sidepieces - tighten all the nuts for the threads (15.). Hereafter you may now tighten all other screws. Place the 2 fixtures for the ladder onto the ladder and sidepiece with the screws (2.) →...
- Page 9 Now insert the plastic covers (11.) in the mounting holes over the screws (4. 6. 17. 18.). The plastic covers (10.) are inserted over the mounting holes inside the sidepieces (H.) and the end board pieces (A.). Use a hard object to insert the plastic covers.
- Page 10 All fittings must be tightened, checked regularly and re-tightened. The loft bed must not be used if some parts on the loft bed are damaged or missing. Only use spare parts approved by Oliver Furniture. The loft bed can be cleaned with a wrung cloth.
Need help?
Do you have a question about the 021218 and is the answer not in the manual?
Questions and answers