Advertisement
Advertisement

Subscribe to Our Youtube Channel
Related Manuals for OCO Pro Bullet

Summary of Contents for OCO Pro Bullet
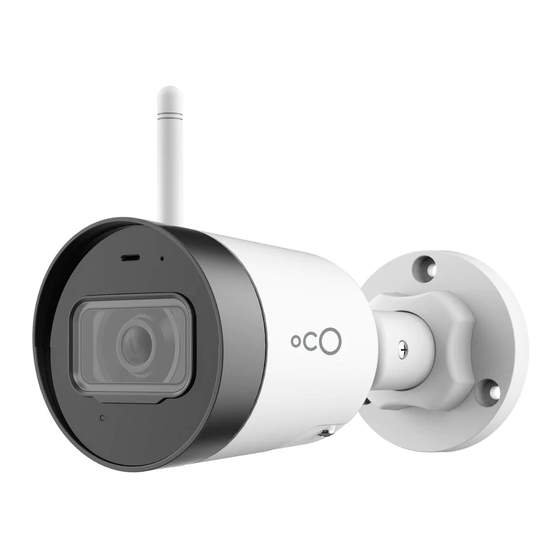
- Page 1 Oco Pro Bullet Setup Guide...
- Page 3 Hi, I’m Oco! I’m very easy to install. However, if you have any questions, don’t hesitate to contact our 24/7 support team at support@getoco.com, 1-888-683-8950 or call us at (English only).
-
Page 5: Table Of Contents
Connecting your Oco • • • • • • • • • • • • • • • • • • •... - Page 6 Setting up your Oco Log into your account at www.ivideon.com (If you do not have an Ivideon account yet, please visit www. ivideon.com and sign up). Go to “My cameras” tab and click “Add a camera or a DVR”. Choose “Ivideon-powered camera”. Follow the instructions.
-
Page 7: Connecting Your Oco
When prompted, plug the PoE power adapter into the power outlet and click “Next”. Oco will boot and connect to the cloud. Please be patient, the connection could take up to several minutes. Once the camera is connected, you will be prompted to set up the WiFi connection. -
Page 8: Mounting The Camera
Mounting the camera When sizing a hole for the screws, drill holes in the wall according to the drill template. Route the corresponding cables. Secure the camera to the wall with the supplied Screws. Adjust the Lens Loosen the adjustable nut. Adjust the pan direction [0°~360°]. - Page 9 Note: Pay attention to the following precautions to prevent IR reflection: Dust or grease on the dome cover will cause IR reflection. Please do not remove the dome cover film until the installation is finished. If there is dust or grease on the dome cover, clean the dome cover with clean soft cloth and isopropyl alcohol.
-
Page 10: Adding Cloud Storage
Adding Cloud Storage Sometimes you’ll want to add more people to your account, or you’ll need to store data for a longer period. That’s no problem, our Cloud plans can help. You can activate extended Cloud Recordings by choosing one of the Ivideon’s price plans (learn more at getoco.com). -
Page 11: Activating Micro Sd Card
Activating Micro SD card With Oco Pro, you can use Micro SD card as a local backup storage. Please note that the Data will be processed in the Cloud and can only be accessed using the Ivideon App. Oco supports Micro SD cards up to 128 GB with speed class 6 or higher. -
Page 12: Granting Access To Other Users
Granting access to other users You can use this feature if you wish to grant access to your Oco camera to other users. 2.In the App, choose your Camera and then tap Camera settings → Grant access... -
Page 13: Adjusting Notifications Settings
Camera settings → Notifications (Settings) Adjusting the sensitivity of the motion sensor Oco uses an intelligent self-learning algorithm to avoid false notifications. It literally gets smarter every hour you use your camera. However, if you’d like to adjust sensitivity of the sensor manually, then open your Ivideon App, choose Camera and tap Camera settings →... -
Page 14: Integrating Other Smart Devices Via Ifttt
Integrating Other Smart Devices via IFTTT With IFTTT, your Oco camera can communicate with other smart devices, or function according to your geolocation, weather, or even the moon phase. To setup IFTTT integration, download the IFTTT App, create an account and follow the App instructions. - Page 16 Follow us for product updates, security tips, and special deals. getococamera...
Need help?
Do you have a question about the Pro Bullet and is the answer not in the manual?
Questions and answers