Table of Contents
Advertisement
Advertisement
Table of Contents

Subscribe to Our Youtube Channel
Related Manuals for AT&T TREK 2 HD


Summary of Contents for AT&T TREK 2 HD
-
Page 1: User Guide
User Guide AT&T TREK™ 2 HD... - Page 2 Copyright © 2017 ZTE CORPORATION. All rights reserved. ZTE and the ZTE logos are trademarks of the ZTE Corporation. AT&T, the AT&T logo and all other AT&T marks contained herein are trademarks of AT&T Intellectual Property and/or AT&T. No part of this publication may be excerpted, reproduced, translated or utilized in any form or by any means, electronic or mechanical, including photocopying and microfilm, without the prior written permission of ZTE Corporation.
-
Page 3: Table Of Contents
Contents Getting Started ........... . . 7 Installing the Nano-SIM Card and the microSDXC™... - Page 4 Protecting Your Tablet With Screen Locks ..... 21 Protecting Your Tablet With Screen Pinning ....22 Knowing the Basics.
- Page 5 Using Options During a Call ........52 Managing Multiparty Calls .
- Page 6 Browser ............68 Opening the Browser .
- Page 7 Playing and Controlling Videos ....... . 84 Managing Video Files ......... . .85 FM Radio .
- Page 8 RF Exposure Information (SAR) ......106 CTIA ............106 Distraction .
-
Page 9: Getting Started
Getting Started Installing the Nano-SIM Card and the microSDXC Card You do not need to power off your tablet before installing or replacing the nano-SIM card or before installing or removing the microSDXC card (not included). You need to unmount the microSDXC card before removing it (see Connecting to Networks and Devices –... -
Page 10: Extending The Battery Life
Warning! Use only ZTE-approved chargers and cables. The use of unapproved accessories could damage your tablet or cause the battery to explode. Important: Do not change the built-in rechargeable battery in your device by yourself. The battery can only be changed by ZTE or a ZTE authorized service provider. -
Page 11: Powering Your Tablet On/Off
• Disable the GPS function when not in use. Most applications using this function will periodically query the GPS satellites for your current location; each query drains your battery. Powering Your Tablet On/Off • Press and hold the Power key to power on your tablet. •... -
Page 12: Using The Touch Screen
Locking the Screen and Keys To quickly turn the screen off and lock the keys, press the Power key. Note: To save battery power, the tablet automatically turns off the screen after a certain period of time when you leave it idle. You will still be able to receive notifications while the tablet screen is off. - Page 13 • Drag – To drag, press and hold your finger with some pressure before you start to move your finger. While dragging, do not release your finger until you have reached the target position. • Pinch – In some apps (such as Maps and Gallery), you can zoom in and out by placing two fingers on the screen at once and pinching them together (to zoom out) or spreading them apart (to zoom in).
-
Page 14: Getting To Know Your Tablet
Getting to Know Your Tablet Front camera Proximity & light sensor Speaker Power key Volume key Touch screen Microphone Nano-SIM/ Home key microSDXC card cover Recent Back key apps key Charging/USB Speaker Type-C™ jack GETTING STARTED... -
Page 15: Key Functions
Key Functions Function Press and hold to turn Airplane mode on or off, restart, or power off. Power key Press to change your tablet to Sleep mode. Press to wake up your tablet. Press to return to the home screen from any application or screen. -
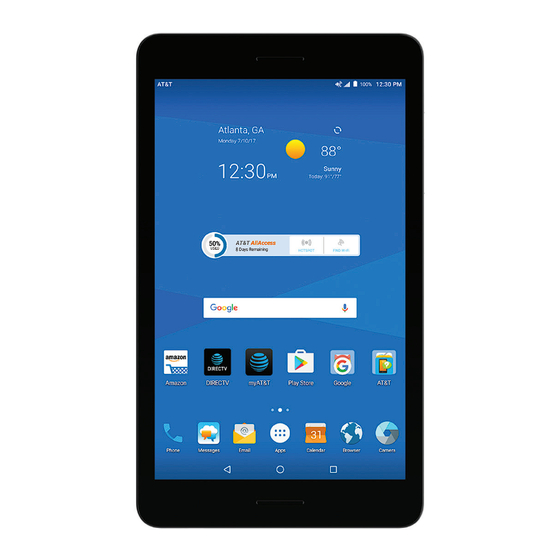
Page 16: Getting To Know The Home Screen
Getting to Know the Home Screen The home screen is the starting point for your tablet’s applications, functions, and menus. You can customize your home screen by adding shortcuts, folders, widgets, and more. Status and notification bar Widget Google search Shortcut Folder Primary... - Page 17 Adding a New Home Screen Panel 1. Press and hold an empty area of the home screen. 2. Slide left or right until you see on the screen. 3. Tap and a new home screen will be automatically added. Deleting a Home Screen Panel 1.
-
Page 18: Personalizing
Personalizing Changing the System Language Settings Languages & input 1. From the home screen, tap Languages. 2. To add a system language, tap Add a language and then the language you need. 3. Press and hold a language and move it to the top to switch to that language. -
Page 19: Changing Ringtone And Notification Sound
Changing Ringtone and Notification Sound You can customize the default phone ringtone and notification sound. 1. From the home screen, tap Settings Sound. 2. Tap Phone ringtone or Default notification ringtone. Note: If you have additional audio files saved in the internal storage or the microSDXC card, tap the Music or Recording tab at the top of the ringtone list. -
Page 20: Switching To Silent Mode
Switching to Silent Mode You can set the tablet to silent mode using one of the following methods: • Press the Volume key when no media application is active to show the volume management window. Drag the slider to the left or press and hold the lower end of the Volume key to switch the tablet to silent mode. -
Page 21: Using The Weather Widget
• Tap Alarms only to allow only alarms. • Tap Total silence to block all notifications. Notes: • To set a Do not disturb exception for a specific app, from the home screen, tap Settings Notifications. Select the app you want, and then tap to enable Override Do Not Disturb to allow its notifications in Priority only mode. -
Page 22: Applying New Wallpapers
To automatically update: Settings. 1. From the home screen, tap the weather widget 2. Slide the Update automatically switch to the On position. 3. In the Update plan section, choose to update only the default city or all added cities. 4. -
Page 23: Setting The Theme
Setting the Theme You can change the icon style by changing themes. 1. Press and hold any blank area of a home screen. 2. Tap Themes. 3. Select the theme you like. Setting the Home Screen Transition Effect 1. Press and hold any blank area of a home screen. 2. -
Page 24: Protecting Your Tablet With Screen Pinning
• Tap PIN or Password to set a numeric PIN or a password that you must enter to unlock the screen. 3. For Pattern, PIN, or Password, select whether or not they should be required to start the device. 4. For Pattern, PIN, or Password, select how you would like notifications and their contents to show when the tablet is locked, and then tap DONE. - Page 25 Pinning a Screen 1. Ensure that screen pinning is turned on. 2. Open the app you want to keep in view. 3. Press the Recent apps key. 4. If there are many app tabs, swipe up to find on the front- most tab.
-
Page 26: Knowing The Basics
Knowing the Basics Monitoring the Tablet Status The Status Bar at the top of the home screen provides notification icons on the right side. Below are some of the icons you may see. Indicator What it means Indicator What it means Wired headset 4G LTE connected connected... -
Page 27: Managing Notifications
Managing Notifications The Status Bar at the top of the home screen provides notification icons on the left side. Below are some of the icons you may see. Indicator What it means Indicator What it means New Exchange microSDXC card email mounted New message(s) - Page 28 • To respond to a notification, tap it. • Slide down with one or two fingers to expand certain notifications. You can also pinch or spread two fingers on a notification to collapse or expand certain notifications. • To remove a notification, swipe it left or right. •...
-
Page 29: Managing Shortcuts And Widgets
• Data: Tap to enable or disable data access over the mobile network. Press and hold to open the Data usage menu. • Location: Tap to turn location access on or off. Press and hold to open the Location menu. •... -
Page 30: Organizing With Folders
3. Press and hold a widget or an app icon and drag it to a home screen panel. Note: While holding the item, you can drag it to the right edge of the screen to create a new home screen panel. Moving Shortcuts and Widgets 1. -
Page 31: Rearranging The Primary Shortcuts
2. Drag the icon to Folder and release it. A new folder will be created with the icon inside. 3. To add more shortcuts into the folder, press and hold each icon and drag it over the folder before releasing it. Note: Tap the folder and then tap the name field to rename the folder. -
Page 32: Google Keyboard
Google Keyboard The Google keyboard provides a layout similar to a desktop computer keyboard. Turn the tablet sideways and the keyboard will change from portrait to landscape. The landscape keyboard is not supported in all applications. • Tap the alphabetic keys to enter letters. Press and hold some specific keys to enter associated accented letters or numbers. -
Page 33: Gesture Typing
Gesture Typing The Google keyboard supports the gesture-typing feature. Use this feature to input a word by sliding from letter to letter on the keyboard. To enable and use gesture typing: 1. Press and hold on the Google keyboard, and then tap Google Keyboard settings. -
Page 34: Google Voice Typing
Google Voice Typing Google voice typing uses the Google voice recognition service to convert speech to text. You must have a data connection on a mobile or Wi-Fi network to use it. 1. Tap to access the voice-typing feature when you are using the Google keyboard. -
Page 35: Opening And Switching Apps
Opening and Switching Apps Opening an App 1. From the home screen, tap 2. Slide up or down on the screen and tap an app to open it. Switching Between Recently Opened Apps 1. Press the Recent apps key. A list of the names and thumbnails of apps you’ve recently used opens. - Page 36 Method Two: 1. Open the first app you want to use, and then press and hold the Recent apps key. 2. Find and open the second app you want to use, either by pressing the Recent apps key and tapping a tab or by tapping To turn off split-screen mode, drag to the top or bottom of...
-
Page 37: Connecting To Networks And Devices
Connecting to Networks and Devices Connecting to Mobile Networks Controlling Mobile Data Use To enable or disable data access: 1. From the home screen, tap Settings Mobile networks Mobile Networks. 2. Slide the Mobile Data switch to enable or disable mobile data use. To get data services when roaming: Settings Mobile networks 1. -
Page 38: Connecting To Wi-Fi
Connecting to Wi-Fi Wi-Fi is a wireless networking technology that can provide Internet access at distances of up to about 300 feet, depending on the Wi-Fi router and your surroundings. Turning Wi-Fi On and Connecting to a Wi-Fi Network 1. From the home screen, tap Settings Wi-Fi. - Page 39 1. From the home screen, tap Settings Wi-Fi. 2. Slide the switch to the On position. 3. Tap Add network. 4. Enter the network SSID (name). If necessary, enter security or other network configuration details. 5. Tap SAVE. Connecting to a WPS Network Wi-Fi Protected Setup (WPS) is a feature that makes it easy to add your tablet to access points that supply WPS.
- Page 40 Note: For detailed information about the WPS feature of the access point, please refer to its documentation. Forgetting a Wi-Fi Network You can make your tablet forget the details of a Wi-Fi network that you added—for example, if you don’t want the tablet to connect to it automatically or if it is a network that you no longer use.
- Page 41 • WPS Pin Entry: Connect to a WPS network via the tablet PIN method. • Connect to AT&T Wi-Fi spot: Enable automatic connection to an available AT&T Wi-Fi hotspot. Using Wi-Fi Direct Wi-Fi Direct allows Wi-Fi devices to connect to each other without the need for wireless access points (hotspots).
-
Page 42: Connecting To Bluetooth Devices
Connecting to Bluetooth Devices Bluetooth is a short-range wireless communication technology. Tablets or other devices with Bluetooth capabilities can exchange information wirelessly within a distance of about 30 feet. The Bluetooth devices must be paired before the communication is performed. Turning Bluetooth On/Off 1. - Page 43 4. Confirm that the Bluetooth passkeys are the same between the two devices and tap PAIR. Alternatively, enter a Bluetooth passkey and tap PAIR. Pairing is successfully completed when the other device accepts the connection or the same passkey is entered. Note: The Bluetooth passkey may be fixed for certain devices, such as headsets and hands-free car kits.
-
Page 44: Connecting To Your Computer Via Usb
Receiving Data via Bluetooth 1. Turn Bluetooth on before trying to receive data via Bluetooth. Note: If the tablet has not been paired with the sending device, you may need to tap your tablet’s device name in the Bluetooth menu in Settings to keep the tablet detectable through Bluetooth. -
Page 45: Using The Microsdxc Card As Portable Or Internal Storage
Note: For Windows XP, please install the drivers and Windows Media Player 11 (or later version) when you use ® Media device (MTP) for the first time. • Camera (PTP): Transfer photos using camera software. Note: To make your tablet connect to the computer automatically using the selected connection type, check Don’t ask me again. - Page 46 You can also open the Notification Panel and tap the microSDXC card name, select Use as portable storage and then tap NEXT DONE. Removing the microSDXC Card From Your Tablet (Portable) If you need to remove the microSDXC card used as portable storage while the tablet is on, you should unmount it first.
- Page 47 Caution: The formatting procedure erases all the data on the microSDXC card, after which the files CANNOT be retrieved. 5. The tablet will prompt you to move your photos, files, and other data from the internal storage to the microSDXC card. Select Move now or Move later and tap NEXT.
-
Page 48: Sharing Your Mobile Data Connection
Settings Storage. 1. From the home screen, tap 2. Tap the microSDXC card name in the Device storage section. 3. Tap Eject EJECT OK. 4. When the screen prompts the card is safely ejected, you can remove it from the tablet. Reformatting the microSDXC card as portable storage: If you no longer want to use your microSDXC card as internal storage, you can reformat the card as portable storage. -
Page 49: Connecting To Virtual Private Networks
1. From the home screen, tap on the AT&T AllAccess widget to enable the hotspot. 2. In the Wi-Fi settings on another Wi-Fi capable device, tap your tablet’s Wi-Fi Network Name (SSID) and enter the password to connect and start using the tablet’s mobile data. Notes: •... -
Page 50: Connecting To A Vpn
3. Enter the VPN name, server address, and other information provided by your network administrator. 4. Tap SAVE. The VPN is added to the list on the VPN screen. Connecting to a VPN Settings More VPN. 1. From the home screen, tap 2. -
Page 51: Phone Calls
Phone Calls You can make voice or video calls from the tablet using your mobile phone number after you successfully log in to AT&T NumberSync, even if your mobile phone is powered off or isn’t with you nearby. Calls to your mobile phone will also ring on your tablet. -
Page 52: Placing And Ending Calls
Note: When roaming, you will be notified at login that 911 emergency calls cannot be made outside of the United States. 9. Tap the default device name if you would like to change it, and then tap Complete Setup. Note: Once logged in, your mobile phone number will be shown at the top right of the screen. -
Page 53: Working With The Call Log
To answer or reject a video call: • Tap to answer as a video call. • Tap to answer the call as a voice call instead. • Tap to reject the call. Note: To silence the ringer before answering a call, press the Volume key. -
Page 54: Using Options During A Call
4. Tap Create contact to add the number as a new contact, or to add the number to an existing contact, tap Add to existing contact the contact Ok. Using Options During a Call During a voice call or video call, you will see a number of call options. -
Page 55: Managing Multiparty Calls
Managing Multiparty Calls When the call waiting and three-way call features are available, you can switch between two calls or set up a conference call. Note: The call waiting and three-way call features need network support and may result in additional charges. Please contact your service provider for more information. -
Page 56: Adjusting Your Call Settings
3. When connected to the second party, tap to merge voice calls or tap to merge video calls. 4. To end the voice conference call, tap (using mobile data) (using Wi-Fi) on the screen. To end the video conference call, tap (using mobile data) or (using Wi-Fi). -
Page 57: Adjusting The Volume
Your number will not show on the receiver device. To allow your number to appear again, select Network Default, or select Show Number to always show your number. Forwarding Incoming Calls The call-forwarding feature allows you to forward your incoming calls to another phone number. - Page 58 3. Tap an available option to choose it, or tap to manually adjust the Dolby Audio™ effect. Using Do Not Disturb Settings Sound Setting From the home screen, tap Do not disturb. See Personalizing – Using Do Not Disturb Mode for more information.
-
Page 59: Contacts
Contacts You can add contacts on your tablet and synchronize them with the contacts in your Google account or other accounts that support contact syncing. Contacts. To see your contacts, from the home screen, tap From here, you can tap the tabs at the top of the screen to quickly switch to favorite contacts or groups. -
Page 60: Setting Up Your Own Profile
Setting Up Your Own Profile You can create your own name card in your tablet. 1. Open the Contacts app and tap the CONTACTS tab. 2. Tap My Info 3. Tap each field to edit the information. 4. Tap More Fields to change or add other profile details. 5. -
Page 61: Working With Favorite Contacts
Working With Favorite Contacts You can add the contacts you use frequently to FAVORITES so that you can find them quickly. Adding a Contact to Favorites 1. Open the Contacts app and tap the CONTACTS tab. 2. Tap a contact, and then tap at the top. - Page 62 Deleting Contacts 1. Open the Contacts app and tap the CONTACTS tab. 2. Tap the contact you want to remove. Delete OK. 3. Tap Linking Contacts As your tablet synchronizes with multiple online accounts, you may see duplicate entries for the same contact. You can merge all the separate information of a contact into one entry in the contacts list.
-
Page 63: Working With Groups
Working With Groups You can arrange your contacts into groups by adding members to the preset groups, or you can create new groups. 1. Open the Contacts app and tap the GROUPS tab. 2. Tap . Select the account under which you want to create the group, or tap Tablet-only if you don’t want it synced with an account. -
Page 64: Accounts
Accounts Adding or Removing Accounts You can add multiple Google accounts and Microsoft Exchange ActiveSync accounts. You may also add other kinds of accounts, ® depending on the apps installed on your tablet. Adding an Account 1. From the home screen, tap Settings Accounts Add account. -
Page 65: Configuring Account Sync
Configuring Account Sync Configuring Auto-sync Settings 1. Swipe down on the Notification Panel with two fingers to open the Quick Settings menu. 2. Tap Sync to enable or disable the auto-sync feature. • When automatic sync is turned on, changes you make to information on your tablet or on the web are automatically synced with each other. -
Page 66: Email
Email From the home screen, tap . Use it to read and send emails from Microsoft Exchange ActiveSync, Gmail, Hotmail, Yahoo! ® and more. Setting Up the First Email Account 1. When you open Email for the first time, tap an email type and then enter your email address and password. -
Page 67: Checking Your Emails
Checking Your Emails Your tablet can automatically check for new emails at the interval you set when setting up the account. You can also manually check for new emails by dragging down on the message list. Responding to an Email You can reply to or forward a message that you receive. -
Page 68: Adding And Editing Email Accounts
Deleting an Email You can delete an email from its folder. You can also delete a batch of emails. • While reading a message, tap • While in a message list (for instance, the Inbox), tap the checkboxes next to the messages and then tap Adding and Editing Email Accounts Adding an Email Account After setting up your first email account (see Email –... -
Page 69: Deleting An Email Account
Deleting an Email Account Settings. 1. Open Email to the Inbox screen and tap 2. Tap the account you want to delete, and then tap Remove account. 3. Tap OK to confirm. All email messages in the account will be deleted from the tablet. Changing General Email Settings General settings apply to all email accounts you add. -
Page 70: Browser
Browser Use Browser to view web pages and search for information. Opening the Browser To open Browser, from the home screen, tap If Browser was recently used, the last web page you were viewing is displayed. If you have not used Browser recently, your home page opens. -
Page 71: Using Multiple Browser Tabs
Using Multiple Browser Tabs You can open several web pages at the same time (one page in each tab) and switch between them freely. Opening a New Browser Tab 1. Tap ADD. - Or - New tab. A new browser tab opens. Switching Between Tabs 1. -
Page 72: Camera
Camera You can take photos and record videos. Photos and videos are stored to the tablet’s memory card or to the tablet’s internal storage. You can copy them to your computer or access them in the Gallery app. Capturing a Photo 1. -
Page 73: Recording A Video
Select MANUAL or AUTO camera mode, or select FUN to use panorama, HDR, special effect, multi- exposure, smile detection, or interval capture modes (only available for the rear-facing camera). Switch between the front-facing and rear-facing cameras. Set a time delay before the camera automatically takes a picture after you tap the shutter icon. -
Page 74: Using Other Camera Modes
1. From the home screen, tap 2. Tap MANUAL. 3. Aim the camera at the subject. You can make the following adjustments: • Drag the green square to any area on the screen that you want to focus on. Press and hold the square to lock the focus. •... -
Page 75: Customizing Camera And Video Settings
• MULTI EXPOSURE: Capture multiple pictures for collages or special effects. • INTERVAL: Capture pictures according to the time interval you choose (0 to 60 seconds). • SMILE: Capture pictures automatically when a smile is detected. Customizing Camera and Video Settings Before capturing a photo or video, you can tap to open the following camera and video setting options (some options will... - Page 76 VIDEO • Video quality: Set the quality for your video. • Time lapse: Set the time interval between each frame when recording videos using the rear-facing camera. • Focus lock when recording: Select whether to lock the focus point on the center of the screen when recording videos using the rear-facing camera.
-
Page 77: Gallery
Gallery Opening the Gallery Gallery to view your pictures and From the home screen, tap videos. Tap Timeline or Album to select a viewing mode. Timeline displays contents in chronological order, and Album displays contents organized by album. Working With Albums Viewing Album Contents In Album view, tap an album to view the pictures and videos it contains. -
Page 78: Working With Pictures
Working With Pictures Tap a picture to view it in full screen. Number Function Tap to return to the album or timeline. Swipe horizontally to see more; double-tap a picture or pinch two fingers together or spread them apart to zoom in or out. Delete the picture. - Page 79 Share the picture. Add the picture to the Favorites album. Rotate, rename, print, check file details, set as wallpaper or contact photo, or view in slideshow mode. Notes: • Pinch a picture or video to make it smaller. You’ll then see a filmstrip-style view of all your pictures and videos in a row.
- Page 80 Adjust the color of the picture with saturation, hue, and other color effects. Draw, add text, or apply a mosaic effect on the picture. 3. Tap to keep the change or to cancel it. 4. Tap to save the new picture. Note: Tap in the Photo Editor screen to see the edits you have made and undo or redo them.
-
Page 81: Playing Videos
Playing Videos 1. Tap the thumbnail of a video. 2. Tap at the center to start playing. 3. Tap the video to view the playback controls. GALLERY... -
Page 82: Music
Music From the home screen, tap Music to play audio files stored on your tablet. Music supports a wide variety of audio formats, so it can play music you purchase from online stores, music you copy from your CD collection, and more. Copying Music Files to Your Tablet Before using Music, you need to copy audio files to your tablet or memory card. -
Page 83: Viewing Your Music Library
Receiving via Wi-Fi Direct You can receive music files from other devices via Wi-Fi Direct (see Connecting to Networks and Devices – Connecting to Wi-Fi – Using Wi-Fi Direct). Viewing Your Music Library From the home screen, tap Music, and your music library is displayed. -
Page 84: Playing Music
Playing Music Tap a song in the music library to listen to it. Tap the playback bar and the following playback screen appears: Number Function Song, album, and artist information. Tap to go back to the music library. Album artwork (if available). Track information. -
Page 85: Managing Playlists
Drag the slider to jump to any part of the song. Play the current playlist in shuffle mode, where tracks are played in random order. Playback control. Skip songs or pause and resume playback. Toggle repeat mode: repeating current song, repeating all songs, or sequential. -
Page 86: Video Player
Video Player Use the Video Player to manage your video library and to watch videos. Opening the Video Library From the home screen, tap Video Player to view your video library. Swipe up or down to find the video you want. You can also to search for video files, or View by or Sort by to change the display mode or sort the list. -
Page 87: Managing Video Files
Open the Dolby Audio app and customize sound options. Take a screenshot. Hide video playback controls and lock the touch screen. Get more options. Notes: • Slide horizontally on the video to rewind or fast forward. • Slide vertically on the right or left part of the screen to adjust volume or brightness, respectively. - Page 88 Trimming a Video 1. Tap a video to start playing it. 2. Tap Trim. 3. Drag the two tabs on the progress bar to select the portion you want to keep. You can tap to preview the selected portion. 4. Once the preview ends, tap . The trimmed video is saved as a new video file.
-
Page 89: Fm Radio
FM Radio With the FM Radio, you can search for radio channels, listen to them, and save them on your tablet. Note that the quality of the radio broadcast depends on the coverage of the radio station in your area. The wired headset works as an antenna, so always connect the headset while using the radio. -
Page 90: Editing A Saved Channel
more than four channels have been added to the favorites list, slide up to view all favorite channels. • You can save up to 16 channels to favorites. • Tap to listen to FM Radio through the tablet speaker. Editing a Saved Channel All channels to display the 1. -
Page 91: More Apps
More Apps Backup & Restore From the home screen, tap Backup & Restore. You can back up your user data, such as contacts and messages, and installed applications to the memory card regularly. If the data gets lost, restore it from the memory card. Help to view a detailed guide. -
Page 92: Downloads
Notes: • To enable or disable existing alarms directly, tap On on the right side of each alarm. • Tap to configure alarm settings, including ringtone volume, alarm duration, volume crescendo, and alarm in silent mode. Using World Time 1. Open the Clock app and tap 2. -
Page 93: Sound Recorder
• Tap folders and files to access stored items. • Press and hold an item to access option icons such as copy, move, share, or delete. • To copy or move an item, navigate to a new location and tap PASTE. •... -
Page 94: Task Manager
To play any saved memo: 1. Tap at the top right of the screen to see all recordings. 2. Tap the title of a memo to play it. Note: You can also tap to delete, share, rename, tag, trim, check file information, or set as notification ringtone. Task Manager From the home screen, tap Task Manager to view or... - Page 95 • Drive: Store files on Google servers for free after you sign in to your Google account. You can access them on computers, tablets, and other devices, share them, or collaborate on them with other users. • Duo: Make video calls to bring you face-to-face with the people who matter most.
-
Page 96: Settings
Settings From the home screen, tap Settings. Settings contains most of the tools for customizing and configuring your device. Wireless & Networks Wi-Fi Turn Wi-Fi on or off and configure your Wi-Fi connections (see Connecting to Networks and Devices – Connecting to Wi-Fi). Advanced Wi-Fi Direct in the Wi-Fi When Wi-Fi is on, tap menu to directly share data between two devices via Wi-Fi (see... -
Page 97: Device
Notes: • The data usage is measured by your tablet, and your carrier’s data usage accounting may differ. • Tap Network restrictions to select Wi-Fi networks that are mobile hotspots. Data usage on recognized mobile hotspots will be restricted to avoid high mobile data bills. Airplane Mode In the Settings app, tap More Airplane mode to turn Airplane mode on or off. - Page 98 • Press power button twice for camera: Tap to enable/disable this feature, which allows you to quickly open the Camera app without unlocking your screen. • Screen saver: Manage the Screen saver function. When this feature is enabled, photos or animations will be displayed as a screensaver.
- Page 99 (see Personalizing – Switching to Silent Mode), manage Do not disturb settings (see Personalizing – Using Do Not Disturb Mode), set up ringtone and notification sound (see Personalizing – Changing Ringtone and Notification Sound), or select system sounds (see Personalizing – Turning System Sounds On/Off). Apps See apps installed on your tablet and manage them.
- Page 100 Storage Check memory information for your external memory card and internal storage. You can choose the default location for new data, such as downloaded files and captured photos. • Save location: Select Tablet or SD card to select the default location for new data, such as files downloaded, photos captured, and audio clips recorded.
-
Page 101: Personal
Users You can add new guest accounts, remove guest accounts, and switch among the different accounts. Connect to PC Select the USB connection mode between your tablet and PC (see Connecting to Networks and Devices – Connecting to Your Computer via USB – Connecting Your Tablet to a Computer via USB). Personal Location Activate location services to determine your location. - Page 102 Security • Screen lock: Lock the screen with long press, pattern, PIN, or password (see Personalizing – Protecting Your Tablet With Screen Locks), or select None to disable the screen lock. • Smart Lock: Keep the tablet unlocked when connected to trusted devices, in trusted places, when unlocked by a trusted face or voice, or when being carried on the body.
- Page 103 • Install from SD card: Install certificates from storage. • Clear credentials: Delete all certificates. • Trust agents: View or deactivate trust agents. • Screen pinning: Turn the screen pinning feature on/off (see Personalizing – Protecting Your Tablet With Screen Pinning). •...
- Page 104 • Text-to-speech output – Preferred engine: Select the speech synthesis engine you want to use or change its settings. – Speech rate: Select how quickly you want the synthesizer to speak. – Pitch: Adjust the tone of spoken text. – Reset speech rate: Reset the speed at which the text is spoken to normal.
-
Page 105: System
• Factory data reset: Reset your tablet to factory default settings. All your data in the internal storage will be erased. You can also erase the data on the memory card during the process. System Date & Time Set date, time, time zone, and how time is displayed. You can also use network-provided data (see Personalizing –... -
Page 106: For Your Safety
For Your Safety General Safety Don’t use this device Turn off when near while driving. Never text explosive materials or while driving. liquids. Small parts may cause Don’t use at gas choking. stations. Your device can produce Your device may a loud sound. -
Page 107: Fcc Regulations
FCC Regulations This device complies with part 15 of the FCC Rules. Operation is subject to the following two conditions: (1) This device may not cause harmful interference, and (2) this device must accept any interference received, including interference that may cause undesired operation. -
Page 108: Rf Exposure Information (Sar)
RF Exposure Information (SAR) This device is designed and manufactured not to exceed the emission limits for exposure to radio frequency (RF) energy set by the Federal Communications Commission of the United States. During SAR testing, this device was set to transmit at its highest certified power level in all tested frequency bands, and placed in positions accepted by FCC. -
Page 109: Distraction
• Only use the battery for the system for which it is specified. • Only use the battery with a charging system that has been qualified with the system per CTIA Certification Requirements for Battery System Compliance to IEEE 1725. Use of an unqualified battery or charger may present a risk of fire, explosion, leakage, or other hazard. -
Page 110: Operating Machinery
(even with a hands-free kit) can cause distraction and lead to an accident. You must comply with local laws and regulations restricting the use of wireless devices while driving. Operating Machinery Full attention must be given to operating the machinery in order to reduce the risk of an accident. -
Page 111: Small Children
• Do not expose your device or its accessories to extreme temperatures, minimum 23°F and maximum 122°F (minimum -5°C and maximum +50°C). • Please check local regulations for disposal of electronic products. • Do not carry your device in your back pocket, as it could break when you sit down. -
Page 112: Loud Noise
Seizures/Blackouts The device can produce a bright or flashing light. A small percentage of people may be susceptible to blackouts or seizures (even if they have never had one before) when exposed to flashing lights or light patterns, such as when playing games or watching video. -
Page 113: Electrical Safety
Electrical Safety Accessories Use only approved accessories. Do not connect with incompatible products or accessories. Take care not to touch or allow metal objects, such as coins or key rings, to contact or short-circuit in the battery terminals. Connection to a Car Seek professional advice when connecting a device interface to the vehicle electrical system. -
Page 114: Hearing Aids
pacemaker. To achieve this, use the device on the opposite ear to your pacemaker and do not carry it in a breast pocket. Hearing Aids People with hearing aids or other cochlear implants may experience interfering noises when using wireless devices or when one is nearby. -
Page 115: Interference In Cars
Interference in Cars Please note that because of possible interference to electronic equipment, some vehicle manufacturers forbid the use of mobile devices in their vehicles unless a hands-free kit with an external antenna is included in the installation. Explosive Environments Gas Stations and Explosive Atmospheres In locations with potentially explosive atmospheres, obey all posted signs to turn off wireless devices such as your tablet or... -
Page 116: Warranty
Warranty ZTE offers you a limited warranty that the enclosed subscriber unit and its enclosed accessories will be free from defects in material and workmanship for a period that expires one year from the date of sale of the Product to you, provided that you are the original end user purchaser of the Product and provided that your purchase was made from a supplier authorized by the Seller. -
Page 117: Limited Warranty
abuse, accident, alteration, improper installation, incorrect voltage application, food or liquid spillage, acts of God. c) Normal wear and tear. d) If the Product has been opened, modified, or repaired by anyone other than a warranty service center, or if it is repaired using unauthorized spare parts. -
Page 118: How To Get Warranty Service
How to Get Warranty Service To obtain warranty service, please call (877) 817-1759. Please have the following information available when you send the tablet in for repair: • A valid Proof of Purchase • Return address • Daytime phone number or fax number •... -
Page 119: Specifications
Specifications Tablet specifications are shown in the following table: Operating system Android™ 7.1.1 (Nougat) Network frequency UMTS 850/1900/AWS/2100 MHz LTE B2/B4/B5/B12/B29/B30/B7/B1 Dimensions (H × W × D) 8.47" (H) x 4.92" (W) x 0.35" (D) Weight 12.8 oz. Display 8" TFT LCD Camera 5 MP (front-facing);... - Page 120 Notes NOTES...
Need help?
Do you have a question about the TREK 2 HD and is the answer not in the manual?
Questions and answers