Table of Contents
Advertisement
Quick Links
Advertisement
Table of Contents

Subscribe to Our Youtube Channel
Summary of Contents for HandHeld ALGIZ XRW
- Page 1 Algiz XRW User’s Manual ALGIZ XRW Quick Start Guide V0.3 - 1 -...
- Page 2 Algiz XRW User’s Manual Accessory Item Description Note 1 piece of 6 Cell Li-Polymer Battery Pack 1 piece of DVD for System Driver Utility. 1 piece of 19V Adapter w/ Standard Power Cord. Euro / U.S. Std type, 1.8M With Windows 7...
- Page 3 Algiz XRW User’s Manual Copyright Notice Copyright © 2012 Handheld Inc., ALL RIGHTS RESERVED. No part of this document may be reproduced, copied, translated, or transmitted in any form or by any electronic or mechanical means, for any purposes without the permission of the original manufacturer in advance.
- Page 4 Please feel free to call or e-mail us. Manufacturer:Handheld Inc. Address:Handheld Group AB, Kinnegatan 17 A, S-531 33, Linkoping, Sweden TEL:+46 (0) 510-54 71 70 FAX:+46 (0) 510-282 05...
- Page 5 UL-60950 and CAN/CSA C22.2 No. 601.1. Power Supply Announcement The Handheld Rugged Netbook Power is supplied by Power Adapter and Battery Pack, the power rating announcement and manufacturer information are listed as below.
- Page 6 FEDERAL COMMUNICATIONS COMMISSION This equipment has been tested and found to comply with the limits for a Class B digital device, pursuant to Part 15 of the FCC Rules. These limits are designed to provide reasonable protection against harmful interference in a residential installation. This equipment generates, uses and can radiate radio frequency energy and, if not installed and used in accordance with the instructions, may cause harmful interference to radio communications.
- Page 7 RF exposure information (SAR) This Rugged Notebook meets the government's requirements for exposure to radio waves. This Rugged Notebook is designed and manufactured not to exceed the emission limits for exposure to radio frequency (RF) energy set by the Federal Communications Commission of the U.S.
- Page 8 Algiz XRW User’s Manual Power Notice! Power Adapter Manufacture: FSP Group Model: FSP065-AAB Input Rated: 100-240Vac, 1.8A, 50-60Hz. Output Rated: DC 19V,3.42A. Battery Pack Manufacture: JHT Energy International Co Ltd Model: ALGX-08A Rated: 5200mAh, DC 11.1V Please notice that the power code of adapter needs to be connected to the ground (earth).
-
Page 9: Table Of Contents
Algiz XRW User’s Manual Index Chapter 1 – Specification ............2 System Specification ................. 2 Chapter 2 – Identifying Hardware Components ......3 Front Side ..................3 Left and Right Side ................4 Bottom side ..................5 Chapter 3 – Buttons and Indicators ..........6 Function Keys .................. -
Page 10: Chapter 1 - Specification
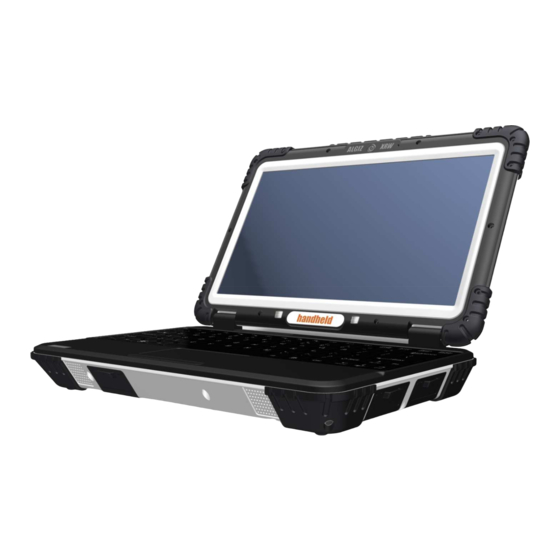
Algiz XRW is a rugged netbook designed for the use in various challenging environments, e.g., field work, outdoor activities and construction site. With its rugged design, Algiz XRW is able to sustain shock, vibration, high humidity as well as high/ low temperatures. -
Page 11: Chapter 2 - Identifying Hardware Components
Algiz XRW User’s Manual Chapter 2 – Identifying Hardware Components 1. Front Side Ref. Item Description Webcam + Microphone 2 megapixels Webcam with Microphone is used for picture taking, video recording as well as any other possible interactive activities. LED Display... -
Page 12: Left And Right Side
On Screen Display OSD includes 3 LED indicators (Number Lock/ CAP Lock/ Scroll Lock) and 5 buttons (Power/Volume down / Volume up /Brightness down / Brightness up) Stereo Speakers 1.5W stereo speakers SD Card Slot Accepts Secure Card(SD) Audio in/ Audio out: connects with external audio Audio out/ line out devices such as headphones or... -
Page 13: Bottom Side
Open the cover to plug in the RS232 cable Battery Lock Used to fastens the battery Battery Used for the purpose of portability of ALGIZ XRW Pogo Pin Pogo pin for docking station Battery Latch Sliding latches to fasten or release the battery USB Cover Open the cover to plug in any USB 2.0 interfaced... -
Page 14: Chapter 3 - Buttons And Indicators
Algiz XRW User’s Manual Chapter 3 – Buttons and Indicators 1. Function Keys Hot Key Function Icon Description Fn+F1 Sleep mode Enter the sleep mode Fn+F2 Enable/ Disable the function of GPS Fn+F3 WLAN/ Wi-Fi Enable/ Disable the function of Wireless... -
Page 15: On Screen Display Hot Keys
Algiz XRW User’s Manual 2. On Screen Display Hot Keys Function Icon Description Number lock Enable/ disable the number lock Capital lock Enable/ disable the capital lock Scroll lock Enable/ disable the scroll lock Volume down Decrease volume Power Boot up the netbook. -
Page 16: Chapter 4 - Getting Your Device Ready
Caution Before you use your ALGIZ XRW, you will have to charge the battery packs as soon as ALGIZ XRW is connected with the external power source. Please fully charge the battery in advance of operating ALGIZ XRW. The new battery packs must be 100% charged before ALGIZ XRW is disconnected from the external power source. -
Page 17: Installing 3G And Wimax Sim Cards
Algiz XRW User’s Manual 3. Installing 3G and WiMAX SIM Cards 3G Installation Plug in the 3G module to mini PCIe slot and screw the module onto the motherboard Pull up the SIM card socket to insert the 3G SIM card and then push the SIM card socket back.
Need help?
Do you have a question about the ALGIZ XRW and is the answer not in the manual?
Questions and answers