
Summary of Contents for Alcatel-Lucent Enterprise OmniSwitch 6865
- Page 1 Alcatel-Lucent Enterprise OmniSwitch 6865 Hardware Users Guide Part No. 060435-10, Rev F August 2017...
- Page 2 This user guide documents OmniSwitch 6865 hardware, including chassis and associated components. The specifications described in this guide are subject to change without notice. enterprise.alcatel-lucent.com Alcatel-Lucent and the Alcatel-Lucent Enterprise logo are trademarks of Alcatel-Lucent. To view other trademarks used by affiliated companies of ALE Holding, visit: enterprise.alcatel-lucent.com/trademarks.
-
Page 3: Table Of Contents
Attaching Table Mount Feet................. 25 Installing Power Supplies.................... 26 Installing Power Supplies for Side Mount Trays ............26 Installing Power Supplies for Rear Mount Trays ............28 Mounting the OS6865-P16X / OmniSwitch 6865-U12X ............30 Rack Mounting ....................30 Table Mounting ....................31... - Page 4 Connections and Cabling .................... 32 Booting the Switch ....................33 System and Port LEDs ..................33 The First Login Session ..................34 Unlocking Session Types ..................35 Changing the Login Password ................35 Setting the System Time Zone ................36 Setting the Date and Time ..................
-
Page 5: About This Guide
OmniSwitch AOS Data Center Guide • OmniSwitch AOS Specifications Guide • OmniSwitch Transceivers Guide Product Release Notes Release Notes can be downloaded from the Customer Support website (account login required). Customer Support Web: support.esd.alcatel-lucent.com Email: ebg_global_supportcenter@al-enterprise.com OmniSwitch 6865 Hardware Users Guide... -
Page 6: Chassis And Power
1 Chassis and Power OmniSwitch 6865 Hardware Users Guide... -
Page 7: Omniswitch 6865-P16X
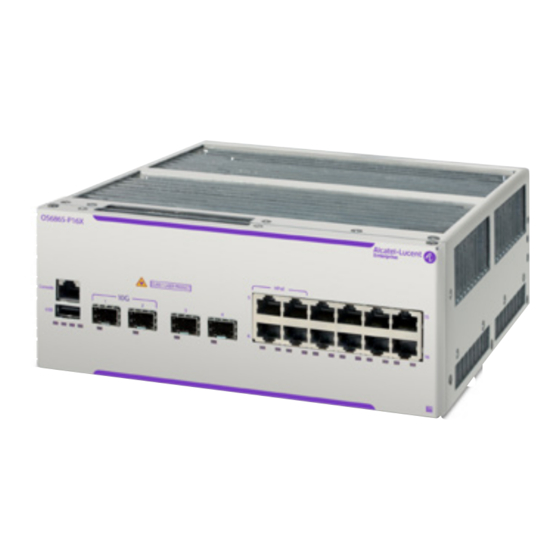
OmniSwitch 6865-P16X The Alcatel-Lucent Enterprise OmniSwitch® 6865 series are Gigabit Ethernet (GigE) and 10 Gb Ethernet (GigE) switches designed for demanding electrical and severe temperature environments. OmniSwitch 6865-P16X (Side Mounted Power Supply Tray Shown) OmniSwitch 6865-P16X Chassis Specifications Fans None... -
Page 8: Chassis Front Panel
Ports 5 through 8 Four (4) 10/100/1000Base-T PoE+ (supporting 75W HPoE per port) Ports 9 through 16 Eight (8) 10/100/1000Base-T PoE+ (supporting 30W PoE per port) Note: For LED descriptions, refer to “System and Port LEDs” on page OmniSwitch 6865 Hardware Users Guide... -
Page 9: Chassis Rear Panel
Chassis Rear Panel Rear Panel Descriptions (Left to Right) Power Supply Connector Power Supply Connector Grounding Block Chassis Ground OmniSwitch 6865 Hardware Users Guide... -
Page 10: Omniswitch 6865-U12X
5% to 95% non-condensing Altitude 4000m/13,000 feet 75W HPoE Ports 30W PoE+ Ports SFP Ports 1G/10G SFP+ Ports 1588v2 Capability Supported PoE Power Budget “Power over Ethernet Budget” on page 40 for more information. Power Consumption (idle) OmniSwitch 6865 Hardware Users Guide... -
Page 11: Chassis Front Panel
Two (2) fixed SFP+ (1G/10G) Ports 3 through 8 Six (6) 100Base-FX/1000Base-X SFP Ports 9 through 12 Four (4)10/100/1000Base-T PoE+ (supporting 75W HPoE per port) Note: For LED descriptions, refer to “System and Port LEDs” on page OmniSwitch 6865 Hardware Users Guide... -
Page 12: Chassis Rear Panel
Chassis Rear Panel Rear Panel Descriptions (Left to Right) Power Supply Connector Power Supply Connector Grounding Block Chassis Ground OmniSwitch 6865 Hardware Users Guide... -
Page 13: Omniswitch 6865-U28X
5% to 95% non-condensing Altitude 4000m/13,000 feet 75W HPoE Ports 30W PoE+ Ports SFP Ports 1G/10G SFP+ Ports 1588v2 Capability Supported PoE Power Budget “Power over Ethernet Budget” on page 40 for more information. Power Consumption (idle) OmniSwitch 6865 Hardware Users Guide... -
Page 14: Chassis Front Panel
Four (4) fixed SFP+ (1G/10G) Ports 5 through 24 Twenty (20) 100Base-FX/1000Base-X SFP Ports 25 through 28 Four (4) 10/100/1000Base-T PoE+ (supporting 75W HPoE per port) Note: For LED descriptions, refer to “System and Port LEDs” on page OmniSwitch 6865 Hardware Users Guide... -
Page 15: Chassis Rear Panel
Chassis Rear Panel Rear Panel Descriptions (Left to Right) Power Supply Connector Power Supply Connector Grounding Block Chassis Ground Ports 29 and 30 QSFP+ VFL Ports OmniSwitch 6865 Hardware Users Guide... -
Page 16: Power Supplies
+56 VDC / 3.22 A Fans Front-of-Supply Component Descriptions (Left to Right) Power Cord Connector Thumb Screw Grounding Block Power Supply Ground Status LED Solid Green indicates normal operation Rear-of-Supply Component Descriptions DB-15 Connector (with Guide Pins) OmniSwitch 6865 Hardware Users Guide... -
Page 17: Os6865-Bp-D - 180W/140W Dc Power Supply
Front-of-Supply Component Descriptions (Left to Right) DC Power Connector “DC Power Supply Connection” on page 14 Thumb Screw Grounding Block Power Supply Ground Status LED Solid Green indicates normal operation Rear-of-Supply Component Descriptions DB-15 Connector (with Guide Pins) OmniSwitch 6865 Hardware Users Guide... -
Page 18: Dc Power Supply Connection
The DC power supply contains a power connector with three (3) square slots for connecting the positive, negative, and ground wires from a DC power source. Side Screws for Connector Removal OmniSwitch DC Power Supply Connector OmniSwitch 6865 Hardware Users Guide... -
Page 19: Installing Dc Power Source Wire Leads
(+) terminal of the DC power supply and the negative (-) wire of the sourcing equipment must be connected to the negative (-) OmniSwitch 6865 Hardware Users Guide... - Page 20 -48V, +24V, or -24V." 5. Repeat Steps 2 through 4 for the remaining positive and negative wire leads. Switch Power Supply DC Power Source Correct Polarity Connections OmniSwitch 6865 Hardware Users Guide...
-
Page 21: Getting Started And Installation
2 Getting Started and Installation OmniSwitch 6865 Hardware Users Guide... -
Page 22: Getting Started
Getting Started Preparing for the Installation Alcatel-Lucent Enterprise products must be installed by a professional installer. It is the responsibility of the installer to comply with product specifications and all applicable local and national codes. When preparing for installation, unpack the product as close as possible to the location where it will be installed. - Page 23 Ethernet cables (especially in new cable runs) to a suitable and safe earth ground before connecting them to the port. Note: Failure to follow the above recommendations could result in voiding the warranty of the affected ALE product. OmniSwitch 6865 Hardware Users Guide...
-
Page 24: Providing Air Flow And Minimum Recommended Clearances
Depending on your order the following items may be included: • OmniSwitch chassis with power supplies and modules • Country specific power cord(s) • Cover Panels • Rack Mount Brackets • Product Documentation and Training Cards • DB9-RJ45 Connector OmniSwitch 6865 Hardware Users Guide... -
Page 25: Preparing The Chassis And Power Supply Tray Assembly
1. To mount the power supply tray to the side of the chassis, be sure that the attachment brackets are installed in the positions show below. Front Chassis-to-Tray Bracket Front Chassis-to-Tray Bracket Rear Chassis-to-Tray Bracket Front Tray-to-chassis Bracket Required Brackets for Side Mount Power Supply Tray (Brackets may be factory-installed.) OmniSwitch 6865 Hardware Users Guide... - Page 26 2. Align the holes in the power supply tray and fasten the two parts into a single assembly using the attachment screws. OmniSwitch 6865 Hardware Users Guide...
-
Page 27: Rear Mount Power Supply Tray
1. To mount the power supply tray to the rear of the chassis, insert the tray tabs into the slots at the rear panel of the chassis. Once the tabs are inserted and the face of the tray is flush against the chassis rear panel, insert and tighten the attachment screws. OmniSwitch 6865 Hardware Users Guide... -
Page 28: Attaching Rack Mount Flanges
Before rack mounting, rack mount flanges must be installed at the left and right sides of the chassis/ tray assembly. To attach the flanges, align the holes in with the threaded holes in the side of the chassis and power supply tray. Insert and tighten the attachment screws. OmniSwitch 6865 Hardware Users Guide... -
Page 29: Attaching Table Mount Feet
Do not attempt to operate the OS6865-P16X on a tabletop surface without these feet properly installed. See “Providing Air Flow and Minimum Recommended Clearances” on page 20 for more clearance information. Attaching Table Mount Feet Table Mount Assembly with 1/2 RU Space Under Chassis OmniSwitch 6865 Hardware Users Guide... -
Page 30: Installing Power Supplies
1. Slide the power supply into the tray and insert the tabs located at the bottom-rear of the power supply into the slots at the base of the power supply tray. 2. Align and tighten the thumb screw at the front of the power supply unit. OmniSwitch 6865 Hardware Users Guide... - Page 31 Do not connect to a power source until all power supplies and power supply-to- chassis cables are installed and the switch is ready to boot. OmniSwitch 6865 Hardware Users Guide...
-
Page 32: Installing Power Supplies For Rear Mount Trays
Note. The switch does not provide an on/off switch. Instead, the switch powers on when a power cord is plugged into the power supply’s front panel and plugged into a power source. OmniSwitch 6865 Hardware Users Guide... - Page 33 Do not connect to a power source until all power supplies and power supply-to- chassis cables are installed and the switch is ready to boot. OmniSwitch 6865 Hardware Users Guide...
-
Page 34: Mounting The Os6865-P16X / Omniswitch 6865-U12X
Mounting the OS6865-P16X / OmniSwitch 6865-U12X Rack Mounting General Rack Mounting Recommendations • Install the switch in the rack using the rack manufacturer’s recommended attachment screws (not provided). Always follow rack manufacturer’s specifications when installing. • The switch is 2 RU high, PLUS requires additional clearance for airflow. Be sure to accommodate these spacing requirements when rack mounting the switch. -
Page 35: Table Mounting
“Preparing for the Installation” “Providing Air Flow and Minimum Recommended Clearances” on page 20—before placing the switch. 2. Fasten the assembly to the surface using attachment bolts or screws as appropriate for the surface material. OmniSwitch 6865 Hardware Users Guide... -
Page 36: Connections And Cabling
Serial Connection Default Settings baud rate 9600 parity none none data bits (word size) stop bits For information on modifying these settings, refer to the OmniSwitch AOS Switch Management Guide. OmniSwitch 6865 Hardware Users Guide... -
Page 37: Booting The Switch
SFP and SFP+ • Off: No link or link down Ports • Solid Green: Link up • Blinking Green: Link up with activity • Solid Amber: Link up (100M) • Blinking Amber: Link up with activity (100M) OmniSwitch 6865 Hardware Users Guide... -
Page 38: The First Login Session
Switch Management Guide. The default welcome banner—which includes information such as the current software version and system date—displays, followed by the CLI command prompt: Welcome to the Alcatel-Lucent Enterprise OS6865 8.3.1, June 03, 2016. Copyright (c) 1994-2014 Alcatel-Lucent. All Rights Reserved. -
Page 39: Unlocking Session Types
New password settings are automatically saved in real time to the local user database; the user is not required to enter an additional command in order to save the password information. Also note that new OmniSwitch 6865 Hardware Users Guide... -
Page 40: Setting The System Time Zone
To specify a system location, use the system location command. Viewing Your Changes To view your current changes, enter show system at the CLI prompt. OmniSwitch 6865 Hardware Users Guide... -
Page 41: Saving Your Changes
Saving Your Changes Once you have configured this basic switch information, save your changes by entering write memory at the CLI command prompt. OmniSwitch 6865 Hardware Users Guide... -
Page 42: Power Over Ethernet (Poe)
3 Power Over Ethernet (PoE) OmniSwitch 6865 Hardware Users Guide... -
Page 43: Managing Power Over Ethernet (Poe)
30000 milliwatts (PoE Ports) Total power available to an lanpower slot maxpower entire slot Power priority level for a port lanpower priority Capacitor detection method Disabled lanpower capacitor-detection Priority disconnect status Enabled lanpower slot priority-disconnect OmniSwitch 6865 Hardware Users Guide... -
Page 44: Power Over Ethernet Budget
(1) OS6865-BP and (1) OS6865-BP-D @ 48V 300W 150W 150W (1) OS6865-BP and (1) OS6865-BP-D @ 24V 240W 150W 150W OmniSwitch 6865-P16X / U12X PoE Budget and Temperature Table Operating Temperature (TMRA)/ 60°C 65°C 74°C Power Supply (without airflow) (without airflow) -
Page 45: Determining The Power Available For Powered Devices (Pds)
PoE, you must issue the lanpower slot service command on a slot-by-slot basis before any connected devices will receive inline power. To activate power to PoE-capable in a switch, enter the corresponding slot number only. For example: -> lanpower slot 2/1 service start OmniSwitch 6865 Hardware Users Guide... - Page 46 Note. Decreasing the slot-wide power could cause lower priority ports to lose power if the new value is less than the total PoE power currently being consumed. To increase or decrease the total power available to a slot, use the lanpower slot maxpower command. OmniSwitch 6865 Hardware Users Guide...
-
Page 47: Setting Port Priority Levels
PDs that are mission critical for network operations. Setting the Capacitor Detection Method By default, the capacitor detection method is disabled. To enable it, use the lanpower capacitor- detection command. For example: OmniSwitch 6865 Hardware Users Guide... -
Page 48: Understanding Priority Disconnect
To disable priority disconnect, use the lanpower slot priority-disconnect command. For example: -> lanpower slot 1/1 priority-disconnect disable Enabling Priority Disconnect To enable priority disconnect, use the lanpower slot priority-disconnect command. For example: -> lanpower slot 1/1 priority-disconnect enable OmniSwitch 6865 Hardware Users Guide... -
Page 49: Priority Disconnect Is Disabled
When priority disconnect is disabled, power will be denied to any incoming PD, regardless of its port priority status (i.e., low, high, and critical) or physical port number. OmniSwitch 6865 Hardware Users Guide... -
Page 50: Understanding Guard Band
PDs in the case of the power budget being reduced, such as the removal of a power supply. Please refer to the “Understanding Priority Disconnect” on page 44 for additional details. OmniSwitch 6865 Hardware Users Guide... -
Page 51: Regulatory Compliance And Safety Information
A Regulatory Compliance and Safety Information OmniSwitch 6865 Hardware Users Guide... -
Page 52: Compliance And Certifications
¬ EN 61000-4-6 ¬ EN 61000-4-8 ¬ EN 61000-4-11 • IEEE802.3: Hi-pot Test (1.5 KV AC or 2.25 KV DC on all Ethernet Ports) Note. For questions regarding these or other certifications, please contact Alcatel-Lucent Enterprise. OmniSwitch 6865 Hardware Users Guide... -
Page 53: Industrial Compliance Requirements
EN 61000-3-2 EN 55024 IEC 61850-3 EN 61000-4-2 to EN 61000-4-6, EN 61000-4-8 EN 61131-2 IEEE 1613, Section 5.2, 5.3, 6.3.1, 6.3.2, 7, 8 DNV 2.4 Railway EN 50121-4 IEC 62236-4 EN 61000-6-4 NEMA NEMA TS-2 OmniSwitch 6865 Hardware Users Guide... -
Page 54: China Rohs: Hazardous Substance Table
China RoHS: Hazardous Substance Table OmniSwitch 6865 Hardware Users Guide... -
Page 55: Taiwan Rohs: Hazardous Substance Table
WARNING: This product contains chemicals known to the State of California to cause cancer and birth defects or other reproductive harm. Products are packaged using one or more of the following packaging materials: Corrugated Cardboard Corrugated Fiberboard Low-Density Polyethylene OmniSwitch 6865 Hardware Users Guide... -
Page 56: Waste Electrical And Electronic Equipment (Weee) Statement
Move the equipment away from the receiver. • Plug the equipment into a different outlet so that equipment and receiver are on different branch circuits. If necessary, the user should consult the dealer or an experienced radio/television technician for additional suggestions. OmniSwitch 6865 Hardware Users Guide... -
Page 57: Jate
Class A Warning for Taiwan and Other Chinese Markets This is a Class A Information Product. When used in a residential environment, it may cause radio frequency interference. Under such circumstances, the user may be requested to take appropriate countermeasure. OmniSwitch 6865 Hardware Users Guide... -
Page 58: Translated Safety Warnings
Deutsch: Installationshinweise Dieses Gerät soll nur von Personal installiert oder gewartet werden, welches in elektrischen und mechanischen Grundlagen ausgebildet ist. Español: Estos equipos deben ser instalados y atendidos exclusivamente por personal adecuadamente formado y capacitado en técnicas eléctricas y mecánicas. OmniSwitch 6865 Hardware Users Guide... -
Page 59: Invisible Laser Radiation Warning
• To ground the equipment properly, connect a Panduit Corporation UL listed Lug, P/N: LCD8-10AL to the two threaded holes located on the rear using 8AWG copper conductors. Use Panduit Corporation, P/N: CT-940CH for crimping. OmniSwitch 6865 Hardware Users Guide... -
Page 60: Read Important Safety Information Warning
Español: Este equipo se debe instalar en un sitio con acceso restrinjido. Un sitio con el acceso restrinjido es uno seguro y con acceso limitado al personal de servicio que tiene una clave especial u otros medios de seguridad. OmniSwitch 6865 Hardware Users Guide... - Page 61 Français: L'électricité statique (ESD) peut endommager les composants du commutateur. Pour cette raison Alcatel-Lucent Enterprise joint à l'envoi du châssis un bracelet antistatique à brancher sur la prise mise à la terre située en bas à droite du commutateur. Vous devrez mettre ce bracelet avant toute intervention hardware.
-
Page 62: Instrucciones De Seguridad En Español
Su interruptor esta equipado por fuentes de alimentación múltiples. Para reducir el riesgo de choque eléctrico, asegúrese desconectar todas las conexiones de alimentación antes de mantener o de mover la unidad. Advertencia sobre una apropiada conexión a tierra Para evitar peligro de descargas: OmniSwitch 6865 Hardware Users Guide... -
Page 63: Advertencia De Acceso Restringido
Para que la pulsera antiestática sea eficaz en la eliminación de ESD, las fuentes de alimentación se deben instalar en el chasis y enchufar en las salidas de CA con descarga a tierra. Clase de seguridad Cumple con 21CFR 1040.10 y 1040.11 ó sus equivalentes. OmniSwitch 6865 Hardware Users Guide...
Need help?
Do you have a question about the OmniSwitch 6865 and is the answer not in the manual?
Questions and answers