
Summary of Contents for Victa VCS1845
- Page 1 MODELS VCS1845 VICTA Chainsaw Assembly and Owner’s Manual WARNING! Read this manual before operating your VICTA Chainsaw...
- Page 2 IMPORTANTNOTES Please read the following Thank you for purchasing your VICTA chainsaw. VICTA prides itself in the quality and performance of all its products. This instruction manual will aid in the assembly, safe operation and maintenance of your chainsaw. Please read the following warnings to ensure safety and the long life of your product.
-
Page 3: Table Of Contents
Cutting Techniques Maintenance & Care Air Filter Spark plug Sharpening Chain Bar Maintenance Sprocket Replacement Adjusting Chain Tension Carburettor Adjustment Lubrication Flow Adjustment Storage Maintenance Chart Troubleshooting Troubleshooting Technical specifications Model Details VICTA Products Accessories & Spare Parts Warranty Warranty Notes... -
Page 4: Feature Definitions
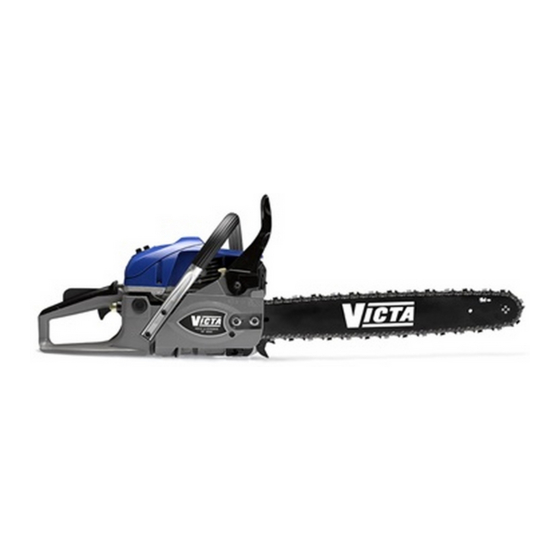
FEATURES DEFINITIONS Machine Layout & Supplied Items VCS1845 18" Chain - 0.325" Oregon chain (21BPX072X) 18" Guide Bar - Oregon (188PXBK095) Spiked Bumper Bar & chain lubrication Oil Cap Fuel Cap Front Handle Chain Brake Guard Bar Tensioner Locknuts x2... - Page 5 FEATURES DEFINITIONS Chainsaw Parts Description VCS1845...
-
Page 6: Safety Features
Anti Vibration operation. It is made up of several springs & rubber mounts. Excessive vibration can cause nerve & circulation damage. Victa recommend the additional use of anti-vibration gloves to further increase the reduction of vibration. Handle Guards to activate the chain brake. -
Page 7: Personal Protective Equipment
AS/NZS standard. All mandatory personal protective equipment must be worn at all times while operating the equipment, Victa recommends using all personal protective equipment shown below. Safety Helmet (AS/NZS 1801) damage caused by attaching stickers, storing in direct sunlight and contact with solvents. -
Page 8: Safety Instructions
SAFETY FEATURES Safety Instructions Do not operate the VICTA chainsaw before reading all safety, assembly & operating sections of the manual. Operator Safety Equipment. above shoulder length. medication. hand. Hazard - Risk Management. NOT operate, seek training on safe operation of the chainsaw by a trained professional or an accredited training provider. - Page 9 SAFETY FEATURES ASSEMBLYPROCEDURES Safety Instructions Starting Safety techniques as listed on page (18) and debris, which could be thrown by the cutting head. Cutting Safety immediately if approached. during kick-back. waist. The chain & bar can come dangerously close to your body. Maintenance Safety working on the unit.
-
Page 10: Risk Management
SAFETY FEATURES ASSEMBLYPROCEDURES Risk Management Risk Management minimize the possiblity of accidents or injury. It is vital that you carry out a risk assessment before each job you intend on using a chainsaw. taking steps to eliminate or minimize the hazards to a safe, manageable level. - Step 1. -
Page 11: Hazards
SAFETY FEATURES Hazards The following safety precautions must be strictly observed to avoid the risk of damage or personal injury. Prior to using the chainsaw, clear the operating area of objects which may be thrown up by the cutting mechanism. Do not start or operate the unit inside a closed room or building. -
Page 12: Fitting Bar & Chain
ASSEMBLY PROCEDURES Fitting the Bar & Chain Chain and bar has very sharp edge's. Use cut resistant gloves when ever handling the chain and bar. Always disconnect the spark plug before any maintenance is performed on the chainsaw. Fitting the Bar and Chain 1. - Page 13 ASSEMBLY PROCEDURES Fitting the Bar & Chain 1. Disconnect spark plug 2. Disengage chain brake 3. Remove tensioner nuts 4. Fit bar to unit 5. Fit chain to bar & sprocket 6. Adjust Tension rod - rod & bar hole to align Equal spacing Chain direction to ensure correct fitment...
-
Page 14: Fitting The Bar Cover
ASSEMBLY PROCEDURES Fitting The Bar Cover Fitting the Bar Cover - Start at a slight angle from the front of the bar and chain. - Slowly slide the bar cover over the front of the bar and chain. - You may feel some resistants from the two retainer tabs, these are meant to be tight to ensure minimal rattling of bar cover during transportation. - Page 15 ASSEMBLY PROCEDURES Setting Chain Tension 1. Loosen nuts - max 1/4 turn 2. Adjust tension - clockwise anti-clockwise 3. Check chain tension 4. Tighten nuts - clockwise Chain and bar has very sharp edge's. Use cut resistant gloves when ever handling the chain and bar.
-
Page 16: Before Starting
Do not use a fuel mixture which has been kept for longer than 90 days, it may damage the unit. Use Non-Victa 2-stroke oil at the mixing ratio of 25:1 Inadequate lubrication causes engine damage, the manufacturer's engine warranty maybe void. -
Page 17: Chain Lubrication
200 ml (Non-Victa Formula V 2-Stroke Oil) Mixing procedure: 25 parts petrol to 1 part oil 5 litre 100 ml (Only for Victa Formula V 2 Stroke Oil) Mixing procedure: 50 parts petrol to 1 part oil USE Clean fresh "Regular Unleaded Fuel"... -
Page 18: Quick Start Guide
OPERATIONAL INSTRUCTIONS Quick Start Guide Review the instructions provided for any safety precautions that should be observed when operating the chainsaw. -
Page 19: Starting Techniques
OPERATIONAL INSTRUCTIONS Starting Techniques Review the instructions provided for any safety precautions that should be observed when operating the chainsaw. Method 2. Ground Start This method is recommended where possible, for cold starts and for heavy or hard to start chainsaws. -
Page 20: Stopping Instructions
Cutting techniques can be broken up into three basic techniques (1) felling, (2) limbing, (3) ripping. The Victa chainsaw is only designed for the use in (2) limbing, (3) ripping. Ensure the chainsaw is only used for these purposes, failure to do so will void the warranty and could cause... - Page 21 OPERATIONAL INSTRUCTIONS Cutting Techniques Cutting Under Tension Techiques Always make cuts in the correct sequence. Otherwise the chainsaw may get pinched or kick back may occur. 1. First cut at the compression side, approximately 1/3 way thru or until compression is released.
-
Page 22: Air Filter
Air Filter Cleaning the Air Filter 1. Remove air filter cover to locate the air filter. - Remove air filter from unit. 2. To clean the air filter slightly tap the edge of the air filter against a hard surface, if a more vigorous clean is needed then: - Seperate the two halves using the provided screw driver to divide the two halves as shown below. -
Page 23: Sharpening Chain
Sharpening Chain Sharpening Essentials It is essential that the chainsaw chain is kept sharp. A correctly sharpened chain will cut much more effectively with minimal force required. Never use a dull or damaged chainsaw chain as this may lead to increased physical injuries, increased vibration levels, unsatisfactory cutting results and increased wear to the unit. - Page 24 Sharpening Chain Sharpening the Chain 1. Secure chainsaw with the front nose clamped in a vice, either a bench vice or a stump vice. (ensure the spark plug cap has been removed before beginning maintenance) 2. Before beginning the sharpening of the cutting edge find the shortest top length of cutter, all other top lengths will need to match this length.
-
Page 25: Bar Maintenance
Bar Maintenance Bar Maintenance Essentials Turn the bar over each time the chain is replaced, this will ensure even wear on both sides of the bar. Regularly clean the bar guide groove, oil inlet and grease port. The groove depth must not be less then 6.0mm of a 18" 0.325" chain - minimum 1mm clearance from the drive link to the guide rail. -
Page 26: Sprocket Replacement
A worn drive sprocket will damage and weaken the chain beyond repair, which in turn causes loss of power and greater guide bar wear. Victa recommends changing the drive sprocket everytime the chain is replaced. To help avoid drive sprocket problems;... -
Page 27: Adjusting Chain Tension
Adjusting Chain Tension Adjust the Chain Tension 1. Loosen both tensioner housing nuts using tool provided. - Maximum 1/4 turn ensuring housing is still firm against bar & chain. 2. Adjust tension of the bar & chain. - Turn clockwise to increase tension. 3. -
Page 28: Carburettor Adjustment
7. Make a test cut and adjust the H needle (1) for best cutting power, not for maximum rpm. (1) High RPM needle (2) Low RPM needle (3) Idle adjustment screw Victa recommends only a trained service technician should attempt to adjust the carburettor... -
Page 29: Lubrication Flow Adjustment
3. Only slight adjustments 1/4 should be made at each time before testing the product to check if the adjustment has been sufficent. Lubrication adjustment screw Victa recommends only a trained service technician should attempt to adjust the lubrication flow of the chainsaw. -
Page 30: Storage
Storage Storage Essentials In order to keep the chainsaw in good working order during long storage periods it is essential correct storage procedures are followed. * Drain and clean the fuel tank in a well ventilated area. * Run the engine until the carburettor is dry - this will help reduce the carburettor diaphram from sticking together. -
Page 31: Troubleshooting
TROUBLE SHOOTING Troubleshooting Problem Possible Causes Remedy > Tune motor and/or use correct fuel Motor starts, runs well but loses fuel/oil mixture - not enough oil in mixture the 2-stroke mixture > Replace spark plug > Leaking fuel pump diaphram >... -
Page 32: Trouble Shooting
TROUBLE SHOOTING Troubleshooting Problem Possible Causes Remedy Motor starts, will not idle but runs at > L Needle not set correctly > Adjust correctly high rpm. > Adjust correctly > Chain drive links jammed by > Replace bar and possible chain if Motor starts, idles but will not pinched bar groove damaged... -
Page 33: Model Details
TECHNICAL SELECTION Model Details Feature Victa Chainsaw Model Number VCS1845 Engine One cylinder air cooled 2 stroke (Victa) Displacement 45cc Power Output (max) 1.66kW @ 8516rpm Drive Type Horizontal Carburettor Diaphram (Walbro) Spark Plug RCJ7Y (champion) 0.70mm Gap Ignition Electronic Weight 5.7Kg... -
Page 34: Accessories & Spare Parts
VICTA PRODUCT Accessories & Spare Parts VICTA provides a range of safety equipment and spare parts that may be purchased at any VICTA Authorised Service Centre. VICTA Safety shield VICTA Safety glasses VICTA Filing Kit VICTA Formula V, Spark plug and Filter VICTA chain &... -
Page 35: Warranty
Warranty Service Warranty Service under both the Express Warranty and the warranties implied by law is available at any VICTA Authorised Service Centre. These centres are staffed and equipped to provide expert service. Model... -
Page 36: Notes
(direct, indirect, special, consequential, or otherwise and whether or not arising from a negligent act or omission of VICTA), incurred or suffered by reason for the goods, their use, their design or any failure to deliver or delay in delivering them. Where it is legal to do so,... - Page 37 ©2011 Victa Lawncare Pty Ltd Victa is a trademark of Victa Ltd. All rights reserved. No part of this booklet may be reproduced by any means without prior written permission. All information herein is subject to change without notice. 01.06.12...
Need help?
Do you have a question about the VCS1845 and is the answer not in the manual?
Questions and answers
Replacement fuel hose and pump on casing