Advertisement
Quick Links
Advertisement

Summary of Contents for EVGA GTX 1080 Ti FTW3 HYBRID
- Page 1 Installation Guide...
- Page 2 The following instructions and pictures are provided to assist your installation of the EVGA GTX™ 1080 Ti FTW3 HYBRID Cooling Kit to the EVGA GeForce GTX™ 1080 Ti FTW3 graphics cards. Please be careful installing the Kit; there are several very small fasteners used that can be stripped if you are not careful.
- Page 4 See the instructions below. 1. Remove the 4 spring screws and 22 backplate screws circled in the picture below, using a Phillips #1 screwdriver. Remove the backplate and set aside; the backplate will be used again. When removing the “Left” backplate (on the right side below), please be careful when disconnecting the LED connector on the PCB, located in the blue-circled area below.
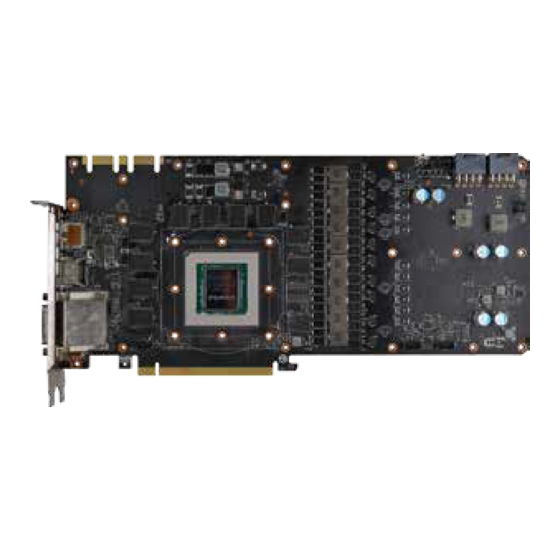
- Page 5 3. Clean the card for installation: Remove all thermal grease on the GPU and remove any pads that stick on the PCB. Clean the GPU with high-percentage isopropyl alcohol and a lint-free cloth. You may try to reattach the thermal pads to the same location on the original cooler in case you need to return the card to its original state for warranty purposes.
- Page 6 (b) Please check to make sure that your thermal pads are in the same location as photo below. If not, please check the back of the card in case the matching thermal pad remains on the card. Install the ...
- Page 7 6. Install the MOS-FET heatsink (a) Install #4 VRM heatsink on the PCB, as shown in the left photo below. Install the fan’s power connector into the right fan header, as shown in the right image below. (b) Please check to make sure that your thermal pads are in the same location as the photo below. If not, please check the back of the card in case the matching thermal pads remain on the card.
- Page 8 7. Install pump (a) Install the pump/heatsink on the GPU, making sure to align the hoses and radiator fan wire with the #5 Tube Holder. Carefully hold the pump in place and turn the graphics card over. Install and tighten 4 #6 screws, as shown in the photo below.
- Page 9 8. Install the shroud (a) Prepare #1 Shroud by removing any adhesive film, and locate the two LED connectors. (b) Connect both LED cables from the shroud to the LED headers on the PCB, as shown in the left and middle photos below.
- Page 10 9. Complete installation (a) Fasten the remaining backplate screws. Using the photo below, tighten 9 #9 screws (circled in blue) and 1 #8 screw (circled in red). (b) Fasten 1 #8 screw using 1 #10 nut, as shown in the photos below.
-
Page 11: Important Information
8.Your EVGA GTX 1080 Ti FTW3 HYBRID Kit installation is now fully complete! Important Information EVGA GTX™ 1080 Ti FTW3 HYBRID Kit is an AIO Water Cooling System. You do not need to add any coolant, and the system is completely self-contained. EVGA GTX™ 1080 Ti FTW3 HYBRID Kits have been leak-tested at the factory before shipping to customers. - Page 12 E009-00-000167...
Need help?
Do you have a question about the GTX 1080 Ti FTW3 HYBRID and is the answer not in the manual?
Questions and answers