Table of Contents
Advertisement
Advertisement
Table of Contents

Related Manuals for IntroMedic MiroCam

Summary of Contents for IntroMedic MiroCam
- Page 1 User Manual...
-
Page 3: User Manual
User Manual Copyright© 2011 IntroMedic Co., Ltd. MM1100-U-1311 Version 3.00 Date: 2013-11-21... - Page 5 IntroMedic Co., Ltd. will repair or replace products that are ascertained by IntroMedic to have defects during the warranty period. IntroMedic Co., Ltd. is not liable for the defects occurred by misuse, careless handling, unauthorized modifications or erroneous use, or any use that is non-compliant with instructions detailed within this User Manual.
- Page 6 Declaration on translation of labeling Based on buyer's request, IntroMedic will provide the labeling, such as ID label, Instruction for use and other promotional materials, which is translated into the national language(s) of European countries. And it will be evaluated by the local language expert, and will be confirmed by the native speaker of the local language.
-
Page 7: Table Of Contents
3. PERFORMING CAPSULE ENDOSCOPY 3-3 3.1 General Comments 3.2 Safety Warnings 3.3 Examination Preparation 3.4 Patient Preparation 3.5 Sensor Placement & Capsule Ingestion 3.6 Using Magnetic Controller 3-18 3.7 Uploading Image Data 3-22 3.8 MiroCam® Receiver Management Post Procedure 3-23 Page 7... -
Page 8: Table Of Contents
Contents SOFTWARE 4.2 Overview 4-10 4.3 Overview - 4-17 4.4 Overview - 4-45 4.5 Overview - 4-89 4.6 Performing Capsule Endoscopy 4-90 4.7 How to import Software 1.0 Files 4-123 5.1 Overview 5.2 Using MiroView 6.1 Overview Page 8... - Page 9 Safety Information...
- Page 10 Safety Information Chapter 1 1- 2...
-
Page 11: Safety Information
CAN/CSA C22.2 NO.601.1. Based on request of the buyer, IntroMedic will provide the labeling, such as ID labels, and the User Manual in the national language(s) of European countries. - Page 12 Safety Information Chapter 1 Safety Symbols: The User Manual incorporates various safety symbols to ensure safe and correct use of the product and to prevent any personal injury or property damage. These symbols are defined in the following table: WARNING WARNING indicates a potential hazard that, if not avoided, could result in serious personal injury or damage to the product.
-
Page 13: Symbols For Safety
Chapter 1 Safety Information 1.2 Symbols for Safety This section describes a set of symbols that the IEC (International Electrotechnical Commission) has established for medical electronic equipment to classify connections and warnings of any potential hazards. EN980: Attention. See instruction manual for use. IEC 878-02-03: Indicates that this is classified into Type BF equipment EN 980: Denotes Date of Manufacture EN 980: Denotes Address of Manufacture... -
Page 14: Function Symbols
Safety Information Chapter 1 1.3 Function Symbols 1.3.1 Software Function Symbols The following table describes symbols or icons used in the MiroView Software. 1.3.1.1 Client Symbol Description Symbol Description Open patient data Open screen to review a screen. specific patient Open screen export... - Page 15 Chapter 1 Safety Information Symbol Description Symbol Description Move to the first image in Move previous the video. captured image. Play images in reverse Stop playback of images. order. Play images in sequential Play order. Move to the next captured Move to the final image in image.
- Page 16 Safety Information Chapter 1 Symbol Description Symbol Description Check selected Uncheck selected captured images captured images Print Preview Save as PDF Export Review Open PACS function Export Captured Images (Registered User Only) with EXMIF Export Captured Images Export Segments Image Video Image / Video / MiroVideo MiroVideo...
- Page 17 Safety Information 1.3.1.2 Operator Symbol Description Symbol Description Connect Open patient data MiroCam® Receiver and screen. open MiroCam® Receiver control screen. Print the selected report on Delete the selected case the List. on the List. Open Recycle Export the case selected dialog.
- Page 18 MiroCam® Receiver Function Symbols Symbol Description Indicates status of signal from the MiroCam® Capsule. Green : Signal is being received from the MiroCam® Capsule. Yellow : Signal is not being received from the MiroCam® Capsule. Initialization status of the MiroCam® Receiver Green : MiroCam®...
-
Page 19: Notes For Safe Use
DO NOT crease, bend, fold or twist the data cable (or data belt). Take care to guard them against mechanical stress (e.g. wheels or heels)! The sensor pads, the MiroCam® Receiver, the data cable, the data belt and the capsule must not be exposed to mechanical shock (e.g. - Page 20 Avoid using the equipment in extreme temperatures or humid environments. DO NOT keep the equipment or carry out the MiroCam® Capsule endoscopy procedure in places such as areas exposed to direct sunlight, vicinity of heaters, vicinity of chemical materials or gases, areas moist/damp or dusty, or poorly ventilated areas.
- Page 21 Chapter 1 Safety Information DO NOT connect the USB cable to the MiroCam® Receiver while the MiroCam® Receiver data cable is still connected to sensor pads or data belt. DO NOT charge the MiroCam® Receiver while the MiroCam® while still attached to the human body.
- Page 22 (close to a transformer), or near instruments generating high-frequency signals. DO NOT use MiroCam® alongside or together with medical WARNING devices or procedures involving electrical currents. DO NOT use MiroCam® with h.f. surgical equipment. It may result in burns at the site of the electrodes and possible damage to the MiroCam®...
- Page 23 The instruction for use of the sensor pads MUST be observed. DO NOT use on patients with pacemakers or defibrillators. DO NOT use the MiroCam® Capsule if the package is unsealed. DO NOT reuse a used capsule. To prevent unexpected accidents like fire or explosion, do not use any product near or in the presence of inflammable or ignitable substances.
- Page 24 Safety Information Chapter 1 DO NOT change the rechargeable battery in the MiroCam® Receiver while the data cable or data belt is still connected to the MiroCam® Receiver. Stay away from high frequency radiation sites (such as high voltage, radar, installation power plants, MRI, CT or electric blankets etc.) during your capsule endoscopy procedure.
- Page 25 Avoid disconnecting the USB while uploading the image data from the MiroCam® Receiver to the workstation. Always confirm that the USB is connected by checking the MiroCam® Receiver screen on the Software. Always check the AC Power rating prior to using the workstation.
- Page 26 Safety Information Chapter 1 The MiroCam® Capsule takes images for 12 hours and WARNING naturally excretes in about 24 hours under normal conditions. If the MiroCam® Capsule has not been excreted from the patient within 72 hours, patient should contact the physician. After examining, the physician may need to perform a surgical operation or treatment to remove the capsule.
- Page 27 ALWAYS operate the equipment under sanitary environmental conditions. DO NOT use heat or gas for disinfection of the capsule. Service Document If required, or upon request, the local IntroMedic distributor (authorized IntroMedic representative) may provide block diagrams, lists of spare parts, descriptions, adjustment instructions or other...
- Page 28 Safety Information Chapter 1 1- 20...
-
Page 29: Overview
Overview & Intended Usage... - Page 30 Overview & Intended Usage Chapter 2 2- 2...
- Page 31 , and accessories. 2.1 Intended Purpose MiroCam® is intended for visualization of the small bowel mucosa as an adjunctive tool in the detection of abnormalities of the small bowel. The device captures images of the small bowel with a wireless camera contained in a capsule.
-
Page 32: Observable Diseases
Not intended for patients with diverticulosis in the Small Bowel. Not intended for patients who are recommended against having the MiroCam® Capsule endoscopy procedure by a Physician. Not intended for patients with pacemakers and/or defibrillators. This device is intended for use in adults and children from two years of age. - Page 33 Chapter 2 Overview & Intended Usage 2.2.3 Small Bowel Tumors Polyps Peutz-Jeghers Syndrome Familial adenomatous polyposis Lymphoma Carcinoid Gastro-Intestinal Stromal Tumor (GIST) Lipoma Hemangioma 2.2.4 Inflammation Intestinal Tuberculosis Typhoid Fever Angeitis Amyloidosis Eosinophilic enteritis 2.2.5 Celiac Disease 2.2.6 2.2.7 Cowden Disease 2.2.8 Cronkhite-Canada Syndrom...
-
Page 34: Product Warranty Period
Overview & Intended Usage Chapter 2 2.3 Product Warranty Period 2.3.1 Maximum Storage Time of MiroCam® Capsule MC1000 : 1 Year MC1000-F : 1 Year MC1000-G : 1 Year MC1000-W : 1 Year MC1000-WG : 1 Year MC1000-WM : 1 Year... -
Page 35: Product Specification
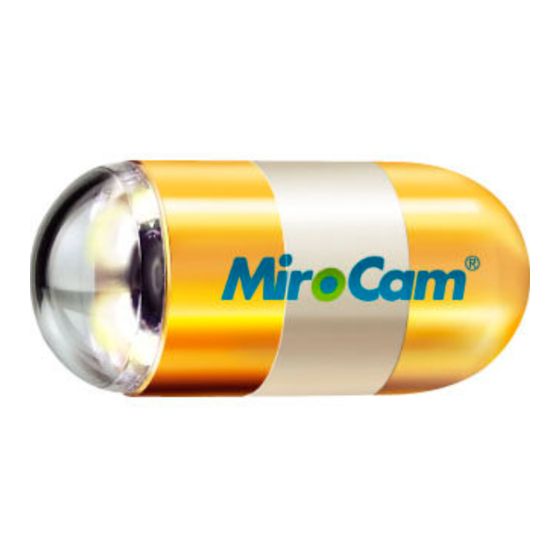
Chapter 2 Overview & Intended Usage 2.4 Product Specification 2.4.1 MiroCam® Capsule Component Component Model Name Quantity Capsule MC1000 1 Piece (Selection) MC1000-F MC1000-G MC1000-W MC1000-WG MC1000-WM MC1000-B MC1200 MC1200-B MC1200-G MC1200-M MC1600 MC1600-B MC1600-G MC1600-M Sensor Pads MC1000-S 10 Piece... - Page 36 Overview & Intended Usage Chapter 2 Specification Item Specification Capsule Unit Size 10.8 X 24 mm (MC1000, Weight 3.25 ± 0.05 g (-F) MC1000-F, 3.5 ± 0.05 g MC1000-G) Frame Rate 3 frame/sec Field of View 150 degrees Battery Life 12 hours Pixels 102,400...
- Page 37 Chapter 2 Overview & Intended Usage Item Specification Capsule Unit Size 10.8 X 24.5 mm (MC1000-W, 10.8 X 25.5 mm (-WM) MC1000-WG, Weight 3.25 ± 0.05g MC1000-WM, 4.75 ± 0.05g (-WM) MC1000-B) Frame Rate 3 frame/sec Field of View 170 degrees Battery Life 12 hours 8 hours (-WM)
- Page 38 Overview & Intended Usage Chapter 2 Item Specification Capsule Unit Size 10.8 X 24.5 mm (MC1200 Weight 3.2 ± 0.05 g MC1200-B 4.5 ± 0.05 g (-M) MC1200-G, Frame Rate 3 frame/sec MC1200-M) Field of View 170 degrees Battery Life 12 hours 8 hours (-M) Pixels...
- Page 39 Chapter 2 Overview & Intended Usage Item Specification Capsule Unit Size 10.8 X 24.5 mm (MC1600 Weight 3.2 ± 0.05 g MC1600-B 4.5 ± 0.05 g (-M) MC1600-G, Frame Rate 6 frame/sec MC1600-M) Field of View 170 degrees Battery Life 12 hours 8 hours (-M) Pixels...
- Page 40 Overview & Intended Usage Chapter 2 2.4.2 MiroCam® Receiver Component Component Model Name Quantity Receiver MR1100 1 piece Battery Pack MR1100-B 2 piece Data Cable MR1000-D 1 piece Data Belt MR1000-D(M), 1 piece MR1000-D(L) Receiver Bag MR1000-G 1 piece System Carrying Case...
- Page 41 Chapter 2 Overview & Intended Usage Item Specification Battery Pack Type Lithium-Ion storage cell (MR1100-B) Capacity 10400 mA Voltage 3.6 V Recharging Time Approx. 4 hours Size 73.8 X 84.3 X 21.4 mm Data Cable Channel (MR1000-D) Size 700 x 900 x 110 mm Data Belt Channel (MR1000-D(M),...
- Page 42 Overview & Intended Usage Chapter 2 Item Specification Power Cable Length 1.5 m (MR1000-P) Measuring Tape Length 1.5 m (MR1000-M) 2.4.3 MiroCam® Software Component Component Model Name Version Software Wireless MiroView RTVi Wireless MiroView RTVi 2- 14...
-
Page 43: Performing Capsule Endoscopy
Performing Capsule Endoscopy... - Page 44 Performing Capsule Endoscopy Chapter 3 3- 2...
- Page 45 Chapter 3 Performing Capsule Endoscopy 3. PERFORMING CAPSULE ENDOSCOPY 3.1 General Comments This chapter describes how to operate and control the MiroCam® Capsule Endoscope System. Installation and initial operation must be done by an Authorized IntroMedic Service Technician. 3.2 Safety Warnings...
-
Page 46: Examination Preparation
Performing Capsule Endoscopy Chapter 3 If SIG indictor of the MiroCam® Receiver does not turn CAUTION green when the patient holds the MiroCam® Capsule by the gold bands, immediately stop the MiroCam® Capsule endoscopy procedure. If images of the small bowel are not captured during the NOTE MiroCam®... - Page 47 Chapter 3 Performing Capsule Endoscopy 3.3.2 Initialize the MiroCam® Receiver Connect the smaller side of the USB Cable to the MiroCam® Receiver Connect the larger side of the USB cable to the workstation. Turn on the MiroCam® Receiver. Click the...
- Page 48 Performing Capsule Endoscopy Chapter 3 Check the initialization indicator (INI) of upper side of the MiroCam® Receiver. Prior to beginning a procedure, this light must be green. Connect the data cable to the MiroCam® Receiver. Indicator Description Indicates status of signal from capsule...
-
Page 49: Patient Preparation
MiroCam® Capsule endoscopy procedure. 3.4.1 Patient Preparation One day prior to the MiroCam® Capsule endoscopy procedure Lunch: Patient can have a normal mean around noon, followed by a liquid diet as instructed by the physician. The patient should fast for at least 12 hours prior to the MiroCam®... - Page 50 GI tract. This should be ingested after the laxative. The patient should abstain from smoking 12 hours before the MiroCam® Capsule endoscopy procedure. On the day of the MiroCam® Capsule endoscope test, the patient should wear comfortable and loose cloths. One-piece clothing should not be worn.
-
Page 51: Sensor Placement & Capsule Ingestion
Chapter 3 Performing Capsule Endoscopy 3.5 Sensor Placement & Capsule Ingestion Following is the detailed procedure required to correctly administer the MiroCam® Capsule endoscopy procedure. 3.5.1 Connecting Sensor Pads After attaching sensor pads to the data cables, attach the sensor pad correctly to each area as shown below. - Page 52 Performing Capsule Endoscopy Chapter 3 3.5.2 Xiphoid process Line Pelvic Line Attach sensor pads according to the number on the data cable. Locate the center between the umbilical and the xiphoid process. From this center point, attach the sensor to the distal Place the sensor pad on the xiphoid process line, directly below the right clavicle.
- Page 53 Chapter 3 Performing Capsule Endoscopy Place the sensor on the right inguinal line, 2 cm to the outside of sensor #2. Place the sensor on the right inguinal line, 2 cm to the outside of sensor #3. Place the sensor pad on the right pelvic line, 2 cm behind sensor #4.
- Page 54 Tighten the data belt around the waist with the velcro. Use the data belt as shown below. Do not attached the Data belt above clothing CAUTION After placing sensor pads on the patient, connect the cable to the MiroCam® Receiver as detailed in the following image. 3- 12...
- Page 55 Removing Capsule from Package While holding the case upside down, peel off the sterilized package cover. 3.5.5 Removing the Case Turn the package over, the MiroCam® case will slip out of the package. While holding the case, open the lid. 3-13...
- Page 56 MiroCam® Capsule is damaged. Do not touch the dome of the MiroCam® Capsule. This may CAUTION result in poor image quality. Check if the front of the MiroCam® Capsule is flashing when it is removed from the case 3- 14...
- Page 57 Switch on the MiroCam® Receiver. Check if the battery indicator (BAT) at the top of the MiroCam® Receiver shows that the battery is fully charged. The battery indicator on the MiroCam® Receiver should be green.
- Page 58 MiroCam® Receiver, since it may cause cable damage problem. 3.5.8 Ingesting the Capsule After checking if the signal indicator on the MiroCam® Receiver is green, ingest the MiroCam® Capsule with water. DO NOT bite the MiroCam® Capsule while ingesting. CAUTION To increase the effectiveness of the MiroCam®...
- Page 59 Chapter 3 Performing Capsule Endoscopy The MiroCam® Capsule should enter the stomach. Make WARNING sure to always check that the MiroCam® Capsule enter the stomach by checking the images on the MiroView (or the Wireless MiroView RTVi) and color of SIG indicator on the MiroCam®...
- Page 60 (e.g. applesauce, cereal, toast) can be resumed six hours after the MiroCam® Capsule was swallowed. Do not touch or disturb the MiroCam® Receiver or get them wet for the duration of the procedure. The MiroCam® Receiver and sensors must remain on the body for a period of 12 hours after ingestion of the MiroCam®...
- Page 61 MiroCam® Capsule endoscopy procedure. Once the patient has ingested a MiroCam® Capsule, the patient may leave the clinic. Patient should not open the MiroCam® Receiver bag. The WARNING safety of ESD (electrostatic discharge) when the patient leaves the clinic is not published.
- Page 62 3.5.11 Completion of the Procedure The MiroCam® Receiver set, sensor pad and cables can be removed by the patient 12 hours after ingestion of the MiroCam® Capsule. Hospital or clinic is to arrange the time for the patient to return the MiroCam®...
-
Page 63: Using Magnetic Controller
Connect to the TV or Wireless RTVi and then confirm current location of capsule. Control the direction of the MiroCam® Capsule in human body with the magnetic controller like following pictures. Lead the MiroCam® Capsule into the duodenum with magnetic controller by... -
Page 64: Uploading Image Data
Performing Capsule Endoscopy Chapter 3 3.7 Uploading Image Data Once the MiroCam® Capsule endoscopy procedure is complete, upload the image data from the MiroCam® Receiver to the workstation and start diagnosis of the data using Software. 3.7.1 Transferring and Checking image data Switch on the workstation. -
Page 65: Procedure
Post Procedure 3.8.1 Cleaning Remove data cable (or data belt) from the MiroCam® Receiver . Capsule, data belt and sensor pads should not be reused. To clean the MiroCam® Receiver and the workstation, dampen a soft cloth with warm water or with a commercial, nonabrasive cleaner (or a mild soap or detergent solution) and wipe the exterior surface lightly. - Page 66 Battery must be recharged after every procedure. Battery can be individually recharged using the battery charger or while attached to the MiroCam® Receiver. Battery must be recharged in the battery charger. If two batteries are inserted in charger, the batteries will automatically consecutively charge (not simultaneous).
- Page 67 Chapter 3 Performing Capsule Endoscopy Connect AC power cable to adaptor. Connect AC power cable to AC outlet or multi-tap. Battery charger indicator lights: Battery is charging when green light is blinking Battery is fully charged when light is solid blue Battery is not-charging if light is yellow Second Battery in charger will automatically begin charging NOTE...
- Page 68 If the indicator on the battery charger is blinking yellow WARNING there is a bad connection. Please disconnect the battery from the battery charger and try again. Only use batteries provided by IntroMedic. Usage of WARNING inappropriate batteries can cause serious damage to the MiroCam® Receiver.
- Page 69 Software...
-
Page 70: Using Miroview
Using MiroView Software Chapter 4 4- 2... - Page 71 SOFTWARE Software is a computer software program that aids in diagnosis of disease of the small bowel via displaying images obtained from the MiroCam® Capsule. Following is a list of new & updated features: - User Interface Software enables adjustable resolution, to appropriately fit to the screen size.
- Page 72 Desktop folder: Client, Operator, Server, and Viewer. However this manual will not explain details on how to use the Viewer. For additional information for Viewer, please refer to the Software, refer to the MiroCam® Service Manual. 4- 4...
- Page 73 This program is used The server stores the for reviewing the for managing the patient data files. Start Viewer is images from the MiroCam® Receivers used for reviewing, MiroCam® Capsule (initialize, upload etc.) Server prior to starting editing and creating and generating a...
- Page 74 Using MiroView Software Chapter 4 4.1 H/W Specifications for Software 4.1.1 Server Minimum Hardware Requirements OS: Windows XP (32 bit, 64 bit), Windows Vista Business (32 bit, 64 bit), Windows 7 (32 bit, 64 bit) CPU: > Core 2 Duo E6300 Memory: >...
- Page 75 Chapter 4 Using Software 4.1.2 Client Minimum Hardware Requirements OS: Windows XP (32 bit, 64 bit), Vista or Windows7 (32 bit, 64 bit) CPU: Pentium4 2GHz Memory: 1GB Video Card: Geforce 7600GT 128MB HDD: SATA 160GB ODD: DVD+-RW Monitor Resolution: 1024x768 Sound Card / Mike / Speaker Recommended Hardware Requirements OS: Windows XP (32 bit, 64 bit),...
- Page 76 Using MiroView Software Chapter 4 4.1.3 Operator Minimum Hardware Requirements OS: Windows XP (32 bit, 64 bit), Vista or Windows7 (32 bit, 64 bit) CPU: Pentium4 2GHz Memory: 1GB Video Card: Windows Compatible HDD: SATA 160GB ODD: DVD+-RW Monitor Resolution: 1024x768 Recommended Hardware Requirements OS: Windows XP (32 bit, 64 bit), Vista or Windows7 (32 bit, 64 bit)
- Page 77 Chapter 4 Using Software 4.1.4 Viewer Hardware Requirements OS: Windows XP (32 bit, 64 bit), Vista or Windows7 (32 bit, 64 bit) CPU: Pentium4 2GHz Memory: 1GB Video Card: Windows Compatible HDD: SATA 160GB ODD: DVD+-RW Monitor Resolution: 1024x768 Software cannot be viewed on a monitor CAUTION with a resolution under 1024x768.
- Page 78 Using MiroView Software Chapter 4 4.2 Overview Server Server software is intended to be used as a system administrative managing tool. The Server manages file systems and database systems. When switching the workstation on, the Server will start automatically. When the following window appears, set up the configuration and press the to continue.
- Page 79 Chapter 4 Using Software can be made via Account Manager function after logging in the Confirm the password. Set the Active Path; Video Path and Data Path as the desirable path. Select one of multiple paths from the paths list for the active path.
- Page 80 Using MiroView Software Chapter 4 After setting up the Configuration Windows, the Server window above will appear. Click the to hide the window. 4- 12...
- Page 81 Chapter 4 Using Software The Video Path list and the Data Path list for the Active Paths can be modified via Server Menu Multi Data Path on the Server running. Login window will appear. Input the password for the Administrator account. 4-13...
- Page 82 Using MiroView Software Chapter 4 Case Path Setting will appear. Click the to show the Active Path Setting. 4- 14...
- Page 83 Chapter 4 Using Software Click the to set the path for the Video Path and the Data Path respectively. 4-15...
- Page 84 Using MiroView Software Chapter 4 The user can modify the Video Path and Menu Path using (add path) and (remove path) as well. (below 10GBytes), set the path as new one larger than 30 Server provides the task manager to show NOTE the activating status on the server.
- Page 85 Chapter 4 Using Software 4.3 Overview - Operator Operator software is intended to be used for administrative purposes, including the Account Manager, the Patient Manager and the MiroCam® Receiver management functionality. 4.3.1 Start Operator Double-click the to run the Operator.
- Page 86 Using MiroView Software Chapter 4 Set the Active Path; Video Path and Data Path as the desirable path. Select one of multiple paths from the paths list for the active path. Direct the Default Export Data Folder. Choose the preferred Language settings and press access the Operator.
- Page 87 Chapter 4 Using Software After clicking the the window will appear like the above. Type the Server IP address and port. Then press the after inputting ID and password. DO NOT forget the ID and password after they are CAUTION encrypted.
- Page 88 Using MiroView Software Chapter 4 4.3.2 List Mode List Mode Opens List Mode Receiver Mode Opens Receiver Mode Print Report Print out the selected Report Delete Case Delete the selected Cases Recycle Bin Open Recycle Bin Window Export Export the selected Report Search Search Cases and/or Reviews by keyword Refresh and Show all the Cases and Review on...
- Page 89 Receiver Initialization Delete all data from the MiroCam® Receiver and/or prepare the MiroCam® Receiver for the next patient Receiver Port Shows the status of the connected the MiroCam® Receiver for each of the four ports Detail Information selected Receiver 4-21...
- Page 90 Using MiroView Software Chapter 4 When running MiroView Operator on a 64bits CAUTION OS, Do not turn off or disconnect the MiroCam® Receiver while uploading a patient file. 4.3.4 Receiver Initialization Click the to initialize the selected Receiver. 4- 22...
- Page 91 After completing the required fields, click the to save the patient information onto the MiroCam® Receiver. The fields in the patient information are editable and additional fields can be added. This can be accessed via Tools...
- Page 92 Software Chapter 4 4.3.6 Image Data Upload After the MiroCam® Capsule endoscopy procedure, upload the image data from the MiroCam® Receiver to the MiroCam® system via the Operator. Click the to upload the image data from the MiroCam® Receiver. After the image data in the MiroCam® Receiver has been successfully uploaded, enter the List Mode and check if the new Case has been created.
- Page 93 Chapter 4 Using Software 4.3.7 User Account Management Operator enables management of multiple users & Groups. Users can be organized into Groups to readily control access. The following screen can be accessed by Tools Account Manager. 4-25...
- Page 94 Using MiroView Software Chapter 4 Click the to show the window as displayed below to create a new user ID. ID: User ID Password: Password Name: User Name Type: User type. - User: can access own reviews and all the reviews in the - Super User: can access all the reviews in the System - Operator: can log in via the Operator S/W...
- Page 95 Chapter 4 Using Software 4.3.8 Patient Manager Operator enables management of Patient. The following screen can be accessed by Tools Patient Manager Click the to show the window as displayed below ID: ID for the new patient. Name Date of birth: The date of birth for the patient which will appear on the report Gender 4-27...
- Page 96 Using MiroView Software Chapter 4 4.3.9 Preferences To set and/or change the settings for the Operator, access Preferences via Tools Preferences. Preferences for the Operator falls into two categories: Global and Local. Global preference is saved on the Server and has in effect for all the users using the Server.
- Page 97 Chapter 4 Using Software Global Settings - Hospital Information - Measurement - Agent & Distributor Information PACS - PACS Registration - Technical Settings Local Settings - Language - GI Tract Color Reference - Free Hard Disk - Display - Default Export Data Folder - Finding Setting User - Change Password...
- Page 98 Using MiroView Software Chapter 4 1) Global Settings Hospital Information Country Choose the Country where the hospital is located. Hospital Name Address Telephone field. Logo Image Add the Logo Image These information will be applied and shown on the final report.
- Page 99 Chapter 4 Using Software Measurement Height Weight - Waist - These information will be applied and shown on the case information and patient information iii. Agent & Distributor Information Contact: Input the contact information for the agency. 4-31...
- Page 100 PACS related functionalities. Click the . PACS registration window will appear like the below. Carry out in alphabetical order like following picture. Generation key is a key that unlocks the PACS NOTE function on the MiroCam® workstation. 4- 32...
- Page 101 Chapter 4 Using Software Generation key will be generated automatically. Click to send the Generation key to IntroMedic. Mail Box window will appear like below. Input the e-mail address of the hospital administrator in send to IntroMedic: Hospital name, Hospital address,...
- Page 102 Using MiroView Software Chapter 4 receive the reply. Click the to close the Mail Box window. After receiving the Registration Key, input the Key in the Registration Key field on PACS registration window. Click the to finalize the registration process. Caller: Technical properties for Caller.
- Page 103 Chapter 4 Using Software Work list Server: Technical property for Work list Server. Title: Input the Title for Work list Server. IP Address: Input the IP Address for Work list Server. Port: Input the port number to connect to Work list Server. Other Settings: Technical properties for PACS setting.
- Page 104 Using MiroView Software Chapter 4 3) Local Settings Language Display: Choose the display language. CEST: Choose the CEST language. GI Tract Color Reference: Show the color references for the GI Tract. Free Hard Disk: Decide the number of cases on the local drive.
- Page 105 Chapter 4 Using Software Display Display: Font setting to display. Default Export Data Folder: Direct the folder for exporting data. Click the to open the browser. Finding Setting: Configure the finding setting. Click the to open the configuration dialogue. 4-37...
- Page 106 Using MiroView Software Chapter 4 4) Local User User Name: Input User Name which will be used for log-in Email Address: Type in the e-mail address here. Telephone: Type in the telephone number here. Change Password Current: Input the current password New: Input the desired password to use.
- Page 107 Chapter 4 Using Software 5) Local Network Server IP Address: Input the IP Address where the Server is installed. Port: Input the port number to connect with Server. Server Manager Port: Input the port number for connection between the Server Manager and the Server.
- Page 108 Using MiroView Software Chapter 4 6) Local List Display Columns: Configure the columns which will appear on List. 4- 40...
- Page 109 Chapter 4 Using Software 7) Local Receiver Patient Information Configuration: Configure the items shown Patient Information after initializing MiroCam® Receiver. 4-41...
- Page 110 Configuration window. - Add/Delete/Modify the items. After completing the tasks, click the to close the window. Multiple Upload Count: Set the number of MiroCam® Receivers to upload to the Operator at once. Choose a number, 1 to 4. 4- 42...
- Page 111 Chapter 4 Using Software 8) Local Print Page Setup Footer: Type in the string for footer which will appear on the final report. Page Setup: Edit the layout of the report. 4-43...
- Page 112 Using MiroView Software Chapter 4 - Click the to show the Page Setup window. - Choose the paper type; A4 or Letter and adjust the margins for Header, Footer, Right and Left. 4- 44...
- Page 113 Using Software 4.4 Overview - Client 4.4.1 Start Client Client is used to review images from the MiroCam® Capsule procedure and generating a patient report. Network Connectivity, List Mode, Review Mode, Report Mode, Export Mode, Image Atlas, Multi-Review, SGIB(Suspected Bleeding)Play, Express View, Range View, Map View, Positioning Window, GI Dictionary, and Finding / Diagnosis Information.
- Page 114 Using MiroView Software Chapter 4 If the Server is installed on the network, input the workstation Server is installed for this field, and the port which the Server is using, referring to the IT engineer in the hospital. Active Path Direct the Default Export Data Folder.
- Page 115 Chapter 4 Using Software After clicking the the window will appear as the above. Type Server IP address and port. Then press the after inputting ID and password. (Use the to change the port number for the Server Manager, which is used to manage the server availability) ID and password are encrypted.
- Page 116 Using MiroView Software Chapter 4 4.4.2 List Mode List List Mode Open List Mode Review Mode Open Review Mode Report Mode Open Report Mode Export Mode Open Export Mode Print Report Print selected Report Delete Case Delete Selected Case Add a Review Add a Review for the Selected Case Delete Review Delete selected Review...
- Page 117 Open Review Mode Report Mode Open Report Mode Export Mode Open Export Mode Position Window Current position of the MiroCam® Capsule in 2D Single View Change to Single View Dual View Change to Dual View Quad View Change to Quad View...
- Page 118 Full Screen Mode Fit image to full screen Time Display Display time duration MiroCam® Capsule from procedure start. Annotation Expand / Shrink the control panel Handle (Show / Hide the Capture Box) The video image area may widen by Annotation Box Handle.
- Page 119 Chapter 4 Using Software Comparison Window Display the image selected from the Image Atlas Thumbnail Extension Extend the Capture Box to display all captured images. (Hide the Video area) Capture Box / Replace the Capture Box with Finding Finding Summary Summary Box or Drag Bag.
- Page 120 Using MiroView Software Chapter 4 Choose a section of Summary Box to show the thumbnails. When a section of Summary Box is selected, the thumbnails will be shown in the screen. Click the to close the thumbnail mode. 4- 52...
- Page 121 Chapter 4 Using Software Drag Bag Choose a section of Drag Bag to show the captured images. There are two ways to set the captured image, the drag bag: set the main image to a drag directly and capture the main image first and set the image to a drag bag via the pop-up menu.
- Page 122 Using MiroView Software Chapter 4 Left click the mouse and drag the mouse downwards. Fan shaped Drag Bags will appear like below. Release the mouse in one of them. Left click the mouse and drag to upper direction. Fan shapes for Landmarks will appear like below. Release the mouse on one of them.
- Page 123 Chapter 4 Using Software iii. Right click the mouse on a captured image and then set the image to a Drag Bag. 4-55...
- Page 124 Using MiroView Software Chapter 4 Mode Control Full Screen Mode Click the to change to Zoom View mode Play Slide Control is available on the Full Screen NOTE Mode to set playing direction, playing speed and playing status: Play and Pause. Move the cursor away from the bottom of the NOTE screen and the Play Control will appear.
- Page 125 Chapter 4 Using Software Viewing Modes Select one of the for preferred Viewing Mode. Single View Dual View Quad View Range View Range View has been designed to assist in readily NOTE finding transition points in the GI tract. The display will show 9 images before and 9 images after the current position.
- Page 126 Using MiroView Software Chapter 4 Map View - Use the wheel of the mouse to zoom in/out the map. - Double-click the desired image to capture. Right click the mouse for the desirable image to capture or set landmark. - Click the desirable image and press <Space> to play the adjacent image frames.
- Page 127 The SGIB Play shows the images in red or the NOTE obscure bleeding images. IntroMedic does not guarantee the performance and/or accuracy. Thus, use this function for reference only. 4-59...
- Page 128 Software Chapter 4 Position Window Divides the body into 8 areas and displays the location of where the MiroCam® Capsule took the current image. Organ Bar User is able to choose the option of selecting the NOTE type of Position Window between line and region.
- Page 129 Chapter 4 Using Software User can now choose the Organ bar option. This NOTE organ bar also displays the entire trajectory of the MiroCam® Capsule in the GI track. 4-61...
- Page 130 Using MiroView Software Chapter 4 Comparison Window Displays the image shown from the Image Atlas lastly. Image Enhancement Window Alter images characteristics (ie. color, saturation etc.) to assist in identifying abnormalities: Color Weakness : Image adjustment for the reviewer color blindness.
- Page 131 Chapter 4 Using Software 4.4.4 Report Mode Select the desired review for the Case from the List Mode and click the to move to the Report Mode. Report Mode 1 2 3 4-63...
- Page 132 Using MiroView Software Chapter 4 List Mode Open List Mode Review Mode Open Review Mode Report Mode Open Report Mode Export Mode Open Export Mode Circumference Opens graduated scale for display on markers the image Drawing Tools Enables users to include annotations for the image.
- Page 133 NOTE modified via Tools -> Preferences -> Report Right click the mouse on Text Comments area to NOTE use Annotations. Refer to 4.6.4 more information. Patient information, including the reason for NOTE referral, is registered in the MiroCam® Receiver 4-65...
- Page 134 Using MiroView Software Chapter 4 4.4.5 Export Mode 15 16 17 4- 66...
- Page 135 Chapter 4 Using Software List Mode Open List Mode Review Mode Open Review Mode Report Mode Open Report Mode Export Mode Open Export Mode Check Select Captured image and add to the list to Captured print/export. Image Uncheck Deselect Captured image and remove from the Captured candidate list to print/export.
- Page 136 Using MiroView Software Chapter 4 4.4.6 Preferences Preferences for the Client falls into two categories: Global and Local. Global preference is saved on the Server and has in effect for all the users using the Server. Local preference is saved on the workstation on which the Client is installed and has in effect for the workstation only.
- Page 137 Chapter 4 Using Software Global Settings - Hospital Information - Measurement - Agent & Distributor Information PACS - PACS Registration - Technical Settings Report - User added comment tab Local Settings - Language - GI Tract Color Reference - Captured Image Box - Free Hard Disk - Display - Default Export Data Folder...
- Page 138 Using MiroView Software Chapter 4 1) Global Settings Hospital Information Country Choose the Country where the hospital is located. Hospital Name this field. Address Telephone field. Logo Image Add the Logo Image These information will be applied and shown on the final report.
- Page 139 Chapter 4 Using Software Measurement Height Weight - Waist - These information will be applied and shown on the case information and patient information iii. Agent & Distributor Information Contact: Input the contact information for the agency. 4-71...
- Page 140 Using MiroView Software Chapter 4 2) Global PACS Registration: Process to enable the PACS related functionalities. Click the . PACS registration window will appear like below. 4- 72...
- Page 141 Software Generation key will be generated automatically. Click the to send the generation key to IntroMedic. Mail Box window will appear like below. Input the e- for receiving the Registration Key. Fill in the information for the items in the text box: Hospital name, Hospital address, Main contact, Telephone, E-mail address and Generation key.
- Page 142 Using MiroView Software Chapter 4 Click the to close the Mail Box window. After receiving the Registration Key, input the Key in the Registration Key field on PACS registration window. Click the to finalize the registration process. Caller: Technical properties for Caller. Title: Input the Title for Caller.
- Page 143 Chapter 4 Using Software Worklist Server: Technical property for Worklist Server. Title: Input the Title for Worklist Server. IP Address: Input the IP Address for Worklist Server. Port: Input the port number to connect to Worklist Server. Other Settings: Technical properties for PACS setting. PACS Module: Choose the appropriate PACS Module of DreamWell or Vieworks.
- Page 144 Using MiroView Software Chapter 4 3) Global Report User added comment tab: If checking on the checkbox and typing the desired string into the textbox, a comment tab will be added on the Report Mode. To apply the change, click 4- 76...
- Page 145 Chapter 4 Using Software 4) Local Settings Language Display: Choose the display language. CEST: Choose the CEST language. GI Tract Color Reference: Show the color references for the GI Tract. Captured Image Box: Check the check box to show GI tract reference colors in the background of Captured Image Box.
- Page 146 Using MiroView Software Chapter 4 iii. Free Hard Disk Keep the number of cases on the local drive. If the cases are cached from the Server more than the configured number, the oldest case on the local drive will be freed up. Display Display: Font setting to display.
- Page 147 Chapter 4 Using Software vii. Finding Setting: Configure the finding setting. Click the to open the configuration dialogue. Local User User Name: Input User Name which will be used for log-in Email Address: Type in the e-mail address here. Telephone: Type in the telephone number here. Change Password Current: Input the current password New: Input the desired password to use.
- Page 148 Using MiroView Software Chapter 4 6) Local Network Server IP Address: Input the IP Address where the Server is installed. Port: Input the port number to connect with the Server. Server Manager: Utility to manage the Server remotely. Port: Input the port number for connection between Server Manager and the Server.
- Page 149 Chapter 4 Using Software 7) Local List Display Columns: Configure the columns which will appear on List. 4-81...
- Page 150 Using MiroView Software Chapter 4 8) Review Range View Range View Previous Offset: Set the range for range view. Range View Next Offset: Set the range for range view. Summary Control Summary Item Range: Set the period of one item on the Finding Summary Box.
- Page 151 Chapter 4 Using Software Captured Image Box Captured Image Option: If the checkbox is checked, the video will stop when capturing an image on Review Mode. Drag Bag: Drag Bag related setting. Add/Remove the Drag Bags and set a Bag to Default Bag by choosing one from the combo list.
- Page 152 Position Window Type: Choose the type for the Position Window. If Line is chosen, the trace of the MiroCam® Capsule will be displayed in line. If Region is chosen, the position of the MiroCam® Capsule will be displayed on region segmented.
- Page 153 Chapter 4 Using Software 9) Local Report Panel Layout: Choose the Panel Layout. The Panel Layout will be shown as per the choice. 4-85...
- Page 154 Using MiroView Software Chapter 4 10) Export Export AVI Save as AVI: Set the length of the AVI to export. FPS (AVI): Set the frame rate of the AVI to export. 4- 86...
- Page 155 Chapter 4 Using Software 11) Local Print Page Setup Footer: Type in the string for footer which will appear on the final report. 4-87...
- Page 156 Using MiroView Software Chapter 4 Page Setup: Edit the layout of the report. - Click the to show the Page Setup window. - Choose the paper type; A4 or Letter and adjust the margins for Header, Footer, Right and Left. 4- 88...
- Page 157 Chapter 4 Using Software 4.5 Overview - Viewer 4.5.1 Start Viewer Double-click the to run the Viewer. Open an Image File (EXMIF-Exchangeable Medical Image Format data or Image Display Image Display Area (EXMIF or JPEG) Title Title for the image in the Image Display Description Description for the image in the Image Display Study...
- Page 158 Software Chapter 4 4.6 Performing Capsule Endoscopy 4.6.1 Initializing Receiver Connect the MiroCam® Receiver to the workstation via USB port. Run the Operator by double-clicking the on the desktop or from the Windows Start-up menu. Log in. Carry out in alphabetical order like following picture.
- Page 159 Chapter 4 Using Software Enter the MiroCam® Receiver mode and select the MiroCam® Receiver port to initialize and click the When following message will appear, click the start the initializing process. 4-91...
- Page 160 Using MiroView Software Chapter 4 After the initializing process is complete, the following message will appear. Click the and the Patient Information window will appear. Input the patient information for each field. Click the to input the patient name and then click the to input the doctor name.
- Page 161 Receiver Add / Modify. 4.6.2 Upload Image Data ( Operator) Connect the MiroCam® Receiver to the workstation via USB port. Run the Operator by double-clicking the on the desktop or from the Windows Start-up menu. Log in. Carry out in alphabetical order like following picture.
- Page 162 Using MiroView Software Chapter 4 After switching the MiroCam® Receiver on, enter the MiroCam® Receiver mode and select the proper the MiroCam® Receiver port to upload the image data. Carry out in alphabetical order like following picture. Click the to start the Upload.
- Page 163 After completing the Upload, the following message will appear. When the MiroView Operator is running on a CAUTION 64bits OS, Do not turn off or disconnect any MiroCam® Receivers connected to the workstation while uploading. 4.6.3 Change Patient Information After uploading the Image Data (Optional)
- Page 164 Using MiroView Software Chapter 4 patient information and click the 4- 96...
- Page 165 Chapter 4 Using Software 4.6.4 Review ( Client) Run the Client by double-clicking the on the desktop or from the Windows Start-up menu. Log in. Carry out in alphabetical order like following picture. Click the on the Log-in screen to run the client as Local Mode.
- Page 166 Using MiroView Software Chapter 4 Open the Case/Review via Menu Home Open Choose a file to open and click the After completely reviewing the file, save the review via Menu Home Save Active Review so that the user can import the edited review file on the M future.
- Page 167 Chapter 4 Using Software Select the Patient Video Data on the List Mode - Select a patient video data to review from the List Mode and click to enter the Review Mode. - Check to see if another user is reviewing the patient file on the Current User column in the List Mode.
- Page 168 Using MiroView Software Chapter 4 Review the Patient Video on the Review Mode When using network connection between the NOTE Server and the Client, for efficient video playback the video is cached locally in the server. During this buffering process, the video may be reviewed.
- Page 169 Chapter 4 Using Software - Use the Range View and Map View to find all the landmarks. NOTE Click the and select landmark type: Esophagus, Gastric, Duodenum, Ileo-cecal, Cecal and User landmark. - After marking the necessary landmarks, play the video via the Express Play and capture abnormalities and / or suspected disease pathologies in the small bowel.
- Page 170 Using MiroView Software Chapter 4 NOTE image. To identify abnormalities and/or disease pathology more easily, use the Image Enhancement function to adjust preferred image settings. Click the to open the Image Enhancement window. 4- 102...
- Page 171 Chapter 4 Using Software Converting AVI File Click two images (the first image and the last image) while holding the < Ctrl > key among the to convert the segment to an AVI file. Right mouse click and select Save from dialog box. 4-103...
- Page 172 Using MiroView Software Chapter 4 Carry out in alphabetical order like following picture. Choose the location you want to save this file and click the Click the to save selected range as Video. 4- 104...
- Page 173 Chapter 4 Using Software Composing the Report on the Report Mode - After capturing images of suspected disease in the Review Mode pathology, click the to enter the Report Mode. Use the auto complete dictionary slide and choose available disease pathology from the list. auto complete function while composing comments.
- Page 174 Using MiroView Software Chapter 4 The user can add the word shown on the GI Dictionary into the text comment by double-clicking the appropriate word or clicking The user can prepare Annotations for use by right clicking the mouse in the comments area. Click Edit Annotation .
- Page 175 Chapter 4 Using Software Completing the report: Complete image comments for captured images (as required) Complete the following tabs: Reason for referral; Procedure Info & Findings; and Summary & Recommendations After completing the report, enter the Export Mode to print out the complete report and/or export the Software data.
- Page 176 Using MiroView Software Chapter 4 Print report, create file and export the Review on the Export Mode. Select the images to select and click the and add the selected captured images to the candidate list to export. (Remove the selected images from the candidate list using User is able to change default settings on whether NOTE or not to add the images on the report via Tools ->...
- Page 177 Chapter 4 Using Software Check to include on the report when capturing the image. Uncheck to not include the images on the report. Click the to use export function. A window will appear like below. 4-109...
- Page 178 Using MiroView Software Chapter 4 Select the File Type to export and change the desired file location on the Selected Folder and click the window will appear with a progress bar. 4- 110...
- Page 179 Chapter 4 Using Software The user can use the for EXMIF. When clicking the the window will appear like below. The user can configure the EXMIF properties: title and description. Findings will be saved as the JPEG file format(.jpg) and diagnosis images will be saved as the multiple image file format(.tiff) The user can use the for Segment Export (Video / Miro...
- Page 180 Using MiroView Software Chapter 4 Print Report and save the report as PDF on the Report Preview - Click the to print reports and/or click the to save the report as PDF. - Show report preview on the screen. The user can include or exclude findings/diagnosis data on the final report via Menu Preview Including findings &...
- Page 181 Chapter 4 Using Software Click the to print the report, the Print window will appear. Choose the desirable Printer, Print Ranage, Copies/format, Print Option and Layout. Carry out in alphabetical order like following picture. Software privides the ODF for the soft copy of the report so that the user can open the ODF report in other word processors;...
- Page 182 Using MiroView Software Chapter 4 Back up the segment If a hospital wants only back up small bowel section, they can to add segment first. Click the ., Export Segments as Video/MiroVideo. 4- 114...
- Page 183 Chapter 4 Using Software Carry out in alphabetical order like following picture. 4.6.5 Image Atlas Atlas The following picture show via Help Atlas 4-115...
- Page 184 Using MiroView Software Chapter 4 Atlas Default Atlas Images My Atlas Atlas Images configured by the user Atlas + My Atlas Show Atlas Images and My Atlas Images at once. Import Atlas Import Atlas Images from file; BMP, JPEG, Images from file GIF, EMF, WMF, TIFF and PNG file format.
- Page 185 Chapter 4 Using Software Study Show the Information of the Atlas Image Information / Image Information Findings / Show the Findings / Diagnosis Information Diagnosis Atlas Search the Atlas Image Thumbnail Area(2) 4-117...
- Page 186 Using MiroView Software Chapter 4 Comparison Window Show Current Image Comparison Image at once. 4- 118...
- Page 187 Chapter 4 Using Software To compare a captured image with ATLAS image, click the (Optional). Atlas to compare the atlas image with the captured image for a side by side comparison. (Option) 4-119...
- Page 188 Using MiroView Software Chapter 4 Double-click an ATLAS image for selection. To show the ATLAS image on the comparison window, click the on the ATLAS mode. 4- 120...
- Page 189 Chapter 4 Using Software The comparison windows will appear. Figure out the current image and comparison image. Import Atlas Images from file(s) Software allows the user to import image files for personal purpose. Click the import. 4-121...
- Page 190 Using MiroView Software Chapter 4 Import Atlas Images from file(s) Software allows the user to import image files for personal purpose. Click the import. Select the file to import and click the and click the 4- 122...
- Page 191 Express function, insert DVD media to the DVD writer or connect the external hard disk or USB flash memory to the workstation via USB port. Software supports NOTE Software Case / Review files, the (the MiroCam® Capsule Endoscope System companying with .MMV) and the Software 1.0 backup files(.ifo companying with .ict and .frg files)
- Page 192 Using MiroView Software Chapter 4 Carry out in alphabetical order like following picture. A window will appear like below and if the function ends 4- 124...
- Page 193 Chapter 4 Using Software 4.7.2 Import Software 1.0 files Run the Operator or Client. menu 4-125...
- Page 194 Using MiroView Software Chapter 4 Select the Software 1.0 files from the file extension drop-down box and look for the file to upgrade Import . Carry out in alphabetical order like following picture. 4- 126...
- Page 195 Chapter 4 Using Software Task Manager will appear and will proceed with importation of the file. Progress bar will appear. Upgrading the Software 1.0 file to the Software file will be completed. 4-127...
- Page 196 Using MiroView Software Chapter 4 4.7.3 Software 1.0 files Batch Import If the Software 1.0 is already installed on the workstation, user can use the Software 1.0 files Batch Import function via <Menu -> Tools -> Import from the Software 1.0>...
- Page 197 Chapter 4 Using Software 4.7.4 Using Client at Local PC without connecting to Server Run the Client by double-clicking the on the desktop or from the Windows Start-up menu. Log in. Carry out in alphabetical order like following picture. *If running the Client as Local Mode, click the on the Log-in screen.
- Page 198 Using MiroView Software Chapter 4 Open the Case/Review via Menu Home Open Case/Review Choose a file to open and click the After completely reviewing the file, save the review via Menu Home Save Active Review so that the user can import the edited review file on the Server in the future.
- Page 200 Chapter 5 5- 2...
- Page 201 Chapter software application of the MiroCam® System Real-time Viewer, consist of a data transmission module that directly receives the image data from the MiroCam® Receiver and an output module for image display. 5.1 Overview The MiroView RTV. Basic Screen Layout...
- Page 202 Chapter 5 Recommended Hardware Specification OS: Windows Vista (32 bit), Windows XP (32 bit), Windows7 (32 bit) CPU: Atom N450(1.66GHz) or higher Memory: 1GB or higher Display Adaptor: Windows Compatible Hard Disk: 80GB memory space available Monitor Resolution: 1024 X 600 or higher Monitor Contrast : Windows Compatible In compliance with IEC60950-1 or IEC60601-1 5- 4...
- Page 203 Thus, prior to RTV software, please make sure that the MiroCam® Capsule endoscopy procedure has been undergone. Connect the data cable of the Real-time Viewer to the MiroCam® Receiver. The data cable for the MiroView NOTE USB port on the MiroCam®...
- Page 204 Starting Switch on the Mobile PC. Click the on the screen to launch the Connect the small side of the USB cable to the MiroCam® Receiver. Connect the large side of the USB cable to the Mobile PC. Click the...
- Page 205 If an error message appears while using the NOTE RTV, reconnect the USB cable between the MiroCam® Receiver and the Mobile PC 5.2.3 After Using Disconnect USB cable between the MiroCam® Receiver and the Mobile PC. Continue MiroCam® Capsule endoscopy procedure.
- Page 206 Chapter 5 5- 8...
- Page 207 Using...
- Page 208 Using Wireless MiroView RTVi Chapter 6 6- 2...
- Page 209 6. USING , a software application of MiroCam® System Real-time Viewer, consist of a data transmission module that directly receives the image data from the MiroCam® Receiver and an output module for image display. The receives image data via Wi-Fi channel.
- Page 210 Patient Display patient name, ID, gender and age Information HDR Button High Dynamic Range Image Button Main Display Display captured image. Wi-Fi Indicates the MiroCam® Wi-Fi operation time Operation Time Recording Indicates the MiroCam® Capsule recording time. time 6- 4...
- Page 211 Indicates the MiroCam® Wi-Fi operation time Operation Time Recording Indicates the MiroCam® Capsule recording time. time If turning the iPad upright as Portrait View, the MiroCam® NOTE Receiver List will disappear from the Main Display to be enlarged. 6.1.3 Recommended Hardware Platform...
- Page 212 When the run at first, network NOTE configuration for iPhone or iPad is required. 6.2.2 Turn on the Wi-Fi function of the MiroCam® Receiver. Press the Wi-Fi switch of MiroCam® Receiver. Keep pressing it until the buzzer sounds. 6- 6...
- Page 213 DO NOT press the Wi-Fi switch when the buzzer sounds. It WARNING can cause the lost of captured images. The Wi-Fi switch of MiroCam® Receiver can be turned on WARNING involuntarily. Therefore, be careful it is not turned on. The MiroView...
- Page 214 Using Wireless MiroView RTVi Chapter 6 Turn on the Wi-Fi. If Wi-Fi is already turned on, please turn it off and turn it back on. Carry out in alphabetical order like following picture. 6- 8...
- Page 215 Chapter 6 Using Wireless MiroView RTVi 6.2.4 TCP/IP Configuration (for the first time to connect a MiroCam® Receiver access point: AP) Check a network with SSID of MiroCam_xxx in the network list. Click the on the SSID (MiroCam_xxx). NOTE TCP/IP configuration is needed once at first.
- Page 216 Using Wireless MiroView RTVi Chapter 6 Click the Click the on the top-left after entering the IP Address and Subnet Mask. (Setup as Static; IP Address: 192.168.3.200, Subnet Mask:255.255.255.0) Carry out in alphabetical order like following picture. 6- 10...
- Page 217 Chapter 6 Using Wireless MiroView RTVi Click the SSID. Click the 6-11...
- Page 218 Using Wireless MiroView RTVi Chapter 6 Enter the password '1234567890' in the field with instruction of system. Afterward, click the .Carry out in alphabetical order like following picture. Press home button when network connection finished. 6- 12...
- Page 219 Chapter 6 Using Wireless MiroView RTVi 6.2.5 Running Click the on the desktop to launch the RTVi. The Splash window will appear for a while and then will disappear. 6-13...
- Page 220 Using Wireless MiroView RTVi Chapter 6 Enter the password '1234567890' in the field with instruction of system. Afterward, click the . Carry out in alphabetical order like following picture. 6- 14...
- Page 221 Chapter 6 Using Wireless MiroView RTVi Check whether Patient Information, MiroCam® Receiver Scan Button, Main Display, Wi-Fi Operation Time and Recording time are displayed normally. Patient Display patient name, ID, gender and age Information HDR Button High Dynamic Range Image Button Main Display Display captured image.
- Page 222 Chapter 6 6.2.6 After Using press the home button and then check whether the Wi-Fi light of the MiroCam® Receiver is off. NOTE If MiroCam® Receiver is turned off, following window will appear after about 10 seconds. To Close this window, click Run the Settings for the iOS.
- Page 223 Chapter 6 Using Wireless MiroView RTVi Turn Wi-Fi off and turn it back on. 6-17...
- Page 224 Using Wireless MiroView RTVi Chapter 6 6- 18...
- Page 225 Appendix...
- Page 226 Case Form Report A- 2...
- Page 227 Case Form Report Trial ID : Version No. : 1.0 : 30/07/2007 CASE REPORT FORM Subject No.: Subject Initials : Center No.: Principal Investigator Center Name Address Telephone No. Fax No. E-mail CONFIDENTIAL...
- Page 228 Case Form Report Trial ID : Version No. : 1.0 : 30/07/2007 Screening Subject No.: Subject Initials : Center No.: Date of Informed consent signed Inclusion Criteria 1. Informed consent form voluntarily signed 2. Male / Female subject of age 19 years~70 years. If there is one or more CONFIDENTIAL A- 4...
- Page 229 Case Form Report Trial ID : Version No. : 1.0 : 30/07/2007 Screening Subject No.: Subject Initials : Center No.: Date of visit : Exclusion Criteria have gastrointestinal disorder (suspected malignantlesions or gastrointestinal obstructive disorders, perforation, stenosis or fistula)? 2. Do you have a cardiovascular disorder (dysrhythemia, trouble with cardiac conduction system, hypertension(high blood pressure) or ischemic heart disease)? Have you been diagnosed of cardiac insufficiency, angina...
- Page 230 Case Form Report A- 6...
- Page 231 Office: +39-02-484241 European Union and other Mobile: +39-02-48424290 European countries with separate collection systems IntroMedic Co.,Ltd. Suite 1104, E&C Venture Dream Tower 6-Cha 197-28 Guro-Dong, Guro-Gu, Seoul, KOREA 152-719 Tel : +82-2-801-9300 Fax : +82-2-801-9330 http://www.intromedic.com 0120 e-mail: helpdesk@intromedic.com CAUTION: Federal (U.S.A) law restricts this device to sale by or on...
Need help?
Do you have a question about the MiroCam and is the answer not in the manual?
Questions and answers