Table of Contents
Advertisement
Quick Links
Advertisement
Table of Contents

Related Manuals for Supra VISION Touch 2018

Summary of Contents for Supra VISION Touch 2018
- Page 1 ® SUPRA VISION TOUCH™ 2018 Owner’s Manual 1715054 2017-08-30...
- Page 2 Trademarks & Patents Supra® is a U.S. and Canadian registered trademark owned by Skier’s Choice, Inc. and AutoWake® is a U.S. registered trademark owned by Skier’s Choice, Inc. Skier’s Choice™, the Skier’s Choice logo, the Supra logo, SR™, SA™, SE™, VISION Touch™, Swell™ and SmartPlate™ are trademarks owned by Skier’s Choice, Inc.
-
Page 3: Table Of Contents
Table of Contents Product Information ........................... 4 Care and Maintenance .........................4 Basic Navigation Features ........................ 5 Quick Access Keys ..........................5 Touch Point Commands ........................5 Features ............................... 6 Home Screen ............................6 GPS ..............................12 Media ..............................14 Profiles ............................... 22 Lights ..............................25 Ballast .............................. -
Page 4: Product Information
Product Information The Supra VISION Touch 2018 display is designed for instrumentation and control on electronically controlled engines communicating via SAE J1939 and NMEA 2000. The display enables boat operators to view many different engine, ballast, transmission parameters and service codes... -
Page 5: Basic Navigation Features
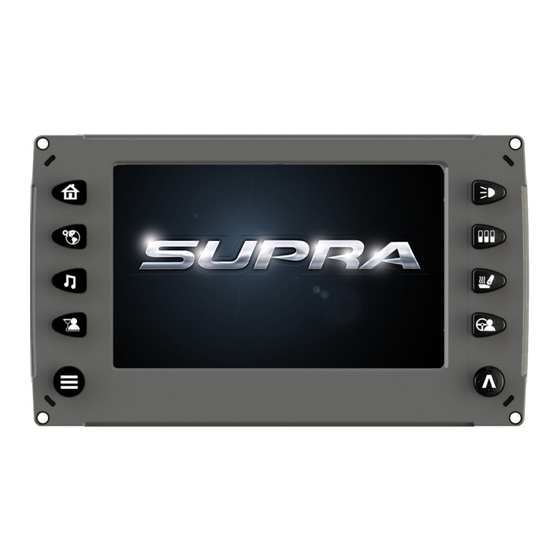
Basic Navigation Features All product features are easily accessed through Quick Access Keys, Touch Point commands and Menus. Quick Access Keys A new screen can be accessed quickly by pressing one of the following Quick Access Keys: Touch Point Commands Once the desired screen is accessed, navigation within the screen is controlled with Touch Point commands. -
Page 6: Features
Features Home Screen The Gauges screen can be accessed by pressing the Home/Gauges Quick Access Key. This screen shows the: • Water Depth • Water Temperature • Engine Temperature • Battery Voltage • Speedometer/Setspeed • Fuel Gauge • Oil Gauge •... - Page 7 The cruise control can be turned ON or OFF from this screen by touching [ZEROOFF] located in the lower right of the screen. Home Screen Touch Points 2017-08-30 1715054...
- Page 8 Touch Point Description Stereo Opens the Stereo screen. Other multimedia options and video viewing screens are accessed from this screen. When held down for 2-3 seconds while on the home screen, the active stereo is muted. Engine Temp Displays the engine temperature when touched and held. Camera Activates the camera to view the current rider in action.
- Page 9 Touch Point Description GPS Speed Interactive touch toggles from On to Off mode. (Speed adjustment with Set Speed +/-) Control Rider Name / Interactive touch toggles from the rider’s name to the rider’s time. When the name is touched, Time the Profiles page is displayed.
- Page 10 River Mode River Mode is a user interface for estimating both upstream and downstream river current without the use of a paddle wheel. The River Flow UP/DN icon switches back and forth during the turns as you turn against or with the current. The river current estimate value will be added to (downstream) or subtracted from (upstream) the base speed set point and should deliver a reasonably consistent speed over the water.
- Page 11 Swell™ Surf Swell Surf will cause the trim plates to deploy to create a surfing swell on the side the rider is surfing. Touch the Off button to turn the system on then touch the side on which the surfing will occur. Swell will only engage if AutoWake is inactive and Cruise is on with the set speed between 7 and 12 mph.
-
Page 12: Gps
The GPS screen can be accessed by pressing the GPS Quick Access Key. The functions on the GPS are handled through touch points on the screen. The touch points change depending upon which view of the screen is showing. To see more options, touch [TRACKING]. - Page 13 Touch [CREATE WAYPOINT] to add a waypoint to the map. A keypad is displayed to type the name (10 alpha character limit). When finished typing the name touch [DONE]. The waypoint is now displayed on the map represented by an anchor icon. This anchor icon can be changed to another icon in the Waypoint Manager (for more information on the Waypoint Manager, see GPS Settings under the Settings...
-
Page 14: Media
Touch [SAVE TRACK] to save the currently recorded track. This action will save the currently recorded track from where the recording started to the current position and restart the track recording from the current position of the boat. Touch [MORE] to view latitude and longitude of the current position of the boat and change the compass to desired position (choices are North up or Course up). - Page 15 Stereo Display - Touch Commands Touch Point Description Volume : Press to increase the volume. Press to decrease the volume. Previous/Tune: Press to go to the closest saved station to the left. Press to tune the station to the left. Next/Tune: Press to go to the closest saved station to the right.
- Page 16 Touch Point Description Save to Favorites: Touch this button to save the displayed station in your favorite stations. Preset Stations: This list contains 6 of the previously saved favorite stations. Favorites List – Touch to alternate between List A and List B. This provides 12 pre- saved favorite stations.
- Page 17 Touch Point Description Displays the Bluetooth utility. Displays the Auxiliary Input display to choose between three channels. Displays the iPod/USB screen. List – Touch this point to display a list of the following icons: Icon Description Displays the Bluetooth Devices screen. Displays the Sound Control (Equalizer) menu.
- Page 18 Bluetooth To display the Bluetooth utility, on the left side of the screen, touch then . The screen on the right will display: Touch and then . The screen on the right will display: 2017-08-30 1715054...
- Page 19 If available devices are found, they will be displayed on the screen. Touch the listed device to which the Supra will be paired. The following screen will appear: Touch the green check mark to pair, or the red X to cancel. Touch the screen of the device to be paired with the Supra and confirm the Pairing process.
-
Page 20: Sound Control
Sound Control To display the Sound Control utility, on the left side of the screen, touch and then . The screen on the right will display: To mute the sound, touch Adjust the volume with the left and right arrows. Touch the right arrow to display the Equalizer screen: The Equalizer is available to control the sounds in five different areas between Bass and Treble. - Page 21 To adjust the volume, touch the + or – of this area: Touch to display this screen: Touch a square on the grid to select a preset sound configuration according to your specific preferences (i.e., Dance is heavy on the Bass, light on Vocals;...
-
Page 22: Profiles
Profiles 2017-08-30 1715054... - Page 23 Touch Point Description Deletes (after confirmation) the currently displayed Rider Profile. Activates the currently displayed Rider’s profile, and changes the boat settings to align with the displayed settings. Displays the Edit Rider screen: Touch each field to be edited, then adjust the settings with the –...
- Page 24 Touch Point Description Rotates through the saved profiles. Returns back to the Home screen. Displays a keyboard to type the new rider’s name. Touch Done, then Edit to adjust the settings. Displays the Rider Statistics screen. To reset the number of rides, press and hold and the number will reset to 0.
-
Page 25: Lights
Lights The Lights screen can be accessed by pressing the Lights Quick Access Key. On this screen the following lights can be turned on and off: • Navigation Lights • Anchor Lights • Storage Lights • Dome Lights • Docking Lights •... -
Page 26: Ballast
Ballast The Ballast screen can be accessed by pressing the Ballast Quick Access Key. This screen displays the current state of the ballasts and is interactive for immediate settings. To adjust the Ballast settings slide finger up the tank to the desired level or tap the UP or DOWN arrows below the tank. -
Page 27: Comfort
Comfort The Comfort screen can be accessed by pressing the Comfort Quick Access Key. On the Comfort screen, touch a cell to activate. Touch it again to change the setting or use the arrows. The following comfort settings can be made if the option is installed on your boat package: •... -
Page 28: Driver Presets
Driver Presets The Driver Presets screen can be accessed by pressing the Driver Presets Quick Access Key. This feature displays preferences for the boat drivers and is interactive for needed changes. Setting up Driver’s Preferences To enter a driver’s preset, press the Driver Presets Quick Access Key. - Page 29 Follow the directions below to set the Driver’s Presets. Step Action Touch Edit, then to name the driver. Touch Theme, and if a different color is desired, utilize the + and – buttons to scroll through the available colors. Touch Texture, and if a different texture is desired, utilize the + and –...
-
Page 30: Autowake
Delete Driver Preset To delete a Driver Preset, press the Driver Preset Quick Access Key. Touch beside the desired preset to delete, and confirm the deletion. AutoWake ® AutoWake* is a patented system that will manipulate the ballast levels in order to achieve and maintain the best possible wake for surfing and wakeboarding. -
Page 31: Main Settings Menu
Main Settings Menu The Main Menu screen can be accessed by pressing the Main Menu Quick Access Key. The contents of this screen are described on the next page. 2017-08-30 1715054... - Page 32 Function Description/Action User Settings Displays ambient light and brightness settings, US/Metric settings, etc. Engine Displays a list of engine fault codes and descriptions; on some engines, corrective Diagnostics action will be shown. Contains options to set up track and position, chart and time and waypoint manager. GPS Utilities Also displays satellite status.
-
Page 33: User Settings
User Settings On the Main Menu screen, touch [USER SETTINGS] to access the User Settings screen. The User can set viewing preferences for the display. To edit the settings, touch the field to be changed. For Shutdown Time and Minimum Depth, touch arrows to adjust the settings. - Page 34 Function Description/Action The choices are: Enable or Disable. NOTE: Enabling the Auto Backlight will reduce the screen Auto Backlight brightness when the Nav Light is ON. Brightness Touch and slide your finger along the brightness bar to adjust the setting. Color Scheme Touch one of the colors to change the color scheme of the display.
-
Page 35: Engine Diagnostics
Engine Diagnostics On the Main Menu screen, touch [Engine Diagnostics] to access the Engine Diagnostics screen. When choosing this selection, the display queries the engine’s ECU and displays feedback on any diagnostic codes that have been activated and stored in the ECU for service needs. 2017-08-30 1715054... - Page 36 Function Description/Action Touch [GET FAULTS] to show the number of active faults and the fault number currently Get Faults being displayed. Arrows The Left and Right arrows at the top of the page scroll through messages. Diagnostic Most common SPNs and FMIs have text for the description stored in the display. If there is Message and no text, then this SPN and FMI must be defined by referring to the engine manufacturer or Description...
-
Page 37: Gps Utilities
GPS Utilities On the Main Menu screen, touch [GPS Utilities] to access the GPS Utilities screen. The GPS Utilities includes the following: • Depth and Position • Waypoint Manager • Chart and Time • Track Manager • Satellite Status 2017-08-30 1715054... - Page 38 Depth and Position Settings On the GPS Utilities screen, touch [Depth and Position] to access the Depth and Position screen. This feature allows you to define the amount of detail to display for longitude and latitude information on the GPS map and depth display.
- Page 39 Function Description/Action Displays a list of existing waypoints that have been set. Use the [Up] and Waypoints [Down] keys to highlight the desired waypoint. Waypoint Title Edit the waypoint title. Waypoint Icon Assign one of four different icons to any of the waypoints listed. Displays latitude and longitude values for the currently highlighted Go To…...
- Page 40 Chart and Time Setup On the GPS Utilities screen, touch [Chart and Time Setup] to access the Chart and Time Setup screen. This menu option allows you to setup viewing options for the GPS Display. Function Description/Action Use the [Plus/Minus] soft keys to select the Chart Setup information you want...
-
Page 41: Satellite Status
Track Manager On the GPS Utilities screen, touch [Track Manager] to access the Track Manager screen. Multiple tracks for displaying on the GPS map can be set up. The Track Manager allows you to select tracks to show on the map or hide a map you are not currently using. -
Page 42: System Information
System Information On the Main Menu screen, touch [System Info] to access the System Information screen. This information-only screen provides the following: • Application version and part number • Operating system version and part number • Bootloader version and part number •... - Page 43 NOTE: The [Crossover Point] defaults to 50 percent of your set speed. This is the point at which the SmartPlate will be automatically driven to the active profile set point. If no set point is active, the SmartPlate will be driven to the [SmartPlate Up] setting (default 50 percent).
-
Page 44: Audio Settings
For example: The driver has filled the ballasts to Full and then installed a new version of software. This new version of software would default the Ballast Levels back to Empty (0 percent). Since the driver knows that the boat has Full ballasts, the driver can use this calibration feature to set the display level to Full (100 percent). - Page 45 Function Description/Action Wireless Tap to enable the pairing of a wireless remote to the Supra Vision Touch. Touch the Remote Pairing circled X to clear all paired remotes. Bluetooth Provides a way to Bluetooth Devices to be paired. See the Bluetooth section beginning Settings on page 17.
-
Page 46: Pdm Diagnostics
PDM Diagnostics On the main Menu screen, touch [PDM Diagnostics] to access the PDM Diagnostics screen. The screen displays short circuits, open circuit, over current, in/out of range and faults within the system outputs, switch inputs, analog inputs and CAN communication. Touch the [PDM2] or [PDM3] buttons to view alternate screens. -
Page 47: Troubleshooting
1. Check display supply wires are connected properly to battery. 2. Verify battery is charged properly. 3. Check battery for efficient starter current. Display has no backlight. Contact your Supra service center. Display has no keypad backlight. Contact your Supra service center. 2017-08-30... - Page 48 - NOTES - ______________________________________________________________________ ______________________________________________________________________ ______________________________________________________________________ ______________________________________________________________________ ______________________________________________________________________ ______________________________________________________________________ ______________________________________________________________________ ______________________________________________________________________ ______________________________________________________________________ ______________________________________________________________________ ______________________________________________________________________ 2017-08-30 1715054...
Need help?
Do you have a question about the VISION Touch 2018 and is the answer not in the manual?
Questions and answers
My vision touch system screen has several buttons that suddenly do not work, screen comes on and some touch screen works and some not. 2017 Supra SA450