Advertisement
Quick Links
Advertisement

Subscribe to Our Youtube Channel
Related Manuals for Hathaway NG2015


Summary of Contents for Hathaway NG2015
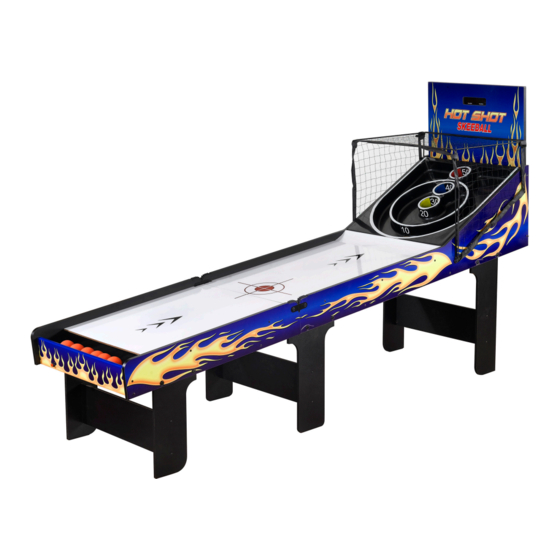
- Page 1 8' HOT SHOT SKEEBALL TABLE ASSEMBLY INSTRUCTIONS NG2015...
- Page 2 THANK YOU! Thank you for purchasing this product. We work around the clock and around the globe to ensure that our products maintain the highest possible quality. However, in the rare instance that your product is defective or missing parts, contact your retailer, or call 800-759-0977, to submit parts requests or warranty claims.
- Page 3 PARTS IDENTIFIER (NOT TO SCALE) H1 - 1-1/4” Screw (36) H2 - 5/16” x 1-1/8” H4 - 1/4” x 1-1/4” H3 - 5/16” Washer (12) Bolt (12) Bolt (4) H5 - 1/4” x 1” Bolt (4) H6 - 1/4” Washer (4) H7 - 1/4”...
- Page 4 PARTS IDENTIFIER (NOT TO SCALE) P10 - Front P8A - Crossbeam (1) P8B - Crossbeam (2) P9 - Front Bottom Panel (1) Top Panel (1) P11 - Back Upper P12 - Back Bottom P14 - Electronic P13 - Back Panel (1) Panel (1) Board (1) Scorer (1)
-
Page 5: Assembly Tips
ASSEMBLY TIPS 1. Find a clean, level surface to begin the assembly of your game table. The table will be partially assembled upside down and then turned over onto its legs. This is a heavy game and turning it over will require at least two strong adults. 2. - Page 6 ASSEMBLY INSTRUCTIONS 1. Find a clean, level place to begin the assembly of your game. We recommend building the unit on the shipping carton to protect the parts during assembly. Note: The two main units are assembled upside down then turned over for final assembly. 2.
- Page 7 ASSEMBLY INSTRUCTIONS (CONT.) 7. Attach CROSSBEAM, P8B, with cutout opening facing down and to the left, using (2) SCREWS, H1, and pre-drilled holes on each side. Use (1) SCREW, H11, to attach center of crossbeam through P10 and into P21B, as shown in Figure 3. 8.
- Page 8 THANK YOU! ASSEMBLY INSTRUCTIONS (CONT.) 10. Attach the SUPPORT PANEL, P21A, to the FRONT BOTTOM PANEL, P10, using (1) SCREW, H8, through the center hole as shown in Figure 4. The outer two holes will be used in a later step. Note: The P12 panel and P21A support panel both have pre-drilled holes for screws.
- Page 9 ASSEMBLY INSTRUCTIONS (CONT.) 14. Attach CROSSBEAMS, P8A and P8B, with cutout openings facing down and to the right, using (2) SCREWS, H1, and pre-drilled holes on each side. Use (1) SCREW, H11, to attach center of CROSSBEAM, P8B, through P12 and into P21A, assembled in Step 10.
- Page 10 ASSEMBLY INSTRUCTIONS (CONT.) 19. With the help of another adult, set both completed assemblies upright and position so gears face each other as shown in Figure 7. Using (2) HINGE SETS, P16, connect assemblies using BOLT, H5, and Washer, H7, as shown in Figure 7. The bolts should be snug, but NOT over tightened as this is a pivot area.
- Page 11 ASSEMBLY INSTRUCTIONS (CONT.) 22. Feed the long white wire through the cutouts in all CROSSBEAMS, P8A and P8B, and the Velcro on P22, toward the back and up through the hole in the BACK BOTTOM PANEL, P12. This will connect to the short white wire on the wiring harness.
- Page 12 ASSEMBLY INSTRUCTIONS (CONT.) 27. Loosely attach NET FRAME FRONT, P18, and NET FRONT BACK, P19, to the Back Side Aprons using (4) BOLTS, H4, and WASHERS, H6, through the eye hole at the bottom of the frames. 28. Attach (2) NET SPACER BARS, P20, between the Front and Back Frames, on either side, by inserting the curved ends into the frame receptacle as shown in Figure 9.
-
Page 13: Care And Use
CONGRATULATIONS! You have now assembled your Game Table. Please note the Care and Use instructions below to ensure years of trouble free use of your game table. CARE AND USE 1. This product is intended for INDOOR use only. 2. Do NOT sit, climb or lean on the table. 3. - Page 14 180-DAY LIMITED WARRANTY This product is warranted to the original purchaser to be free from defects in material or workmanship for a period of 180 days from the date of the original retail purchase. This warranty does not cover defects or damage due to improper installation, alteration, accident or any other event beyond the control of the manufacturer.
- Page 15 8’ HOT SHOT SKEEBALL TABLE - NG2015 Parts List PARTS P1L NGP5856 P1R NGP5857 P2L NGP5858 P2R NGP5859 P3L NGP5860 P3R NGP5861 P4 NGP5862 RIGHT BACK LEFT MIDDLE RIGHT MIDDLE RIGHT FRONT LEFT BACK LEG SPREADER LEFT FRONT LEG NGP5863...
- Page 16 HARDWARE PACK - NGP5887 1/4” FLAT 1/4” FLAT 1-1/4” SCREW 5/16” WASHER 1/4”X1” BOLT 5/16” BOLT 1/4”X1-1/4” BOLT WASHER WAS HER ADDITIONAL EQUIPMENT REQUIRED: 3/4” FLAT PHILLIPS HEAD 1-1/4” FLAT 3/4” SCREW 3/8” SCREW ALLEN WRENCH 1-1/2” SCREW SCREWDRIVER SCREW SCREW 9/13...
Need help?
Do you have a question about the NG2015 and is the answer not in the manual?
Questions and answers