
Related Manuals for Aperto X-Box 550

Summary of Contents for Aperto X-Box 550
- Page 1 EN TRANSLATION OF THE ORIGINAL INSTALLATION AND OPERATING MANUAL X-Box 550 X-Box 800 46725V001-422016-0-DRE-Rev.C_EN...
-
Page 2: Table Of Contents
Opening control unit ............... 21 Max. permissible door dimensions * ..........4 Install and connect the additional button ........21 Technical data (Aperto X-Box) ............4 Obstacle detection (DIP 1, 2 + 3) ........... 22 Scope of delivery ................5 Connect button 2 (DIP 2) ............... -
Page 3: General Information
(transmission). Storage Caution! Risk of death! The APERTO X-Box must be stored in an enclosed, dry area at a room temperature of –20 – +50 °C. Remove all cords, straps and locks necessary to operate the door by hand. -
Page 4: Max. Permissible Door Dimensions
* Door in accordance with EN 12604, EN 12605 ** With standard hinged double door fi tting, part no. 1501. For taller doors, correspondingly longer tracks or track extensions must be installed. Please ask you specialist dealer. Technical data (Aperto X-Box) General Rated voltage: 24 V DC... -
Page 5: Scope Of Delivery
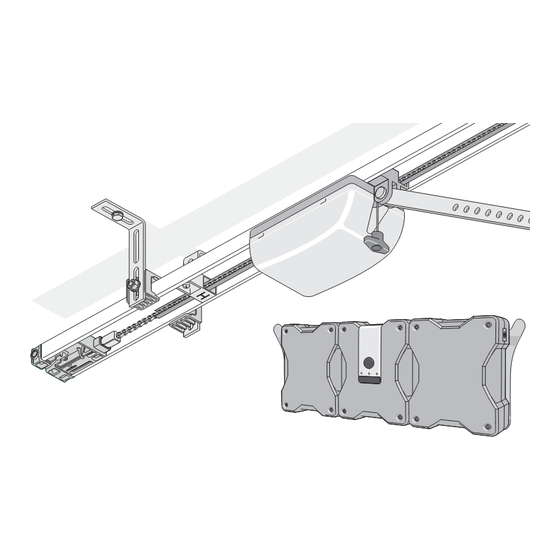
General Information Scope of delivery Caution! Important information! The Aperto X-Box must always be operated with both battery Check that the delivered parts are complete before beginning units connected! installation! The actual scope of supply may vary depending on the version. -
Page 6: Ec Declaration Of Conformity
Hans-Böckler-Straße 29 73230 Kirchheim/Teck Germany hereby declares that the garage door operators X-Box 550; X-Box 800 have been developed, designed and manufactured in conformity with the • Machinery Directive 2006/42/EC • Low Voltage Directive 2014/35/EU • Electromagnetic Compatibility Directive 2014/30/EU •... -
Page 7: General Installation
General Installation General Installation Door types and accessories Overview of accessories (optional) Accessories are not included in the scope of delivery. Item Name Bowden cable for extending the emergency release Release lock for emergency release Door type Accessories Slip door safety device | Pass door fuse | Swinging door | •... -
Page 8: Installation
Installation Installation The door must be counterbalanced. Safety instructions Test: Half-open the door by hand. The door must remain in this position. If the door moves up or down, re-adjust the door Caution! mechanically. Ask a specialist retailer for advice. Walls and ceiling must be solid and stable. -
Page 9: Tips For Installation
Installation Tips for installation Selection of installation variants • Check the delivery scope components before beginning installation; Caution! this way you save time and unnecessary effort if a part is missing. The chain cover is not packaging. • It is safest and quickest to do installation with two people. Do not remove it! •... -
Page 10: Preinstallation Of Installation Variant A
Installation Preinstallation of installation 9 0 ° variant A Important information! Dispose of the packaging according to locally applicable regulations. • Remove the operator from the packaging. • Attach tensioner (1) to chain (2) and turn it 90°. Insert connecting element (6) and push tensioner (1) through it. -
Page 11: Preinstallation Of Installation Variant B
Installation Preinstallation of installation variant B 9 0 ° Important information! Dispose of the packaging according to locally applicable regulations. • Remove the operator from the packaging. • Attach tensioner (1) to chain (2) and turn it 90°. Insert connecting element (6) and push tensioner (1) through it. -
Page 12: Installation (Example: Installation Variant B)
Installation Installation (example: installation Caution! Wear safety glasses when drilling! Take the thickness variant B) of the wall or ceiling into consideration, especially with regard to prefab concrete garages. Caution! Use a non-slip, stable ladder. Important information! If the distance between the ceiling and the bottom edge of the C-track is greater than 245 mm, extend the ceiling ½... - Page 13 Installation max. 30° • Loosen the switch-trigger (1) and push it completely back • Align ceiling bracket (1). The position should be in the range to the stop position (2). Open the door (3) by hand. of (W = 0…600 mm). •...
-
Page 14: Mounting And Connecting The X-Box
Installation Mounting and connecting Connecting solar module the X-Box Caution! Connect only a suitable 12 W or 23 W solar module. Selection of the installation variant: Caution! Important information! Installation variant A Installation variant B Do not connect the solar module until both battery units 22 A 22 B are pushed onto the centre station. -
Page 15: Commissioning
Commissioning Commissioning Safety instructions Putting the battery units into operation Caution! After installation of the operator, the person responsible Inserting fuses for the installation must complete an EC declaration of conformity for the door system in accordance with Insert supplied glass tube fuses (T 6 A) into the fuse holders on the outside Machinery Directive 2006/42/EC and apply the CE mark and of the battery units.The right-hand battery unit is pictured;... -
Page 16: Programming The Operator
Commissioning Programming the operator Checking the emergency release Important information! The control unit has an automatic force setting. The control system memorizes the required force during the “OPEN” and “CLOSE” door You can activate backjump for sectional doors or doors movements and stores it when the end position has been reached. -
Page 17: Mount The Information Sign
Commissioning • Press the desired handheld transmitter button (5) until the LED (3/4) extinguishes, depending upon which channel has been selected. • LED goes out - programming is fi nished. The handheld transmitter has transferred the radio code to the radio receiver. Programming additional handheld transmitters. -
Page 18: Operation/Use
Operation/Use • If the garage door does not have a built-in slip door or the garage does Safety instructions not have a separate entrance, you must install an emergency release – Keep children, disabled persons and animals away from the door. a release lock or Bowden cable –... -
Page 19: Led Signals On The Control Unit
Operation/Use LED signals on the control unit Setting the afterglow time There are three LEDs on the control unit which provide information of the LED lighting on the state of charge of the battery units. The afterglow time of the LED lighting can be set to a value between 10–120 seconds. -
Page 20: Deleting A Handheld Transmitter Button From The Radio Receiver
Operation/Use • Keep the desired handheld transmitter button pressed (5) until the LED (3/4) extinguishes, depending upon which channel has been selected. • LED goes out – programming is fi nished. The handheld transmitter has transferred the radio code to the radio receiver. •... -
Page 21: Extended Functions And Connections
Extended functions and connections General information Install and connect the additional button Caution! The activities described in the chapter “Extended functions Caution! and connections” must only be performed by qualifi ed When actuating the button, the drive must keep clear of the electricians. -
Page 22: Obstacle Detection (Dip 1, 2 + 3)
Extended functions and connections Obstacle detection (DIP 1, 2 + 3) DIP switch 1: No reaction during an interruption of a safety input. The door stops during a power cut-off. The operator stops the door. DIP switch 2: Safety connection function NC contact for photo eye Button connection for button 2 (partial opening, defi... -
Page 23: Backjump (Dip 6)
Extended functions and connections Backjump Carriage circuit board (DIP 6) Important information! You can set DIP switch 6 to ON for sectional doors or doors with ceiling guides; this relieves the operator and door mechanisms. Simpler actuation of the emergency release. Serves to relieve the door and operator mechanical system. -
Page 24: Partial Opening (Dip 8)
Extended functions and connections 4. Press button 2 once the desired position is reached. Partial opening (DIP 8) 5. Close door with button 2. Important information! Partial opening saved and pressing button 2 opens the door to the saved Before programming the second opening height (before DIP 8 position. -
Page 25: Maintenance And Care
Maintenance and care Maintenance and care Safety instructions Caution! First note the position of the plug and boards. Make sure the board and plug position is correct when Danger! reinserting them! Mixing up the contacts damages the device. Never use a water hose or high-pressure cleaner to spray Only hold the outside edge of the boards (6 and 7)! down the operator or the control unit housing. -
Page 26: Maintenance And Care
Observe applicable national regulations. as possible to follow. If you have any suggestions as to how we could improve it or if you think more information is needed, please send your suggestions to us: Fax: +49 (0) 7021 9447-25 E-mail: info@aperto-torantriebe.de... -
Page 27: Troubleshooting
434.42 MHz) must be used with older HomeLink systems. If this does not help, contact your specialist dealer for assistance or consult Information can be found under http://www.eurohomelink.com our website at http://aperto-torantriebe.de or contact your specialist dealer. Malfunction Possible cause... - Page 28 The radio receiver is in the Learning Press the desired handheld transmitter button. mode and is waiting for a radio code from a handheld transmitter. APERTO Germany APERTO Torantriebe GmbH Hans-Böckler-Straße 29 73230 Kirchheim/Teck Germany Phone: +49 (0) 7021 9447-0 Fax: +49 (0) 7021 9447-25 info@aperto-torantriebe.de...
Need help?
Do you have a question about the X-Box 550 and is the answer not in the manual?
Questions and answers