Aprilaire 8120X Installation And Operation Manual
Digital ventilation controller
Hide thumbs
Also See for 8120X:
- Installation & operating instructions manual (24 pages) ,
- Installation & operating instructions manual (24 pages)

Related Manuals for Aprilaire 8120X


Summary of Contents for Aprilaire 8120X
- Page 1 Model 8120X Digital Ventilation Controller CODE MIN/ Installation and Operation Manual...
-
Page 2: Table Of Contents
TABLE OF CONTENTS WARNINGS AND CAUTIONS Warnings and Cautions . . . . . . . . . . . . . . . . . . . . . . . . . . . . . . . . . . . . . . . . . . . . . . . . . . . . . . . . . . . . . . . . . . . 3 WARNING Package Contents . -
Page 3: Package Contents
PACKAGE CONTENTS MOUNTING THE CONTROLLER AND OUTDOOR TEMPERATURE SENSOR MOUNTING TO AN 8140NC VENTILATOR CONTROL #8 x 5/8" HEX HEAD SHEET METAL SCREW (2) NOTE: In hot/humid climates where limiting ventilation with high indoor RH is important, #8 x 1/2" PAN HEAD mount the control to the return duct and mount the outdoor temperature sensor as shown on TYPE 25 SCREW (2) pages 6-9 . -
Page 4: Mounting The Controller To The Return Ductwork
Duct Board Installation MOUNTING THE CONTROLLER TO THE RETURN DUCTWORK 1. Take out the duct board mounting bracket, remove the wall plate from the control and put the rest of the control in a safe location until after wiring is completed . NOTE: Mount the controller to the return ductwork at a location where the temperature 2. -
Page 5: Mounting The Controller In A Closet Return Plenum
MOUNTING THE CONTROLLER IN A CLOSET RETURN PLENUM MOUNTING THE OUTDOOR TEMPERATURE SENSOR 1. Drill a 3/8" diameter hole in the duct of the fresh air inlet hood . NOTE: Do not mount directly in the path of the outdoor air . Mount the control where it will 2. -
Page 6: Wiring
FIGURE 2 – WIRING TO HEAT PUMP Disconnect power to the HVAC system to prevent electrical shorts while wiring . HEAT PUMP THERMOSTAT MODEL 8120X DIGITAL VENTILATION CONTROL 1. Run a 2-conductor cable from the control to the outdoor temperature sensor (if installed) and Y W1 WIRE NUT wire to the controller ODT terminals . -
Page 7: Wiring To Model 6506 Damper
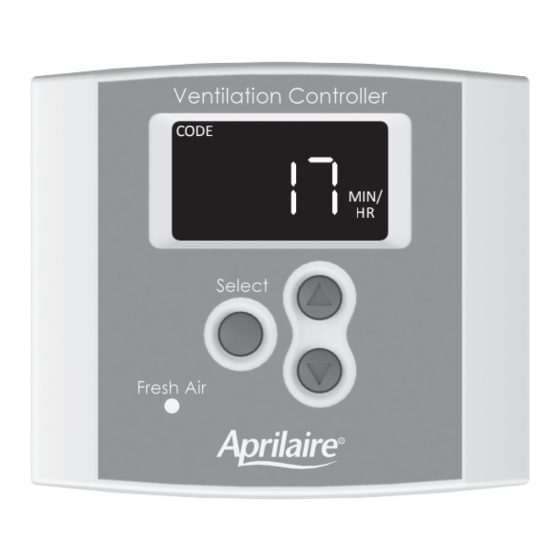
OPERATION FIGURE 4 – WIRING TO MODEL 6506 DAMPER The display will appear faint normally; the first press of any button will turn on the display at full power . Shows the ventilation time setting (minutes/hr), VENT mode of operation (Code or Comfort) and whether the HVAC fan has been turned on when ventilating . -
Page 8: Set Up Menu
SET UP MENU Menu Item Values Description HP if wiring to a heat pump . HP or HC NOTICE HC if wiring to furnace and AC . Before setting up the control for use, the amount of ventilation air being delivered (CFM) by CODE # BEDROOMS HIGH... -
Page 9: Test Mode
TEST MODE Menu Item Values Description Only available when bLnd is selected . When the outdoor OFF, 5°F less than COMFORT HOUSE (FT temperature is below the setting, the HVAC fan will be °F After wiring and set up have been completed, Test Mode can be used to verify that all Vent . -
Page 10: Rater/Inspector Verification
RATER/INSPECTOR VERIFICATION SEQUENCE OF OPERATION – “CODE” SETTING The control will turn on ventilation with a heating, cooling or fan call for the set number of minutes To verify the ventilation time setting, press the Select button to scroll through the calculated during a one-hour cycle period . -
Page 11: Limited Warranty
WARRANTY REGISTRATION Visit us online at www.aprilaire.com to register your Aprilaire product . If you do not have online access, please mail a postcard with your name, address, phone number, email address, product purchased, model number, date of purchase, and dealer name and address to: Research Products Corporation, P .
Need help?
Do you have a question about the 8120X and is the answer not in the manual?
Questions and answers