Advertisement
Available languages
Available languages
Manuel d'utilisation
Instruction Manual
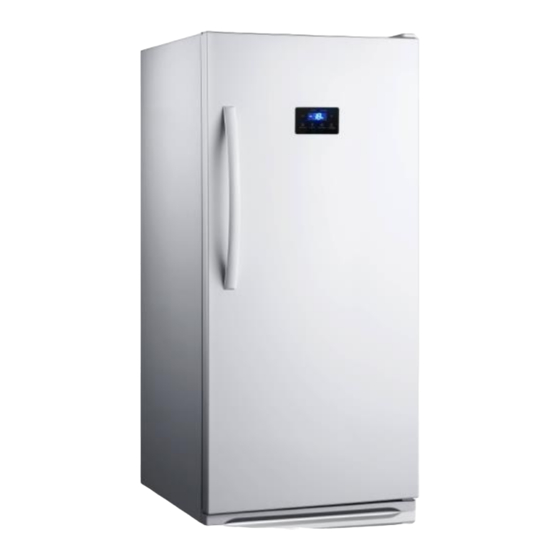
Congélateur Vertical 13.7 pi.cu.
Upright Freezer 13.7 cu. Ft.
Model/Modèle Ellipse
ECV137W
Pour une utilisation optimale de cet appareil ainsi que pour votre sécurité, veuillez lire
attentivement les instructions contenues dans ce manuel avant de faire fonctionner votre
appareil.
To ensure proper use of this appliance and your safety, please read the following
instructions before operating this appliance.
Advertisement
Table of Contents

Summary of Contents for Ellipse ECV137W
- Page 1 Instruction Manual Congélateur Vertical 13.7 pi.cu. Upright Freezer 13.7 cu. Ft. Model/Modèle Ellipse ECV137W Pour une utilisation optimale de cet appareil ainsi que pour votre sécurité, veuillez lire attentivement les instructions contenues dans ce manuel avant de faire fonctionner votre appareil.
- Page 2 TABLE DES MATIÈRES 1.PRÉCAUTIONS IMPORTANTES……………………………………...3 2.INSTRUCTIONS D’INSTALLATION …..........4-5-6-7 3.FONCTIONNEMENT.................8-9 4.NETTOYAGE ET ENTRETIEN............9-10 5.GUIDE DE DÉPANNAGE.............….11 6.GARANTIE………………...............…12...
-
Page 3: Précautions Importantes
1. PRÉCAUTIONS IMPORTANTES VEUILLEZ LIRE TOUTES LES INSTRUCTIONS AVANT D’UTILISER L’APPAREIL POUR VOTRE SÉCURITÉ N’entreposez pas ou n’utilisez pas de l’essence ou tout autre vapeur ou liquide inflammable près de cet appareil ou de tout autre appareil électroménager. Lisez les étiquettes du produit concernant les avertissements d’inflammabilité... - Page 4 2.INSTALLATION VANT DE METTRE VOTRE APPAREIL EN MARCHE LIRE ET SUIVRE CES ÉTAPES INITIALES IMPORTANTES A. ELECTRICITÉ, MISE À LA TERRE ET DEGAGEMENT Il est nécessaire de brancher l’appareil à un circuit unique, mise à la terre, ne desservant que le congélateur.
- Page 5 B. DEBALLER ET NETTOYER L’APAPREIL Enlever l’emballage, le ruban adhésif et autre avant d’utiliser le congélateur. Ne pas utiliser d’instruments pointus, d’alcool, de liquide inflammable ou un produit abrasif qui risquent d’abîmer le fini. Nettoyage du congélateur avant l’utilisation: en vous servant d’une éponge, ou d’un ...
- Page 6 D. MISE À NIVEAU Il est important que le congélateur soit être mis à niveau lors de l'installation. Sinon les portes ne fermeront pas ou et l’unité ne sera pas scellée correctement, causant des problèmes de refroidissement, de gel ou d'humidité. Pour mettre au niveau votre réfrigérateur, tourner les pattes dans le sens des aiguilles d’une montre et soulever l’unité...
- Page 7 F. INSTALLER LA GRILLE DE BASE Pour installer la grille de base au bas du réfrigérateur suivez la méthode selon le diagramme ci- dessous : Retirer la plaque de couverture et installer la grille décorative de fond à l'aide de vis tel que démontré...
-
Page 8: Fonctionnement
3. FONCTIONNEMENT PANNEAU DE CONTRÔLE Voyants lumineux 1. Alarme de température : Si la température intérieure est ≥ -8 ° C depuis ≥ 6 hrs l’alarme se mettra en marche indiquant une possible problématique. (Code E9) 2. Alarme porte ouverte ; l’alarme retentira si la porte est maintenue ouverte pendant plus de 60 secondes. -
Page 9: Entretien Et Nettoyage
Après 10 secondes le mode entrera automatiquement en fonction. Si vous le désirez vous pourriez aussi appuyer sur la touche « Lock/Unlock » (D) pour confirmer la sélection. A moins de circonstances exceptionnelles nous ne recommandons pas de choisir 48 heures. - Page 10 3. N'utilisez pas les nettoyants abrasifs. Lavez, rincez et bien séchez toutes les surfaces. N'utilisez pas de cires de nettoyage, détergents, agents de blanchiment ou nettoyeurs contenant du pétrole sur les surfaces de plastiques et les pièces en caoutchouc. N'utilisez jamais de serviettes de papier, nettoyeur à fenêtre, ou les liquides inflammables sur des pièces en plastique, car ils peuvent endommager.
-
Page 11: Guide De Dépannage
5. DÉPANNAGE Vous pouvez facilement résoudre plusieurs des problèmes courants de votre appareil et vous épargner ainsi des frais de service. Essayez les suggestions ci-dessous qui peuvent s’appliquer à votre situation avant de faire appel à un professionnel PROBLÈME(S) SOLUTION(S) ... -
Page 12: Garantie
6. GARANTIE Votre appareil est couvert par une garantie limitée d’un an. Pendant un an à partir de la date originale de livraison , . assumera les coûts des réparations et/ou du remplacement des pièces CORBEIL ÉLECTRIQUE INC de l’appareil qui présente un défaut de fabrication ou de matériau, si cet appareil est installé, utilisé et entretenu selon les instructions fournies. - Page 13 TABLE OF CONTENTS 1.SAFETY PRECAUTIONS …………………………………………………….….14 2.INSTALLATION INSTRUCTIONS ………………………………………….….15 3.OPERATING YOUR APPLIANCE……………………………………….….…..14 4.CARE AND MAINTENANCE ………………………………………………. ..15 … 5.TROUBLESHOOTING GUIDE………………………………………….……….17 6.WARRANTY ………………………………………………………………… …18 …...
-
Page 14: Important Safety Instructions
1. IMPORTANT SAFETY INSTRUCTIONS READ ALL INSTRUCTIIONS BEFORE USING YOUR FREEZER FOR YOUR SAFETY Do not store or use gasoline or other flammable vapors and liquids in the vicinity of this or any other appliance. Read product labels for flammability and other warnings, WARNING CHILD SAFETY Destroy carton, plastic bags, and any exterior wrapping material immediately after the freezer is... -
Page 15: Installation Instructions
2. INSTALLATION INSTRUCTIONS To ensure that you get the best results from your new freezer, please take time to follow these initials steps. A. ELECTRICAL CONNECTION AND CLEARANCE It is recommended to use a separate electrical circuit serving only this appliance. ... - Page 16 B. UNPACKING AND CLEANING YOUR APPLIANCE Remove tape and any labels from your fridge before using (except the rating label). Do not use sharp instruments, rubbing alcohol, flammable fluids, or abrasive cleaners to remove tape or glue. These products can damage the surface of your refrigerator. ...
- Page 17 D. LEVELLING If the fridge is not leveled the doors may not close or seal properly, causing cooling, frost, or moisture problems. It is very important of the fridge to be level in order to function properly. To level your fridge you may either turn the level leg clockwise to rise the side to the fridge or counter –...
-
Page 18: Operating Your Freezer
3.OPERATING YOUR FREEZER SIGNAL LIGHTS Hi-Temp alarm: when the inner temp. ≥-8 °C last ≥6hrs the alarm will start as the freezer temp. show problematic status(E9) Door Open alarm: when the door is open for more than 60 seconds, the alarm will start KEYS A. - Page 19 To exit the “Quick freeze” function mode: press “Quick freeze” ( A key), the temperature screen will show -24, the “Quick freeze” (A Key) again to exit. You may also press “Lock/Unlock“ (D key) to lock in the desired mark. Temperature in C°of F °mode “...
-
Page 20: Care And Maintenance
4.CARE AND MAINTENANCE CLEANING YOUR FREEZER Upon installation of your new appliance, it is recommended that it be cleaned thoroughly. 1. Turn the temperature control to "OFF", unplug the freezer. 2. Use a clean sponge or soft and a mild detergent in warm water. 3. -
Page 21: Troubleshooting
5.TROUBLESHOOTING You can solve many common freezer problems easily, saving you the cost of a possible service call. Try the suggestions below to see if you can solve the problem before calling the Service Center. PROBLEM POSSIBLE CAUSE Not plugged in. Freezer does not operate. - Page 22 6.WARANTY INFORMATION Your appliance is covered by a one year limited warranty. For one year from your original date of delivery, Corbeil Électrique Inc. will repair or replace any parts of this appliance that prove to be defective in materials or workmanship when such appliance is installed, used, and maintained in accordance with the provided instructions.
Need help?
Do you have a question about the ECV137W and is the answer not in the manual?
Questions and answers