Table of Contents
Advertisement
Quick Links
© 2011 KidKraft, LP
Please retain this information for future reference
HARDWARE
I. Espresso Large Head
Screw x 4 pcs
A. Blue Cross Dowel Bolt
x 4 pcs
3/4 in / 18 mm
2 in / 52 mm
J. Yellow Cross Dowel Bolt
x 2 pcs
B. Cross Dowel Nut x 13 pcs
1/2 in / 12 mm
C. Yellow Cross Dowel Bolt
K. White Cross Dowel Bolt
x 4 pcs
x 2 pcs
2 in / 52 mm
1/2 in / 12 mm
D. Hex Bolt x 2 pcs
L. Pink Insert Bolt x 2 pcs
1 9/16 in / 40 mm
M. Large Head Screw x 4 pcs
E. White Cross Dowel Bolt
x 1 pc
3/4 in / 18 mm
2 in / 52 mm
F. White Cross Dowel Bolt
x 2 pcs
1/2 in / 12 mm
O. Espresso Small Head
2 7/8 in / 72 mm
Screw x 2 pcs
G. Yellow Cross Dowel Bolt
1/2 in / 12 mm
x 2 pcs
P. White Screw x 7 pcs
2 7/8 in / 72 mm
3/8 in / 10 mm
H. Pink Large Head Screw
x 2 pcs
Q. White Insert Bolt x 2 pcs
7/8 in / 22 mm
CAUTION:
ADULT ASSEMBLY REQUIRED. Hardware contains
small screws with sharp points. Keep unassembled
parts out of the reach of small children.
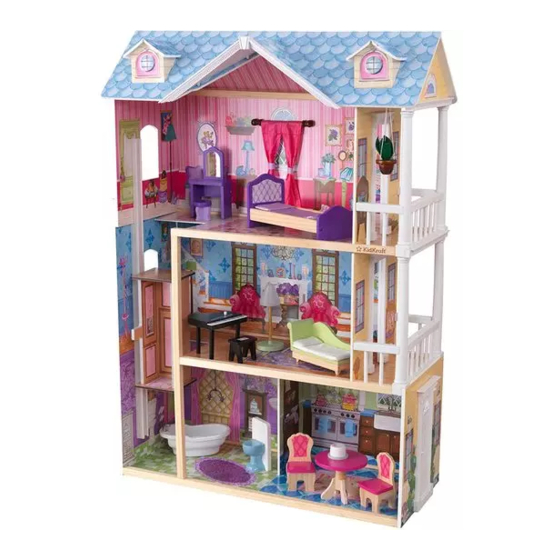
My Dreamy Dollhouse
R. Purple Screw x 4 pcs
7/8 in / 22 mm
S. Light Blue Large Head
Screw x 13 pcs
7/8 in / 22 mm
T. Yellow Screw x 2 pcs
3/4 in / 18 mm
U. Screw x 4 pcs
7/8 in / 22 mm
V. White Screw x 27 pcs
1/2 in / 12 mm
Allen Wrench x 1 pc
The following tool (not
included) is required for
assembly :
®
Phillips
screwdriver
WARNING:
If used improperly, your dollhouse may be pulled over or fall,
creating risk of injury or damage. To minimize this risk,we
recommend that you use the enclosed wall anchor kit, which gives
you the option of attaching the dollhouse to a wall. In addition,
children should not be permitted to climb or pull on the dollhouse.
Assembly Instructions
PARTS LIST
1
7a
x 2
2
x 2
7b
8
3
31
32
30
53
52
x 2
56
37
57
x 2
36
40
USE AND MAINTENANCE:
-Use on level surfaces only
-Please check assembly at regular intervals, and
frequently tighten hardware if necessary. If maintenance
is not carried out, the product could cease to function
properly.
To order replacement parts, please visit www.kidkraft.com
9
5
4
6
14
23
18
15
17
16
19
47 x 3
48
x 2
50
51
54
x 2
34
33a
39
33b
46
44
41
WARNING:
CHOKING HAZARD. Small parts and sharp
points, not suitable for children under 3 years.
Item #65823
11 x2
12
10
13
20
22
x2
21
26
25
24
28
29
x2
27
55
35
38
43
42c
42b
42a
Customer Service
1-800-933-0771
www.kidkraft.com
1
Advertisement
Table of Contents

Related Manuals for KidKraft 65823


Summary of Contents for KidKraft 65823
- Page 1 My Dreamy Dollhouse Assembly Instructions Item #65823 © 2011 KidKraft, LP Please retain this information for future reference To order replacement parts, please visit www.kidkraft.com PARTS LIST HARDWARE I. Espresso Large Head R. Purple Screw x 4 pcs Screw x 4 pcs 11 x2 A.
- Page 2 My Dreamy Dollhouse Assembly Instructions Item #65823 © 2011 KidKraft, LP Bed Assembly Piano Assembly Dollhouse Assembly Step 2 Step 1 Step 1 Step 1 Step 3 Step 4 Step 5 Step 6 Step 7 Before calling customer service, please...
- Page 3 My Dreamy Dollhouse Assembly Instructions Item #65823 © 2011 KidKraft, LP Step 8 Step 9 Step 10 *Be sure to match artwork on these parts to match the artwork in each room of the dollhouse. Step 11 Step 12 Step 13...
- Page 4 My Dreamy Dollhouse Assembly Instructions Item #65823 © 2011 KidKraft, LP Step 16 Step 17 Step 18 Step 19 Insert elevator slide into track before attaching to dollhouse wall. Adults can loosen or tighten the screws on part 22 to adjust the elevator resistance.
- Page 5 My Dreamy Dollhouse Assembly Instructions Item #65823 © 2011 KidKraft, LP Step 25 This device complies with Part 15 of the FCC Rules. Operation is subject to the following two conditions: (1) This device may not cause harmful interference, and (2) this device must accept any interference received, including interference that may cause undesired operation.
- Page 6 My Dreamy Dollhouse Assembly Instructions Item #65823 © 2011 KidKraft, LP Piano Battery Assembly Instructions Instructions for Use: To replace battery: Prior To Use: Step 2 Step 1 Button Pull Tab - Locate the Battery Compartment underneath the piano - Replace old batteries with three (3) new LR44 / AG13 (1.5V) batteries.
- Page 7 My Dreamy Dollhouse Assembly Instructions Item #65823 © 2011 KidKraft, LP Toilet Battery Assembly Instructions Continued Floor Lamp Battery Assembly Instructions Prior To Use: Step 2 Step 3 Pull Tab Battery Tips: - Batteries should always be installed and changed under adult supervision.
Need help?
Do you have a question about the 65823 and is the answer not in the manual?
Questions and answers