
Related Manuals for Lexus ES 300

Summary of Contents for Lexus ES 300
- Page 1 ES300_Navi_U (L/O 0208) 2003 Lexus Navigation System Owner’s Manual ES300 Navi (U)
- Page 2 ES300_Navi_U (L/O 0208) −2 Publication No. OM33592U 2002 TOYOTA MOTOR CORPORATION Part No. 01999−33592 Printed in Japan 01−0208−00 I All rights reserved. This material may not be reproduced or copied, in ES300 Navigation whole or in part, without the written permission of Toyota Motor Corporation. ES Navi (U)
- Page 3 The Lexus Navigation System is one of the most technologically advanced vehicle accessories ever developed. The system receives satellite signals from the Global Positioning System (GPS) operated by the U.S. Department of Defense. Using these signals and other vehicle sen- sors, the system can show you where you are and assist you in locating a desired destination.
- Page 4 When you start the engine or turn the ignition Touch either “English” or “French” to se- switch to “ACC”, the initial “LEXUS” screen NOTICE lect a language. Read and follow the in- appears and the system begins operating.
- Page 5 ES300_Navi_U (L/O 0208) Safety Instruction Before attempting to use this system while D While you are driving, be sure to you are driving, learn how to use it and be- follow the traffic regulations and come thoroughly familiar with it. Read the keep the road condition in mind.
- Page 6 ES300_Navi_U (L/O 0208) Safety Instruction Use this system only in locations where it is legal to do so. Some states/provinces may have laws prohibiting video screens within sight of the driver. 2003 ES300 Navigation from Aug. ’02 Prod. (OM33592U)
- Page 7 ES300_Navi_U (L/O 0208) Overview of Touch Screen and Switches Switch operation This system is operated mainly by the switches on the screen. To prevent dam- age to the screen, lightly touch switches on the screen with your finger. When you touch a switch on the screen or push a button, a beep sounds.
- Page 8 ES300_Navi_U (L/O 0208) Symbols, Switches and Buttons North–up or heading–up symbol and GPS mark (Global Positioning Map/Guidance scale of map System) Touch this switch to change the Indicates a map view with north up or Whenever your vehicle is screen mode. For details, see heading up.
- Page 9 ES300_Navi_U (L/O 0208) Symbols, Switches and Buttons Changing the route guidance When you touch this switch, the “Change route” screen will appear. For details, see page 32. One–touch registration of marked point To register the current vehicle position as a marked point.
- Page 10 ES300_Navi_U (L/O 0208) 2003 ES300 Navigation from Aug. ’02 Prod. (OM33592U) viii...
-
Page 11: Table Of Contents
ES300_Navi_U (L/O 0208) SECTION BASIC FUNCTIONS Descriptions of basic operations in frequent use Your navigation system ..........Inputting letters and numbers . -
Page 12: Your Navigation System
ES300_Navi_U (L/O 0208) Your Navigation System NOTICE Do not obstruct the display while it is moving. It could damage your naviga- tion system. NE003 You can adjust the angle of the display by “TILT” pushing the button. Each push “TILT” of the button will tilt the display to position 1 , 2 , 3 and then back to... -
Page 13: Inputting Letters And Numbers
ES300_Navi_U (L/O 0208) Inputting Letters and Numbers The navigation system is operated by “List” Touching the switch will change the switches on the screen and the buttons screen to a display of the database items that located on the front face around the match the name or address that you have screen. -
Page 14: How To Move The Cursor
ES300_Navi_U (L/O 0208) Inputting Letters and Numbers How to Move the Cursor appears to the right of the item name, the complete name is too long for the display. Touch , and the name will scroll to the end of the name. -
Page 15: Destination Input
ES300_Navi_U (L/O 0208) How to Move the Cursor Destination Input “DEST” Touch the tab on the screen and the “Destination” screen appears. L00017 L00019 L00018 " Position locating screen on the map “US1” “CAN” Touch one of the through switches to select a search area. Touch the 2. - Page 16 ES300_Navi_U (L/O 0208) Destination Input Illinois Canada Indiana States included in the search Provinces and regions included Switch Kentucky Switch area in the search area Michigan Idaho Alberta Ohio Oregon British Columbia Wisconsin Washington Manitoba Alabama New Brunswick California Arkansas Newfoundland and Labrac Nevada Louisiana...
- Page 17 ES300_Navi_U (L/O 0208) Destination Input You can find your destination using various 5. By Marked Point: You can register your 11. By Map Selection: You can select a methods. See pages 8 through 25 for the own favorite destinations as a “Marked destination simply by touching the location detailed steps.
- Page 18 ES300_Navi_U (L/O 0208) Destination Input Destination Input by HOME D When setting the destination, you Touch the switch on the “Destina- tion” screen. should use the map on a scale of one half mile or smaller. The screen changes and displays the D To select an “Address”, “Point of In- map location of your home.
- Page 19 ES300_Navi_U (L/O 0208) Destination Input by PRESET DESTINATION Touch any of — (preset destina- tion) switches on the “Destination” screen. The screen changes and displays the map location of the preset destination. Guidance starts from your current position to the preset destination immediately after you touch the preset destination switch.
- Page 20 ES300_Navi_U (L/O 0208) Destination Input by ADDRESS (a) Inputting a house number and a street name “Address” Touch the switch on the destination screen. The “Address” L00020 L00022 screen appears, and then you can input a house number. Touch letters directly on the screen to in- put a house number.
- Page 21 ES300_Navi_U (L/O 0208) Destination Input by ADDRESS (b) Selecting a city to search The screen for selecting last 5 cities appears “City” if you touch the switch on the “Ad- dress” screen on page 10. L00015 L00023 When you find your desired street name, If you input a street name first, the screen L00025 changes.
- Page 22 ES300_Navi_U (L/O 0208) Destination Input by ADDRESS Destination Input by POI The screen for inputting a city name appears The screen changes and displays the There are 3 ways to select a point of in- “Input city name” map location of the selected destination terest location.
- Page 23 ES300_Navi_U (L/O 0208) Destination Input by POI (a) Input the name directly (b) Selecting a city to search “POI” “City” Touch the switch on the “Destina- Touch the switch on the “POI” tion” screen. screen. L00028 L00029 L00027 Touch the of your desired destina- tion.
- Page 24 ES300_Navi_U (L/O 0208) Destination Input by POI (c) Selecting from the categories When you touch the of your desired category, the screen changes and dis- “Category” Touch the switch on the plays the menu to input a name. “POI” screen. L00030 L00031 Input the city name.
- Page 25 ES300_Navi_U (L/O 0208) Destination Input by POI When you touch the of your desired item, the screen changes and displays the map location of the selected destina- tion and the route preference. (See “(a) L00033 L00183 Entering destination” on page 26.) Once you have selected a category, you can If you input the name of a specific point of in- L00036...
- Page 26 POI (POINTS OF INTEREST) ICONS CONTINENTAL PARKING LOT RESTAURANT MEXICAN RENTAL CAR AGENCY JAPANESE TOYOTA DEALERSHIPS SEAFOOD (all search areas) CHINESE LEXUS DEALERSHIPS SHOPPING (all search areas) FRENCH GROCERY STORE AUTOMOBILE CLUB ITALIAN AUTO SERVICE & GAS STATION MAINTENANCE OTHER PARKING GARAGE/HOUSE...
- Page 27 ES300_Navi_U (L/O 0208) Destination Input by POI CONVENTION/EXHIBITION GOLF COURSE WINERY CENTER SKI RESORT CITY HALL COURT HOUSE AMUSEMENT PARK POLICE STATION TRAIN STATION (all search areas) SPORTS COMPLEX LIBRARY AIRPORT (all search areas) CASINO HOSPITAL BUS STATION PARK/RECREATION MARINA COMMUTER RAIL STATION (all search areas) TOURIST ATTRACTION...
- Page 28 ES300_Navi_U (L/O 0208) Destination Input by POI PARK AND RIDE SCHOOL REST AREA TOURIST INFORMATION HIGHER EDUCATION HISTORICAL MONUMENTS BUSINESS FACILITY CITY CENTER/NAMED PERFORMING ARTS PLACE MUSEUM BANK 2003 ES300 Navigation from Aug. ’02 Prod. (OM33592U)
- Page 29 ES300_Navi_U (L/O 0208) Destination Input by MARKED POINTS “Marked points” There are 3 ways to list the marked point Touching the switch by touching switches on bottom of the on the “Destination” screen displays screen. your list of registered marked points. See page 66 on registering and editing Sort by Icon: Touch this switch to list the marked points.
- Page 30 ES300_Navi_U (L/O 0208) Destination Input by PREVIOUS DESTINATION “Prev. dest” You can delete the list of previous destina- Touch the switch on the tions while you stop your car, if you no longer “Destination” screen. need them. L00038 L00078 The screen lists up to 20 previously set des- “MENU”...
- Page 31 ES300_Navi_U (L/O 0208) Destination Input by EMERGENCY “Emergency” By touching the switch INFORMATION on the “Destination” screen, the display changes to a screen to select dealers, The navigation system does not guide hospitals or police stations. During driv- in areas where route guidance is un- L00041 ing, only nearby police stations, hospi- available.
- Page 32 ES300_Navi_U (L/O 0208) Destination Input by INTERSECTION “Intersection” Touch the switch on the “Destination” screen. L00043 EMV3111U L00042 Touch the of your desired item. Af- ter inputting the two intersecting streets, If the same two streets cross at more than the screen changes and displays the map Input the name of the two intersecting one intersection, the screen changes and...
- Page 33 ES300_Navi_U (L/O 0208) Destination Input by FREEWAY ENTRANCE or EXIT To input a freeway entrance or exit, touch “FWY Ent./Exit” switch on the “Destination” screen. L00045 L00047 L00044 Select the desired freeway by touching Touch the of the desired entrance or exit name.
- Page 34 ES300_Navi_U (L/O 0208) Destination Input by FREEWAY ENTRANCE or EXIT There are 2 ways to list the freeway en- trance or exit. Dist. sort: Touch this switch to list the en- trances or exits in order of distance from your current location.
- Page 35 ES300_Navi_U (L/O 0208) Destination Input by PREVIOUS STARTING POINT Destination Input by MAP “Previous starting point” “Map” Touch the Touch the switch on the “Des- tination” screen. switch on the “Destination” screen. The screen changes and displays the map location of the previous starting point and the route preference.
-
Page 36: Setting And Deleting Destination
ES300_Navi_U (L/O 0208) Setting and Deleting Destination (a) Entering destination You are given a number of choices on the “Allow” Touching the switch on each item conditions which the system uses to deter- allows its use. After you input the destination, the mine the route to your destination. - Page 37 ES300_Navi_U (L/O 0208) Setting and Deleting Destination Quick: A route by which you can reach the (b) Adding destinations destination in the shortest time “MENU” 1. Touch the tab on the screen This route is indicated by an orange line. to display the “Menu”...
- Page 38 ES300_Navi_U (L/O 0208) Setting and Deleting Destination 4. Input an additional destination in the (c) Relocating destinations same way as the destination input. (See “MENU” 1. Touch the tab on the screen page 26.) to display the “Menu” screen and touch “Edit route”...
- Page 39 ES300_Navi_U (L/O 0208) Setting and Deleting Destination (d) Deleting destination 3. A message appears to confirm your re- quest to delete. To delete the destina- “Yes” tion(s), touch the switch. “Yes” If you touch the switch, the data can- not be recovered. L00056 “No”...
-
Page 40: Setting And Deleting Preferred Road
ES300_Navi_U (L/O 0208) Setting and Deleting Preferred Road (a) Adding preferred road “Next” Touch the switch to change the road type. L00060 L00059 L00061 Move the cursor to your desired loca- “Preferred road” tion and touch the “Edit route” Touch the switch on the switch. - Page 41 ES300_Navi_U (L/O 0208) Setting and Deleting Preferred Road (b) Modifying preferred road (c) Deleting preferred road “Delete” 1. Touch the switch under “Set preferred road”. The “Delete prefer- red road” screen appears. L00063 L00056 L00064 Follow the same procedure as when adding a preferred road.
-
Page 42: Route Guidance Screen
ES300_Navi_U (L/O 0208) Route Guidance Screen The route guidance system has two dif- Upon reception of signals from ferent screen modes. the GPS (Global Positioning System), this mark appears. (For details, see page 50.) L00065 Magnifies or reduces the map scale. - Page 43 ES300_Navi_U (L/O 0208) Route Guidance Screen Search Condition Route Overview The “Change route” screen ap- pears and the following settings “Search condition” Touch the switch are available. on the “Edit route” screen. The “Search condition” screen appears. L00059 L00066 L00067 “Route overview”...
- Page 44 ES300_Navi_U (L/O 0208) Route Guidance Screen Turn List You can change from the map screen to a “Turn list” screen that displays the list L00092 of the roads up to your destination. This L00091 list can be used for a route guidance. L00059 2.
-
Page 45: Route Preview
ES300_Navi_U (L/O 0208) Route Guidance Screen Route Preview “Map” “Route preview” Touch the switch of your desired Touch the switch on INFORMATION point. The point which you choose is dis- the “Menu” screen. The “Route preview” D The current vehicle position mark played on the map screen. -
Page 46: Current Position Display
ES300_Navi_U (L/O 0208) Route Preview Current Position Display To review the route to the cur- rent position in fast–forward mode To indicate the current position L00071 L00074 “Edit” The current vehicle position mark ap- Touch the switch to display the pears in the center of the map screen. -
Page 47: Voice Guidance
ES300_Navi_U (L/O 0208) Current Position Display Voice Guidance Voice guidance to the destination during INFORMATION route guidance. Use voice guidance just for your reference. When you use the “one–touch” scroll feature, the current vehicle position You can adjust the volume of the voice or turn L00075 mark may disappear from the screen. -
Page 48: Typical Voice Guidance Prompts
ES300_Navi_U (L/O 0208) Typical Voice Guidance Prompts INFORMATION 4.2 miles On freeways, interstates of other high- 0.25 miles ways with higher speed limits, the voice guidance will be made at earlier UN301 NZ018 points than on city streets in order to al- low time to maneuver. - Page 49 ES300_Navi_U (L/O 0208) Typical Voice Guidance Prompts INFORMATION One–way road D If the system cannot determine the current vehicle position correctly (in cases of poor GPS signal reception), EMV3114U EMV3115U the voice guidance may be made ear- ly or delayed. D If you did not hear the voice guid- “MAP/ ance command, touch the...
-
Page 50: Registering Your Home
ES300_Navi_U (L/O 0208) Registering Your Home If you register your home address before- “De- DELETING YOUR HOME If your home is already registered, the hand, you can easily set the route back to lete home” switch will appear. your home. L00059 L00059 L00077... -
Page 51: Registering Preset Destinations
ES300_Navi_U (L/O 0208) Registering Your Home Registering Preset Destinations You can register up to 5 preset destina- tions. “MENU” 1. Touch the tab on the screen L00079 to display the “Menu” screen and touch L00081 “Marked points” switch. L00080 The screen changes and displays the map 3. - Page 52 ES300_Navi_U (L/O 0208) Registering Preset Destinations EDITING PRESET DESTINATIONS DELETING THE PRESET DESTINATIONS “MENU” “MENU” 1. Touch the tab on the screen 1. Touch the tab on the screen to display the “Menu” screen and touch to display the “Menu” screen and touch “Marked points”...
-
Page 53: Detour Setting
ES300_Navi_U (L/O 0208) Registering Preset Destinations Detour Setting 3. Select the preset destination that you When you are driving while the route guidance is operating, you can change want to delete and touch the switch. the route to detour around a section of If you want to delete all the preset des- the route where a delay is caused by road tinations, touch the “Delete all”... -
Page 54: Displaying Poi
ES300_Navi_U (L/O 0208) Detour Setting Displaying POI Points of interest such as gas stations and restaurants can be displayed on the map screen. You can also set their loca- tion as a destination and use them for route guidance. L00086 EMV3065U L00074 “Chg. - Page 55 ES300_Navi_U (L/O 0208) Displaying POI A window with a limited choice of points of in- “Route” By turning the switch on, you can terest will be displayed. When you touch search for POIs on the route when in the your desired type of point of interest, sym- route guidance mode.
-
Page 56: Map Appearance
ES300_Navi_U (L/O 0208) Displaying POI Map Appearance The map will shift so that the symbol is cen- You can select the single screen map or tered on the screen and overlaps with the the dual screen map. You can also cursor . - Page 57 ES300_Navi_U (L/O 0208) Map Appearance Single map Dual map Arrow screen L00074 L00097 L00095 This screen shows the single map. The screen shows the dual map. The map This screen shows the current road name on the left is the main map. You can change and the distance to the next corner.
-
Page 58: Map Scale
ES300_Navi_U (L/O 0208) Map Appearance Map Scale Turn list screen INFORMATION When the map scale is at the maxi- mum range of 128 miles, will disappear. When the map scale is at the minimum range of 1/32nd L00098 mile, will disappear. L00096 Touch to change the scale of... -
Page 59: Screen Scrolling
ES300_Navi_U (L/O 0208) Screen Scrolling Orientation of the Map “Mark” If you touch switches such as “POI” , etc., the screen does not scroll and the selected function operates. L00100 L00099 After you scroll the screen, the map remains centered at the selected location until you activate another function. -
Page 60: Limitations Of The Navigation System
ES300_Navi_U (L/O 0208) Orientation of the Map Limitations of the Navigation System You can change the orientation of the This navigation system calculates the map from north–up to heading–up by current vehicle position using satellite touching the orientation symbol at the signals, various vehicle signals, map top left of the screen. - Page 61 ES300_Navi_U (L/O 0208) Limitations of the Navigation System D After replacing a tire or tires. Even when the navigation system is receiv- (a) Accurate current vehicle ing good GPS signals, the vehicle position position may not be shown in D When using tires that are smaller or larger may not be shown accurately or inappropri- the following cases: than the factory specifications.
- Page 62 ES300_Navi_U (L/O 0208) Limitations of the Navigation System D If the route to your destination includes (b) Inappropriate route guidance gravel, unpaved roads or alleys, the route may occur in the following guidance may not be shown. cases: D Your destination point might be shown on D When turning at a wrong intersection off the opposite side of the street.
-
Page 63: Map Database Information And Updates
ES300_Navi_U (L/O 0208) Map Database Information and Updates This system uses the maps of DENSO There are two types of areas available for based on NAVTECH maps, GDT maps route guidance. (See the following and infoUSA POIs. pages.) In one type of area, primarily around metropolitan centers, detailed 2001 Navigation Technologies. - Page 64 The map database is normally updated once “DVD” switch on the “Menu” screen. The a year. Contact your Lexus dealer for infor- “DVD information” screen appears and dis- mation about the availability and pricing of an plays the map database version.
- Page 65 ES300_Navi_U (L/O 0208) Map Database Information and Updates Route guidance availability 1NO077 2001 by NAVTECH Route guidance available areas Route guidance available for main roads only 2003 ES300 Navigation from Aug. ’02 Prod. (OM33592U)
- Page 66 ES300_Navi_U (L/O 0208) Map Database Information and Updates Route guidance availability 1NO078 2001 by NAVTECH Route guidance available areas Route guidance available for main roads only 2003 ES300 Navigation from Aug. ’02 Prod. (OM33592U)
- Page 67 ES300_Navi_U (L/O 0208) Map Database Information and Updates Route guidance availability 1NO088 2001 by NAVTECH Route guidance available areas Route guidance available for main roads only 2003 ES300 Navigation from Aug. ’02 Prod. (OM33592U)
- Page 68 ES300_Navi_U (L/O 0208) Map Database Information and Updates Route guidance availability 1NO089 2001 by NAVTECH Route guidance available areas Route guidance available for main roads only 2003 ES300 Navigation from Aug. ’02 Prod. (OM33592U)
- Page 69 ES300_Navi_U (L/O 0208) Map Database Information and Updates Route guidance availability 1NO090 2001 by NAVTECH Route guidance available areas Route guidance available for main roads only 2003 ES300 Navigation from Aug. ’02 Prod. (OM33592U)
- Page 70 ES300_Navi_U (L/O 0208) Map Database Information and Updates Route guidance availability 1NO091 2001 by NAVTECH Route guidance available areas Route guidance available for main roads only 2003 ES300 Navigation from Aug. ’02 Prod. (OM33592U)
- Page 71 ES300_Navi_U (L/O 0208) Map Database Information and Updates Route guidance availability 1NO083 2001 by NAVTECH Route guidance available areas Route guidance available for main roads only 2003 ES300 Navigation from Aug. ’02 Prod. (OM33592U)
- Page 72 ES300_Navi_U (L/O 0208) Map Database Information and Updates Route guidance availability 1NO084 2001 by NAVTECH Route guidance available areas Route guidance available for main roads only 2003 ES300 Navigation from Aug. ’02 Prod. (OM33592U)
- Page 73 ES300_Navi_U (L/O 0208) Map Database Information and Updates Route guidance availability 1NO085 2001 by NAVTECH Route guidance available areas Route guidance available for main roads only 2003 ES300 Navigation from Aug. ’02 Prod. (OM33592U)
- Page 74 ES300_Navi_U (L/O 0208) Map Database Information and Updates Route guidance availability 1NO086 2001 by NAVTECH Route guidance available areas Route guidance available for main roads only 2003 ES300 Navigation from Aug. ’02 Prod. (OM33592U)
- Page 75 ES300_Navi_U (L/O 0208) SECTION ADVANCED FUNCTIONS Descriptions of operations for more effective use Marked points ........... . Area to avoid .
- Page 76 ES300_Navi_U (L/O 0208) Marked Points You can register and keep your own (a) Registering marked points marked points of interest list (like restau- rants, sports facilities, etc.) and use the marked points to input a destination. L00059 L00104 A screen similar to that for destination input appears.
- Page 77 ES300_Navi_U (L/O 0208) Marked Points (b) Editing marked points Once a marked point is registered, you can edit the icon, name or telephone number. L00106 L00105 “MENU” 1. Touch the tab on the screen to display the “Menu” screen and touch “Marked points”...
- Page 78 ES300_Navi_U (L/O 0208) Marked Points When you touch the desired icon or CHANGING THE NAME CHANGING THE PHONE NUMBER “Back” , or complete the direction setting, the previous screen is displayed. “With With sound: When you set L00108 L00110 sound” for these icons, a buzzer sounds as your vehicle approaches them.
- Page 79 ES300_Navi_U (L/O 0208) Marked Points CHANGING THE POSITION You can register up to 100 marked points. If (c) Deleting marked points you attempt to register more than 100, a “MENU” 1. Touch the tab on the screen message appears for confirmation. to display the “Menu”...
- Page 80 ES300_Navi_U (L/O 0208) Marked Points A screen for confirmation will appear (d) One–touch marked point with the map of the marked point. If you registration “Yes” want to delete it, touch switch. “No” “Back” Touching switch will return to the previous screen. L00114 If you want to delete all of the marked L00115...
- Page 81 ES300_Navi_U (L/O 0208) Marked Points Area to Avoid If you want to register a new point, delete one Any areas you want to avoid due to traffic of the marked points. See “(c) Deleting jams, construction work or other reasons marked points”.
- Page 82 ES300_Navi_U (L/O 0208) Area to Avoid “OK” (a) Registering area to avoid 3. Touch the switch when the cur- sor is at the center of the area that you “Register” 1. Touch the switch under want to avoid. L00122 “Area to avoid”. L00119 L00121 After a few seconds, the “Marked points”...
- Page 83 ES300_Navi_U (L/O 0208) Area to Avoid (b) Editing area to avoid You can edit the name, location and size of the area to avoid. Touch the change switch “Edit” 1. Touch the switch under “Area of any item that you want to edit. to avoid”...
- Page 84 ES300_Navi_U (L/O 0208) Area to Avoid (c) Deleting area to avoid L00128 “Delete” 1. Touch the switch to display the “Delete area to avoid” screen. L00126 3. Either of the above messages appears. “Yes” To delete the area(s), touch the switch.
- Page 85 ES300_Navi_U (L/O 0208) Current Position Calibration The current vehicle position mark will be POSITION/DIRECTION CALIBRATION automatically corrected during driving on reception of GPS signals. If your ve- L00129 hicle cannot receive GPS signals, you L00130 can correct the current position mark manually.
- Page 86 ES300_Navi_U (L/O 0208) Current Position Calibration TIRE CHANGE CALIBRATION The tire change calibration function should be used when the tires are repla- ced. This will adjust for any possible change in tire circumference from the old L00131 tires to the new ones. If this procedure is not performed when tires are replaced, the current vehicle position mark may be- come incorrect.
- Page 87 ES300_Navi_U (L/O 0208) SECTION MORE ADVANCED FUNCTIONS Convenient features Setup ............Map color .
- Page 88 ES300_Navi_U (L/O 0208) Setup Map Color “OK” “MENU” You can set the values shown on the Set- 3. Touch the switch on the screen 1. Touch the tab on the screen. up screen. and the previous screen returns. “Setup” 2. Touch the switch.
- Page 89 ES300_Navi_U (L/O 0208) Map Color Auto Reroute Map color list When the auto reroute feature is turned on, the system will automatically search “Auto” for a new route to the destination if you Map color Switch NO. L00133 mode leave the guidance route. This feature does not operate while you are driving on Green Mar.–May...
- Page 90 ES300_Navi_U (L/O 0208) Estimated Travel Time When the “Estimated travel time” feature is turned on, the time required to reach the destination is displayed on the route guidance screen. L00134 L00135 L00059 “On” 2. Touch the switch of the “Esti- To set average speeds: mated travel time”.
- Page 91 ES300_Navi_U (L/O 0208) Estimated Travel Time Adjust Time Zone “MENU” “Adjust” 1. Touch the tab on the screen. 3. Touch the switch. The “Ad- INFORMATION just time zone” screen appears on the display. D The displayed time to the destination is the approximate driving time cal- culated based on the speeds you se- lected and your actual position...
- Page 92 ES300_Navi_U (L/O 0208) Distance Notify Seasonal Restrict “MENU” “MENU” “On” 1. Touch the tab on the screen. 1. Touch the tab on the screen. 3. Touch the switch of the “Notify “OK” seasonal restrict”. Touch the switch. The screen returns to the current position map.
- Page 93 ES300_Navi_U (L/O 0208) Voice Guidance in All Modes Current Street Name “MENU” “MENU” 1. Touch the tab on the screen. 1. Touch the tab on the screen. L00059 L00059 “Setup” “Setup” 2. Touch the switch. 2. Touch the switch. L00147 L00164 “On”...
-
Page 94: Maintenance Information
ES300_Navi_U (L/O 0208) Current Street Name Maintenance Information “On” 3. Touch the switch on the right of “Current street name”. The current street name appears on the map screen. NZ019 L00136 L00148 “INFO” This system has a function which informs 1. - Page 95 “Maintenance” screen. The icon color will Oil change change to green after the date or driving dis- tance are input. The icon color will change to orange when your Lexus needs to be ser- L00138 viced. The following switches appear on the Replace oil filter Maintenance screen.
- Page 96 ES300_Navi_U (L/O 0208) Maintenance Information Dealer Setting (a) Registering dealer Replace brake fluid Replace ATF L00137 L00139 Scheduled maintenance You can register your dealer’s name and “Set dealer” address. Touch the Replace air filter 1. Enter your dealer’s location address in switch on the Maintenance screen.
- Page 97 ES300_Navi_U (L/O 0208) Dealer Setting Dealer Setting (b) Editing dealer EDITING THE NAME OF THE DEALER OR CONTACT 00E002 00E003 L00142 2. After you enter your dealer, the screen changes and displays the map location of “Set dealer” 1. Touch the switch and “Enter”...
- Page 98 ES300_Navi_U (L/O 0208) Dealer Setting EDITING THE LOCATION EDITING THE PHONE NUMBER (c) Deleting dealer 00E004 L00144 00E003 Touch the arrows to scroll to your desired Touch numeral keys directly. “Set dealer” 1. Touch the switch and point on the map screen. “Delete dealer”...
- Page 99 ES300_Navi_U (L/O 0208) Calendar with Memo (a) Inputting a memo L00185 L00153 L00153 “INFO” This system has a function which informs Push the button to display the you the memo you entered. When the “Information Menu” screen. Touch the 1. Touch directly on the day you want to system begins operating after reaching “Calendar”...
- Page 100 ES300_Navi_U (L/O 0208) Calendar with Memo “OK” After you input the memo, touch the switch at the bottom right of the screen. The previous screen will be displayed. You can input a memo until December 31. 2020. L00160 L00186 3. Touch keys directly to input a memo. You can select your desired date and/or You can input up to 24 letters.
- Page 101 ES300_Navi_U (L/O 0208) Calendar with Memo Calendar with Memo (b) Adding a memo (c) Deleting a memo (d) Editing a memo L00186 L00186 L00186 L00186 When you want to add a memo, touch di- Touch the date for which you already in- If you want to edit the memo, touch the rectly on the date you want to add the put the memo.
- Page 102 ES300_Navi_U (L/O 0208) Calendar with Memo (e) Memo list L00158 L00156 L00153 “Period” If you want to delete and/or edit the Touch the switch to display memo, touch the switch of the the “Memo list” as long as you desire. If you want to look at the memo you input, memo.
- Page 103 ES300_Navi_U (L/O 0208) Calendar with Memo If you want to remove all of the date “Remove colors you input, touch the color of date” switch. A message appears on the display. To remove the “Yes” colors, touch the switch. To allow “No”...
- Page 104 ES300_Navi_U (L/O 0208) 2003 ES300 Navigation from Aug. ’02 Prod. (OM33592U)
- Page 105 ES300_Navi_U (L/O 0208) SECTION OTHER FUNCTIONS Screen adjustment ..........Screen transition .
- Page 106 ES300_Navi_U (L/O 0208) Screen Adjustment You can adjust the brightness or contrast of the screen depending on the bright- ness of your surroundings. You also can turn the screen off. NZ074 NZ075 “DISPLAY” 1. Push the button. The following adjustment screen appears. BRIGHTNESS: Adjusts the brightness of Depending on the position of the head- the screen.
- Page 107 ES300_Navi_U (L/O 0208) Screen Transition NZN045 NZN044 “ON” “OFF” You can select a function that enables au- 2. Select and then “OK” tomatic return to the previous screen touch from the audio screen. ON: The previous screen automatically re- “INFO” 1.
- Page 108 ES300_Navi_U (L/O 0208) 2003 ES300 Navigation from Aug. ’02 Prod. (OM33592U)
- Page 109 ES300_Navi_U (L/O 0208) SECTION AUDIO SYSTEM Audio system ........... . 2003 ES300 Navigation from Aug.
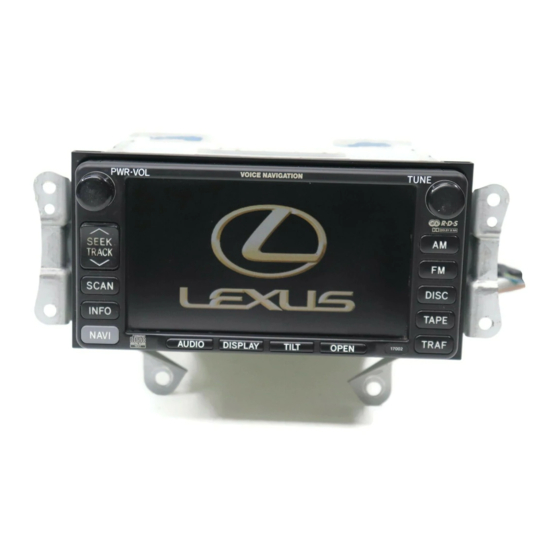
- Page 110 ES300_Navi_U (L/O 0208) Audio System Quick reference for your audio system Function switch display screen Touch the switches displayed on the “PWR·VOL” knob screen to control the radio, cassette Push this knob to turn the audio tape player and compact disc player. system on and off, and turn it to For details, see page 103.
- Page 111 ES300_Navi_U (L/O 0208) Audio System Your audio system The slots for the cassette tape player and compact disc player are behind the dis- play. To lower the display, push the “OPEN” button. After you inserting the cassette tape or compact disc, push the button again to close the display.
- Page 112 Using your audio system: (a) Turning the system on and off some basics This section describes some of the basic features of the Lexus audio system. Some information may not pertain to your system. NE009 Your audio system works when the ignition NE006 switch is in the “ACC”...
- Page 113 ES300_Navi_U (L/O 0208) Audio System (b) Tone and balance How good an audio program sounds to you is largely determined by the mix of the treble, midrange, and bass levels. In fact, different NZ022 NZ025 kinds of music and vocal programs usually sound better with different mixes of treble, midrange, and bass.
- Page 114 ES300_Navi_U (L/O 0208) Audio System (d) Your radio antenna (f) Your compact disc player Your vehicle has an antenna printed on the When you insert a compact disc, insert it with inside of the rear window. the label side up. The compact disc player will play from track 1 through the end of the disc.
- Page 115 ES300_Navi_U (L/O 0208) Audio System Radio operation (b) Presetting a station NE008 NZ023 NE007 1. Tune in the desired station. Turn the knob clockwise to step up the 2. Touch one of the station selector station band or counterclockwise to step (a) Listening to the radio switches (1—6) and hold it until a beep is down.
- Page 116 ES300_Navi_U (L/O 0208) Audio System (c) Selecting a station To scan the preset stations: Touch the (d) Radio Data System “SCAN” switch on the screen or push the Your vehicle has an electronic tuning radio “SCAN” button for longer than 2 seconds. “P. (ETR).
- Page 117 ES300_Navi_U (L/O 0208) Audio System “RDS SRCH” (RDS search) switch If no RDS stations are found, “No RDS Sta- tions Found” will be displayed and the beep This switch allows you to search all available sounds. Then the radio will return to the pre- RDS stations out of the entire FM band and vious FM mode and frequency.
- Page 118 ES300_Navi_U (L/O 0208) Audio System To recall a radio text messages stored in (e) Traffic announcement Pushing this button turns on RDS if it was off memory, touch the “RECALL” switch. and the traffic announcement feature will Touching the “LATEST MESSAGE” will dis- come on (“TRAF”...
- Page 119 ES300_Navi_U (L/O 0208) Audio System When “TA” is received next time, the system Cassette tape player operation To insert a cassette tape, push the compares the volume before “TA” is received “OPEN” button to lower the display. Put (a) Playing a cassette tape and the memorized TA volume and automat- the cassette tape in the slot with the ex- ically selects the louder volume.
- Page 120 ES300_Navi_U (L/O 0208) Audio System NOTICE Do not obstruct the display while it is moving. It could damage your audio system. NE021 NE012 Push the “TAPE” button if a cassette tape is already in the slot. ∗ Dolbyr Noise Reduction feature: If you are listening to a tape that was recorded with ∗...
- Page 121 ES300_Navi_U (L/O 0208) Audio System ∗ Auto–reverse feature: After the cassette Dolby noise reduction manufactured under li- player reaches the end of a tape, it automati- cense from Dolby Laboratories Licensing Corpo- cally reverses and begins to play the other ration.
- Page 122 ES300_Navi_U (L/O 0208) Audio System Push the lower side of this button to skip Compact disc player operation To insert a compact disc, push the backward. Push the button until “REW” and “OPEN” button to lower the display. Put (a) Playing a compact disc the number of programs you want to skip ap- the compact disc in the slot with the label pears on the screen.
- Page 123 ES300_Navi_U (L/O 0208) Audio System NOTICE Do not obstruct the display while it is moving. It could damage your audio system. NE016 NE015 Push the “DISC” button if a compact disc is already loaded in the slot. “CD” appears on the screen. To stop and eject the compact disc, push the “OPEN”...
- Page 124 ES300_Navi_U (L/O 0208) Audio System With CD changer— (b) Selecting a desired disc (with CD (d) Selecting a desired track changer) Push the “DISC” button twice if the maga- zine is already loaded in the player. Touch the desired disc number on the screen.
- Page 125 ES300_Navi_U (L/O 0208) Audio System (e) Searching for a desired track (f) Other compact disc player functions “RAND” switch: Use it for automatic and random selection. When the switch is touched, the system se- lects a track in the disc. To cancel it, touch the switch once again.
- Page 126 ES300_Navi_U (L/O 0208) Audio System (g) Inserting compact discs (with CD changer) NE043 NE045 NE041 3. Push this button to eject the maga- 5. Put a disc on the tray with its label face zine. up and push the tray back into the maga- zine.
- Page 127 Remove the load cycle. Then the system will begin nor- magazine from the player to cool it. mal play. If the player still does not operate, have it checked by your Lexus dealer. 2003 ES300 Navigation from Aug. ’02 Prod. (OM33592U)
- Page 128 ES300_Navi_U (L/O 0208) Audio System Car audio system operating For example, nearby buildings and terrain Station swapping—If the FM signal you are can interfere with FM reception. Power lines listening to is interrupted or weakened, and hints or telephone wires can interfere with AM sig- there is another strong station nearby on the nals.
- Page 129 ES300_Navi_U (L/O 0208) Audio System D Avoid using cassettes with a total playing CARING FOR YOUR CASSETTE PLAYER CAUTION AND TAPES time longer than 100 minutes (50 minutes per side). The tape used in these cas- For the best performance for your cassette Compact disc players use an invisible settes is thin and could get stuck or player and tapes:...
- Page 130 ES300_Navi_U (L/O 0208) Audio System NZ001 5NZ001 5NZ003 D Use only compact discs marked as shown " Special shaped discs " Labeled discs above. The following products may not be playable on your compact disc player. NOTICE Copy–protected CD To prevent damage to the player or CD–R (CD–Recordable) changer, do not use special shaped, CD–RW (CD–Re–writable)
- Page 131 ES300_Navi_U (L/O 0208) Audio System D Remove discs from the compact disc player when you are not listening to them. Store them in their plastic cases away from moisture, heat, and direct sunlight. NZ003 NZ004 " Correct " Wrong D Handle compact discs carefully, especial- ly when you are inserting them.
Need help?
Do you have a question about the ES 300 and is the answer not in the manual?
Questions and answers