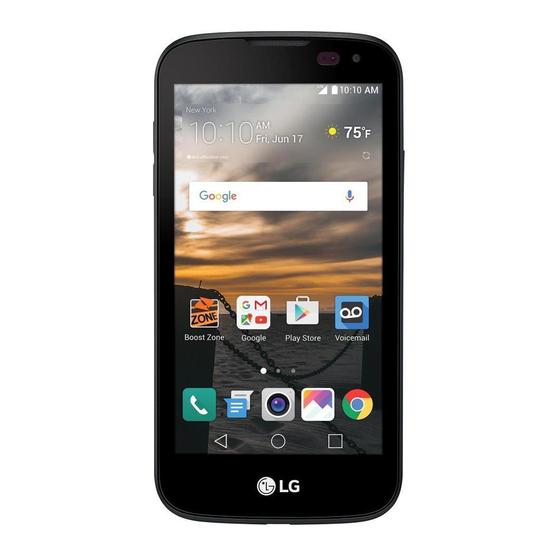
LG K3 User Manual
Hide thumbs Also See for K3:
Table of Contents

Advertisement

LG LS450

User Guide

[UG template version 16a]
[bmu_lg_ls450_ug_en_030816_d1]

Advertisement

Table of Contents
loading

Summary of Contents for LG K3

  • Page 1: User Guide

    LG LS450 User Guide [UG template version 16a] [bmu_lg_ls450_ug_en_030816_d1]...
  • Page 2: Table Of Contents

    Table of Contents Getting Started .............................. 1 Introduction ............................2 About the User Guide ........................2 Set Up Your Phone ..........................3 Parts and Functions ........................3 Battery Use ........................... 5 Insert the Battery ........................5 Remove the Battery ......................6 Charge the Battery ........................
  • Page 3 Phone Keyboard ......................... 20 Tips for Editing Text ......................20 Google Account .......................... 21 Create a Google Account ....................21 Sign into Your Google Account ................... 22 Google Play Store ........................23 Find and Install an App ....................... 23 Request a Refund for a Paid App ..................24 Update an App ........................
  • Page 4 In-Call Screen Layout and Operations................39 Place a Call from Contacts ....................40 Call from Call Logs ......................41 Voicemail ............................. 41 Voicemail Setup ........................41 Visual Voicemail Setup ....................... 41 Review Visual Voicemail ..................... 42 Listen to Multiple Voicemail Messages ................43 Visual Voicemail Options ....................
  • Page 5 Create and Send a Gmail Message ..................60 Check Received Gmail Messages ..................61 Use Gmail Labels ........................ 62 Archive Gmail Threads ....................... 62 Mute Gmail Threads ......................62 Delete Gmail Threads ......................63 Search Gmail Messages ..................... 63 Report Spam or Phishing Gmail ..................63 Add Another Google (Gmail) Account ................
  • Page 6 Install the Twitter App on Your Phone ................75 Tweet on Twitter ......................... 75 LinkedIn ............................76 Hangouts ............................. 76 Connectivity ............................77 Connections Optimizer ........................ 77 Transfer Files Between Your Phone and a Computer ..............78 Wi-Fi ............................79 Turn Wi-Fi On and Connect to a Wireless Network ............
  • Page 7 Send Pictures or Videos Using Bluetooth ................92 Share Pictures or Videos via Additional Apps or Social Media .......... 93 Share Videos on YouTube ....................93 Camera Settings ......................... 94 Switch Cameras ........................94 Set Camera Functions ......................94 Productivity ............................95 Calendar ............................
  • Page 8 Networks Settings ..........................109 Wi-Fi Settings ..........................109 Bluetooth Settings ........................109 Mobile Data Settings ......................... 109 Call Settings ..........................109 Share & Connect ........................109 Tethering ........................... 110 More Settings ..........................110 Virtual Private Networks (VPN) ....................111 Prepare Your Phone for VPN Connection ................ 111 Set Up Secure Credential Storage ...................
  • Page 9 Location ............................. 124 Accounts & Sync ........................124 Accessibility..........................124 Shortcut Key..........................126 Security ............................. 126 Date & Time ..........................128 Storage ............................128 Battery & Power saving ......................128 Activate This Device ......................... 128 System Updates ........................129 Apps ............................129 Default Message App ........................
  • Page 10 Basic Definitions ....................... 148 The Service Agreement ....................148 Additional Terms ....................... 148 Our Policies ........................148 When You Accept The Agreement ................... 149 Our Right To Change The Agreement & Your Related Rights ......... 149 Our Right To Suspend Or Terminate Services ..............149 Your Right To Change Services &...
  • Page 11 You Agree That We Are Not Responsible For Certain Problems ........157 You Agree That Our Liability Is Limited - No Consequential Damages ......158 DISPUTE RESOLUTION AND ARBITRATION ..............158 No Trial By Jury and No Class Action ................160 Indemnification ........................
  • Page 12: Getting Started

    Getting Started The following set of topics will introduce you to your phone, help you get set up with service, provide an overview of the phone screen, and get you started with basic phone operations.
  • Page 13: Introduction

    The following topics describe the basics of using this guide and your new phone. About the User Guide Thank you for purchasing your new LG LS450. The following topics explain how best to use this guide to get the most out of your phone.
  • Page 14: Set Up Your Phone

    Proximity Sensor Note: Please be careful not to cover the sensors with a protective film, pouch, or a protective case not authorized by LG. Displays all the information needed to operate your phone, such Touchscreen as the applications, call status, the Contacts list, the date and time, and the signal and battery strength.
  • Page 15 Locks the screen. Press and hold to open the phone options menu Power/Lock Button for the following options: Power off, Power off and restart, and Turn on/off Airplane mode. Lets you hear the different ringers and sounds. The speaker also Speaker lets you hear the caller’s voice in speakerphone mode.
  • Page 16: Battery Use

    Battery Use The following topics explain how to insert and remove your phone’s battery. Battery Cautions Storage: Avoid storing or leaving battery with no charge remaining. Saved information and settings may become lost or changed, or battery may become unusable. Charge once every six months before storing or leaving unused for a long period.
  • Page 17: Remove The Battery

    Remove the Battery Follow these instructions to remove your phone’s battery. Always power the phone off before removing the battery. 1. Remove the back cover.  Lift gently in the direction shown. 2. Remove the battery.  Lift upward gently as shown. 3.
  • Page 18: Nano Sim Card

    Charge Using a PC Connection Before using a PC connection to charge your phone, ensure that the computer is turned on. Depending on the type of connection, your phone’s battery may not charge. 1. Insert the small end of the micro USB cord into the charger/accessory port at the bottom of your phone.
  • Page 19: Microsd Card

    Insert Nano SIM Card Follow these instructions to insert a Nano SIM card. Remember to power off your phone before inserting a Nano SIM card. 1. Remove the back cover.  Lift gently in the direction shown. 2. Insert the Nano SIM card. ...
  • Page 20: Unmount The Microsd Card

    2. Insert the microSD card.  Insert the microSD card all the way gently without bending and with the terminals facing down.  Insert only microSD cards. 3. Insert the battery. 4. Attach the back cover.  Make sure all the tabs are secure and there are no gaps around the cover. Unmount the microSD Card Always unmount the microSD card before removing it from your phone.
  • Page 21: Turn Your Phone On And Off

    1. Tap > > Settings > General tab. 2. Tap Storage. 3. Tap Erase SD card. 4. Tap Erase SD card again. 5. Tap Erase SD card to confirm.  All data on the microSD card is erased, and the card is formatted for use on your phone. Turn Your Phone On and Off The instructions below explain how to turn your phone on and off.
  • Page 22: Touch And Hold

    Touch and Hold To open the available options for an item (for example, a contact or link in a Web page), touch and hold the item. Swipe or Slide To swipe or slide means to quickly drag your finger vertically or horizontally across the screen. Drag To drag, press and hold your finger with some pressure before you start to move your finger.
  • Page 23: Activation And Service

    Activation and Service Before using your phone, you must set up your service with Boost Mobile. You will need your phone‘s serial number (MEID), printed on a sticker inside the battery compartment. For more information about your Boost Mobile account, see Boost Account Information and Help.
  • Page 24  Select language - Select a desired language.  Set internet connection - If prompted, follow the prompts to sign in to an available Wi-Fi network. For secured Wi-Fi networks, you will need to enter a password. See Wi-Fi for more details.
  • Page 25: Basic Operations

    Basic Operations The following topics outline basic features and operations of your phone. Basics The following topics offer an overview of your phone’s basic operations. Home Screen and Applications (Apps) List Most of your phone’s operations originate from the home screen or the apps list. 1.
  • Page 26: Portrait And Landscape Screen Orientation

    – or – Drag the status bar down and tap Settings For more information, see Settings. Portrait and Landscape Screen Orientation The default orientation for your phone’s screen is portrait (vertical), but many apps will change to landscape orientation (widescreen) when you rotate the phone sideways. Not all screens will adjust for landscape orientation.
  • Page 27: Apps List

     The apps list opens. 2. Tap an app icon to launch the corresponding application.  The application opens. Apps List The apps list expands to include any apps you download and install on your phone. The following table outlines the primary apps that have been preinstalled on your phone. Function/Service Access the Google applications.
  • Page 28 Allows you to take screen shots and write a memo using the images. QuickMemo+ Accesses the phone’s Settings menu. Settings Launches the LG SmartWorld app. LG SmartWorld Allows you to create a task and to synchronize with MS Exchange Tasks account.
  • Page 29: Phone Number

    Boost 411 gives you access to a variety of services and information, including residential, business, and government listings; movie listings or show times; driving directions, restaurant reservations, and major Boost 411 local event information. You can get up to three pieces of information per call, and the operator can automatically connect your call at no additional charge.
  • Page 30: Enter Text

    Google voice typing allows to use Google voice recognition to convert speech to text. ● LG Keyboard allows you to use a LG keyboard to enter text. Note: Keyboard layouts and options may change depending on where you’re using them. For example, if you’re entering text to do a Web search, a search icon may be available instead of an enter key.
  • Page 31: Qwerty Keyboard

    QWERTY Keyboard You can enter text using the on-screen keyboard. The on-screen keyboard appears on the screen when you tap an available text entry field. Phone Keyboard When ATX is off, to enter text, tap the key labeled with the desired letter until it appears on the screen. For example, tap once for "a", twice for "b", or three times for "c".
  • Page 32: Google Account

    > > Settings > General tab > Language & keyboard > LG Keyboard > Keyboard height and layout > QWERTY keyboard layout. 2. Drag to add or delete keys or change the order. To change to another character on the visible key, tap the key and choose the desired character that you want displayed.
  • Page 33: Sign Into Your Google Account

    2. On the main page, tap or click Sign in > Create an account. 3. Follow the on-screen prompts to create your free account. 4. Log into your provided email address, locate the email from Google, and respond to the new email to both confirm and activate your new account.
  • Page 34: Google Play Store

    3. Enter your Password and tap NEXT. 4. Select if you want to back up your phone's apps, app data, settings, and Wi-Fi passwords and tap NEXT. 5. Checkmark the entries you want to set up payment info (if necessary) and tap NEXT. Your phone then communicates with the Google servers to confirm your information.
  • Page 35: Request A Refund For A Paid App

    6. Check the progress of the current download by opening the Notifications Panel. 7. You will be notified when the item is downloaded and installed on your phone. 8. On the Play Store screen, tap > My Apps, tap the installed application in the list, and then tap OPEN.
  • Page 36: Uninstall An App

    2. Tap > Settings. 3. Tap Auto-update apps and select an option.  The app is set to update automatically whenever an update becomes available (depending on your settings). Note: Automatic updates are unavailable for some apps. Uninstall an App You can uninstall any app that you have downloaded and installed from Google Play.
  • Page 37: Unlock Your Screen Using The Knock Code Feature

     The lock screen appears. 2. Swipe your finger across the screen to unlock it.  The screen is unlocked.  If you have set up a screen lock, you will be prompted to draw the pattern or enter the password or PIN.
  • Page 38: Update Your Phone Software

    Update Your Phone Software You can update your phone's software using the System Update option. Before Updating Your Phone Updating your phone may result in a loss of saved data depending on the condition of your phone (malfunctioning, damaged, water seepage, etc.). You must back up all critical information before updating your phone firmware.
  • Page 39 > Settings > General tab > System updates. 2. Tap Update LG software > CHECK FOR UPDATE.  Your phone automatically downloads and installs any available updates. You may be required to power your phone off and back on to complete the software upgrade.
  • Page 40: Update Your Profile

    Update Your Profile This option allows you to automatically update your online user profile information. If you choose to change your user name and select a new one online, you must then update the user name on your phone. 1. Tap >...
  • Page 41: Your Phone's Home Screen

    Your Phone's Home Screen The following topics describe how to use and customize your phone’s home screen, understand the status bar, and use the notifications window. Home Screen Basics The home screen is the starting point for your phone’s applications, functions, and menus. You can customize your home screen by adding application icons, shortcuts, folders, widgets, and more.
  • Page 42: Extended Home Screens

    Extended Home Screens In addition to the main home screen, your phone features extended home screens to provide more space for adding icons, widgets, and more. Swipe across the screen to move from the main screen to an extended screen. The small circles above the primary shortcuts let you know your current screen position. ■...
  • Page 43 4G LTE data service 3G (data service) Airplane mode Sync active Alarm set Battery (charging) Battery (full charge) Main Notification Icons Icon Notification Missed call New voicemail New email New Gmail New text or MMS message New Hangout message New Boost Zone message Event USB connection Alarm...
  • Page 44: Notification Panel

    Warning Update available Update downloading Update successful Keyboard active More notifications available (pull down to view) Note: Additional notification icons may appear. All notifications may be accessed through the notification panel. Notification Panel Your phone’s notifications appear at the left side of the status bar, and you can access the full notification panel by pulling down the status bar.
  • Page 45: Change The Wallpaper

    Operations for Rearranging the Home Screen ● Moving Widgets and Icons: From home, touch and hold an item and then drag it to the desired location. ● Deleting Widgets and Icons: From home, touch and hold an item and then drag it to Remove ●...
  • Page 46: Add Widgets To The Home Screen

     The shortcut is added to the home screen. Add Widgets to the Home Screen You can add widgets to your phone’s home screen. Widgets are self-contained apps that display on a home screen. Unlike a shortcut, the Widget works like as an onscreen application. There are all kinds of ®...
  • Page 47: Making Connections

    Making Connections The following set of topics will cover your phone’s ability to help you make connections, from phone calls and maintaining contacts, to text messages, email, Internet, and international services.
  • Page 48: Phone Calls And Voicemail

    Phone Calls and Voicemail The following topics outline the use of your device’s phone app to place and receive calls, use voicemail, set up and manage contacts, and more. Place and Answer Calls The following topics describe how to directly dial calls, how to answer incoming calls, and how to use the in-call screen options.
  • Page 49: Call Emergency Numbers

     Use the on-screen buttons to add another call, put a call on hold, to use the speakerphone, and for other options, as described in In-Call Screen Layout and Operations. 3. Tap to end the call. Tip: To redial your last outgoing call, follow step 1 to access the Dialer, tap the Call logs tab, locate the call entry and tap You can also make calls from your Contacts list and from the Call logs.
  • Page 50: In-Call Screen Layout And Operations

    is not stored in People, only the default caller ID icon and phone number appear on the Incoming call screen. Note: If your phone is turned off, all calls automatically go to voicemail. Answer an Incoming Call 1. When a call arrives, drag in any direction to answer it.
  • Page 51: Place A Call From Contacts

    ● End to end the current call. ● Dialpad to display the dialpad to enter additional numbers, for example, an extension or access code.  For example: When you call your bank‘s 800 number, use your dialpad to enter your account number and PIN.
  • Page 52: Call From Call Logs

    2. Tap the Contacts tab to display the Contacts list. 3. Tap a contact. 4. Tap Call next to the number you want to call. 5. To end the call, tap Call from Call Logs The Call logs list lets you quickly place calls to recent incoming, outgoing, or missed numbers. 1.
  • Page 53: Review Visual Voicemail

    About Visual Voicemail Visual Voicemail gives you a quick and easy way to access your voicemail. Now you can find exactly the message you are looking for without having to listen to every voicemail message first. This feature periodically goes out to your voicemail, and gathers the caller information from all of the current voicemails.
  • Page 54: Listen To Multiple Voicemail Messages

    Tip: There are several icons at the bottom of the review screen for maintenance, storage, messaging, and other options. For an explanation of all your options, tap Menu > Help > Visual Voicemail Menu. Listen to Multiple Voicemail Messages When you are done listening to a voicemail message you can easily access other voicemail messages without returning to the main voicemail screen.
  • Page 55: Change Your Main Greeting Via The Voicemail Menu

    • SMS delivery to allow sending SMS message to recipients who do not have Avatar capability.  Display • Themes to choose the type of theme used for the application. • Display name to enter a name to identify yourself to people when replying or forwarding messages.
  • Page 56: Optional Calling Services

    2. Tap > Settings > Preferences > Personalize voicemail. 3. Tap OK to connect to the voicemail system. Follow the prompts to change your current greeting. Edit the Display Name via the Voicemail Menu From your Visual Voicemail menu, you can quickly change the name or number attached to your voice messages.
  • Page 57: Call Waiting

    Call Waiting When you’re on a call, Call Waiting alerts you to incoming calls by sounding two beeps. Your phone’s screen informs you that another call is coming in and displays the caller’s phone number (if it is available). To respond to an incoming call while you’re on a call: ■...
  • Page 58: Call Settings

    4. Tap  You will hear a tone to confirm the activation of Call Forwarding. All calls to your wireless number will be forwarded to the designated phone number. To deactivate Call Forwarding: 1. Tap > Phone > Dial tab. 2.
  • Page 59: Tty Mode

    A TTY (also known as a TDD or Text Telephone) is a telecommunications phone that allows people who are deaf, hard of hearing, or who have speech or language disabilities, to communicate by telephone. Your phone is compatible with select TTY phones. TTY mode Please check with the manufacturer of your TTY phone to ensure that it is compatible with digital cell phones.
  • Page 60 Your phone is compatible with select TTY devices. Please check with the manufacturer of your TTY device to ensure that it supports digital wireless transmission. Your phone and TTY device will connect using a special cable that plugs into your phone’s headset jack. If this cable was not provided with your TTY device, contact your TTY device manufacturer to purchase the connector cable.
  • Page 61: Contacts

    Contacts The Contacts application lets you store and manage contacts from a variety of sources, including contacts you enter and save directly in your phone as well as contacts synchronized with your Google Account, your PC, compatible email programs (including Exchange Server), and your friends from compatible social networking applications.
  • Page 62: View Contacts

    3. To add the number to an existing contact, tap Update contact. To add a new contact, tap Create contact.  For an existing contact, tap the contact name and select a number type for the new number.  For a new contact, enter the name and any additional information. 4.
  • Page 63: Delete A Contact

    1. Tap > > Contacts 2. Tap the contact to view its details. 3. Tap Edit 4. Tap any field you want to change or add. 5. Add or edit the information, and then tap SAVE. Note: To select a type (label) for a phone number, email address, or postal address (such as HOME, WORK, etc.), tap the type to the right of the field.
  • Page 64: Back Up Contacts

    4. Select where to import from and save to, then tap OK. 5. Tap the files you wish to import and tap IMPORT and YES to confirm. Back Up Contacts You can back up and export all of the contacts on your phone, as vCard files. You can then copy this file to a computer or another phone that is compatible with this format, such as an address book application.
  • Page 65: Messaging

    Messaging With wireless service and your phone’s messaging capabilities, you have the opportunity to share information through many different channels and accounts, including Gmail (Google), personal and corporate email, text and multimedia messaging. Text and Multimedia Messaging With text messaging (SMS), you can send and receive instant text messages between your wireless phone and another messaging-ready phones.
  • Page 66 Note: See your service plan for applicable charges for multimedia messaging. Compose Multimedia Messages 1. Tap > > Messaging 2. Tap 3. Tap the To field and enter the recipient’s name, phone number, or email information. 4. Tap the text field and enter your message. 5.
  • Page 67: Save And Resume A Draft Message

    Create a Slideshow In a multimedia message, you can add slides, each containing a picture, video, or audio. 1. In the multimedia message you’re composing, tap > Slide to add space for a new slide. 2. Tap the space for the slide. 3.
  • Page 68: Manage Message Conversations

    A new message icon also appears in the notifications area of the status bar to notify you of a new text or multimedia message. The Messages application icon (if shown on the home screen) also displays the number of new messages ■...
  • Page 69: Delete A Single Message

    Note: To view the details of a particular message, in the message thread, touch and hold the message to open the options menu, and then tap Details. Note: If a message contains a link to a web page, tap the message and then tap the link to open it in the web browser.
  • Page 70: Text And Mms Options

    View Contact Information from a Message When you have received a message from someone in your stored contacts, you can tap the contact’s photo or icon in the message thread to open a menu of options. Depending on the stored contact information, you can view the contact details, phone or send an email message to the contact, and more.
  • Page 71: Gmail

    any attachments will automatically download to your phone when the message is received. If you disable this option, only the multimedia message header will be retrieved and displayed. • Roaming auto-retrieve: Disable this option if you only desire the multimedia message headers to download while roaming.
  • Page 72: Check Received Gmail Messages

     The Gmail inbox opens. 2. In the inbox, tap  The Gmail composition window opens. 3. Enter the message recipient(s), subject, and message, and then tap Send  The Gmail message is sent. Gmail Composition Options ● Adding Cc/Bcc: In the mail composition window, tap and then add recipients.
  • Page 73: Use Gmail Labels

     The message thread opens, with the newest message displayed. Options when Reviewing Gmail Messages ● Replying to Gmail Messages: With the Gmail message open, tap Reply , compose your reply message, and tap Send  To reply to all, tap >...
  • Page 74: Delete Gmail Threads

     The inbox opens. 2. Touch and hold a conversation thread to add a checkmark to it, and then tap > Mute.  The thread is now hidden. Delete Gmail Threads If you no longer wish to keep a Gmail conversation thread, you can simply delete it from the inbox. 1.
  • Page 75: Switching Between Gmail Accounts

    3. Enter your Gmail username and password, and then tap NEXT. 4. After your phone connects with the Google servers, select the items you would like to sync with your phone and then tap Sync now. 5. Tap Finish setup. ...
  • Page 76: Email

    Email Use the Email application to send and receive emails from your webmail or other accounts, using POP3 or IMAP, or access your Exchange account for your corporate email needs. Set Up an Email Account Your phone supports several types of email accounts and allows you to have multiple email accounts set up at one time.
  • Page 77: Add An Exchange Account

     Tapping NEXT prompts your phone to attempt a "regular" email setup and test the incoming and outgoing servers.  If you have custom settings you need to configure, tap MANUAL SETUP and enter your settings. These may include mail type, user name, password, server, security type, etc. 3.
  • Page 78: Compose And Send Email

    Compose and Send Email Compose and send email using any account you have set up on your phone. Increase your productivity by attaching files such as pictures, videos, or documents to email messages. 1. Tap > > Email 2. From the Inbox, tap 3.
  • Page 79: Delete An Email Account

    Options when Reviewing Email Messages ● Resetting Mail as Unread: Tap > Select. Tap the check box on the left side of a read message and then tap MARK AS UNREAD. ● Deleting Email: Tap > Select. Tap the check box on the left side of a message or messages and then tap DELETE.
  • Page 80: Microsoft Exchange Email Features

    3. If the option is available, place a checkmark next to each option if you want the phone to automatically synchronize. If you want to manually synchronize, tap > Sync now. Sort Email Messages 1. From the inbox, tap > Sort by. 2.
  • Page 81  Email sync period: Choose how many days of email you want to sync.  Message size limit: Allows you to set the size limit for messages.  Advanced settings: Allows you to configure advanced email settings. • Message format: Select the format you want to view email messages in. •...
  • Page 82: Internet And Social Networking

    Internet and Social Networking The following topics describe how to connect to and use the Internet on your phone, and how to access popular social networking sites such as Facebook, Twitter, Hangouts, LinkedIn, and more. Data Services General Information (4G LTE and 3G Networks) The following topics will help you learn the basics of using your data services, including managing your user name, launching a data connection, and navigating the Web with your phone.
  • Page 83: Data Connection Status And Indicators

    Find Your User Name You can find your user name through your phone's device menu. Update Your User Name If you choose to change your user name and select a new one online, or make any changes to your services, you must then update the profile on your phone. Data Connection Status and Indicators Your phone displays the current status of your data connection through indicators at the top of the screen.
  • Page 84: Add A Bookmark

    Tip: For more information, from your computer, visit: google.com/intl/en/chrome/browser/mobile/. Add a Bookmark Bookmark favorite sites using the browser menu options. 1. Tap > > Chrome  The browser opens. 2. Navigate to the Web page you want to bookmark, and tap >...
  • Page 85: Browser Settings

    Browser Settings Customize your experience with the Internet through the browser settings menu. 1. Tap > > Chrome  The browser opens. 2. Tap > Settings and customize your browser settings.  Your browser settings are saved. Facebook Post updates, read what your friends are up to, upload pictures and check-ins, and more with on-the-go Facebook access.
  • Page 86: Twitter

    1. Tap > > Facebook  The Facebook app launches.  If this is the first time you’ve used Facebook on your phone, enter your Facebook ID and password and tap LOG IN to sign in to an existing account, or tap Sign Up for Facebook to set up a new Facebook account.
  • Page 87: Linkedin

    LinkedIn [content TBD] Hangouts Hangouts is Google's instant messaging service. Use to communicate with other Hangout users, and also use video calling. Log in to a Google account beforehand (see Google Account). The Google Hangouts application lets you have real-time text conversations with your friends. Open the Hangouts Application ■...
  • Page 88: Connectivity

    Connectivity The following topics address your phone’s connectivity options, including USB file transfer and tethering, Wi-Fi, Bluetooth, IR connectivity, and more. Connections Optimizer The Connections Optimizer is a tool that automatically selects the best mobile network for your phone, including "remembered" Wi-Fi networks. About Connections Optimizer The Connections Optimizer helps you manage and enhance your data experience by finding and connecting to "remembered"...
  • Page 89: Transfer Files Between Your Phone And A Computer

    Transfer Files Between Your Phone and a Computer You can use the supplied USB connector to connect your phone directly to your computer and transfer music, pictures, and other content files. For example, if you have a music album stored on your computer that you want to listen to on your phone with any of the music apps, just attach your phone to the computer and copy the files to the music folder.
  • Page 90: Wi-Fi

    5. If available, select a drive (SD card for microSD card or Internal storage for internal phone storage). 6. Select a folder (for example, Music for songs and albums) and copy files to it from your computer. 7. When you are done, disconnect your phone from your computer. ...
  • Page 91: Wi-Fi Settings

    Wi-Fi Settings Use the Wi-Fi settings menu to manually set your Wi-Fi connection options. 1. Tap > > Settings > Networks tab. 2. Tap Wi-Fi. 3. Tap the Wi-Fi switch to turn Wi-Fi on  You will see the names and security settings of in-range Wi-Fi networks. ...
  • Page 92: Hotspot

     If a connection is not accepted after a certain period, the connection request is cancelled.  To stop a connection, tap the a device > OK. Hotspot Wi-Fi Hotspot allows you to turn your phone into a Wi-Fi hotspot. When this feature is turned on, you can share your phone's mobile data services via Wi-Fi with other Wi-Fi enabled devices.
  • Page 93: Bluetooth

    2. Select a tethering option: Wi-Fi hotspot or Bluetooth tethering.  Wi-Fi hotspot: Allows other devices to connect to your phone via Wi-Fi.  Bluetooth: Pair your phone with the other device via Bluetooth. Tip: For additional support with tethering, tap Help from the tethering menu. Bluetooth ®...
  • Page 94: Pair Bluetooth Devices

    Tip: You can also turn Bluetooth on or off with the toggle menu in the Notifications window. Drag the Status bar down to display the Notifications window and then tap Bluetooth to turn Bluetooth on or off. Note: Turn off Bluetooth when not in use to conserve battery power, or in places where using a wireless phone is prohibited, such as aboard an aircraft and in hospitals.
  • Page 95: Send Information Using Bluetooth

    The pairing and connection status is displayed below the device’s name in the Bluetooth devices section. When the device is connected to your phone, the Bluetooth paired icon is displayed in the Status bar. Depending on the type of device you have connected, you can then start using the headset or car kit to listen to music or make and receive phone calls.
  • Page 96: Smartshare

    For a vCard contact file, if there are multiple vCard files on your storage card, you can choose to import one, several, or all of those contacts to your contacts list. SmartShare SmartShare allows you to receive multimedia content via LG phone and tablets. 1. While viewing the content you want to share, tap > SmartShare.
  • Page 97: Apps And Entertainment

    Apps and Entertainment The following set of topics will explore the features that make your phone so much more than a phone, from the camera and productivity apps to music, entertainment, and more.
  • Page 98: Camera And Video

     Cheese shutter: Allows you to take pictures with voice commands. When on, just say "Cheese", "Smile", "Whiskey", "Kimchi", or "LG" to take a picture.  Timer: Set your camera's timer. This is ideal if you want to be a part of the picture.
  • Page 99: Take Pictures And Record Videos

    2. Tap Settings > Help , and tap a topic to learn more. Take Pictures and Record Videos You can take high-resolution pictures using your phone’s camera. Note: If you have an SD card installed, pictures and videos can be stored to the SD card. If no card is installed, pictures and videos are saved to your phone’s memory.
  • Page 100: Gesture Shot

    5. Tap to pause recording video. You can resume recording again tapping 6. Tap to stop recording. Your video will be automatically saved to the Gallery. Gesture Shot The Gesture shot feature allows you to take a picture with a hand gesture using the front camera. Take a Photo There are two methods for using the Gesture shot feature.
  • Page 101: Edit Pictures

     The picture opens or the video begins playing.  Tap a picture or video to view it full screen.  When viewing pictures and videos, you can touch and hold an image to open a selection menu and choose what to do with the picture or video. Pictures and Videos: Review Screen After capturing a picture or video, from the camera screen, tap the thumbnail image at the bottom right corner of the screen to see the item in the review screen.
  • Page 102: Share Pictures And Videos

     The album list opens. 2. Tap an album (such as Camera).  The list of pictures and videos for the album opens. 3. Tap the picture you want to crop. 4. Tap > Crop.  A crop box appears on the picture. 5.
  • Page 103: Send A Picture Or Video By Multimedia Message

    Note: If you selected Email and you have multiple email accounts, the default email account will be used. For more information about using email and Gmail, see Compose and Send Email Create and Send a Gmail Message. Send a Picture or Video by Multimedia Message Multimedia Messaging (MMS) lets you send pictures and videos using your phone’s messaging app.
  • Page 104: Share Pictures Or Videos Via Additional Apps Or Social Media

    5. Tap Share and then on the Share via menu, tap Bluetooth.  Follow the onscreen prompts to complete and send the files. For more information, see Bluetooth. Share Pictures or Videos via Additional Apps or Social Media From Gallery, you can share your pictures and videos from a variety of apps and social media sites, such as Facebook, Google+, Hangouts, Instagram, Flickr, Picasa, and more.
  • Page 105: Camera Settings

     To select multiple videos, tap while viewing an album. Then tap all the videos you want to include. 5. Tap Share and then on the Share via menu, tap YouTube. 6. Enter the prompted information, such as description and tags, and select a privacy option. 7.
  • Page 106: Productivity

    Productivity The following topics detail many of your phone’s tools and features such as maps and navigation, calendar, clock, social networking apps, music, memos, and more. Calendar Use Calendar to create and manage events, meetings, and appointments. Your Calendar helps organize your time and reminds you of important events.
  • Page 107: View Calendar Events

     Select your Google Account to create a Google Calendar event. If you have several Google Calendars on the Web, select one in which to add your event. • You can create multiple Google Calendars only in Google Calendar on the Web. After creating them in Google Calendar on the Web, you’ll be able to see them in the Calendar application on your phone.
  • Page 108: Navigation Apps

    1. Tap > > Settings > General tab > Accounts & sync > Microsoft Exchange.  To confirm your sync settings, tap the account name and make sure the Calendar box is selected. Tap to return to the sync menu. 2.
  • Page 109: Google Search

    Install the Scout App on Your Phone Before you use Scout on your phone, you may need to download and install the app from the Google Play Store app. 1. Tap > > Play Store 2. Tap the Search icon and search for "scout". 3.
  • Page 110: Use Google Voice Search

    Google Search Options ● Changing Search Information: In the search window, touch and hold > Settings > Phone search and select where to search. ● Using Google Now: Google Now automatically searches for information based on search keywords used, your current location, etc., and presents search results in the search screen. Google Now also informs users of scheduled events.
  • Page 111: Clock

    Clock Your phone has a clock app that lets you set alarms, view time in time zones around the world, use a stopwatch, set a timer, and use your phone as a desk clock. Checking the Time You can check the phone any time on your phone. The current time displays in the upper right corner of the status bar.
  • Page 112: Additional Clock Features

    Additional Clock Features Your phone’s clock app provides additional useful features including world clock, stopwatch, and timer functions. All features are available from the clock app display. ■ > > Clock Timer The timer provides a countdown timer. 1. Tap >...
  • Page 113: Capture

    Stopwatch The stopwatch lets you time events down to the hundredth of a second. 1. Tap > > Clock > Stopwatch tab. 2. Tap to start stopwatch time. 3. Tap to stop the stopwatch.  While measuring time, tap to view lap times. Capture+ The Capture+ feature allows you to create memos and capture screen shots.
  • Page 114: Quickmemo

    View the Saved Memo Your memo can be saved in the QuickMemo+ application or in the Gallery application. To view the memo saved in QuickMemo+: ■ > > QuickMemo+ and select the memo. To view the memo saved in your Gallery: ■...
  • Page 115: Entertainment And Activities

    Entertainment and Activities The following topics address your phone’s connectivity options, including USB file transfer and tethering, Wi-Fi, Bluetooth, IR connectivity, and more. Music You can play audio files that are stored in your phone's storage. Copy audio files from your computer onto your phone before you open the Music application.
  • Page 116: Back Up Your Downloaded Music Files

    Play a Song 1. Tap > > Music > Songs tab. 2. Select the song you want to play. Create a Playlist 1. Tap > > Music 2. Tap > Add to playlist. 3. Select the songs you want to add to the playlist and tap ADD. 4.
  • Page 117: View Youtube Videos

    View YouTube Videos You can use the YouTube app to view videos on YouTube even if you aren’t signed in to a YouTube account. Post a Video to YouTube You can post videos to your YouTube account from your phone. Before posting, you must set up a YouTube account and sign in to it on your phone.
  • Page 118: Settings

    Settings The following set of topics will cover your phone’s settings menus and options. For an overview of the settings menu, see Basic Settings. Basic Settings to access your phone’s settings menu. > > Settings The table below outlines the top-level settings categories. Category Description Wi-Fi...
  • Page 119: Access Settings

    Shortcut key Set keys for quick action. Security Set security options. Date & time Set date and time options. Storage Get memory information, etc. Battery & power saving Set battery saver and check battery usage status, etc. Activate this device Activate the your phone.
  • Page 120: Networks Settings

    Networks Settings This group of settings lets you control your phone's Wi-Fi settings, Bluetooth, Tethering, VPN, Mobile networks, and more. Access Networks Settings 1. Tap > > Settings 2. Tap Networks tab. 3. Set your networks options.  Your networks settings are saved and applied. Wi-Fi Settings Your phone lets you take advantage of Wi-Fi hotspots for high-speed data access using available computer networks.
  • Page 121: Tethering

    Printing The Printing menu allows you to manage your Google Cloud Print settings and print jobs. ■ > > Settings > Networks tab > Share & connect > Printing. Tethering Use Tethering to share your device’s Internet connection with a computer that connects to your device via Wi-Fi hotspot or by Bluetooth.
  • Page 122: Virtual Private Networks (Vpn)

    > Settings > Networks tab > More > VPN. 2. Tap Basic VPN or LG VPN. Note: A screen lock is required to configure a VPN. 3. Configure the settings according to the security details you have obtained from your network administrator.
  • Page 123: Connect To Or Disconnect From A Vpn

    4. When finished, tap SAVE.  The VPN is then added to the VPNs section of the VPN settings screen. Connect to or Disconnect From a VPN Once you have set up a VPN connection, use the Wireless networks settings menu to connect to or disconnect from the VPN.
  • Page 124: Sound Settings

    Sound Settings In the Sound settings menu, you can configure call and notification ringtones, audio volume, as well as some related settings. Access Sound Settings 1. Tap > > Settings 2. Tap Sound tab. 3. Set your sound options.  Your sound settings are saved and applied. Sound Profile Set your phone's sound profile.
  • Page 125: Ringtone

    Tip: You can adjust the ringer volume on the Home screen or Applications screen, or almost any screen by using the Volume Buttons on the back of your phone. In other applications such as Music, YouTube, spoken directions, and other audio, the Volume Buttons control the volume of the application. Ringtone The phone ringtones alert you of incoming calls.
  • Page 126: Interruptions

    Interruptions Allows you to set a schedule when to prevent interruptions from notifications. You can set to allow certain features to interrupt when Priority only is set. 1. Tap > > Settings > Sound tab. 2. Tap Interruptions. 3. Set the desired options as needed. Lock Screen Allows you to choose if you want to show or hide notifications on the lock screen.
  • Page 127: Sound Effects

    Vibrate on Tap Vibrate when tapping the Home touch buttons and during other UI interactions. 1. Tap > > Settings > Sound tab. 2. Tap More > Vibrate on tap. 3. Tap the checkbox to turn on the feature. (A checkmark will appear.) Sound Effects This menu lets you select whether you hear tones when touching numbers on the dialpad, selecting on- screen options, and more.
  • Page 128: Display Settings

    Display Settings Adjusting your phone's display settings not only helps you see what you want, it can also help increase battery life. Access Display Settings 1. Tap > > Settings 2. Tap Display tab. 3. Set your display options.  Your display settings are saved and applied. Home Screen Configure your phone's home screen settings.
  • Page 129: Lock Screen

    Screen Swipe Effect Choose the desired type of effect to display when you swipe from one Home screen canvas to the next. 1. Tap > > Settings > Display tab. 2. Tap Home screen > Screen swipe effect. 3. Tap the desired effect and OK. Allow Home Screen Looping Displays the first screen after the last screen when scrolling the Home screen.
  • Page 130  PIN: Enter a numeric PIN to unlock screen.  Password: Enter a password to unlock screen. From then on, any time you wish to turn the phone on or unlock the screen, you must draw your unlock pattern or enter the PIN or password to unlock the screen. Note: You have five opportunities to enter your unlock Pattern, PIN or Password.
  • Page 131: Home Touch Buttons

    1. Tap > > Settings > Display tab. 2. Tap Lock screen > Shortcuts. 3. Tap a shortcut and select the desired app. You can also select Delete shortcut so that no icon is displayed. 4. Tap SAVE. Contact Info for Lost Phone Select whether to display the owner information on the lock screen and customize the owner information.
  • Page 132: Font Type

    2. Tap Home touch buttons > Button combination. 3. Drag the icons to rearrange the Home touch buttons. To select the color of your home touch buttons: 1. Tap > > Settings > Display tab. 2. Tap Home touch buttons > Color. 3.
  • Page 133: Screen Timeout

    2. Tap the Auto-rotate screen checkbox to automatically rotate the screen. (A checkmark will appear.) – or – To disable the auto-rotate feature, tap the Auto-rotate screen checkbox again so that the checkmark is removed. Note: Some applications on your phone do not support the Auto-rotate feature. Screen Timeout Select how long the display screen remains backlit after you touch the screen or press a key before the screen darkens.
  • Page 134: General Settings

    General Settings This group of settings lets you configure general settings such as accounts & sync, cloud, location, etc. Access General Settings 1. Tap > > Settings 2. Tap General tab. 3. Set your general options.  Your general settings are saved and applied. Language &...
  • Page 135: Location

    Reverse buttons Reverse the mouse buttons to use the primary button on the right side. Location Allows you to turn on location service. Your phone determines your approximate location using GPS, Wi- Fi and mobile networks. ■ > > Settings >...
  • Page 136  Screen shade: Set to 0% brightness of device for saving power and low vision.  Font size: Checkmark to increase the size of the text.  Touch zoom: Zoom in or out by triple tapping the screen.  Screen color inversion: Checkmark to invert the colors of the screen and content. ...
  • Page 137: Shortcut Key

     Screen timeout: Set the desired screen timeout.  Touch control areas: Limit touch control to selected areas of the screen. Press the Volume Down Button and Home Key at the same time to activate and deactivate this feature. General The System setting allows you to configure system options.
  • Page 138 Encrypt Phone Opens a screen that encrypts data on the phone for security. You will be required to enter a PIN or password to decrypt your phone each time you power it on. Encrypt SD Card Storage Encrypt SD card storage and keep data unavailable for other devices. Password Typing Visible Checkmark to briefly show each character of passwords as you enter them so that you can see what you enter.
  • Page 139: Date & Time

    Screen Pin This feature allows you to lock your device so that the current user can only access the pinned app. This is useful for users with children. App Usage Access Allows you to set to access App usage. Date & Time Set your preferences for how the date and time is displayed.
  • Page 140: System Updates

    System Updates From time to time, updates may become available for your phone. You can download and apply updates through the Settings menu. ■ > > Settings > General tab > System updates. Apps The Apps menu lets you view details about the applications installed on your phone, manage their data, force them to stop, and set whether you want to permit installation of applications that you obtain from websites and email.
  • Page 141: Backup & Reset

    > > Settings > General tab > Backup & reset. LG Backup Backs up all information on the device and restores it in the event of data loss or replacement. Back Up My Data Allows you to back up app data, Wi-Fi passwords, and other settings to Google servers.
  • Page 142: Getting Help

    Getting Help The following set of topics will cover troubleshooting tips, phone specifications, and how to contact [Sprint, Boost, Virgin Mobile, etc.] and manage your wireless service.
  • Page 143: For Assistance

    For Assistance The following topics address areas of support for your device, such as account information. Boost Account Information and Help Find out about managing your account online and on your phone, buying additional minutes for your plan, and getting help. For more information about your Boost Mobile account, as well as other Boost Mobile services, visit us at: boostmobile.com.
  • Page 144: Re-Boost

    Re-Boost Boost Mobile makes it easy to add money to your account. You decide exactly how and where you want to pay. Keep your account active by using your phone and adding money to your account. Pay with Cash Find an Authorized Re-Boost Retailer near you. Pick up a Re-Boost Card or recharge for as low as $10 at the register, where available.
  • Page 145: Copyright Information

    © 2015 Boost Worldwide All rights reserved. Other marks are the property of their respective owners. ® LG and the LG logo are registered trademarks of LG Corp. LG LS450 trademark of LG Corp. Wi-Fi ® the Wi-Fi logo are registered trademarks of the Wi-Fi Alliance. Bluetooth is a registered trademark of Bluetooth SIG, Inc.
  • Page 146: Important Information For The Lgls450

    Important Information for the LGLS450 Important Safety Information This booklet contains important operational and safety information that will help you safely use your phone. Failure to read and follow the information provided in this booklet may result in serious bodily injury, death, or property damage.
  • Page 147: Following Safety Guidelines

    Following Safety Guidelines To operate your phone safely and efficiently, always follow any special regulations in a given area. Turn your phone off in areas where use is forbidden or when it may cause interference or danger. Using Your Phone Near Other Electronic Devices Most modern electronic equipment is shielded from radio frequency (RF) signals.
  • Page 148: Using Your Phone With A Hearing Aid Device

    Restricting Children’s Access to Your Phone Your phone is not a toy. Do not allow children to play with it as they could hurt themselves and others, damage the phone or make calls that deplete your available minutes. Using Your Phone With a Hearing Aid Device Your LGLS450 has an M3/T3 rating.
  • Page 149: Getting The Best Hearing Device Experience With Your Phone

    Wireless Phones and Hearing Aid Accessibility http://www.accesswireless.org/ Gallaudet University, RERC http://tap.gallaudet.edu/Voice/ FCC Hearing Aid Compatibility and Volume Control http://www.fcc.gov/cgb/dro/hearing.html The Hearing Aid Compatibility FCC Order http://hraunfoss.fcc.gov/edocs_public/attachmatch/FCC-03-168A1.pdf Hearing Loss Association of America [HLAA] http://hearingloss.org/content/telephonesandmobile-devices Note: HAC statement: This phone has been tested and rated for use with hearing aids for some of the wireless technologies that it uses.
  • Page 150: Caring For The Battery

    ● Position the phone so the internal antenna is farthest from your hearing aid. ● Move the phone around to find the point with least interference. Caring for the Battery Protecting Your Battery The guidelines listed below help you get the most out of your battery’s performance. ●...
  • Page 151: Radio Frequency (Rf) Energy

    ● Only use the battery with a charging system that has been qualified with the system per CTIA Certification Requirements for Battery System Compliance to IEEE1725. Use of an unqualified battery or charger may present a risk of fire, explosion, leakage, or other hazard. ●...
  • Page 152 ANSI/IEEE standard and the guidelines published by the National Council of Radiation Protection and Measurements (NCRP). Body-Worn Operation This device was tested for typical body-worn operations with the back of the phone kept 0.39 inches (1cm) between the user’s body and the back of the phone. To comply with FCC RF exposure requirements, a minimum separation distance of 0.39 inches (1cm) must be maintained between the user’s body and the back of the phone.
  • Page 153: Fcc Notice

    SAR information on this model phone is on file with the FCC and can be found under the Display Grant section of www.fcc.gov/oet/ea/fccid/ after searching for FCC ID ZNFLS450. To find information that pertains to a particular model phone, this site uses the phone FCC ID number which is usually printed somewhere on the case of the phone.
  • Page 154: Open Source Software

    In addition to the source code, all referred license terms, warranty disclaimers and copyright notices are available for download. LG Electronics will also provide open source code to you on CD-ROM for a charge covering the cost of performing such distribution (such as the cost of media, shipping, and handling) upon email request to opensource@lge.com.
  • Page 155: Manufacturer's Warranty

    (6) The customer shall bear the cost of shipping the product to the Customer Service Department of LG. LG shall bear the cost of shipping the product back to the consumer after the completion of service under this limited warranty.
  • Page 156 3. WHAT LG WILL DO: LG will, at its sole option, either repair, replace or refund the purchase price of any unit that does not conform to this limited warranty. LG may choose at its option to use functionally equivalent re-conditioned, refurbished or new units or parts or any units.
  • Page 157 AAA in the manner described in the AAA Rules. You must also send a copy of your written demand to LG at LG Electronics, USA, Inc.
  • Page 158 Opt Out. You may opt out of this dispute resolution procedure. If you opt out, neither you nor LG can require the other to participate in an arbitration proceeding. To opt out, you must send notice to LG no later than 30 calendar days from the date of the first consumer purchaser’s purchase of the product by...
  • Page 159: General Terms And Conditions Of Service

    General Terms and Conditions of Service Please note that these terms may not be the most current version. A current version of the terms is available at boostmobile.com or upon request. For further information on Boost Mobile plans, products, and services go to boostmobile.com or email Boostmobilecustomerassistance@boostmobile.com. Para solicitar esta literatura en español, por favor visitar espanol.boostmobile.com.
  • Page 160: When You Accept The Agreement

    When You Accept The Agreement You must have the legal capacity to accept the Agreement. You accept the Agreement when you do any of the following: (a) accept the Agreement through any printed, oral, or electronic statement, including on the Web by electronically marking that you have reviewed and accepted; (b) attempt to or in any way use the Services;...
  • Page 161: Your Right To Change Services & When Changes Are Effective

    Your Right To Change Services & When Changes Are Effective The account holder can typically change Services upon request. In some instances, changes may be conditioned on payment of an Early Termination Fee or certain other charges, or they may require a new Term Commitment.
  • Page 162: Porting/Transferring Phone Numbers

    This Device is sold exclusively for use with our Service and in other coverage areas that we may make available to you. As programmed, it will not accept wireless service from another carrier. Except for any legal right you may have to port/transfer your phone number to another carrier, you have no—and cannot gain any (for example, through publication, use, etc.)—proprietary, ownership, or other rights to any phone number, identification number, email address, or other identifier that we assign to you, your Device, or your account.
  • Page 163: Specific Terms & Restrictions On Using Data Services

    Content may be: (1) unsuitable for children/minors; (2) unreliable or inaccurate; or (3) offensive, indecent, or objectionable. You’re solely responsible for evaluating the Data Content accessed by you or anyone through your Services. We strongly recommend that you monitor data usage by children/minors.
  • Page 164: Types Of Charges

    for additional services; and taxes, surcharges, and fees associated with your Services. For the actual usage charges applicable to your Service, see the detailed plan or other information we provide or refer you to during the sales transaction or on our website. Depending on your Services, charges for additional services may include operator and directory assistance, voicemail, call forwarding, data calls, texts, and Web access.
  • Page 165: Taxes & Government Fees

    Examples of data for which you will be charged includes the size of a requested file or Data Content (game, ringer, etc.); Web page graphics (logos, pictures, banners, advertisement, etc.); additional data used in accessing, transporting, and routing the file on our network; data from partial or interrupted downloads;...
  • Page 166: Switching Between Service Plans

    this time period, your account will be cancelled. If your account is cancelled, you will lose any phone number, identification number, or email address associated with your account. Reactivation fees will apply if you choose to restart Service after cancellation. There may be limits over which your account balance may not exceed.
  • Page 167: Location-Enabled Services

    Call Monitoring: To ensure the quality of our Services and for other lawful purposes, we may monitor or record calls you make to us or we make to you (for example, your conversations with our customer service or sales departments). Authentication and Contact: You (the account holder) may password protect your account information by establishing a personal identification number (“PIN”).
  • Page 168: 911 Or Other Emergency Calls

    You agree that any authorized user may access, use, or authorize Boost or third-party location-enabled applications through the Services. You understand that your use of such location-enabled applications is subject to the application’s terms and conditions and policies, including its privacy policy. If you activate location-enabled services for devices used by other authorized users, you agree to inform the authorized user(s) of the terms of use for locationenabled applications and that the Device may be located.
  • Page 169: You Agree That Our Liability Is Limited - No Consequential Damages

    Enhanced 911 or otherwise; (f) interrupted, failed, or inaccurate location information services; (g) information or communication that is blocked by a spam filter; (h) damage to your Device or any computer or equipment connected to your Device, or damage to or loss of any information stored on your Device, computer, equipment, or Boost storage space from your use of the Services or from viruses, worms, or downloads of malicious content, materials, data, text, images, video, or audio;...
  • Page 170 out of in any way our Services or the Agreement; or (c) that Boost brings against you. Disputes also include, but are not limited to, (i) claims in any way related to or arising out of any aspect of the relationship between you and Boost, whether based in contract, tort, statute, fraud, misrepresentation, advertising claims or any other legal theory;...
  • Page 171: No Trial By Jury And No Class Action

    (4) We each are responsible for our respective costs, including our respective counsel, experts, and witnesses. Boost will pay for any filing or case management fees associated with the arbitration and the professional fees for the arbitrator’s services. (5) An arbitrator’s award will be a written statement of the disposition of each claim and will also provide a concise written statement of the essential findings and conclusions which form the basis of the award.
  • Page 172 party except our corporate parents, affiliates, subsidiaries, agents, and predecessors and successors in interest. You can’t assign the Agreement or any of your rights or duties under it, unless we agree to the assignment. We can assign the Agreement without notice. You cannot in any manner resell the Services to another party.
  • Page 173: Index

    Index 4G LTE, 71 Call Using the Phone Dialer, 37 About Phone, 130 Call Waiting, 46 About the User Guide, 2 Caller ID Blocking, 45 Accessibility, 124 Camera Overview, 87 Accounts & Sync, 124 Camera Settings, 94 Activate This Device, 128 Capture Screenshots, 15 Activation and Service, 12 Capture+, 102...
  • Page 174 General Settings, 123 Pair Bluetooth Devices, 83 Gesture Shot, 89 Parts and Functions, 3 Get Help with Google Play, 25 Phone Keyboard, 20 Gmail, 60 Phone Number, 18 Gmail Settings, 64 Phone Settings Menu, 14 Google Account, 21 Place a Call from Contacts, 40 Google Maps, 97 Place and Answer Calls, 37 Google Play Music, 104...
  • Page 175 Status Bar and Notification Panel, 31 Update Your Phone Software, 27 Storage, 128 Update Your PRL, 29 Switch Cameras, 94 Update Your Profile, 29 Switching between Gmail Accounts, 64 Use Facebook, 74 Sync Calendars, 96 Use Gmail Labels, 62 Synchronize an Microsoft Exchange Calendar, Use Google Search, 98 Use Google Voice Search, 99 System Updates, 129...

This manual is also suitable for:

Ls450

Table of Contents