
Related Manuals for SE International Inspector USB

Summary of Contents for SE International Inspector USB
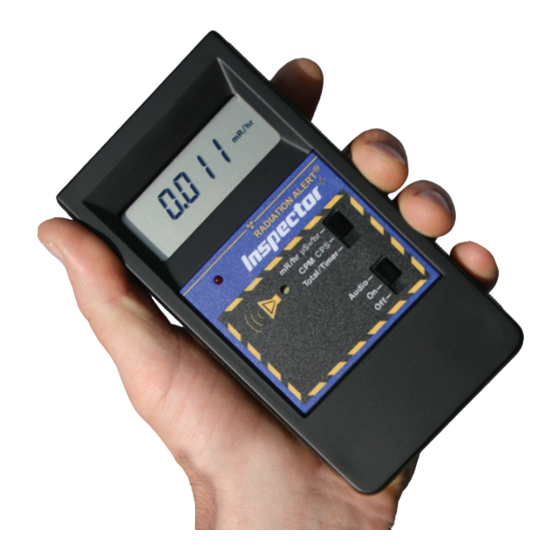
- Page 1 INTERNATIONAL ® S.E. International, Inc. P.O. Box 39, 436 Farm Rd. Summertown, TN 38483 USA 1.800.293.5759 | 931.964.3561 | Fax: 1.931.964.3564 www.seintl.com | radiationinfo@seintl.com...
-
Page 2: Table Of Contents
Contents Chapter 1: Introduction The X Axis How The Inspector Detects Radiation The Y Axis Precautions Observer USB Meter Screen Enable Alarm Chapter 2: Features Zero The LCD Display Units/Echo Display Indicators Averaging Time The Switches Mode Switch Chapter 8: Observer USB Calibration Software Off/On/Audio Switch General Discussion of Calibration The Backlight... -
Page 3: Chapter 1: Introduction
Chapter 1: Introduction The Inspector is a health and safety instrument that is optimized to detect low levels of radiation. It measures alpha, beta, gamma, and x-ray radiation (ionizing radiation only). Its applications include: • Detecting and measuring surface contamination •... -
Page 4: Chapter 2: Features
Chapter 2: Features The Inspector measures alpha, beta, gamma, and x-ray radiation. It is optimized to detect small changes in radiation levels and to have high sensitivity to many common radionuclides. For more information, see Appendix A, Sensitivity to Common Radionuclides. This chapter briefly describes the Inspector’s functions. For more information on how to use the Inspector, see Chapter 3: Operation. -
Page 5: The Switches
The Switches The Inspector has 2 switches on the front and 3 buttons on the end panel. Each switch has 3 settings which are described below. Mode Switch Figure 2(2) mR/hr µSv/hr: The numeric display shows the current radiation level in milliroentgens per hour or, when SI units are used, in microsieverts per hour. -
Page 6: Set Button
Set Button Figure 3 (5) The Set button is used to set the Alert or Timer in normal operating mode and to select items in the Utility Menu. See Chapter 3 Using the Alert, Taking a Timed Count, and Utility Menu. + and - Buttons Figure 3 (6) The + and - buttons are used to adjust the numeric... -
Page 7: Chapter 3: Operation
Chapter 3: Operation Starting the Inspector Before starting the Inspector, install a standard 9-volt alkaline battery in the battery compartment located in the lower rear (Figure 4). Note: Place the battery against the bottom wall, and make sure the wires are placed along the side of the battery and not under it. -
Page 8: Autoranging
Autoranging When radiation levels increase in some modes over certain preset levels, the Inspector uses autoranging, automatically changing to the X1000 scale. While in CPM or Total/Timer mode, whenever X1000 is shown above the numeric display, multiply the displayed reading by 1000 to determine the radiation level. mR/hr, µSv/hr, and CPS are not applicable. -
Page 9: Using Dose/Rate Modes While Timer Is On
To take a timed count, follow these steps: 1. With the Inspector operating, set the Mode switch to Total/Timer. The display shows 0 and Total in the upper left portion of the display. 2. Press the SET button on the end panel to set the time for your count. You will see the hourglass, and the most recent timing period used. -
Page 10: Utility Menu
Utility Menu The Utility Menu allows the user to change default settings for several operating parameters. Once a setting is changed, it remains in effect unless they are changed through the Utility Menu or The USB Observer Software. 1. To activate the Utility Menu, hold down the + button on the end panel while turning the instrument on. The display will show the MENU icon. -
Page 11: Setting The Internal Clock
Setting the Internal Clock It is necessary to set the internal clock to properly time stamp the data collection on your device. We recommend the clock be set prior to collecting data to ensure a correct time and date in your collected data. The unit will beep three times on start up if the clock has been reset. -
Page 12: Checking For Surface Contamination
Checking for Surface Contamination To check a surface, hold the detector window close to the surface, and read the count rate (wait 30 seconds or until the reading has stabilized). If you want to find out if a surface is slightly radioactive, take a timed count or a longer accumulated count. -
Page 13: Chapter 6: Basics Of Radiation And Its Measurement
Chapter 6: Basics of Radiation and Its Measurement Ionizing Radiation Ionizing radiation changes the structure of individual atoms by ionizing them. The ions produced in turn ionize more atoms. Substances that produce ionizing radiation are called radioactive. Radioactivity is a natural phenomenon. -
Page 14: Chapter 7: Observer Usb Software
Chapter 7: Observer USB Software The Observer USB reads in Total Counts, CPM, CPS, µR/hr, mR/hr, µSv/hr and has the ability to collect, log the data received, calibrate the unit, and echo the readings collected on a PC. The data is displayed on a graph as well as a digital on-screen meter and can be saved or printed in various ways, including a spreadsheet format. -
Page 15: Show Grid
Show Grid The Show Grid check box displays the data collected in the grid. The grid displays an ongoing collection of data based on the user selectable settings in the View > Preferences > Grid Settings dialog box. For example, if the grid setting is 60 seconds, a new data point will appear on the grid every minute. -
Page 16: Chapter 8: Observer Usb Calibration Software
Chapter 8: Observer USB Calibration Software General Discussion of Calibration In order to have confidence in the measurements taken with a radiation detection instrument, a calibration must be performed. The calibration compares the response of the instrument to known values and the instrument is adjusted (if needed) to bring all indications within the range of the instrument to within ±10% of the true values. -
Page 17: Efficiency Calibration
Efficiency Calibration The Inspector can be used beyond simple detection of contamination and can also be used to determine the activity of any beta- or alpha-emitting isotopes present. Efficiency is the ratio of events detected by the instrument to the number of decays of the particular isotope. The units are therefore counts per disintegration of c/d. - Page 18 Procedure (Metric Units) 1. Attach the Wipe Test Plate and power on the Inspector. Make sure the Inspector is in Total/Timer mode displaying COUNTS. 2. Place the Inspector in the location where the efficiency calibration will be performed and take a count of at least 10 minutes.
-
Page 19: Exposure Rate Calibration
Exposure Rate Calibration An exposure rate calibration correlates the number of counts in a given time to the exposure rate present in that field. This is in many ways similar to efficiency but we refer to it in this case as gamma sensitivity. Although it is possible to express this value in several different units, the Inspector uses a formula of CPM/mR/hr (counts per minute per milliroentgen per hour). -
Page 20: Chapter 9: Built In Isotope Efficiencies
Activity is the number of disintegrations of a radioactive substance in a given unit of time, which is specific to the isotope being detected. The efficiencies programmed into the Inspector USB are based on the geometry of our wipe test plate, which places samples 1cm from the end window of the detector. Caution: Do not use the built in efficiencies unless you are surveying a known isotope, as doing so will give you inaccurate results. -
Page 21: Chapter 10: Troubleshooting
Chapter 10: Troubleshooting The Inspector is a highly reliable instrument. If it does not seem to be working properly, look through the following chart to see if you can identify the problem. Problem Possible Cause Action Display works, but no counts defective Geiger tube or bad cable look through the window to check the are registered... -
Page 22: Chapter 11: Basics Of Taking Measurements
Chapter 11: Basics of Taking Measurements The Inspector will not detect neutron, microwave, RF (radio frequency), laser, infrared, or ultraviolet radiation. All of our instruments are most accurate for Cesium-137 and isotopes of similar energies. Some isotopes detected relatively well by most Geiger counters are Cobalt-60, Technicium-99M, Phosphorous-32, Strontium-90, and many forms of Radium, Plutonium, Uranium, and Thorium. -
Page 23: How To Determine Alpha, Beta, Or Gamma Source
Geiger counters can detect the four main types of ionizing radiation: alpha, beta, gamma, and x-rays. Some detect only gamma and x-rays. Our instruments are calibrated to Cesium 137, but also serve as excellent indicators for many other sources of ionizing radiation. Gamma and x-rays are measured in milliroentgens per hour (mR/hr), microsieverts (µSv/hr), or millisieverts (mSv/hr). -
Page 24: Radiation Measurement Units
Radiation Measurement Units Several different units are used to measure radiation, exposure and dosage. Roentgen is the amount of X-radiation or gamma radiation that produces one electrostatic unit of charge in one cc of dry air at 0° C and 760 mm of mercury atmospheric pressure. One thousand milliroentgen (1,000 mR)= 1R. -
Page 25: Chapter 12: Glossary Of Common Terms
Chapter 12: Glossary of Common Terms Background Radiation Naturally occurring radiation is always present, it includes high energy gamma rays and particles from the sun and outer space and alpha, beta, and gamma radiation emitted from elements in the earth. CPM (counts per minute) The unit of measurement usually used to measure alpha and beta radiation. -
Page 26: Chapter 13: Accessories
Chapter 13: Accessories Xtreme Boot The Xtreme boot offers maximum performance in a lightweight rugged solution for using Radiation Alert® products in the field. The Xtreme boot is designed specifically for individuals operating in tough environments, such as 1st Responders, Mining and HAZMAT crews. -
Page 27: Appendix A: Technical Specifications
Appendix A: Technical Specifications Detector Internal Halogen-quenched, uncompensated GM tube with thin mica window, 1.4-2.0 mg/cm2 areal density. Effective diameter of window is 45 mm (1.77 in.). Radiation symbol on front label and end panel marks the center of the detector. Averaging Periods Display updates every 3 seconds. -
Page 28: Appendix B: Limited Warranty
Appendix B: Limited Warranty WARRANTOR: S.E. International, Inc., P.O. Box 39, 436 Farm Road, Summertown, TN 38483-0039, USA, (931) 964-3561 ELEMENTS OF WARRANTY: S.E. International, Inc., warrants for 90 days the Geiger-Mueller tube and for one year all materials and craftsmanship in this product to be free from all defects with only the limitations set out below. -
Page 29: Calibration Database Application
Calibration Database Application Please fill out this form and send it back to us if you would like to be notified of the NIST calibration renewal for your instrument to: S.E. International, Inc. P.O. Box 39, 436 Farm Rd. Summertown, TN 38483 1.800.293.5759 | 931.964.3561 | Fax: 1.931.964.3564 www.seintl.com | radiationinfo@seintl.com NAME...
Need help?
Do you have a question about the Inspector USB and is the answer not in the manual?
Questions and answers