Table of Contents
Advertisement
Quick Links
Advertisement
Table of Contents

Summary of Contents for Loreda L510
- Page 1 Scouting Camera L510(12MP) - 1 -...
-
Page 2: Table Of Contents
USER’S MANUAL TABLE OF CONTENTS General Information ........................3 1.1 Features ..........................3 1.2 Application .......................... 3 1.3 Illustration ........................... 3 Quick Start ............................5 2.1 Load Batteries ........................5 2.2 Insert SD Card ........................5 2.3 Powering on and Test Mode ....................5 2.4 Powering on and Live Mode .................... -
Page 3: General Information
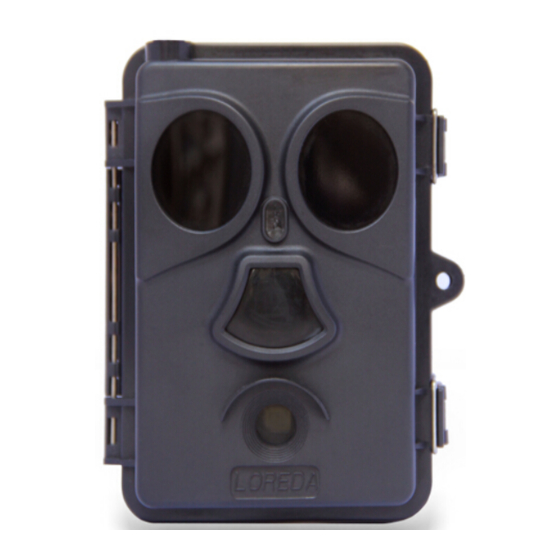
Once objects with higher temperature than ambient environment (like Warm-blooded Creatures or hot objects) in ROI, which can be detected by the PIR Sensor, the Loreda Camera is triggered and record the objects automatically by pictures or videos. If objects with same or lower temperature than ambient environment (like Cold-blooded Creatures or plants), the Loreda Camera works accordingly by Time Lapse functions. - Page 4 Figure 1.1: Front View Figure 1.2: Bottom View The camera provides the following connections for external devices: USB port, SD card slot, TV out jack, and external DC power in jack. To supply power, it is recommended to use eight new high-performance alkaline AA batteries or low self-discharge Ni-MH chargeable AA batteries.
-
Page 5: Quick Start
Before doing any operation, please make sure you have correctly loaded batteries and SDcard into the Loreda camera. If the SD card is not installed correctly, the device will give an alarm with long beep and t turn off automatically. -
Page 6: Powering On And Live Mode
By doing this test, you can find the best placement when mounting and aiming the camera. In general, you are recommended to place the camera 3 to 6 feet (1 to Loreda 2 meters) above the ground. To avoid potential false triggers due to temperature and motion disturbances, please do not aim the camera at a heat source (i.e. -
Page 7: Advanced Settings
ADVANCED SETTINGS camera comes with preset manufacturer settings. You can change the Loreda settings to meet your requirements. Please make sure the camera is in the test mode. 3.1 Parameter Settings Press MENU key to enter/exit the menu. Press , to move the marker, change the setting, and OK to confirm the change. - Page 8 first detected. During the selected interval, the camera will not take pictures/videos. This prevents the SD card from filling up with too many redundant images. Sense Level Normal, High, Select the sensitivity of the PIR Low,Off sensor. The High setting suits indoors and environments with little interference, while the Normal/Low suits outdoors and...
-
Page 9: File Format
automatically take photos/videos according to the set interval, regardless of whether the PIR sensor has detected any object. This is helpful when observing Cold-blooded Creatures or the plants, etc. Beep Sound On, Off If set Off to turn off the sound Cyclic store Off, On Choosing ON enables the “SD... -
Page 10: Cautions
Please turn on the power again if you want to continue to work with the keyboard. ★ There are two options of IR LED on the Loreda Camera, 850nm and 940nm. The former provides up to 65-feet flash range where as the latter up to 30-feet flash range. -
Page 11: Appendix I Technical Specifications
Appendix III: Instruction on Installing Additional Battery Box Appendix I: TECHNICAL SPECIFICATION Item Model Parameters Image Image Sensor 5 Mega Pixels Color CMOS ( Interpolate to 12 Mega Pixels ) 2560x1920 Max. Pixel Size Lens F=3.1; FOV=52°; Auto IR-Cut Picture Size 5MP = 2560x1920 12MP = 4000X3000 1.3MP = 1280X960... - Page 12 Appendix III: Instruction on Installing Additional Battery Box Net Weight 300g Certificate FCC & CE & ROHS Day/Night Settings Operation Mode Trigger Interval 0sec. - 60min; Programmable Shooting Numbers Video Length 1-60sec.; Programmable First take Picture then Video Camera + Video 1~16 Times Playback Zoom In On /Off;...
-
Page 13: Appendix Ii Package Contents
Appendix III: Instruction on Installing Additional Battery Box Appendix II: PACKAGE CONTENTS Part name Quantity Digital camera TV AV IN cable USB cable Strap Instruction Manual Warranty Card - 13 -...
Need help?
Do you have a question about the L510 and is the answer not in the manual?
Questions and answers