Table of Contents
Advertisement
Quick Links
Advertisement
Table of Contents

Summary of Contents for Sensio Home 2 Slice Toaster
- Page 1 2 Slice Toaster User Instructions...
-
Page 3: Table Of Contents
CONTENTS Introduction ....................... 2 Product Safety ....................... 3-4 Electrical Safety ....................5-6 Before First Use ......................7 Features ........................8 Controls ........................9 Using your Toaster ....................10 A Guide to Toasting ....................11 Troubleshooting ....................... 11 Care and Cleaning ....................12 Storage ........................ -
Page 4: Introduction
INTRODUCTION Thank you for purchasing this product You may already be familiar with using a similar product, but do please take time to read these instructions – they have been written to ensure that you get the very best from your purchase. Safety is important To ensure your safety and safety of others, please ensure you read the Product Safety and Electrical Safety information before you operate this product. -
Page 5: Product Safety
PRODUCT SAFETY Please read these instructions before operating this appliance. WARNING! Hot toast can burn. Do not place or operate your Toaster near or below curtains, or any other combustible material. Do not leave your Toaster unattended when it is being used. •... - Page 6 PRODUCT SAFETY • Never let the power cord hang over the edge of a worktop, touch hot surfaces or become knotted, trapped or pinched. • Never place on or near heat sources. • Never leave this appliance unattended during use. •...
-
Page 7: Electrical Safety
ELECTRICAL SAFETY IMPORTANT Read these instructions thoroughly before using this appliance or connecting it to the mains supply. A 13 amp BS1362 ASTA approved fuse must be fitted. This appliance must be earthed. There are no user-serviceable parts inside this appli- ance. -
Page 8: Electrical Safety
ELECTRICAL SAFETY The wires in the power cable of this product are coloured in accordance with the following code: Blue = Neutral Brown = Live Green/Yellow = Earth If the markings on the terminals of your plug do not correspond to the colours of the wires in the power cable, proceed as follows: •... -
Page 9: Before First Use
BEFORE FIRST USE CAUTION: Do not immerse the toaster, main body, power cord or the plug in water or any other liquids. Remove any packaging material from inside the toasting slots and any promotional labels. You may wish to keep the packaging for future use. Wipe the body of the toaster to remove any manufacturing dust with a soft damp cloth prior to use. -
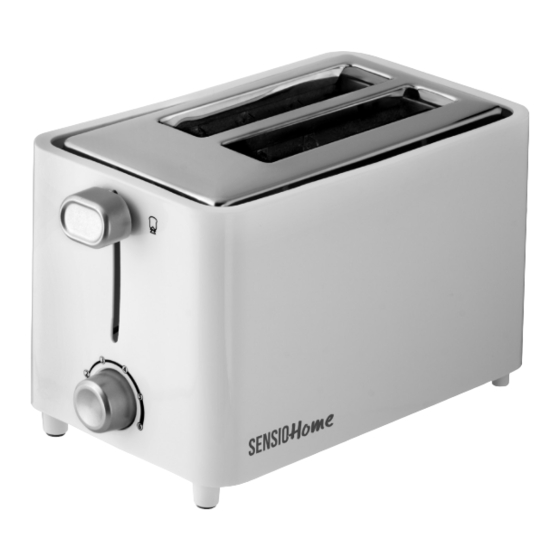
Page 10: Features
FEATURES Extra Lift Feature Cool-Touch Housing Cancel Feature Hinged Crumb Tray Browning Control Dial Power: 230V~, 50/60Hz 750W... -
Page 11: Controls
CONTROLS Variable Browning Control The Browning Control Dial regulates the colour of the toast. Lower settings produce lighter toast and higher settings produce darker toast. When setting the browning control, remember that dryer or thinner slices of bread will toast quicker, and will require a lower setting. Very fresh bread and thick slices will require a higher setting. -
Page 12: Using Your Toaster
USING YOUR TOASTER Selecting Toast Colour 1. The Browning Control Dial is located at one end of your Toaster. Simply turn the Dial to the desired toast colour, (1) for light toasting, (6) for dark toasting. 2. For your first toasting, it is best to position the Browning Control Dial in the middle (3-5), and then adjust each subsequent toasting to your preference. -
Page 13: A Guide To Toasting
A GUIDE TO TOASTING • Toasting is a combination of cooking and drying the bread. The heating element causes the moisture to evaporate from the bread and then dries the bread and toast is the result. • Moisture levels differ between one type of bread and another, which in turn will vary the toasting times. -
Page 14: Care And Cleaning
CLEANING Cleaning Before cleaning your Toaster, unplug it from the mains supply and allow it to cool down completely. Clean the outer surface with a soft damp cloth only. WARNING! Never immerse any part of your Toaster, its cord or plug in water or any other liquid. Crumb Removal Crumbs can catch and burn if allowed to build-up. -
Page 15: Guarantee
GUARANTEE This product is guaranteed for twelve months from the date of original purchase. Any defect that arises due to faulty materials or workmanship will either be replaced or refunded where possible during this period by the dealer from whom you purchased the unit. - Page 16 MPL Home Ltd, IMEX, 575-599 Maxted Road, Hemel Hempstead, Herts, HP2 7DX...
Need help?
Do you have a question about the 2 Slice Toaster and is the answer not in the manual?
Questions and answers