Table of Contents

Related Manuals for Delfield Series CS

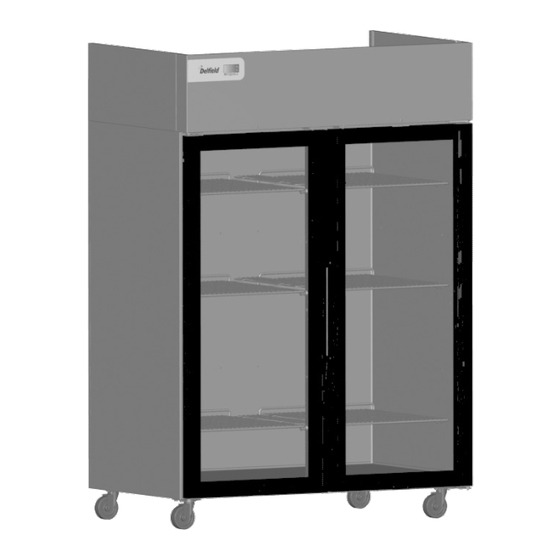
Summary of Contents for Delfield Series CS
- Page 1 Series CS Reach-Ins CoolScapes™ Original Instructions Installation, Operation and Maintenance Manual This manual is updated as new information and models are released. Visit our website for the latest manual. Part Number: 9295040 07/17...
- Page 2 Do not store or use gasoline or other flammable vapors OEM (original equipment manufacture) replacement or liquids in the vicinity of this or any other appliance. parts are used in Delfield equipment. Never use flammable oil soaked cloths or combustible cleaning solutions, for cleaning.
-
Page 3: Table Of Contents
Table of Contents Section 1 General Information Model Numbers ........................ 5 Serial Number Information ....................5 Warranty Information......................5 Regulatory Certifications ....................5 Section 2 Installation Location ..........................7 Clearance Requirements ....................8 Dimensions ........................9 Capacity ..........................9 Electrical Service ......................10 Voltage .......................... - Page 4 Tablc Nf CNnocnos (continued) Section 4 Maintenance Responsibility ........................25 Interior Cleaning ......................26 Gaskets .......................... 26 Preventing Blower Coil Corrosion ................. 26 Exterior Cleaning ......................26 Drain ..........................26 Doors/Hinges ........................ 26 Cleaning the Condenser Coil .................... 26 Part Number: 9295040 07/17...
-
Page 5: General Information
CSF1P-S (H) CSF2P-S (H) CSF3P-S (H) Warranty Information Pass-Thru Freezers CSFPT1P-S (H) CSFPT2P-S (H) Visit Roll-In Freezers http://www.delfield.com/warranty to: CSFRI1P-S CSFRI2P-S • Register your product for warranty. Reach-In Heated Cabinets CSH1-G (H) CSH2-G (H) • Verify warranty information. CSH1-S (H) CSH2-S (H) •... - Page 6 General Information Section 1 THIS PAGE INTENTIONALLY LEFT BLANK Part Number: 9295040 07/17...
-
Page 7: Installation
Section 2 Installation The location selected for the equipment must meet the DANGER following criteria. If any of these criteria are not met, select Installation must comply with all applicable fire and another location. health codes in your jurisdiction. • Units are intended for indoor use only. •... -
Page 8: Clearance Requirements
Installation Section 2 Clearance Requirements DANGER Minimum clearance requirements are the same for noncombustible locations as for combustible locations. The flooring under the appliance must be made of a noncombustible material. DANGER Risk of fire/shock. All minimum clearances must be maintained. -
Page 9: Dimensions
Section 2 Installation Dimensions Capacity Model Length Depth Height Model # of Shelves Shelf Area Volume Reach-In Dual Temperature Reach-In Dual Temperature CSDBR1P-SH CSDBR1P-SH (2X)8.6ft 27.40” (70cm) 32.44” (82cm) 79.50” (202cm) (2X)2 (2X)8ft (7432cm CSDTR1P-SH CSDTR1P-SH (244L) Reach-In Freezers Reach-In Freezers CSF1P-S (H) 27.40”... -
Page 10: Electrical Service
Installation Section 2 Electrical Service Maximum 10ft (3m) cord with plug. Model Amps V, Hz, Ph H.P. Nema Plug DANGER Reach-In Dual Temperature CSDBR1P-SH 115, 60, 1 Ref. 0.20 5-15P Check all wiring connections, including factory terminals, CSDTR1P-SH Frzr. 0.315 before operation. -
Page 11: Drain Connections
Section 2 Installation Drain Connections Refrigeration Heat of BTU/Hour R290 Warning Model Rejection (BTU) Capacity Charge Moisture collecting from improper drainage can create a Reach-In Dual Temperature slippery surface on the floor and a hazard to employees. CSDBR1P-SH Ref. 232 Ref. -
Page 12: Leg & Caster Installation
Installation Section 2 Leg & Caster Installation Level & Stable After the cabinet has been placed in the desired location, Warning cabinets with legs must be leveled. Level units from front to The unit must be installed in a stable condition with back and from side to side. -
Page 13: Reversible Door Instructions
Section 2 Installation Reversible Door Instructions 10. Locate the provided alternate top hinge bracket. 11. Place the hinge bracket over the top hinge pin. APPLICABLE TO FULL DOOR MODELS 12. Open the door. 1. Open the door. 13. Using the original screws install the hinge bracket on the 2. -
Page 14: New Bottom Hinge Cartridge Installation
Installation Section 2 Door Sweep Adjustment New Bottom Hinge Cartridge Installation 1. Verify unit is level with 4’ Level. Shim as needed. 1. Install the new cartridge into the door as received. The new cartridge will be in the CLOSED position. 2. -
Page 15: T-1 Tray Slide Installation
Section 2 Installation T-1 Tray Slide Installation T-1 Installation Instructions 1. For each pan, mount a pair of tray slides; one on each Edge Support for 18” x 26” pans side of the door section at the same height. Mount the tray slides onto the pilasters by sliding the tray slide tabs down into the cutouts. -
Page 16: Tray Slide Installation
Installation Section 2 T-2 Tray Slide Installation Universal Bottom Support for 12” x 20” and 18” x 26” pans T-2 Tray Slide System T-2 Installation Instructions 1. For each pan, two (2) tray slides will be used. Each tray slide must have another tray slide at the same height, Installed T-2 tray slide with both size pans on the opposite side of the door section. -
Page 17: T-3 Tray Slide Installation
Section 2 Installation T-3 Tray Slide Installation T-3 Installation Instructions 1. For each pan, two (2) tray slides will be used. Each tray Edge Support for 12” x 20” pans slide must have another tray slide at the same height, on the opposite side of the door section. -
Page 18: T-4 Rack Slide Installation
Installation Section 2 T-4 Rack Slide Installation 3. Repeat steps 1-2 on the opposite side. Verify that all mounting plates are lined up across the door section. Edge Support for 18” x 26” pans 4. For a full section installation, repeat steps 1-3 for the upper half. -
Page 19: Operation
Section 3 Operation Caution DANGER Do not throw items into the storage area. Failure to The on-site supervisor is responsible for ensuring that heed this recommendation could result in damage to the operators are made aware of the inherent dangers of interior of the cabinet or to the blower coil. -
Page 20: Heated Cabinet Operation
Operation Section 3 Heated Cabinet Operation TEMPERATURE CONTROL & DISPLAY OPERATION 1. Press upper or lower right button to display current DANGER set-point (blinking). The unit surface is very hot! Avoid direct contact with ₋ If buttons untouched for 5 seconds it will return to skin;... -
Page 21: Refrigerator & Freezer Operation
36°F to 40°F (2°C to 4°C). mode. • Delfield freezers are designed to maintain an operational 2. The control will enter a DEFROST mode and the display temperature of 0°F (-18°C). -
Page 22: Temperature Control & Display
Operation Section 3 TEMPERATURE CONTROL & DISPLAY Temperature Alarm The alarm will flash HI or LO 90 minutes after the unit has reached its alarm temperature point or after any power interruption if the temperature is above or below the alarm set points. -
Page 23: Changing Display From Fahrenheit To Celsius
Section 3 Operation Changing Display from Fahrenheit to Celsius 6. -F should be displayed indicating Fahrenheit. Use the down arrow to change it to -C for Celsius and hit the 1. Simultaneously hold the up and down arrows for stand-by button (lower left button) to enter the change. 5 seconds to access menu for password protected parameters. - Page 24 Operation Section 3 THIS PAGE INTENTIONALLY LEFT BLANK Part Number: 9295040 07/17...
-
Page 25: Responsibility
Section 4 Maintenance Warning DANGER When using cleaning fluids or chemicals, rubber gloves It is the responsibility of the equipment owner to perform and eye protection (and/or face shield) must be worn. a Personal Protective Equipment Hazard Assessment to ensure adequate protection during maintenance Caution procedures. -
Page 26: Interior Cleaning
Maintenance Section 4 Interior Cleaning DRAIN Each refrigerated unit has a drain located inside the unit The interior can be cleaned using soap and warm water. If that removes the condensation from the evaporator coil and this isn’t sufficient, try ammonia and water or a nonabrasive routes it to an external condensate evaporator pan. - Page 28 DELFIELD 980 SOUTH ISABELLA ROAD, MOUNT PLEASANT, MI 48858 800-733-8821 WWW.DELFIELD.COM WWW.WELBILT.COM Welbilt provides the world’s top chefs, and premier chain operators or growing independents with industry leading equipment and solutions. Our cutting-edge designs and lean manufacturing tactics are powered by deep knowledge, operator insights, and culinary expertise.
Need help?
Do you have a question about the Series CS and is the answer not in the manual?
Questions and answers