Table of Contents
Advertisement
Advertisement
Table of Contents

Related Manuals for Elektron Technology HENSON 8000

Summary of Contents for Elektron Technology HENSON 8000
- Page 1 Henson Perimeter User Manual © 2017 Elektron Technology...
- Page 2 Henson Perimeter User Manual © 2017 Elekt ron T ec hnology All rights reserved. No parts of this work may be reproduced in any form or by any means - graphic, electronic, or mechanical, including photocopying, recording, taping, or information storage and retrieval systems - without the written permission of the publisher.
-
Page 3: Table Of Contents
2 Za t a t h re s h o ld t e s t Blind spot Fovea measurement Global Indices Mean Defect Standard Deviation Hemifield Test Outputs Threshold Gray Scale Defect Pattern defect Print Out Patient instructions © 2017 Elektron Technology... - Page 4 6 Mo vin g t h ro u g h t h e d a t a b a s e ....................... 1 0 3 7 P DF file s ....................... 1 0 4 8 P rin t in g a d a t a b a s e re co rd © 2017 Elektron Technology...
- Page 5 6 Da t a b a s e e rro rs Database Backup not available Part XIII Appendi x 6 - Li cens e fi l e Part XIV Appendi x 7 - Net worki ng Index © 2017 Elektron Technology...
- Page 7 Part...
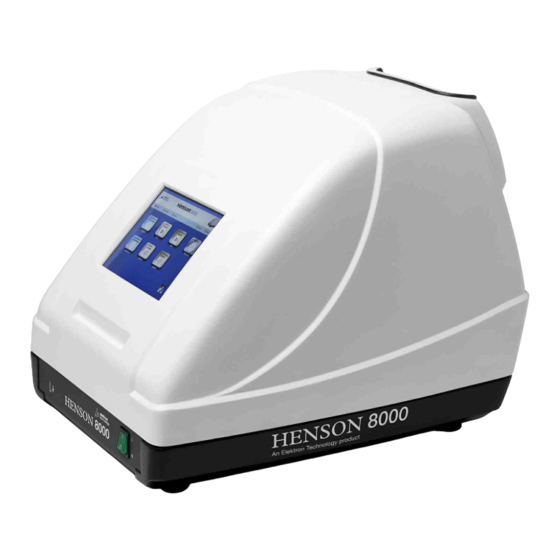
- Page 8 Henson Perimeter User Manual W el come Henson 8000 Perimeter To find out more about the Henson range of perimeters visit: http://www.elektron-healthcare.com or scan the QR code opposite. © 2017 Elektron Technology...
- Page 9 The only warranties for Elektron Technology UK Ltd. products and services are set forth in the express warranty statements accompanying such products and services.
- Page 10 It is strongly recommended that you regularly back up the database of patient records on a USB memory stick, or other suitable removable media, to avoid any possibility of data loss. This simple procedure is described later in this manual in Database Backup © 2017 Elektron Technology...
- Page 11 Version 1.3 May 2015 Changes to patient instructions in the first person. Additional formatting changes and corrections. Version 1.4 November Formatting changes 2015 To determine the version of installed software, click ABOUT on the main menu. © 2017 Elektron Technology...
- Page 12 Elektron Technology UK Ltd. is prohibited, except as allowed under copyright laws. Elektron Technology UK Ltd. shall not be liable for technical or editorial errors or omissions contained herein. The following symbols are used in the manual and on the instrument.
- Page 13 Welcome Ac know ledgement s Microsoft, Windows,XP, Windows 7 and Windows 8 are registered trademarks of Microsoft Corporation. Adobe and Acrobat (R) reader(R) are registered trademarks of Adobe systems. © 2017 Elektron Technology...
- Page 15 Part...
- Page 16 To g e t mo re h e lp o n a n ite m in th e s ta rt-u p s cre e n click th a t ite m o n th e ima g e b e lo w . Appendix 3 for installing and setting up the software. © 2017 Elektron Technology...
- Page 17 To g e t mo re h e lp o n a te s t s cre e n ite m click o ve r th e ite m in th e ima g e b e lo w . © 2017 Elektron Technology...
- Page 18 To g e t mo re h e lp o n a te s t s cre e n ite m click o ve r th e ite m in th e ima g e b e lo w . © 2017 Elektron Technology...
- Page 19 To g e t mo re h e lp o n a te s t s cre e n ite m click o ve r th e ite m in th e ima g e b e lo w . © 2017 Elektron Technology...
- Page 20 Driv ers t est After selecting a Drivers test you will be presented with the Drivers test screen below. To obtain more help on a test screen item click over the item in the image below. © 2017 Elektron Technology...
- Page 21 Part...
- Page 22 Henson Perimeter User Manual Vi s ual fi el d t es t s The following visual field tests are available with the Henson 8000 Multiple Stimulus Supra-Thresho ld Choose this if speed is important. It is approximately twice as fast as the Single Stimulus supra- threshold strategy in patients with little or no defect.
- Page 23 Visual field tests Supra- t hreshold t est s There are two different supra-threshold tests provided with the Henson 8000 software, single multiple stimulus: Both incorporate several levels of testing. Both can be run in an age-related or threshold-related mode.
- Page 24 To g e t mo re h e lp o n a te s t s cre e n ite m click o ve r th e ite m in th e ima g e b e lo w . © 2017 Elektron Technology...
- Page 25 Visual field tests © 2017 Elektron Technology...
-
Page 26: Patient Instructions
Add when setting the threshold by measurement To begin with the lights will be fairly bright. They will then get dimmer and dimmer until they cannot be seen. You should not guess. If unsure it is advisable to say "none". © 2017 Elektron Technology... -
Page 27: Presenting And Selecting Different Multiple Stimulus Patterns
If there is a missed stimulus in the selected pattern then the number is shown in red. When extending the test to a higher level , additional pattern buttons will appear. © 2017 Elektron Technology... -
Page 28: Missed Stimuli In Multiple Stimulus Suprathreshold Test
To correct mistakes (i.e. remove stimuli marked as missed) make sure the Rmv button is selected (down) and touch or click over the mistake. Stimuli missed at a 5dB increment should be tested at a higher intensity level. © 2017 Elektron Technology... -
Page 29: Single Stimulus
To g e t mo re h e lp o n a te s t s cre e n ite m click o ve r th e ite m in th e ima g e b e lo w . © 2017 Elektron Technology... - Page 30 At the beginning of the test the light will be very dim. Do not worry if you do not see many lights Only press the button when you are sure. The lights will brighten up later on. © 2017 Elektron Technology...
-
Page 31: Setting The Test Intensity
You can set the threshold to a given value. You might want to do this to match a previous setting. The perimeter will revert to the default method when swapping to the next eye or starting a new patient. © 2017 Elektron Technology... -
Page 32: Single Stimulus Algorithm
95% confidence limits of the expected age setting. If all test locations are excluded, the threshold is set at 4dB below the age setting. demonstration presentations are made prior to the collection of Heart data. © 2017 Elektron Technology... -
Page 33: Multiple Stimulus Algorithm
It is important to tell the patient what is going to happen, i.e. that the patterns are going to get dimmer and dimmer until they cannot see any of the stimuli. This helps to put the patient at ease when they get too dim to see. © 2017 Elektron Technology... -
Page 34: Test Status Indicator
Display when establishing the threshold in a threshold related supra-threshold test. Testing in the supra-threshold mode. The test has finished. This is displayed during the test sequence in a Drivers test to show that the fixation target is moving. © 2017 Elektron Technology... -
Page 35: Extending The Test
They can start off with a simple screening test and then Extend if necessary. If the auto-extend property is set in the Options program the test will automatically extend if there is a non-blind spot miss. © 2017 Elektron Technology... -
Page 36: Adding And Correcting Presentations
If the Rmv and 5dB buttons are down the location will change to a seen location. If the Rmv and 8dB buttons are down it will change to an 5dB miss (the level below 8dB). © 2017 Elektron Technology... -
Page 37: C Hanging The Supra-Threshold Increment
The perimetrist then marks the location (s) they missed. The perimetrist should then alter the supra-threshold increment in order to measure the depth of the defect. © 2017 Elektron Technology... -
Page 38: Analysing The Results
This calculation is based on a scoring system applied to the visual field data. The score increases with the number, depth and clustering of any missed stimuli. The score is then compared to a normal database of scores to derive a probability value. © 2017 Elektron Technology... -
Page 39: Toolbar
(without losing data). Select method for establishing the threshold. Extend test to the next level Fixation targets Action when clicking over chart area of screen. Supra-threshold increment Status of patient Response button (Single Stimulus tests). © 2017 Elektron Technology... - Page 40 To g e t mo re h e lp o n a te s t s cre e n ite m click o ve r th e ite m in th e ima g e b e lo w . © 2017 Elektron Technology...
- Page 41 Visual field tests © 2017 Elektron Technology...
- Page 42 Henson Perimeter User Manual Blin d s p o t 3 .2 .1 At the beginning of a ZATA test the Henson 8000 searches for the eye's blind spot. It starts off by presenting a Supra-Threshold stimulus at the most likely location of the blind spot.
-
Page 43: Fovea Measurement
Emphasize that many of the presentations will be too dim. If they are not sure they should not press their key. 3. Click Go to start testing. © 2017 Elektron Technology... -
Page 44: Global Indices
Global indices are single numbers that characterise the whole visual field. They are used to monitor the extent of loss over time. There are 3 provided with the ZATA test: Mean Defect. Standard Deviation. Hemifield Test. © 2017 Elektron Technology... -
Page 45: Mean Defect
T he f ig ur e a b o v e s ho ws the g lo b a l ind ic e s a s a p p e a r o n the s ta nd a r d p r int o ut. © 2017 Elektron Technology... -
Page 46: Standard Deviation
T he f ig ur e a b o v e s ho ws the g lo b a l ind ic e s a s a p p e a r o n the s ta nd a r d p r int o ut. © 2017 Elektron Technology... -
Page 47: Hemifield Test
T he f ig ur e a b o v e s ho ws the g lo b a l ind ic e s a s a p p e a r o n the s ta nd a r d p r int o ut. © 2017 Elektron Technology... -
Page 48: Outputs
(Defect). By clicking one of the alternative buttons you can change the displayed format. Gray displays the results in a gray scale format. Thresh displays the threshold values (dB). Defect displays the defect values (dB). © 2017 Elektron Technology... -
Page 49: Threshold
T he a b o v e f ig ur e s ho ws the T hr e s ho ld (le f t) a nd G r a y S c a le (r ig ht) v a lue s f r o m a 24-2 f ie ld te s t a s s e e n in the s ta nd a r d p r into ut. © 2017 Elektron Technology... -
Page 50: Gray Scale
T he a b o v e f ig ur e s ho ws the T hr e s ho ld (le f t) a nd G r a y S c a le (r ig ht) r e s ults o f the s ta nd a r d p r into ut. © 2017 Elektron Technology... -
Page 51: Defect
30dB, then the defect value would be -5dB. Defect values appear on the standard printout and can be displayed on the screen at the end of the test by pressing the defect button. © 2017 Elektron Technology... -
Page 52: Pattern Defect
The Pattern Defect values are presented in two different forms: Absolute values in decibels (dB). Symbols representing the probability that the threshold measure comes from a normal eye. The probability values take into account the variability in threshold estimates at each test location. © 2017 Elektron Technology... - Page 53 A b s o lute v a lue s a t the to p a nd p r o b a b ility s y m b o ls b e lo w. © 2017 Elektron Technology...
-
Page 54: Print Out
Patient demographics and details of the Field test are given at the top of the chart. You can get further help on the different elements of the print out by clicking over that item in the image below. © 2017 Elektron Technology... - Page 55 The first few presentations are a demonstration so do not worry if you make a mistake at the beginning.. As the test proceeds, fewer and fewer lights can be seen; this is normal. © 2017 Elektron Technology...
- Page 56 3 degree square matrix within the central 10 degrees. S tim ulus lo c a tio ns . Le f t 30-2 (24-2 e x c lud ing r e d lo c a tio ns ). R ig ht 10-2. © 2017 Elektron Technology...
- Page 57 If you select a new patient the following data entry form will appear. You must enter the patients name, date of birth and record number before clicking Enter to continue. © 2017 Elektron Technology...
- Page 58 Threshold test the Prior values provide a much better estimate particularly when they have a visual field defect. In addition to speeding up the test, using prior values also increases the accuracy of the result. © 2017 Elektron Technology...
- Page 59 Repeat this eye (start again). Swap eyes (can be done at any time without losing data). Blind Spot re-locate. Extend test to the next level Test fovea Fixation targets Display format. Indicates when patient Response button is pressed. © 2017 Elektron Technology...
- Page 60 Henson Perimeter User Manual Driv ers t est s The Henson 8000/9000 provides 2 visual field tests for drivers. The first, Group 1, meets the standard set by the UK Licensing Authority for drivers of cars and motorcycles. The second, Group 2, is for drivers of lorries and buses.
- Page 61 If you want to take a break hold down the response button. The test will pause until the button is released. The first few presentations are a demonstration only and do not form part of the final result. © 2017 Elektron Technology...
- Page 62 UK. For use in countries where there is no such requirement leave the check box empty. This will allow the beep to be turned off when set to the extreme left. © 2017 Elektron Technology...
- Page 63 St imu lu s lo ca t io n s 3 .3 .3 The patterns of the stimuli in the Group 1 and group 2 Drivers Tests are shown below: Group 1-120 point test Group 2-124 point test © 2017 Elektron Technology...
- Page 65 Part...
- Page 66 It also means that printing of records can be handled by any Windows enabled printer and provides unrivaled well understood networking facilities. Wi-Fi enabled Hensons can be networked wirelessly using an inbuilt Wi-Fi facility. Extendable tests © 2017 Elektron Technology...
- Page 67 Humphrey Perimeter. It also includes the global indices, Mean Defect and Standard Deviation that again match those of the Humphrey Perimeter. It includes a Hemi-field analysis for the early detection of glaucomatous loss that gives a continuous output with probability measures. © 2017 Elektron Technology...
- Page 68 They need to have the correct refractive correction in front of the test eye and an occluder in front of the other eye. The patient also needs to be carefully positioned at the instrument. © 2017 Elektron Technology...
- Page 69 Alig n in g t h e p a t ie n t 4 .1 .1 The patient should be seated comfortably with their head as shown below. The head should be at approximately at approx 45 degrees with their forehead resting against the forehead pad. © 2017 Elektron Technology...
- Page 70 It is important that the patient fully understands what they need to do during the test. Suggested instructions for the different tests can be found by following the links below: Multiple stimulus supra-threshold Single stimulus supra-threshold ZATA Drivers © 2017 Elektron Technology...
- Page 71 It is important that the patient wears the correct refractive correction (suitable for a 25cm test distance) during the visual field test. The Henson 8000/9000 is designed to be used with a special perimetric lens set. This uses large diameter lenses, which attach to a special frame. This set overcomes the problem of lens rim artifacts that are common when trial case lenses are used with a lens holder attached to the perimeter.
- Page 72 Response Time slider or clicking the arrows at either end. The Auto timing can also be turned on or off at any stage of the examination by clicking the Auto check box. © 2017 Elektron Technology...
- Page 73 Perimetrists can provide a more accurate estimate of the patient's reliability by simply observing them during the test. Perimetrists should, therefore, be encouraged to make comments on the visual field chart concerning the reliability of the result, e.g. Fixation excellent, Fixation poor etc. © 2017 Elektron Technology...
- Page 74 If the first eye was OK and the second eye showed up a defect then it is possible to go back to the first eye and test some more locations now that the suspicion of a defect has been raised by the result from the second eye. © 2017 Elektron Technology...
- Page 75 It is a good idea to tell the patient not to be concerned if they make some errors at the beginning of the test as the first first few presentations do not count. If further demonstration is required then the perimetrist should stop the test and start again after re-instructing the patient. © 2017 Elektron Technology...
- Page 76 Ent ering t he pat ient 's dat e of birt h The Henson 8000 requires the operator to enter the patient's Date of Birth at the beginning of each test. Click over the correct day, month and year using the vertical sliders when necessary and then click Enter.
- Page 77 General information F ixat ion t arget s The Henson 8000 has two fixation targets: A small central red spot. Four peripheral spots located 6 degrees from the central point along the 0, 90, 180 and 270 meridians. The four peripheral spots are provided for patients who have lost central vision.
- Page 78 An example of a help page is shown below. On many pages clicking over an item within an image will jump to a new help page where additional information will be available. © 2017 Elektron Technology...
- Page 79 4. Press print to continue or cancel to print without patient details. 5. You will then be presented with a window similar to the one shown below. © 2017 Elektron Technology...
- Page 80 The Zata test results are printed one eye to a page. The Practice name and address will appear on the printout, along with any patient details entered when saving the visual field data in the database. © 2017 Elektron Technology...
- Page 81 When pressed and held down, the response button will pause further stimulus presentations. This is useful if the patient needs to temporarily pause testing. During a test, the status of the response button is given in the toolbar the indicator: Response button down Response button up © 2017 Elektron Technology...
- Page 82 The date and time of test come from the PCs internal clock, which needs to be correctly set via the Windows Control Panel. The Henson software saves a pdf file of the printout that can be used by © 2017 Elektron Technology...
- Page 83 General information practice management systems. For details on the coding of file names please contact your supplier. © 2017 Elektron Technology...
- Page 84 Henson Perimeter User Manual Video c amera 4.12 The Henson 8000 is fitted with a video camera for monitoring a patient's fixation. To adjust the camera settings: 1.Click to display controls (Shown above with blue background). 2.Drag the brightness and contrast sliders to the desired level.
- Page 85 Part...
- Page 86 To g e t mo re h e lp o n a n O p tio n s ite m click o ve r th a t ite m o n th e ima g e b e lo w . © 2017 Elektron Technology...
- Page 87 1. Use the on-screen keyboard or an external keyboard to make changes. 2. Click Save. Note: Clicking Save will save all the changes you have made in this session (not just those on the current tab). © 2017 Elektron Technology...
- Page 88 This warning is to tell you that if the backup drive is not present when a test is saved, then the backup copy will not be made. © 2017 Elektron Technology...
- Page 89 Ticking the onscreen keyboard box means that a pop up keyboard will appear in the database when you click on a search box. this is useful if you are using a touch screen. © 2017 Elektron Technology...
- Page 90 4. The selected path and file name will be displayed in the 'Selected Database' box. 5. If you wish to reset to the default database, (C:\Henson8000\data \fld8.db), press the Select Default button. 6. Press Save to store your new path and name. © 2017 Elektron Technology...
- Page 91 To accommodate the DVLA requirements we have added a check box that when checked meets this requirement. The minimum setting will be a quiet beep rather than off. Checking this box has no effect on the volume settings for other tests. © 2017 Elektron Technology...
- Page 92 Once you have made the required changes click on any of the tabbed pages. The changes on all the pages will be saved and the options program will close. To return without saving any changes click © 2017 Elektron Technology...
- Page 93 (you can override this at the onset of a test). Whether the program starts off at level 1 (26 points) or 2 (68 points). Whether the program auto extends after level 1. © 2017 Elektron Technology...
- Page 94 1. Use the up/down/left/right buttons to position the image in the video window. 2. Adjust the Brightness and Contrast sliders to optimise the video image display (these can also be adjusted when running a test program). 3. Click Save. © 2017 Elektron Technology...
- Page 95 Part...
- Page 96 (only active if multiple pages exist ), zoom out (-) and in (+). No t e : To save records and use the database you will need to have the free Adobe Reader installed. This can be obtained from the support website www.elektron-healthcare/ support © 2017 Elektron Technology...
- Page 97 C:\Henson8000\data\fld8.db The Henson 8000 also saves a backup copy. This backup copy must be on a different storage device (e.g. pen drive or external disc drive). The location of backup copy is also defined in the Options file. If your backup location is not available (e.g.
- Page 98 Henson Perimeter User Manual Changing t he ac t iv e dat abase The Henson 8000 can access and use many different database tables. Each one might contain data from a specific study, or a group of patients. On start-up the...
- Page 99 To delete a record from a database: Select the record to be deleted by clicking it within the list of records. 1. Click 2. When prompted, click OK to confirm. Once deleted, a record cannot be retrieved. © 2017 Elektron Technology...
- Page 100 You cannot use the following characters ( / \ : , ; & ) in patient name or record number (as these are used for the file name of the PDF printout). To correct the stored PDF file after modifying a record you will need to click © 2017 Elektron Technology...
- Page 101 Searching also sorts the database on the basis of the search box you are typing in. For example, if you are searching on Record number, the database will be sorted by record number (highest number first). © 2017 Elektron Technology...
- Page 102 The order of records is initially sorted by family name (FamName). You can sort by record number (RecNum) or testdate (DoT) by clicking on the appropriate column header. You can also search for a specific record by clicking Find © 2017 Elektron Technology...
- Page 103 Database program PDF f iles The Henson 8000 creates a copy of the printout (PDF file) when a record is saved. The directory where the PDF files are stored is a sub directory of your database directory and its name will be your database name plus 'images'.
- Page 104 Press the print button on the toolbar. The currently displayed PDF will be opened in Adobe reader as shown below. Click the Print icon on the toolbar and follow the on-screen prompts to select your printer. © 2017 Elektron Technology...
- Page 105 (PDF file) is created for future printing and use by practice management systems. If you loose a PDF file or edit the data then you can re-create it by clicking No te: The PDF files are stored in a sub-directory of the database file © 2017 Elektron Technology...
- Page 107 Part...
- Page 108 To g e t mo re h e lp o n a u tilitie s s cre e n ite m click o ve r th a t ite m o n th e ima g e b e lo w . © 2017 Elektron Technology...
- Page 109 Once a database is opened you will be able to perform all the other utility routines, e.g. copy, merge edit. When you exit the Utilities program the Henson software will revert back to the database defined within your Options file. © 2017 Elektron Technology...
- Page 110 When the database is created, a folder will be created to hold the visual field chart images (PDF files). When you exit the Utilities program the Henson software will revert to the default database defined within your Options file. © 2017 Elektron Technology...
- Page 111 No tes: The database name will remain the same as the original. This function copies all the database files along with the sub-directory '***images' which contains the PDF image files. © 2017 Elektron Technology...
- Page 112 To delete a record within the database: a. Select the record to be deleted by clicking it within the list of records. b. Click When prompted, click OK to confirm. Once deleted, a record cannot be retrieved. © 2017 Elektron Technology...
- Page 113 '**images' (which contains the PDF image files). The current database would normally be the default database, i.e. the one defined within the options program. Alternative databases can be used by first opening them before the merge. © 2017 Elektron Technology...
- Page 114 3. Select the Source drive, directory and database from the drop-down menus. 4. Click OK. 5. Both sets of database records are now listed in the Utilities windows. 6. In the right-hand panel, double-click each record you want to transfer. © 2017 Elektron Technology...
- Page 115 4. Click OK. The current database would normally be the default database, i.e. the one defined within the options program. Alternative databases can be used by first opening them and then proceeding to the import. © 2017 Elektron Technology...
- Page 117 Part VIII...
- Page 118 Henson Perimeter User Manual Appendi x 1 - 8000 Techni cal s peci fi cat i on The Henson 8000 is a Central field Perimeter which is controlled from a PC running a Windows™ compatible Operating system. It includes a series of...
- Page 119 Storage....1.3 GRMS using a random-vibration spectrum that simulates shipment by truck Ma ximu m s h o ck: Operating ... . . 1.52 m/sec (60 inches/sec) (less than or equal to a © 2017 Elektron Technology...
- Page 120 13. OPTIONAL EXTRAS Electric Table (without top) Custom made top with Printer carrier Perimeter Trial Lens set. 14. LIST OF SPARE PARTS Mains Fuses: 240V : T1.6AH250V 110V : T2AH250V Occluder Patient Response button Dust Cover © 2017 Elektron Technology...
- Page 121 Part...
- Page 122 Henson Perimeter User Manual Appendi x 2 - 8000 Connect i on det ai l s The connections to the Henson 8000 are house within a well in the base of the Unit. The mains input comes from the table (if used).
- Page 123 Part...
- Page 124 5. SAFETY Ensure the connected leads do not trail on the floor and are not subject to abrasion on sharp edges. Use only computers, printers, computers and monitors that conform to EN60950. © 2017 Elektron Technology...
- Page 125 Open the Henson software by double-clicking the desktop icon. To automatically run the Henson software when the computer is started add this shortcut to the windows STARTUP folder. A menu screen showing the available tests is now visible. © 2017 Elektron Technology...
- Page 126 Henson Perimeter User Manual No t e : To save records and use the database you will need to have the free Adobe Reader installed. This can be obtained from the support website www.elektron-healthcare/ support © 2017 Elektron Technology...
- Page 127 Part...
- Page 128 If the unit is supplied with power from an electric table/stand, then the mains cable to the table/stand should be isolated from the wall socket instead. Regular Inspection Changing the fuses, replacing the head and chin rest pads. Cleaning Preventative Maintenance Replacement Parts Repairs and Re-calibration Warranty © 2017 Elektron Technology...
- Page 129 3. Withdraw the fuse drawer. 4. The fuses can be removed and replaced. 6. Push the drawer back into the mains inlet before reconnecting the mains lead. 7. Finally, reconnect the mains lead to the wall socket and switch on. © 2017 Elektron Technology...
- Page 130 Upgrades of the software and documentation are available to download from the support section of the Elektron healthcare web site http://www.elektron- healthcare.com If the software is upgraded, up-to-date operational instructions can be found in the online help, which can be accessed by clicking © 2017 Elektron Technology...
- Page 131 The headrest pad should be wiped between patients with a suitable sterilising wipe. Patient Respo nse Butto n The response button should be wiped clean with a suitable, sterilising wipe. The cable should be checked for cracks and splits regularly. © 2017 Elektron Technology...
- Page 132 The Computer operating system should be kept up to date with any patches and software upgrades. The Henson Software should be kept up to date with any patches and upgrades. Upgrades will be made available from the manufacturer and sales agent’s websites. www.Elektron-healthcare.com © 2017 Elektron Technology...
- Page 133 Mains cable (country Quote country for part specific) number Patient Response Button PRB001 Occluder TNSUN1294 USB Lead * The software part number will change with later versions of software. Contact the supplier for the latest part number. © 2017 Elektron Technology...
- Page 134 The Manufacturer will make available, on request and at its discretion, circuit diagrams, component part lists, descriptions, calibration instructions, or other information that will assist Service Personnel to repair those parts of the Henson 8000 that are designated by the Manufacturer as repairable by Service Personnel. C alibratio n It is recommended that the unit has a calibration check once a year to ensure it is within acceptable limits.
- Page 135 If the original packaging is not available, then please contact the service representative to request packaging. Please note that Elektron Technology reserves the right to alter the specification of the hardware or software at any time without notification. © 2017 Elektron Technology...
- Page 137 Part...
- Page 138 Help button attached to the message. Other messages inform you that the hardware is not working properly and need further investigation. Some of these messages are listed below Background out of Tolerance Bowl Error LED error © 2017 Elektron Technology...
- Page 139 Appendix 5 - Troubleshooting Bac kground out of t oleranc e 12.1 The Henson 8000 incorporates special sensors within the bowl which continually maintain the background luminance at the correct level. If this intensity cannot be maintained at the beginning of an examination, an error message will be displayed.
- Page 140 Henson Perimeter User Manual Bow l error 12.2 A Bowl error message will appear when the communications with the bowl do not appear to be working. If problem continues, contact a service engineer. © 2017 Elektron Technology...
- Page 141 Try operating the on-screen buttons using a left click from a physical mouse instead of the touch screen and if it works, then the touch screen settings need changing. © 2017 Elektron Technology...
- Page 142 If a fault is detected, an error message will be displayed. Press Continue to proceed with the test, but note that data collected may be subject to error. If the problem continues, contact a service engineer. © 2017 Elektron Technology...
- Page 143 A key violation message will appear when trying to save a record in the database using the same family name, record number and date and time of test of a record that already exists. This usually occurs if a test for this patient has already been saved. © 2017 Elektron Technology...
- Page 144 In most cases the error message will have an associated help facility that can be accessed by clicking the help button attached to the message. Some further detail on some of these messages is given through the following links: Test not recognised Database warning © 2017 Elektron Technology...
- Page 145 The default location of the Database Backup is the pen drive fitted inside the housing of the Henson 8000. If the Database Backup locations is not available (e.g. the pen drive has been removed) then you will get this warning message.
- Page 147 Part XIII...
- Page 148 Start-up screen opens up a window that shows the version number of the current software. In addition it gives a link to the web site of Elektron Technology - the manufacturers of the Henson range of perimeters and a second link to a file that gives details of the software License.
- Page 149 Part...
- Page 150 The Network socket is shown in the photo below and is a standard RJ45 network connection. The Henson 8000 is supplied with an 802.11N Wi-fi network adapter that supports the following network protocols:- - WMM, WMM-PS (IEEE 802.11 Qos Standard) - 64/128-bit WEP, WPA (TKIP with IEEE 802.1x), WPA2 (AES with IEEE...
- Page 151 7. Double click on ‘Setup’ as shown above. 8. Click yes on the ‘User account control’ window. 9. Select the WIFI N USB 802.11N Adaptor option. See below for details. 11. Select the ‘Windows’ option as highlighted by the arrow below. © 2017 Elektron Technology...
- Page 152 19. Click on the ‘Available network’ tab, shown below. If there wireless networks in range then they will be shown as an available network. To set up the connection the name and security password for the wireless network to connect to must be known. © 2017 Elektron Technology...
- Page 153 Appendix 7 - Networking Uninstalling Wireless Netw o rk 1. Double click on the ‘Realtek USB wireless LAN utility’ icon on the desktop, shown below. 3. Ensure the ‘Disable adaptor’ box is checked. As shown below. © 2017 Elektron Technology...
- Page 154 Henson Perimeter User Manual 5. Click on the Windows start icon and from the program select the ‘RealTek 11n USB wireless’ icon and then click the ‘Uninstall’ option. © 2017 Elektron Technology...
- Page 155 Appendix 7 - Networking 7. Follow the on screen instructions to remove the driver from Windows 7. © 2017 Elektron Technology...
- Page 157 - I - backup path change active database Intensity default path changing delete record Intensity buttons 17, 18, 39, 59 editing records Inter-stimulus interval find record Introduction import earlier format database introduction Key violation © 2017 Elektron Technology...
- Page 158 Practice name and address Threshold Present button 18, 27 check at start of test 17, 18 Print database record overriding Print results 39, 59 setting the default method Px Resp button Threshold display options Thsh button Toolbar © 2017 Elektron Technology...
- Page 159 6000 database introduction merge databases open existing database transfer records - V - Video camera Video settings 59, 84, 94 Volume Drivers Tests - Z - ZATA 22, 40 new/existing patient details © 2017 Elektron Technology...
Need help?
Do you have a question about the HENSON 8000 and is the answer not in the manual?
Questions and answers